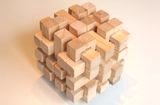
Precise table saw cuts to make a puzzle
Sometimes people tell me "I worked everything to the nearest 16ths of an inch, that's close enough, isn't it?"
A 16th of an inch is about a millimeter and a half. And a lot of times, that is not nearly precise enough. Granted, if you work in fractional inches, working with 32nds and 64ths of an inch gets awkward. That's why engineers, if they work in inches, use decimal inches. But decimal rulers in inches are relatively uncommon, which is why it's best to work in metric for things that require precision.
That said, inches are a nice scale of measure for coarse things. As in "can you move that boulder over by a couple more inches"; much easier to say than "can you move it by another five centimeters".
I figured I should write an article focusing on cutting accurately and that it would best be illustrated by making a small assembly puzzle.
Precise rip cutting
 I always keep a Vernier caliper close at hand when I'm working in my shop. In fact,
I have two of them so I have another one to use when I misplace the first one!
I always keep a Vernier caliper close at hand when I'm working in my shop. In fact,
I have two of them so I have another one to use when I misplace the first one!
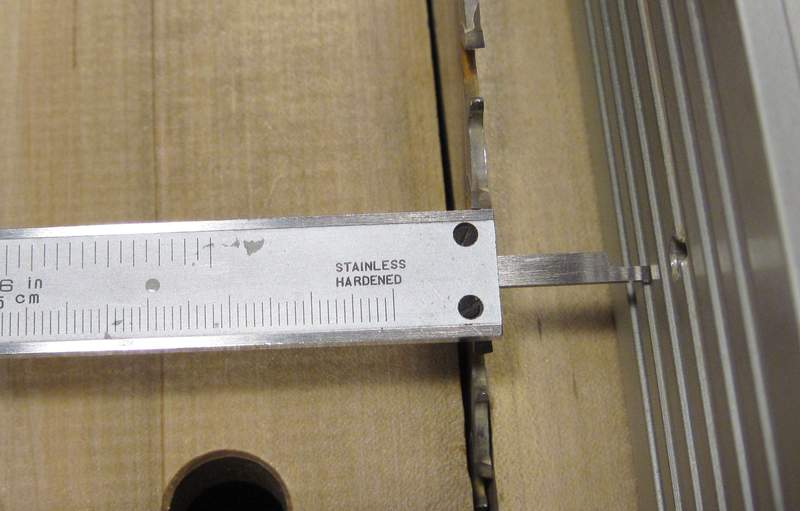
Any time I need to make a precise cut, I set the caliper to the dimension that I need, and then use the bottom end of the caliper to set my table saw fence according to that. I always measure to the edge of the blade. You may say, "but what if the blade wobbles a little". Well, if you can see your blade wobble, you won't be making any precise cuts with your saw. My delta table saw had a bit of a wobble when I bought it, but I was able to true the arbor.
 You do need a decent saw. Generally, a saw that is capable of cutting precisely tends
to cost $400 and up (new) - this is true for benchtop saws and contractor saws.
Table saws in the $200 price range are not suitable for precision work, no matter
how much you tweak them.
You do need a decent saw. Generally, a saw that is capable of cutting precisely tends
to cost $400 and up (new) - this is true for benchtop saws and contractor saws.
Table saws in the $200 price range are not suitable for precision work, no matter
how much you tweak them.
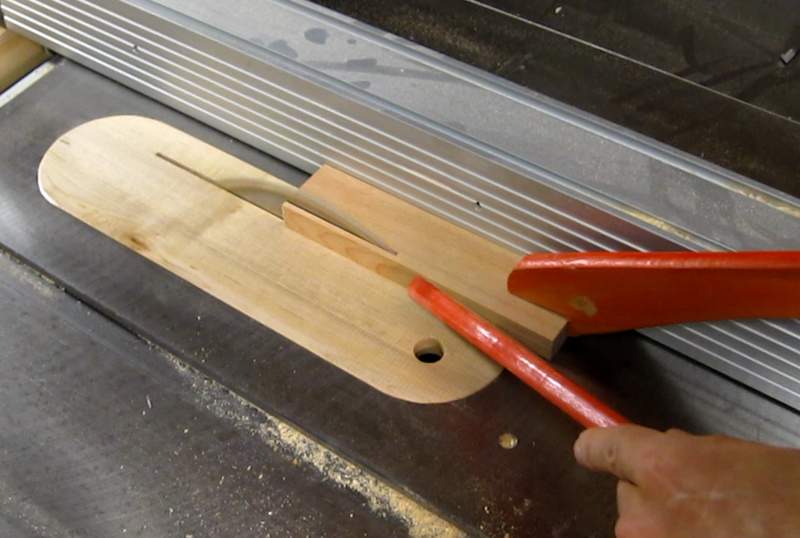
When cutting small pieces, use two push sticks. One to keep the stock pushed against the fence, the other to push the workpiece down and through. You should also have a zero clearance insert so that you have enough support near the blade. Working with small pieces without a zero clearance insert can be dangerous.
A featherboard could be used instead of the second push stick, but unless you
make a lot of similar cuts, the featherboard is a bit too much bother to set up.
 For the puzzle I'm building, I needed the stock to be precisely 18 mm thick. I cut some pieces just
slightly thicker than 18 mm from my stock. I then did a slight trim cut to bring them
down to their final size. With the blade only cutting a fraction of a millimeter
off the wood, the blade itself will push the stock against the fence.
For the puzzle I'm building, I needed the stock to be precisely 18 mm thick. I cut some pieces just
slightly thicker than 18 mm from my stock. I then did a slight trim cut to bring them
down to their final size. With the blade only cutting a fraction of a millimeter
off the wood, the blade itself will push the stock against the fence.
I should warn that this type of cut has the potential of ejecting the workpiece
back towards the operator, so be careful. Don't let go of the stock, and don't let
it ride up the blade!
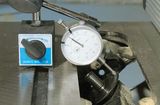
 Here I'm checking the dimensions of my stock, as cut. All my pieces ended up between
0.05 and 0.1 mm (.002" and .004") too small. Close enough, although it appears I had
a bit of common error, so I guess I should have aimed to set my saw to 18.05 mm
instead of 18.0 to get my pieces closer to 18 mm.
Here I'm checking the dimensions of my stock, as cut. All my pieces ended up between
0.05 and 0.1 mm (.002" and .004") too small. Close enough, although it appears I had
a bit of common error, so I guess I should have aimed to set my saw to 18.05 mm
instead of 18.0 to get my pieces closer to 18 mm.
Making precise crosscuts
 I make most of my cross cuts with my regular
crosscut sled, but that sled is a little big for making small puzzle pieces.
I make most of my cross cuts with my regular
crosscut sled, but that sled is a little big for making small puzzle pieces.
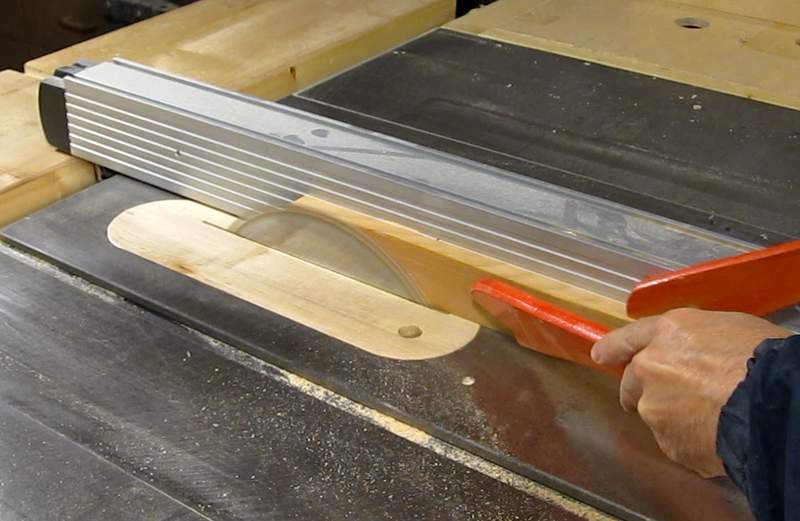
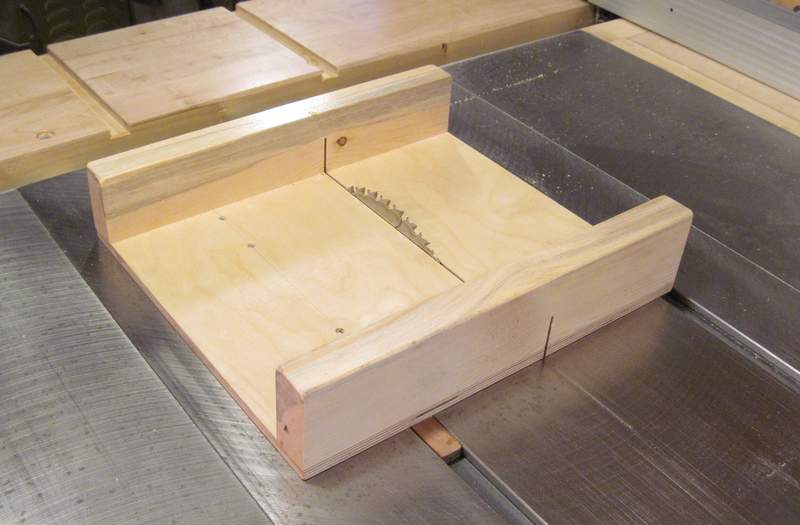
So I built a smaller crosscut sled. Seeing that I already have my other sled for larger pieces, I could make this sled fairly small. I also made it to have support on both sides, which helps a lot when cutting small pieces.
I always use my table saw for finishing crosscuts. Miter saws and radial arm saws
just don't have the rigidity to make smooth consistent crosscuts.
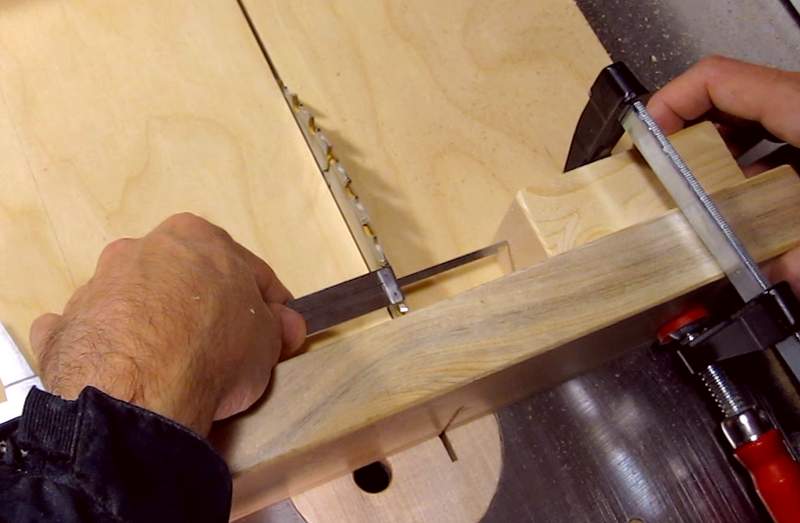 For a length stop, I clamp a block of wood to the sled with a bar clamp and
use my calipers to set the position of the block.
For a length stop, I clamp a block of wood to the sled with a bar clamp and
use my calipers to set the position of the block.
 I chamfered the edges of the stop block. The chamfer allows sawdust to get pushed into
the corners between the block and the sled. That way, if I have a small amount
of sawdust on my sled, the sawdust bunching into the corners doesn't prevent
the workpiece from being pushed all the way against my stop block.
I chamfered the edges of the stop block. The chamfer allows sawdust to get pushed into
the corners between the block and the sled. That way, if I have a small amount
of sawdust on my sled, the sawdust bunching into the corners doesn't prevent
the workpiece from being pushed all the way against my stop block.
 When making small cuts like this, with the right side of my workpiece between the stop block
and the sled, there is the potential that it might get jammed in a funny way and cause
some kickback. Holding it down with a piece of wood while making the cut prevents this.
When making small cuts like this, with the right side of my workpiece between the stop block
and the sled, there is the potential that it might get jammed in a funny way and cause
some kickback. Holding it down with a piece of wood while making the cut prevents this.
 I'm making two T-shaped pieces as elements of my puzzle. I'm cutting these
on my table saw sled, with the blade set to cut exactly 18 mm above the sled's surface.
I'm making two T-shaped pieces as elements of my puzzle. I'm cutting these
on my table saw sled, with the blade set to cut exactly 18 mm above the sled's surface.
The little cube that I just cut out isn't held in place at all, and there is the risk that
it might catch in a funny way with the blade. It's small though, and doesn't really have
anywhere to go, but I figured I'd point that out nonetheless.
Putting the puzzle together
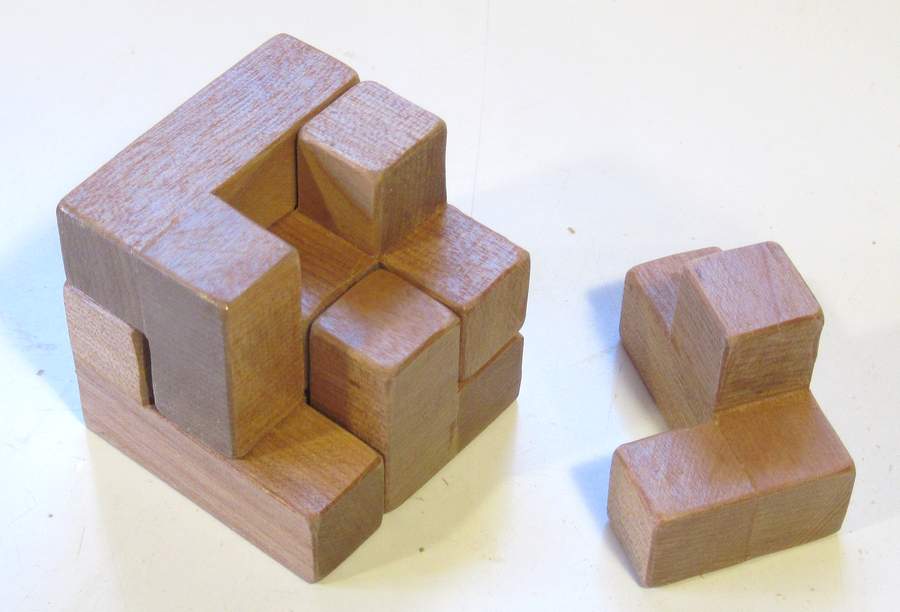
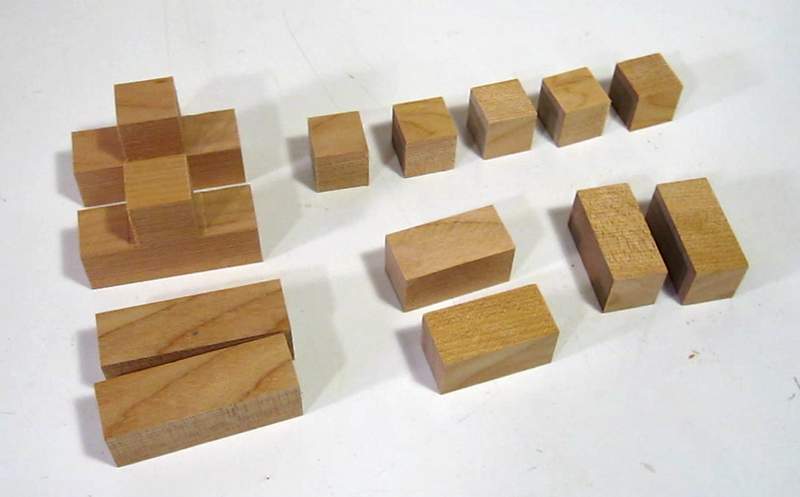 These are the pieces I cut for this puzzle. All dimensions on these pieces are 18 mm
or multiples of 18 mm. Actually, I made my cubes and two pieces on the right to be
only about 17.8 mm long to leave a bit of tolerance when the puzzle goes together.
These are the pieces I cut for this puzzle. All dimensions on these pieces are 18 mm
or multiples of 18 mm. Actually, I made my cubes and two pieces on the right to be
only about 17.8 mm long to leave a bit of tolerance when the puzzle goes together.
The two pieces to the right are the same shape
as the two towards the center, but with the grain going sideways. I want the grain in
my assembled pieces to all be oriented in the same direction, and these will
glue on sideways.
 Here's my pieces stacked to the final shapes, without any glue. Just to make sure I
have all the necessary bits.
Here's my pieces stacked to the final shapes, without any glue. Just to make sure I
have all the necessary bits.
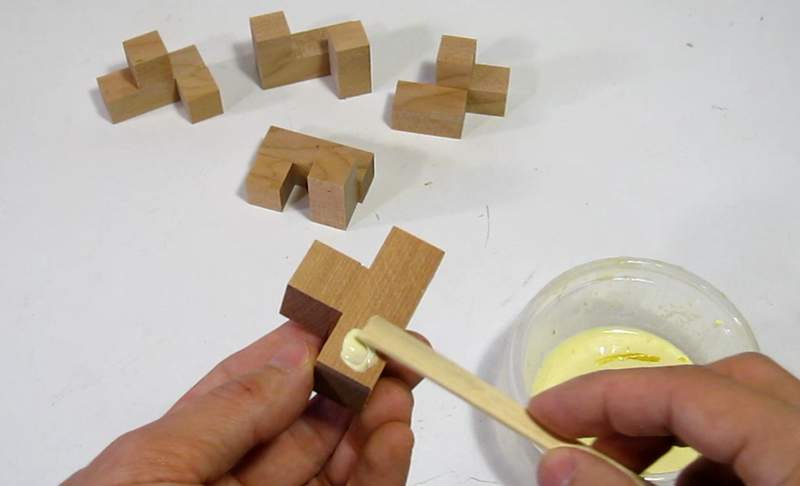 The flat against flat surface joints only take a little bit of glue. For small amounts
of glue like that, I find it easiest to dab the glue on with a wooden splint,
giving better control over how much glue I get compared to squeezing it out of a bottle.
The flat against flat surface joints only take a little bit of glue. For small amounts
of glue like that, I find it easiest to dab the glue on with a wooden splint,
giving better control over how much glue I get compared to squeezing it out of a bottle.
 Wet wood glue is a pretty good lubricant. This can be a problem when clamping.
Unless the clamp is applied just right, the clamp will cause the two
workpieces to slip with respect to each other.
Wet wood glue is a pretty good lubricant. This can be a problem when clamping.
Unless the clamp is applied just right, the clamp will cause the two
workpieces to slip with respect to each other.
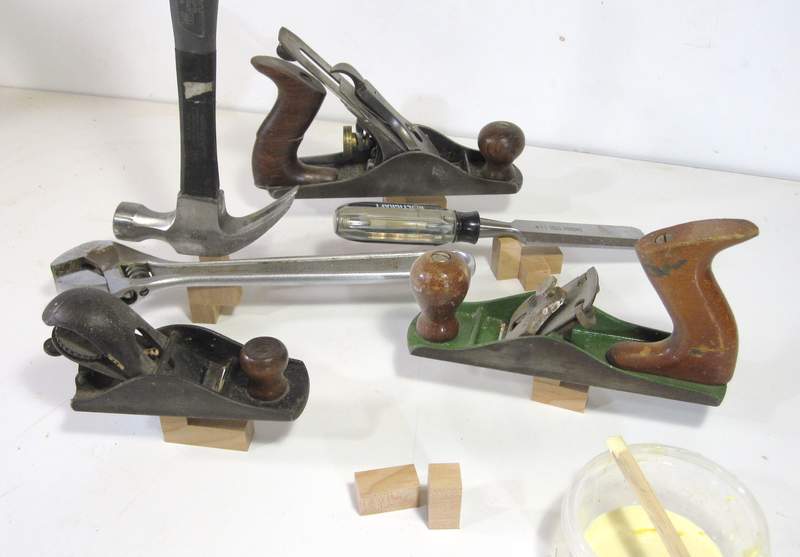
It doesn't take that much pressure to glue these flat joints together, so this is a good time to use your nice hand planes and other tools to weigh them down. They make excellent weights!
Some of the pieces don't have the glue surfaces all in the same plane. So I had to
glue the two pieces in the front of the photo on later.
But it only took a few minutes for the glue to firm up, so I didn't have to wait that long.
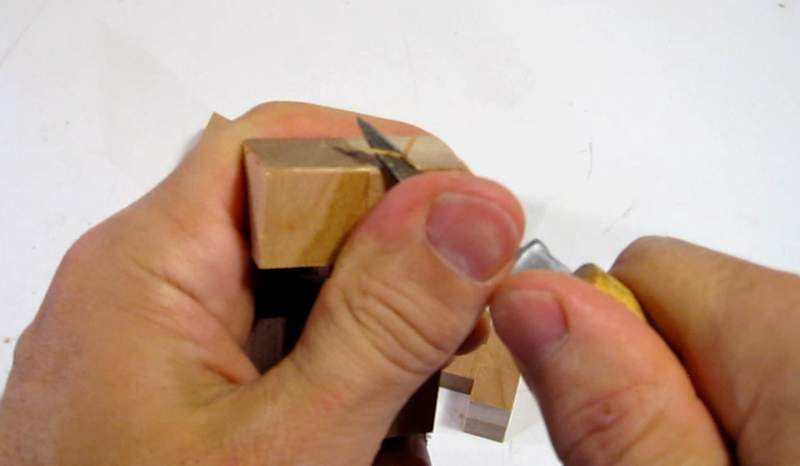 With all that precise cutting in nice hardwood, the puzzle has some very sharp corners.
This makes the pieces uncomfortable to handle. So the thing to do is to trim all the
edges with a carving knife. You can achieve the same effect with sandpaper, but a
knife is quicker, especially for the inside edges.
With all that precise cutting in nice hardwood, the puzzle has some very sharp corners.
This makes the pieces uncomfortable to handle. So the thing to do is to trim all the
edges with a carving knife. You can achieve the same effect with sandpaper, but a
knife is quicker, especially for the inside edges.
 A final sanding helps to round the chamfers and edges, making the pieces feel nice
to handle
A final sanding helps to round the chamfers and edges, making the pieces feel nice
to handle
 Finally, a few coats of varnish help to seal the wood against dirt and hand grease.
When varnishing small pieces like these, it's best to wear gloves, as it's impossible
to keep the varnish off your hands.
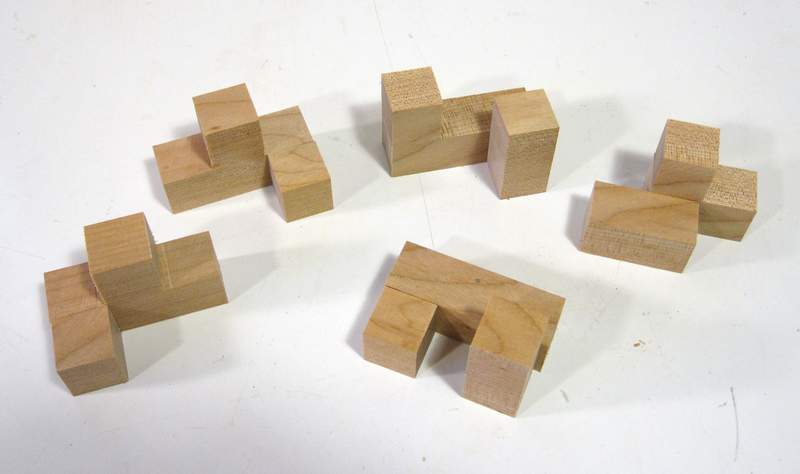
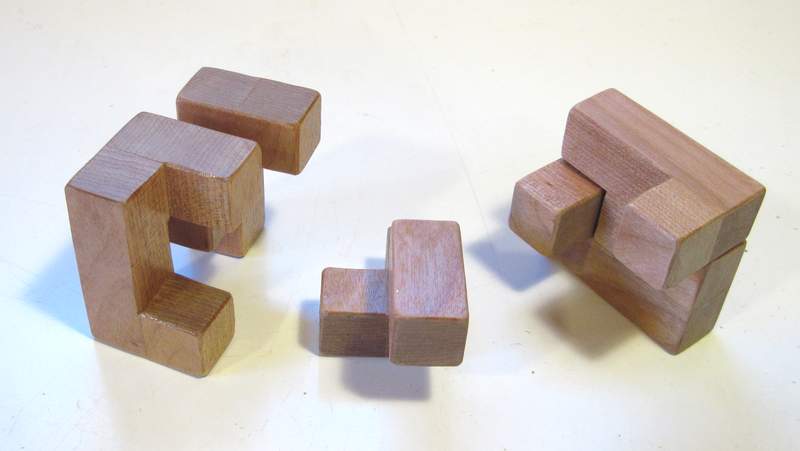 And here's how the pieces go together. The pairs of pieces on the left and right
form the outside layers, and the middle piece fits in between them.
I guess it might still be a puzzle
to figure out how it goes together from this image. But then again, it IS a puzzle
after all. Or you could just watch the video below.
And here's how the pieces go together. The pairs of pieces on the left and right
form the outside layers, and the middle piece fits in between them.
I guess it might still be a puzzle
to figure out how it goes together from this image. But then again, it IS a puzzle
after all. Or you could just watch the video below.
See also:
 More wooden puzzles
 Table saw fence micro adjusting
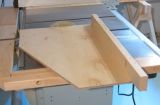 Table saw sled
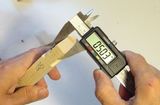 Mortise and tenon joint accuracy
 Fixing the wobble in a table saw arbor
Back to my Woodworking website.