Jens Larsen's dust extractor Thien-baffle modifications
Jens Larsen writes:
I recently renovated my shop and have, among other things, improved my dust extractor and shop-vac, both of which I have equipped with a Thien baffle. In case you haven’t heard of this, I recommend you look it up for they can work very well indeed.
I found out about the principle by chance when I was searching for information on cyclones on the net, and was taken in by the simplicity of the thing and the claims of how well it works, and started experimenting with it on my dust extractor.
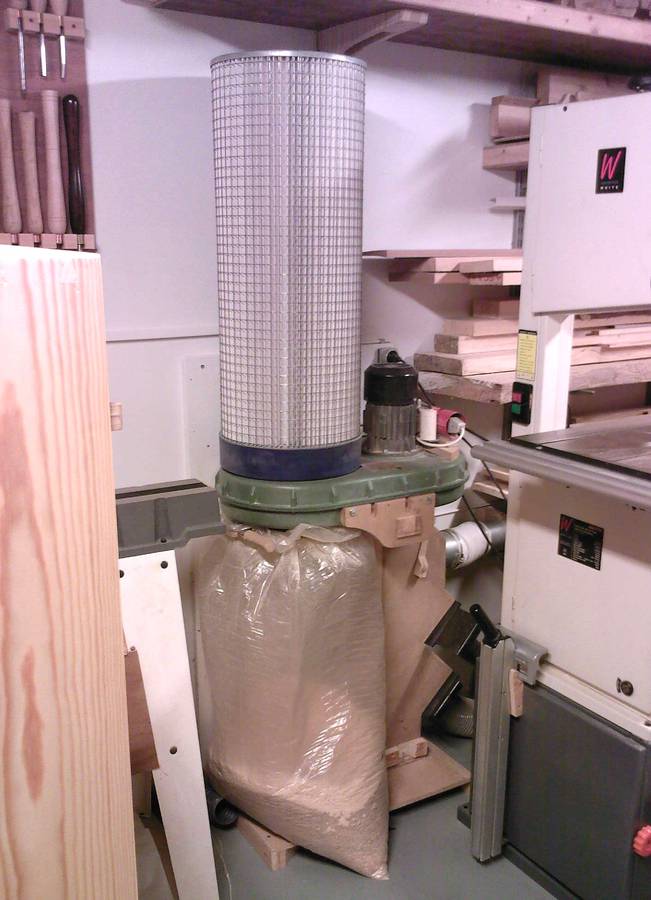 The dust extractor is small, 750 watt, quite old, and of the type made of
two plastic castings serving as fan housing, ducting to, and base for
the filter bag and collecting bag.
The dust extractor is small, 750 watt, quite old, and of the type made of
two plastic castings serving as fan housing, ducting to, and base for
the filter bag and collecting bag.
I’d found having a portable dust extractor in a small shop a nuisance and had installed it and some ducting on the wall. I found that I could, but only just and with a clean bag, clear the shavings from my jointer/planer about 6 m away.
So improvements were needed, hence my thought to install a cyclone, and possibly a filter in place of the bag which was, to say the least, not that efficient.
But a cyclone takes up space, need a separate bucket, etc. So instead, a Thien baffle inserted after the blower in the space between the filter bag and the collecting bag below ought to be worth a try.
And after some experimenting with different distances between the inlet and the baffle, and to the details of the membrane inserted to restrict airflow to the filter bag, I found a setup that worked satisfactorily. So satisfactory in fact that I could run the thing without the filter bag and not create a dust storm in the shop. That was good enough for me, so I replaced the cardboard and duct tape with plywood disks, and the bag with an appropriate filter.
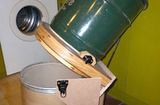
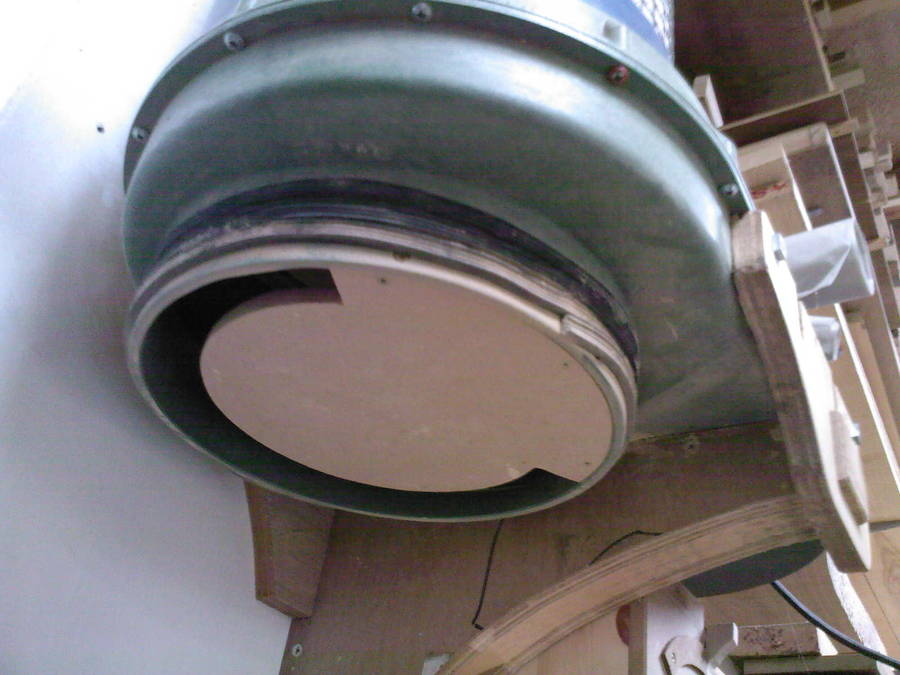 The Thien baffle in position. It’ simply a piece of 12mm MDF
fastened to the rim with three 4/35 mm screws. The opening along the rim
(or 3/4 of it, rather) is about 3 cm wide.
The Thien baffle in position. It’ simply a piece of 12mm MDF
fastened to the rim with three 4/35 mm screws. The opening along the rim
(or 3/4 of it, rather) is about 3 cm wide.
 The cyclone chamber with the baffle removed. The offset inlet is
on the right, and it can be seen how clean the filter still is after
filling the bag seen in the picture above. The separation to the filter
is also a piece of 12mm MDF, and the inlet stud is made from a 5”
plastic flowerpot.
The cyclone chamber with the baffle removed. The offset inlet is
on the right, and it can be seen how clean the filter still is after
filling the bag seen in the picture above. The separation to the filter
is also a piece of 12mm MDF, and the inlet stud is made from a 5”
plastic flowerpot.
With that I can now fill a bin-bag with shavings, sawdust and/or dust from the sander with little or next to no dust residue on the filter, and consequently no discernible loss of suction efficiency.
While renovating the shop I moved the thing nearer the machines and installed the simple manifold with a two-way valve that can be seen in the first picture. This is not very efficient aerodynamically, but easy to make, and it was the only way I could find to make room for that many outlets.
Thien baffle shop-vac modification
Having seen how efficient a Thien baffle arrangement could be, I set about modifying my shop-vac as well. The easiest would have been to install the Thien-baffle in a separate bucket and hook this up to the shop-vac, but I found that arrangement would be cumbersome and inelegant.I thought an alternative would be to have a small bag chamber and an inlet chamber with a Thien baffle in a ring inserted between the bucket and the motor unit.
And I would have easily done this had I not ruined the fan on the shop-vac while testing. So I ended up having to build a base and enclosure for a salvaged domestic vacuum cleaner motor instead.
Not bad really. The motor from that vacuum cleaner is a good deal less noisy, and it came with a spring loaded cable winding reel that I also reused. The arrangement works quite well. There is very little dust in the bag, even after the bucket has been filled 3-4 times. So there is little or no loss of suction power.
Well worth the effort, and with a coat of paint it might even look half decent.
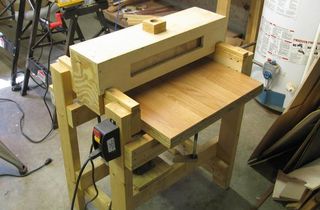
 The shop-vac ready to use after reassembly. The switch was
moved to the top (done as the thing would move when operating the
switch when it was placed on the side). The cable wind up is activated
by pressing the ash spring/lever seen next to the switch (works the
same way as on the vac it came from). I know, the grill and
filter pad is ugly; I’ll get around to modify it some day.
The shop-vac ready to use after reassembly. The switch was
moved to the top (done as the thing would move when operating the
switch when it was placed on the side). The cable wind up is activated
by pressing the ash spring/lever seen next to the switch (works the
same way as on the vac it came from). I know, the grill and
filter pad is ugly; I’ll get around to modify it some day.
 The underside of the motor unit with a secondary/safety filter
over the inlet to the fan, and the ribbing added to help air
circulation from the filter bag to the fan inlet.
The underside of the motor unit with a secondary/safety filter
over the inlet to the fan, and the ribbing added to help air
circulation from the filter bag to the fan inlet.
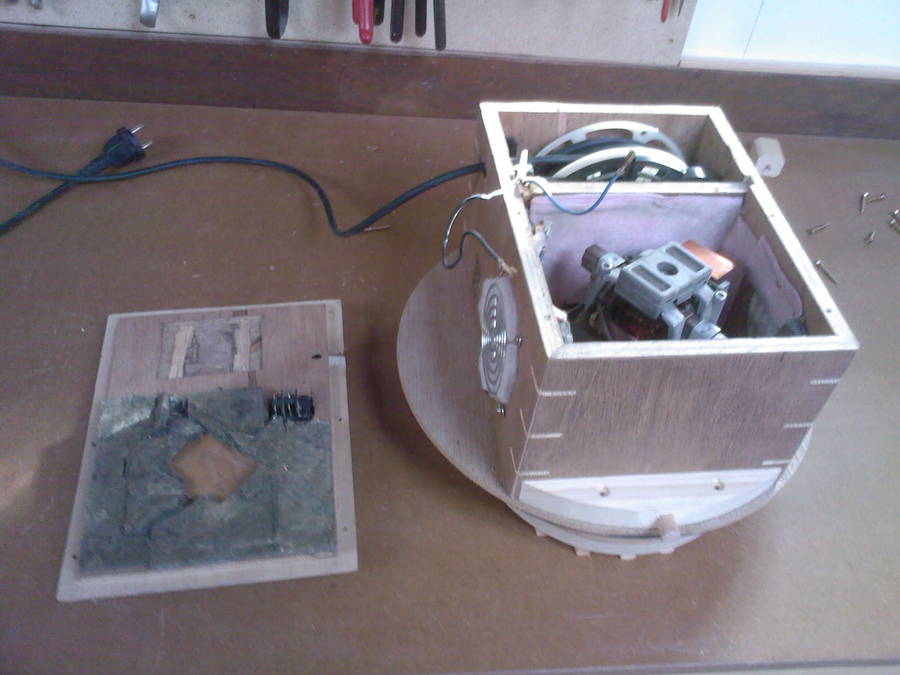
 Here I have just lifted up the ring housing the ”bag chamber” and
"cyclone chamber” off the bucket. You’ll notice that the underside of
the Thien baffle (the underside of the cyclone chamber separating this
from the bucket) is covered with dust, and how the contours of the
airflow can be seen in this.
Here I have just lifted up the ring housing the ”bag chamber” and
"cyclone chamber” off the bucket. You’ll notice that the underside of
the Thien baffle (the underside of the cyclone chamber separating this
from the bucket) is covered with dust, and how the contours of the
airflow can be seen in this.
And this illustrates quite well how the thing works and what the baffle does. It prevents the dust under it (in the incoming air and in the bucket) reaching the inlet to the filter. Without it the, dust you see, and much more, would end up in the filter bag. Trust me, I’ve tried it
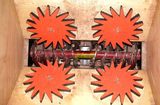
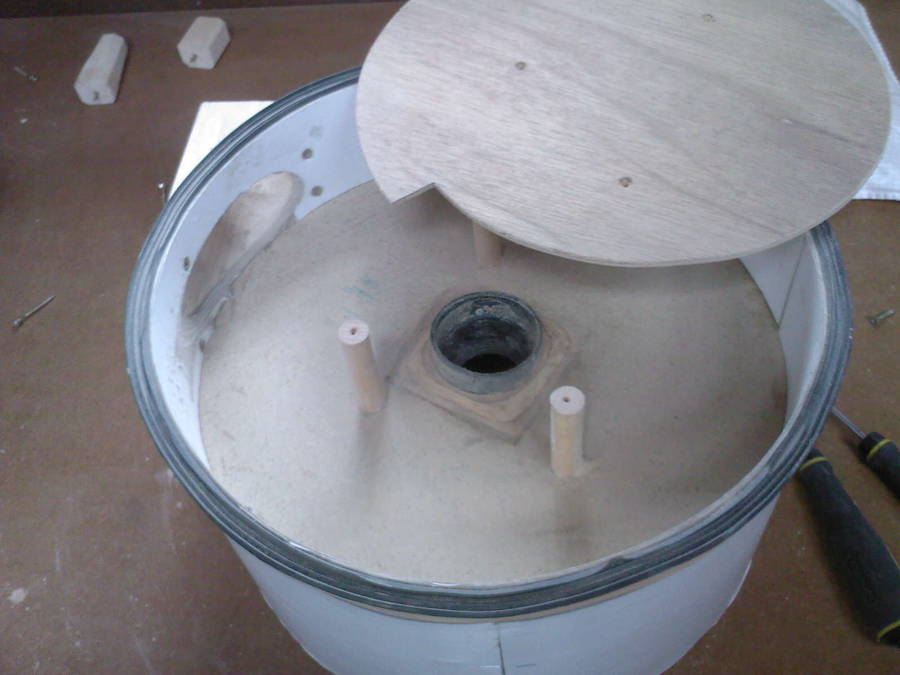 The cyclone chamber above the Thien baffle with the baffle
(partly) removed. The black pipe stud in the centre of the chamber is,
of course, the inlet to the filter. The three dowels are spacers/holders
for the baffle. You may notice that the chamber is virtually free of
dust, apart from a small amount in the shadow of the dowels. That
suggests smaller dowels would be in order.
The cyclone chamber above the Thien baffle with the baffle
(partly) removed. The black pipe stud in the centre of the chamber is,
of course, the inlet to the filter. The three dowels are spacers/holders
for the baffle. You may notice that the chamber is virtually free of
dust, apart from a small amount in the shadow of the dowels. That
suggests smaller dowels would be in order.
The dust on the side of the chamber just after the inlet indicates that the transition from the inlet to the chamber wasn’t quite smooth enough, so I sanded it down a bit before reassembly.
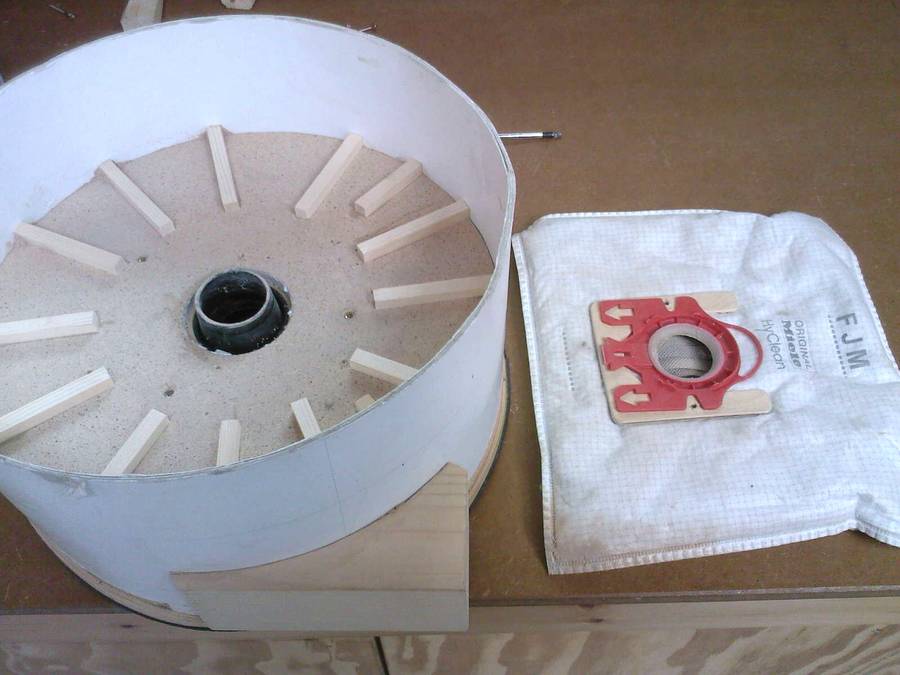 The "filter chamber" with the bag removed. The bag, an
ordinary one for domestic vacuum cleaners, is held in place by screwing
the U-shaped piece of plywood around the (red) plastic collar, to
the base plate. This bag has served for 2-3 fillings of the bucket, and
has, as can be seen, still a lot of life left (it has not been emptied
or shaken in between).
The "filter chamber" with the bag removed. The bag, an
ordinary one for domestic vacuum cleaners, is held in place by screwing
the U-shaped piece of plywood around the (red) plastic collar, to
the base plate. This bag has served for 2-3 fillings of the bucket, and
has, as can be seen, still a lot of life left (it has not been emptied
or shaken in between).
 Here’s the motor unit with the top off. The motor/fan unit and the
cable wind up are as they came off the domestic vacuum, without alterations,
other than snipping a bit off the rod activating the wind up (the
white nylon stick on the left of the cable reel).
Here’s the motor unit with the top off. The motor/fan unit and the
cable wind up are as they came off the domestic vacuum, without alterations,
other than snipping a bit off the rod activating the wind up (the
white nylon stick on the left of the cable reel).
I didn’t have any suitable noise dampening material at hand, so I reused what was in the vacuum. Ended up rather patchy I’m afraid.
The motor is held in place by the lid pressing tightly down on the original rubber pad seen on top of the motor.
 Figuring that there wouldn’t be too much dust ending in the filter bag I
chose to let the motor/fan unit protrude quite a bit into the ”filter
chamber.” This obviously obstructs the airflow somewhat, but it’s still
better than on the domestic vac I stripped, and doesn’t seem
to have affected suction power adversely.
Figuring that there wouldn’t be too much dust ending in the filter bag I
chose to let the motor/fan unit protrude quite a bit into the ”filter
chamber.” This obviously obstructs the airflow somewhat, but it’s still
better than on the domestic vac I stripped, and doesn’t seem
to have affected suction power adversely.
The rubber ring laying on top of the base plate is the original motor/fan ”seat”, with the one modification that a couple of ”ears” were cut off. The dug out in the base plate (behind the hole for the motor) is to allow room for the cable reel. This could have been avoided by better planning (motor/fan sunk slightly less deep into the filter chamber, and a slightly higher enclosure), but that’s what happens when one starts off without a properly detailed drawing.
I mentioned previously that the thing is very quiet, and the reason for this is to be found in the construction of the motor/fan unit.
Most/many shop-vacs are made for wet/dry operation, which means the air from the fan cannot pass through the motor, and allowance must be made for any water that may enter the fan to be led away relatively easily, thus leaving noise reduction (more or less) to the plastic housing.
Not so on a domestic vacuum. The worst that can happen is that dust gets pulled through the motor, which it might even be tolerated if it's only small particles (hence the secondary filter). With that restriction gone the motor and fan casing can be made to act as an effective noise reduction.
On the shop-vac, which handles a relative small amount of air at relative high differential pressure, the ring housing the filter and cyclone chambers, has a diameter of about 30 cm, the cyclone chamber a height of about 6 cm, and the pipe stud to the filter has a diameter of about 5 cm and protrudes about 2.5 cm into the cyclone chamber.
On the dust extractor, which handles much more air and mostly much larger particles, the diameter of the ”cyclone chamber” is 26/32 cm (varies due to the offset inlet which adds positively to the cyclone effect), with the outlet to the bag, and thus the Thien baffle, being only 26 cm in diameter. The height of the chamber is about 12 cm, the inlet to the filter also about 12 cm and protruding about 6 cm into the chamber.
Rather too small one would have thought, or that was my thought at
least. But a good handful of dust was all that came out after vigorous
shaking and banging of the filter after having filled 2-3 bags with
sawdust and shavings. Some (on the internet) claim to do better, but that’s
easily good enough for me.
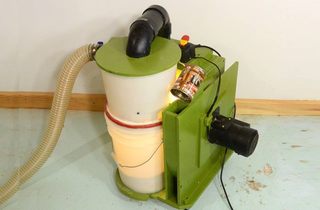
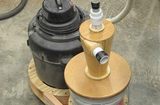
 The shop-vac and dust extractor.
Notice how small the dust extractor is, the fan wheel is about 8 cm high
and has a diameter of only about 26-28 cm.
The shop-vac and dust extractor.
Notice how small the dust extractor is, the fan wheel is about 8 cm high
and has a diameter of only about 26-28 cm.
That simple, and it was made in a couple of hours. After spending time
messing about before I got it right, that is.
I hope the above illustrates and explains how my shop-vac and dust extractor modifications work.
All the best
Jens Larsen
See also:
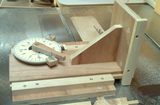 Jens Larsen's Dial-a-tenon jig
 Ron Walters Shopvac
cyclone separator