 Andrew Scott sent me the suggestion of sharpening
carbide tipped saw blades with a diamond disk for a Dremel tool.
I tried this, and, surprisingly, it worked. But I wanted
more precise control over how I sharpened the blade.
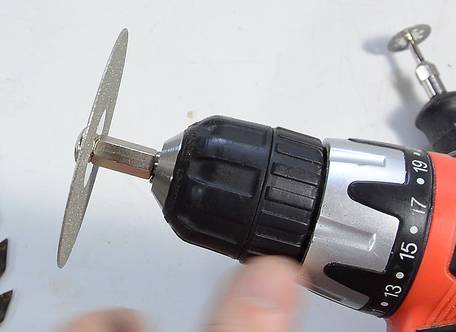
I also wanted to use a larger diamond disk, so I bought a 3" (76 mm)
diameter disk. It came with an arbour for use in a drill,
but it always wobbled slightly. The arbour wasn't that precise.
I tried grinding the end flat, but no luck, and mounting
the arbour in a drill wasn't consistent enough either.
Andrew Scott sent me the suggestion of sharpening
carbide tipped saw blades with a diamond disk for a Dremel tool.
I tried this, and, surprisingly, it worked. But I wanted
more precise control over how I sharpened the blade.
I also wanted to use a larger diamond disk, so I bought a 3" (76 mm)
diameter disk. It came with an arbour for use in a drill,
but it always wobbled slightly. The arbour wasn't that precise.
I tried grinding the end flat, but no luck, and mounting
the arbour in a drill wasn't consistent enough either.
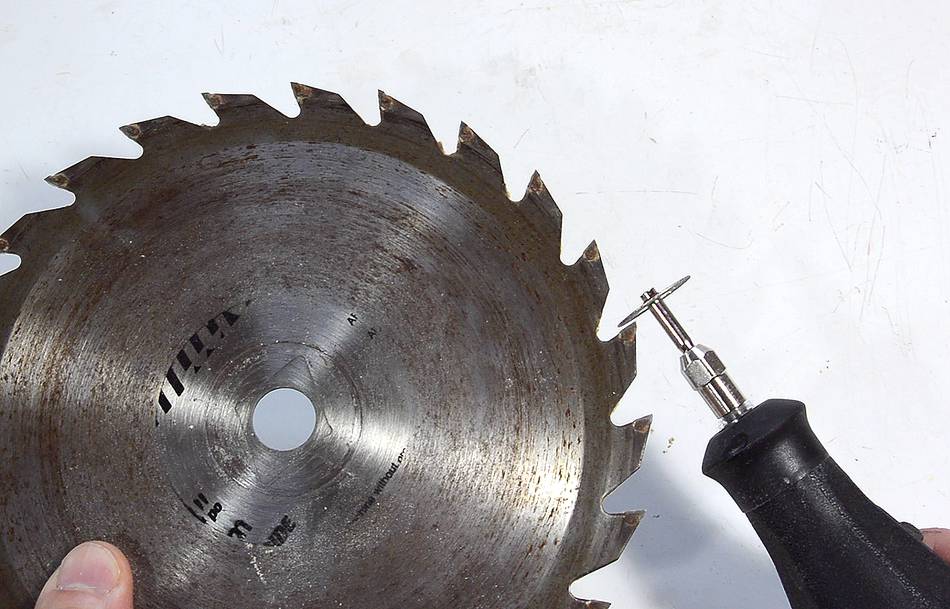
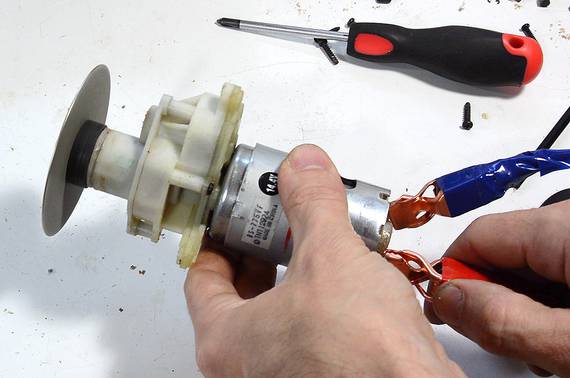
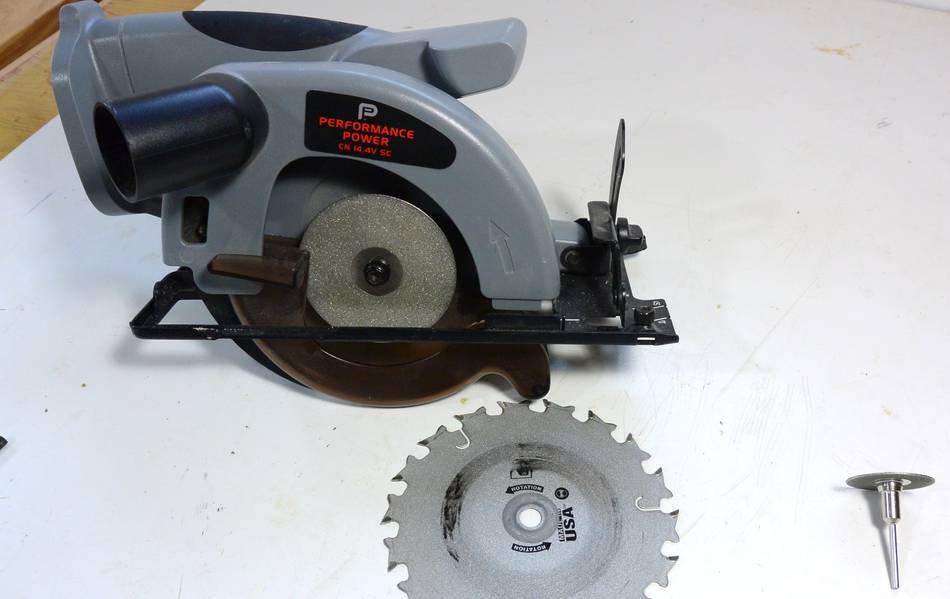 Somebody once convinced me to take this old battery powered circular
saw from him (for free). The batteries were long missing.
I figured, with the smaller abour in that saw,
maybe I could mount the diamond blade. But the hole in the diamond
blade was too small. But examining the arbour, I noticed that
the flanges were flat on both sides.
Putting both flanges on the arbour, they
ended up just flush with the end of the arbour itself.
I could then mount the blade off the end of the arbour with
a screw and washer, and the flanges gave good support for it.
The blade turned surprisingly true with this arrangement.
Somebody once convinced me to take this old battery powered circular
saw from him (for free). The batteries were long missing.
I figured, with the smaller abour in that saw,
maybe I could mount the diamond blade. But the hole in the diamond
blade was too small. But examining the arbour, I noticed that
the flanges were flat on both sides.
Putting both flanges on the arbour, they
ended up just flush with the end of the arbour itself.
I could then mount the blade off the end of the arbour with
a screw and washer, and the flanges gave good support for it.
The blade turned surprisingly true with this arrangement.
With no other use for this saw, I figured I might as well adapt it as a blade sharpener.
 Taking it apart. The blade guard could be unscrewed. Very handy.
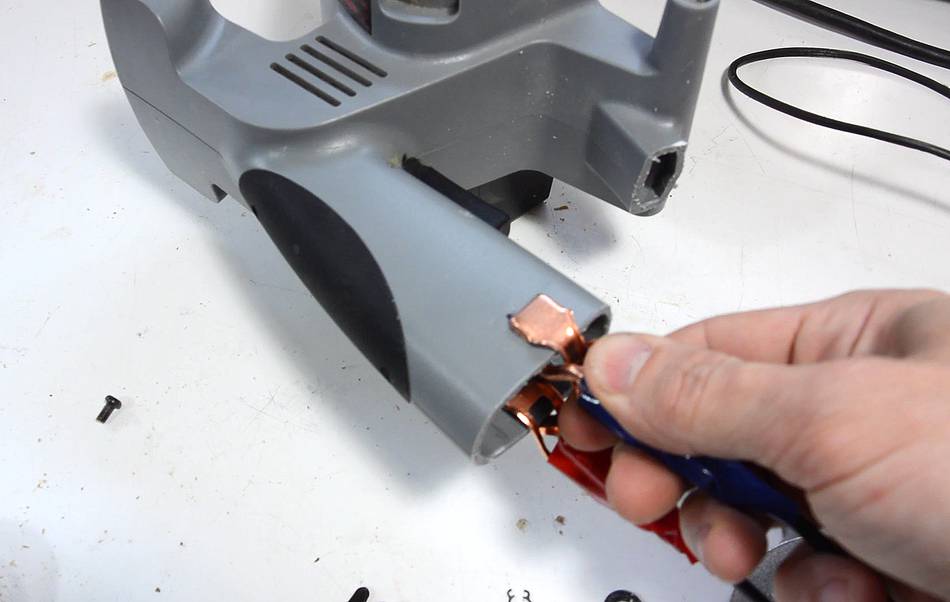
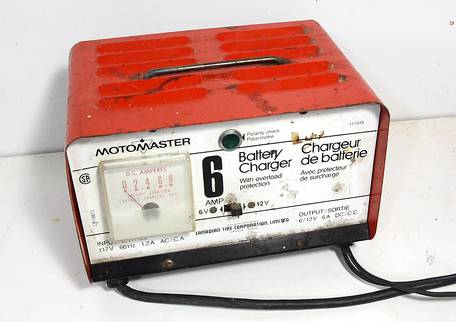 After cutting off the flange for the battery mount, I was able to put the clips
from my old 6 amp battery charger right on the contacts. With no
variable speed electronics, the unfiltered DC from the battery charger was
enough to run the saw, though not very fast. My 6 amp charger, once 6 amperes
are drawn from it, drops the voltage substantially.
After cutting off the flange for the battery mount, I was able to put the clips
from my old 6 amp battery charger right on the contacts. With no
variable speed electronics, the unfiltered DC from the battery charger was
enough to run the saw, though not very fast. My 6 amp charger, once 6 amperes
are drawn from it, drops the voltage substantially.
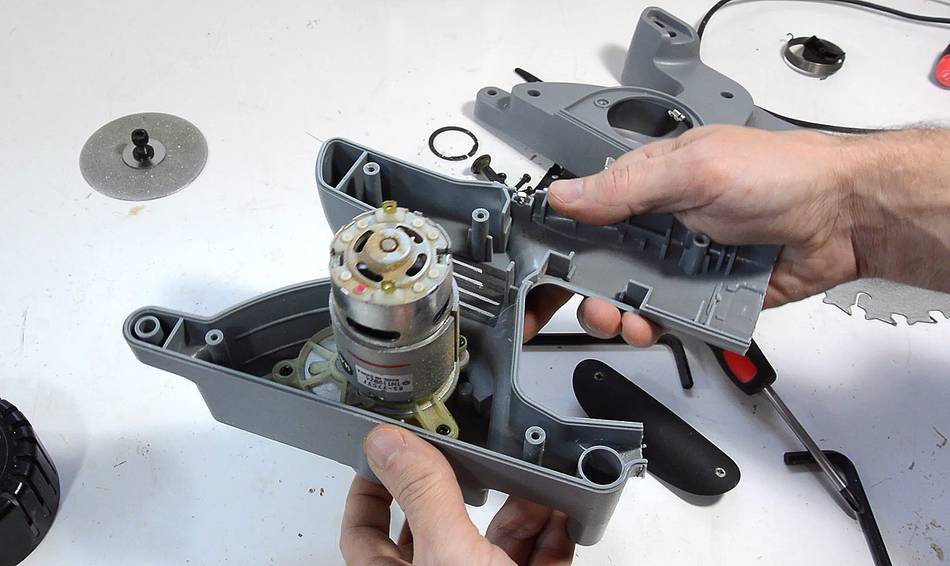
 I popped the rest of the plastic housing open to see what was inside:
a relatively small motor and gearbox. Not a very powerful saw,
but, but convenient for this application. I took the motor
unit out and threw away the rest of the case.
I popped the rest of the plastic housing open to see what was inside:
a relatively small motor and gearbox. Not a very powerful saw,
but, but convenient for this application. I took the motor
unit out and threw away the rest of the case.
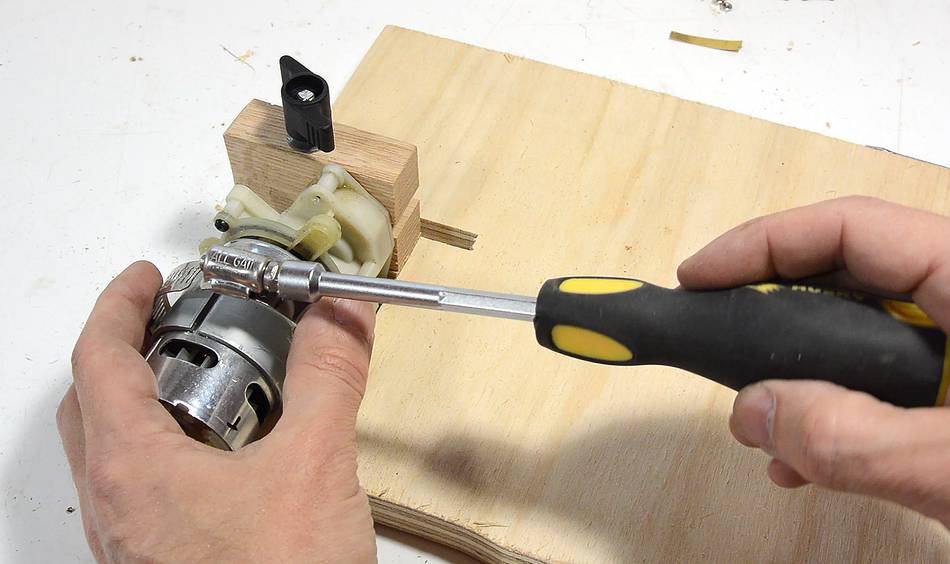 I made a block of wood to clamp around the cylindrical part near the arbour
and attached the motor to the board with a hose clamp.
I made a block of wood to clamp around the cylindrical part near the arbour
and attached the motor to the board with a hose clamp.
 I wanted something to slide the saw blade towards and away from the diamond disk.
Initially I thought of using drawer ball glides
like here, but then figured the hard carbide dust would probably damage
the bearings. Going through my junk, I found this no-bearing metal slide.
I wanted something to slide the saw blade towards and away from the diamond disk.
Initially I thought of using drawer ball glides
like here, but then figured the hard carbide dust would probably damage
the bearings. Going through my junk, I found this no-bearing metal slide.
It had a bit of play, but adding a shim to one side eliminated most of the play. The shim was cut from an aluminium can.
 I mounted a piece of plywood on the slide, plus a piece of 5/8"
dowel for the blade to rotate on. This ensures the teeth will always approach
the diamond disk at the same angle.
I mounted a piece of plywood on the slide, plus a piece of 5/8"
dowel for the blade to rotate on. This ensures the teeth will always approach
the diamond disk at the same angle.
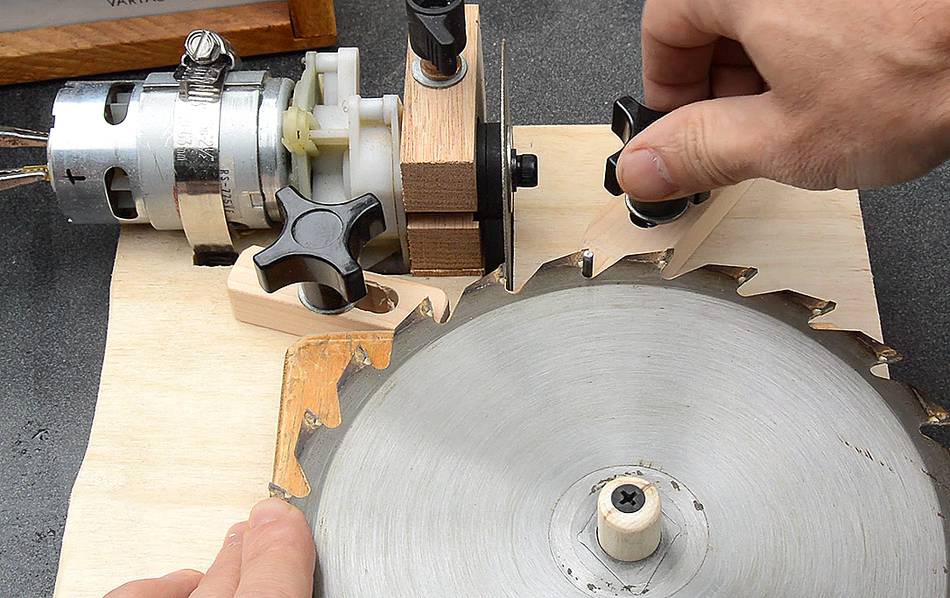
I also added a threaded insert near the cutting disk. To install it, I put the insert on the end of a 5/16" bolt, jammed with a nut, then used a drill with nut driver attachment to drive that into the wood. I then backed out the bolt, with the insert staying in the wood.
 The insert is for holding this piece of wood with a metal pin in it.
The pin serves as an adjustable index for the blade.
The pin is positioned to index against the valley or the back of the
blade's teeth (or any other part not being ground). That way, I can ensure
that all teeth are ground to the same level.
The insert is for holding this piece of wood with a metal pin in it.
The pin serves as an adjustable index for the blade.
The pin is positioned to index against the valley or the back of the
blade's teeth (or any other part not being ground). That way, I can ensure
that all teeth are ground to the same level.
I also added another block on the left to adjust how far forward the blade can be slid.
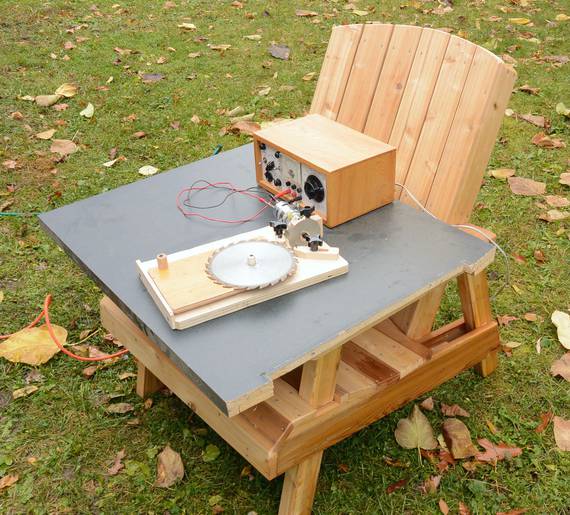 Setting it up for sharpening, outside. With this blade, there's enough of a valley
between teeth to give good reference. For some blades with a lot of teeth,
I have to index off the back of a tooth.
Setting it up for sharpening, outside. With this blade, there's enough of a valley
between teeth to give good reference. For some blades with a lot of teeth,
I have to index off the back of a tooth.
It was a chilly, windy day outside, but I'm told dust from grinding carbide is harmful to health, so I figured it's best to do it outside. The wind only helps in this case.
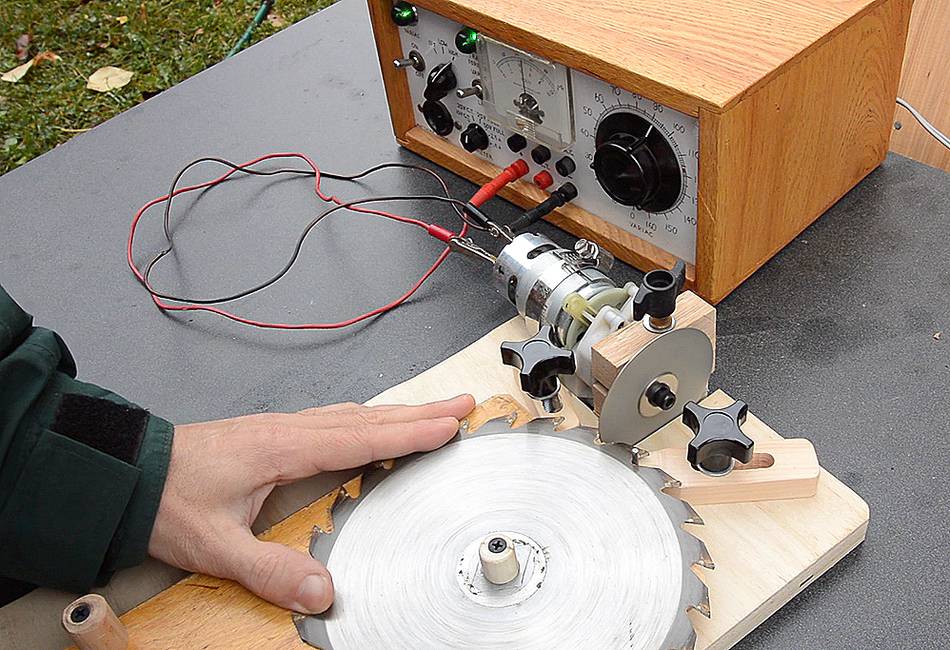
 I could have kept using the battery charger, but to speed things up,
I used a beefier old homemade benchtop power supply (I built that one in 1986).
I could have kept using the battery charger, but to speed things up,
I used a beefier old homemade benchtop power supply (I built that one in 1986).
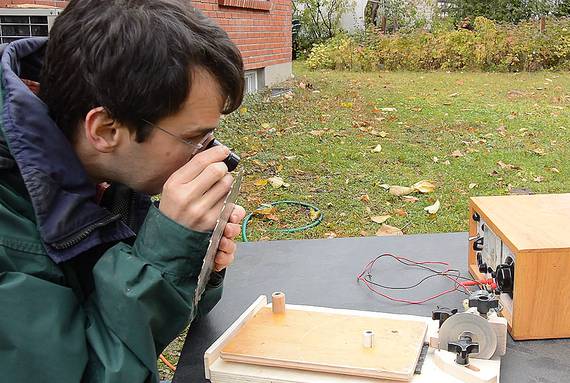
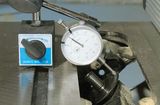
I'm using a 16-mm lens from an old super-8 projector like a jeweler's loop to inspect the teeth. This blade had a number of the teeth chipped. I ended up grinding away from the tops of the teeth as well, but freehand. I should come up with another jig to do that sort of grinding as well.
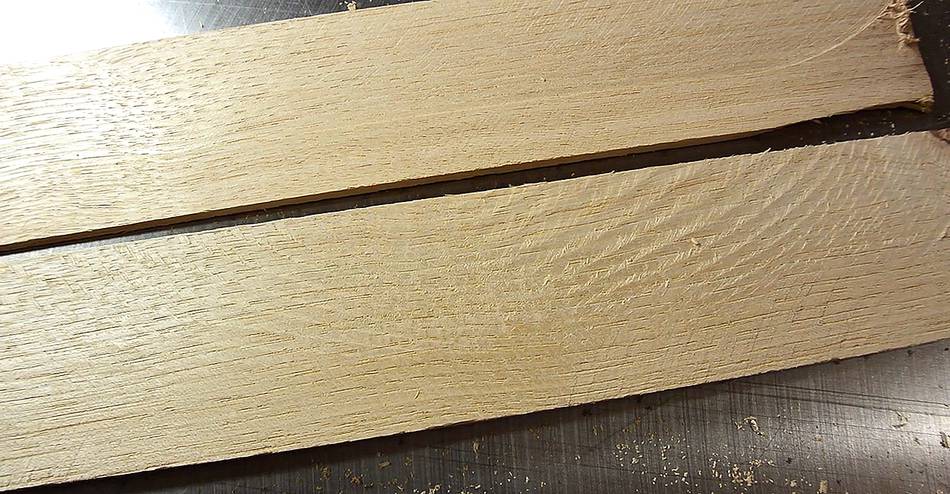 After grinding, I tried the blade in my table saw on some hickory. First test
was pushing it through very fast. It kept up, but the cut surface was a bit rough.
After grinding, I tried the blade in my table saw on some hickory. First test
was pushing it through very fast. It kept up, but the cut surface was a bit rough.
I then did another test, pushing the wood through at a more moderate rate. The upper piece of wood at left is from that cut. That blade was never a particularly good blade, and it was incredibly dull before I sharpened it, so I'm satisfied with the results. But for my fine cutting blades, I'll probably get them professionally sharpened every other time.
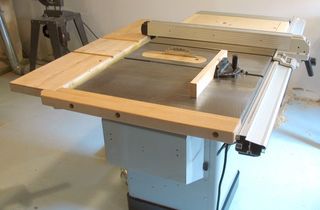 More about my table saw
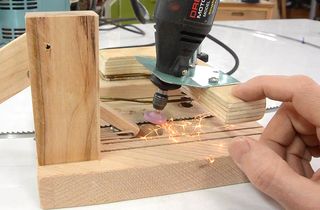 Bandsaw blade sharpener jig
 Sharpening drill bits
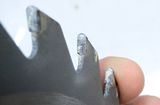 Modifying saw blades
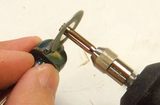 Sharpening router bits
 Sharpening jointer knives
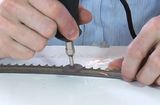 Sharpening
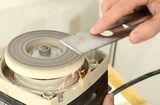 Sharpening hand planes
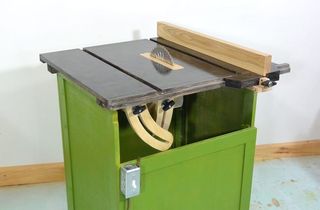 Homemade table saw
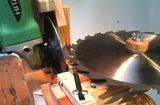
 Fixing the wobble in a table saw arbor