Homemade bandsaw (continued)
Tilting table and trunnions
I wanted this bandsaw to have a tilting table. Basically, this bandsaw was designed to replace my 14" cast iron bandsaw. I still wanted to have at least one bandsaw with a tilting table.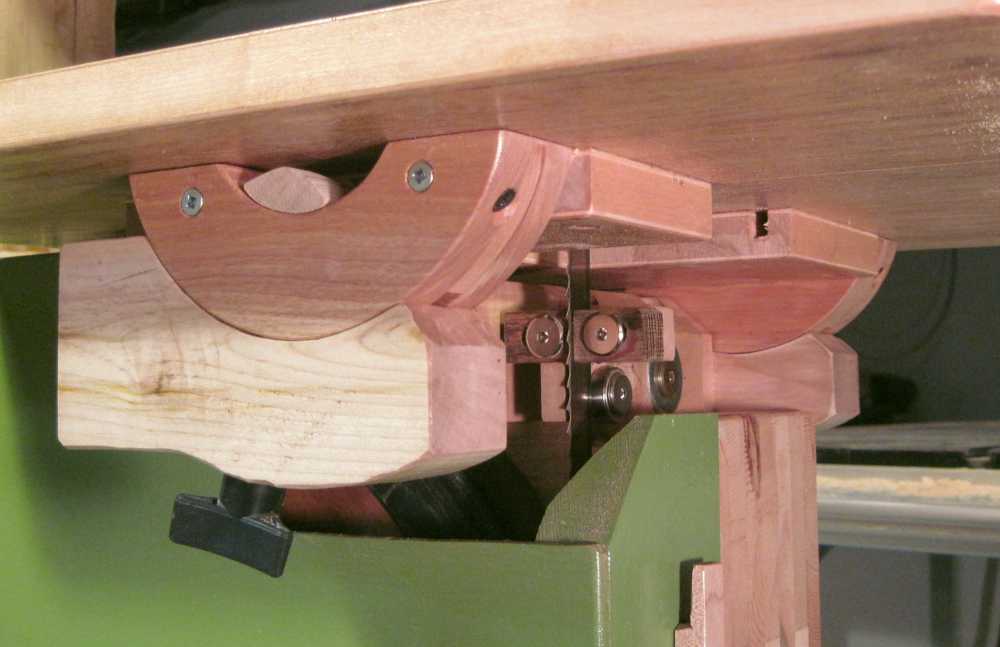 It would have been easier to make the table tilt by mounting it to hinges on the bottom of the
table, but then the top of the table, and the blade slot, would move side to side as the
table is tilted.
It would have been easier to make the table tilt by mounting it to hinges on the bottom of the
table, but then the top of the table, and the blade slot, would move side to side as the
table is tilted.
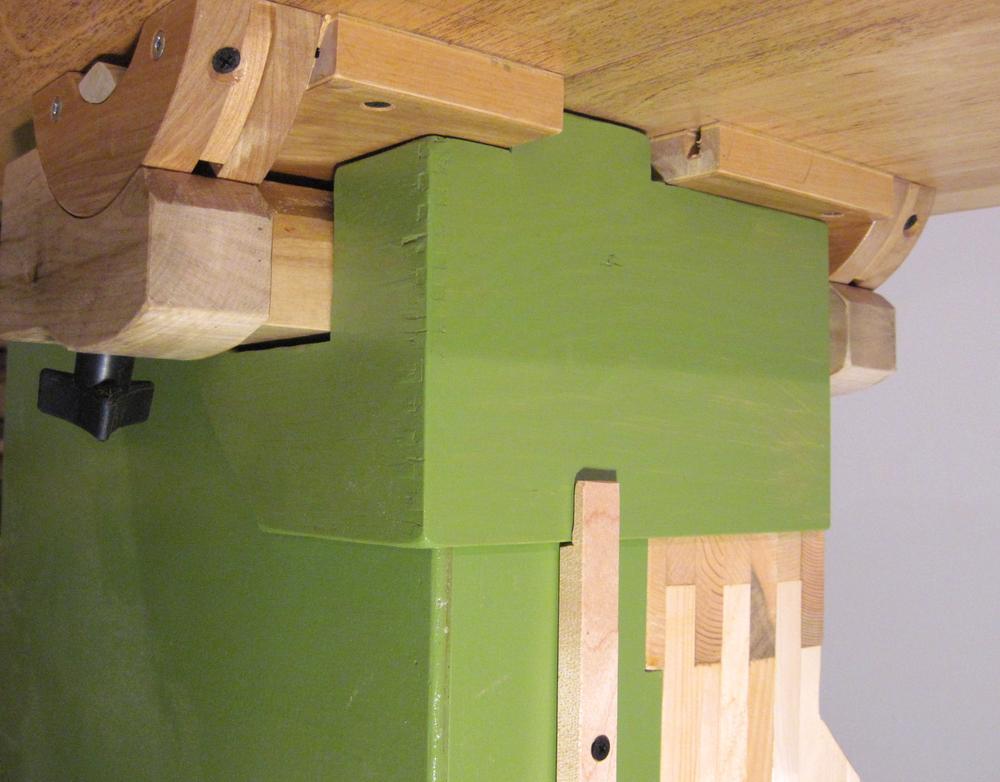
The trunnions allow the table to rotate about an axis that is actually on top of the table, so that the point where the blade goes through the table doesn't move as the table is tilted.
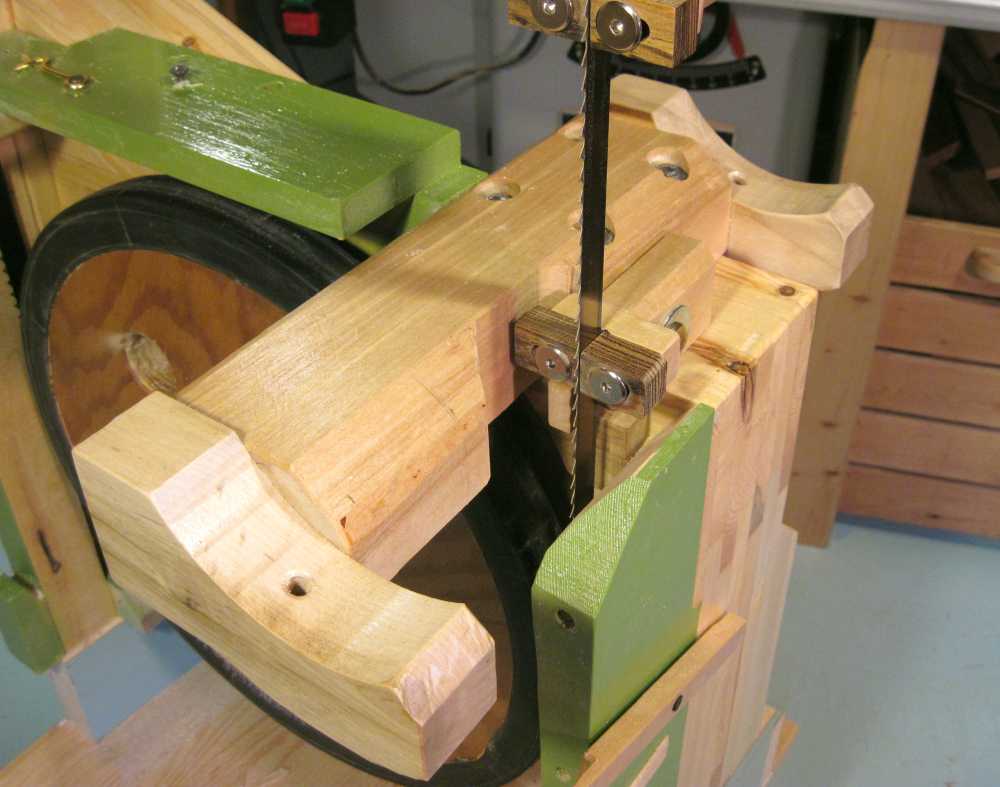
Cutting out the trunnions does require a bandsaw. If you don't already have a bandsaw, you can just clamp a non-tilting table to the saw temporarily and use that to cut out the trunnions.
 The front trunnion support is a little bit complicated. It needs to reach through
below the table, above the wheel, and to the left of the blade. It would be
nice to support the front trunnion from the right or from
directly below, but that would make it difficult or impossible to change
bandsaw blades.
The front trunnion support is a little bit complicated. It needs to reach through
below the table, above the wheel, and to the left of the blade. It would be
nice to support the front trunnion from the right or from
directly below, but that would make it difficult or impossible to change
bandsaw blades.
Commercial bandsaws have the same constraint, and on a lot of them, the front trunnion support is quite flimsy on account of this. On this bandsaw design, I used a large piece of hardwood to reach forward from the frame.
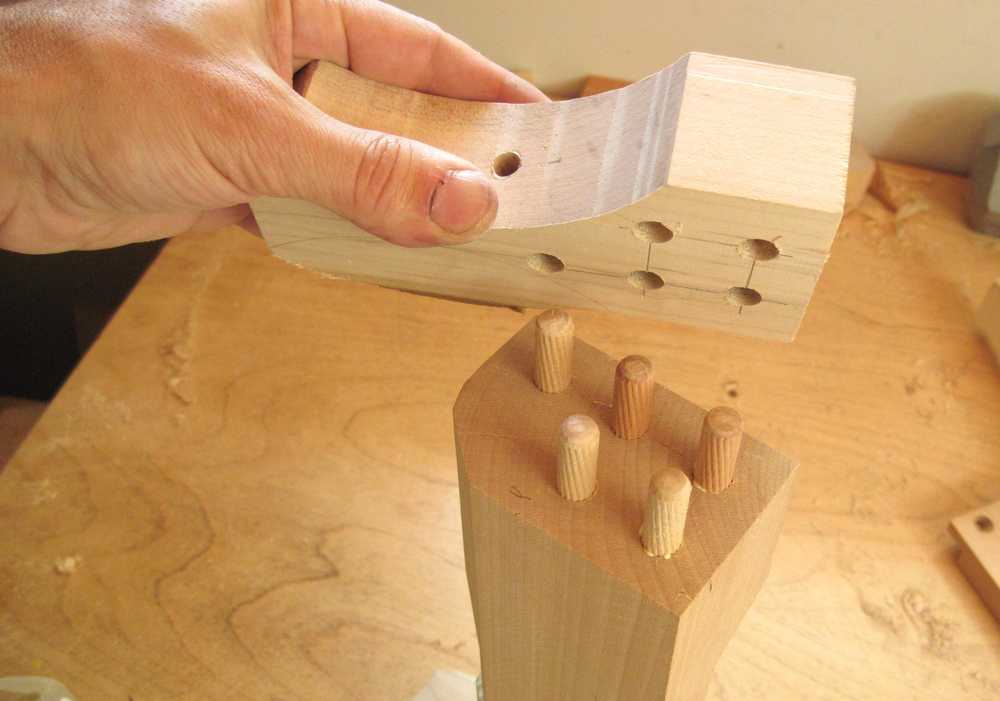 The trunnion supports are attached to the end of the support beam with five 3/8" dowels.
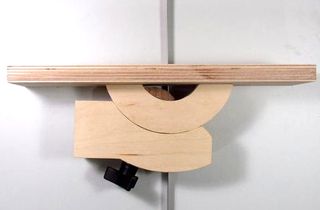
Update: Since I built this bandsaw, I have come up with a better method of making the trunions out of plywood.
 Making bandsaw trunions
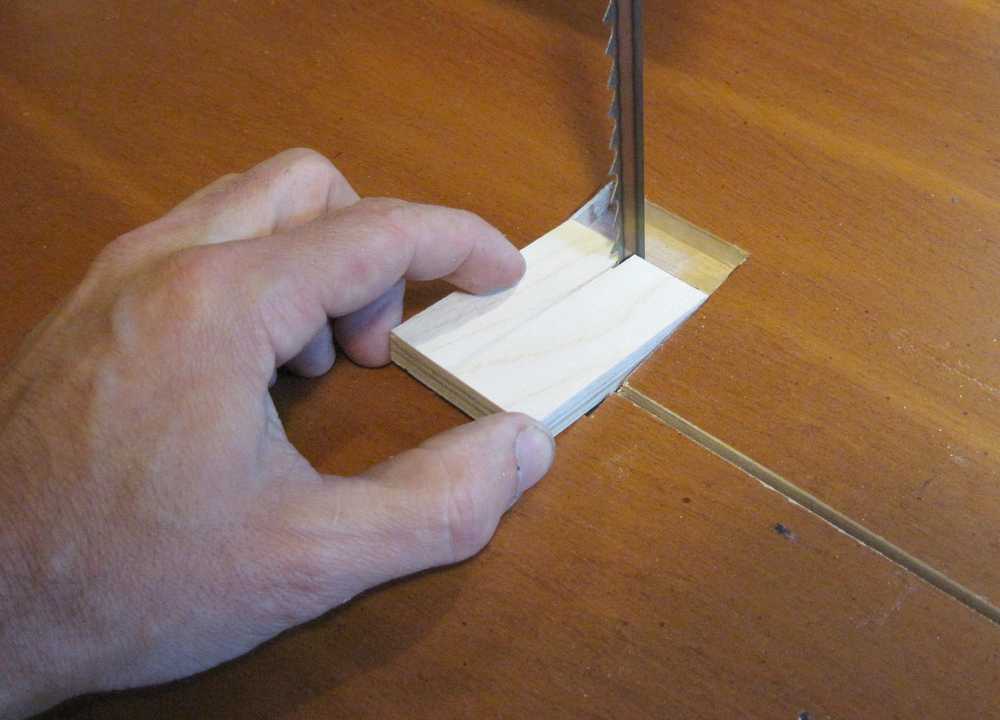 Most bandsaws have a circular insert to go around the blade.
I chose to make a rectangular cutout on my bandsaw. The nice thing about that is
that it's much easier to make an insert for it. And to make a zero clearance insert,
all I have to do is slip a piece of plywood into the slot with the saw running.
The simplicity of this makes me wonder why commercial bandsaws use round inserts.
Most bandsaws have a circular insert to go around the blade.
I chose to make a rectangular cutout on my bandsaw. The nice thing about that is
that it's much easier to make an insert for it. And to make a zero clearance insert,
all I have to do is slip a piece of plywood into the slot with the saw running.
The simplicity of this makes me wonder why commercial bandsaws use round inserts.
Enclosure
 The top cover for the bandsaw slides on from above. That way, I didn't have to worry
about latches for holding the cover closed or rattling from a lid that wasn't securely
held in place. The cover has dowel pins on the back that slide into holes on the frame.
It is a bit tricky to get the pins lined up when putting the cover on, but having done it a few times,
I always hit the spot on the first try now.
The top cover for the bandsaw slides on from above. That way, I didn't have to worry
about latches for holding the cover closed or rattling from a lid that wasn't securely
held in place. The cover has dowel pins on the back that slide into holes on the frame.
It is a bit tricky to get the pins lined up when putting the cover on, but having done it a few times,
I always hit the spot on the first try now.
 I made an extra cover to go around the lower blade guides. This helps to contain the
dust to inside the saw so that the sawdust all falls out the bottom. On my 14" bandsaw, the wind from
the lower wheel tends blow most of the dust out the side of the saw, and it always makes a bit of a mess
next to the saw.
I made an extra cover to go around the lower blade guides. This helps to contain the
dust to inside the saw so that the sawdust all falls out the bottom. On my 14" bandsaw, the wind from
the lower wheel tends blow most of the dust out the side of the saw, and it always makes a bit of a mess
next to the saw.
The cover is slid on from below, and then the piece of hardwood below is turned 90 degrees to hold it in place.
This cover does need to be removed when tilting the table.
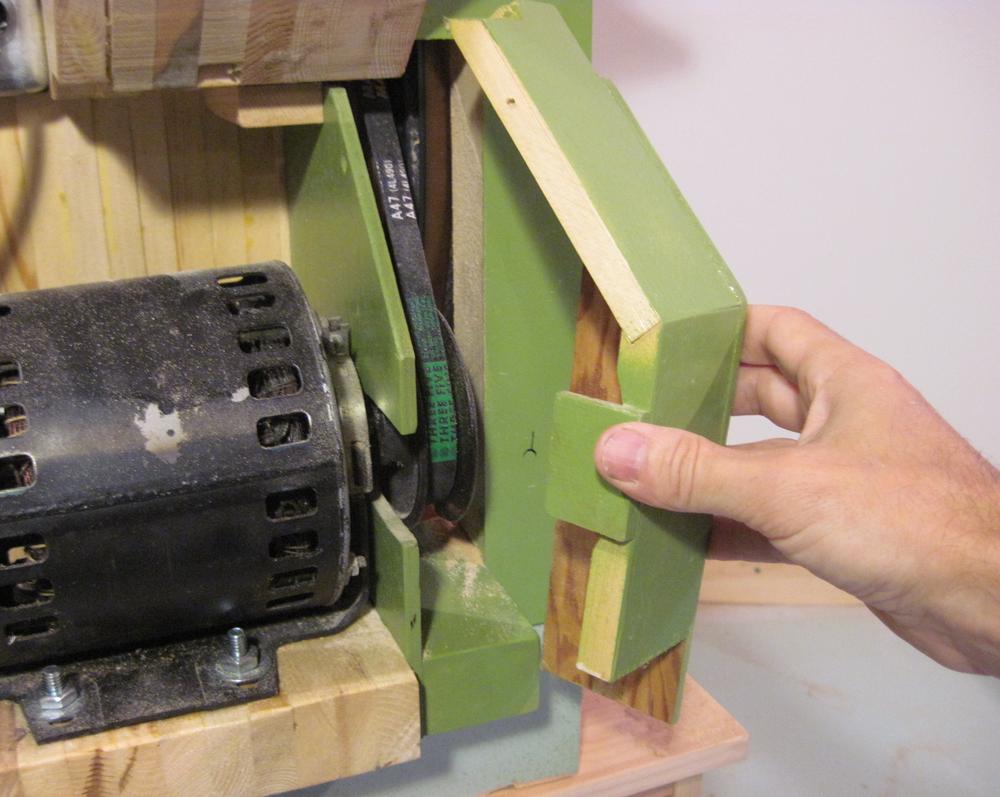 With the drive pulley directly attached to the bottom wheel, this does put the drive belt in the
"dust zone" inside the enclosure. The dust doesn't cause any
problems for the V-belt, but I wanted to keep it away from the motor, especially because
I'm using an open framed motor. So I made an enclosure around the drive belt.
With the drive pulley directly attached to the bottom wheel, this does put the drive belt in the
"dust zone" inside the enclosure. The dust doesn't cause any
problems for the V-belt, but I wanted to keep it away from the motor, especially because
I'm using an open framed motor. So I made an enclosure around the drive belt.
Also note that the motor is bolted directly to part of the frame. I found that most vibration in woodworking machines comes from the motor shaking back and forth from vibrations in the V-belt. By rigidly attaching the motor to the frame, I prevent its heavy weight from moving around and shaking the saw. V-belt vibrations are thus limited to the V-belt itself.
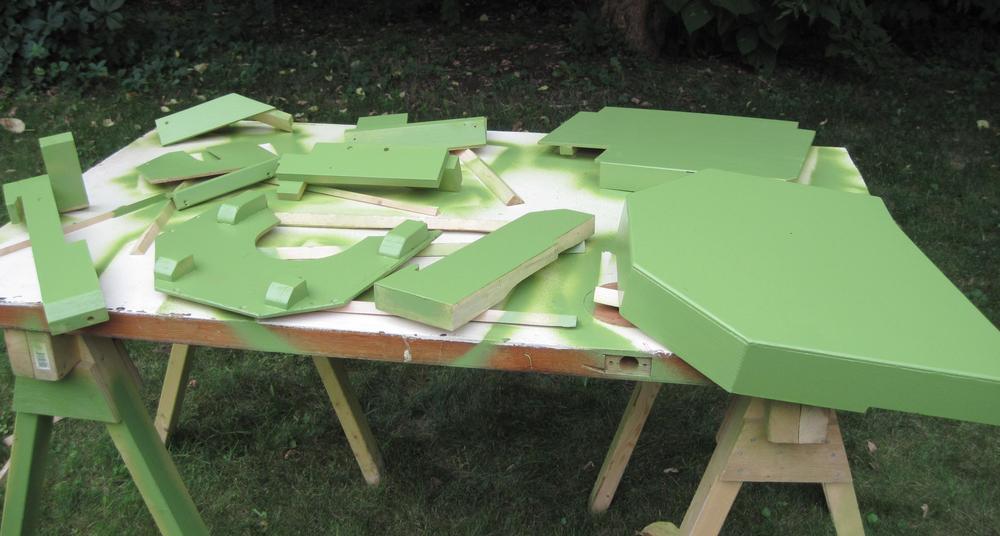 A coat of paint is essential to make the saw look nice! I took all the parts of
the enclosure outside and sprayed them. I used ordinary indoor wall paint. Surprisingly,
this thick paint can be sprayed.
A coat of paint is essential to make the saw look nice! I took all the parts of
the enclosure outside and sprayed them. I used ordinary indoor wall paint. Surprisingly,
this thick paint can be sprayed.
After the paint, I put another clear coat of varnish over the paint to protect it from scratches and give it a shine.
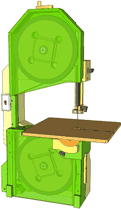
 Although I made a CAD design for this bandsaw ahead of construction, I always end up making minor
design improvements during construction. So I had to check and update all the dimensions
in my CAD drawings.
My workshop is normally a computer free zone. But not wanting to haul the bandsaw upstairs
to my computer, I set up a laptop computer and big monitor in my workshop for a few days
as I checked and updated my CAD model.
Although I made a CAD design for this bandsaw ahead of construction, I always end up making minor
design improvements during construction. So I had to check and update all the dimensions
in my CAD drawings.
My workshop is normally a computer free zone. But not wanting to haul the bandsaw upstairs
to my computer, I set up a laptop computer and big monitor in my workshop for a few days
as I checked and updated my CAD model.
The plans are very comprehensive. On account of all the time that went into them, these cost a little bit more than some of my other plans, but at $21, it's still less than the cost of a good bandsaw blade.
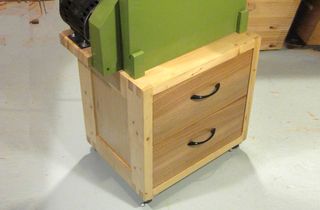
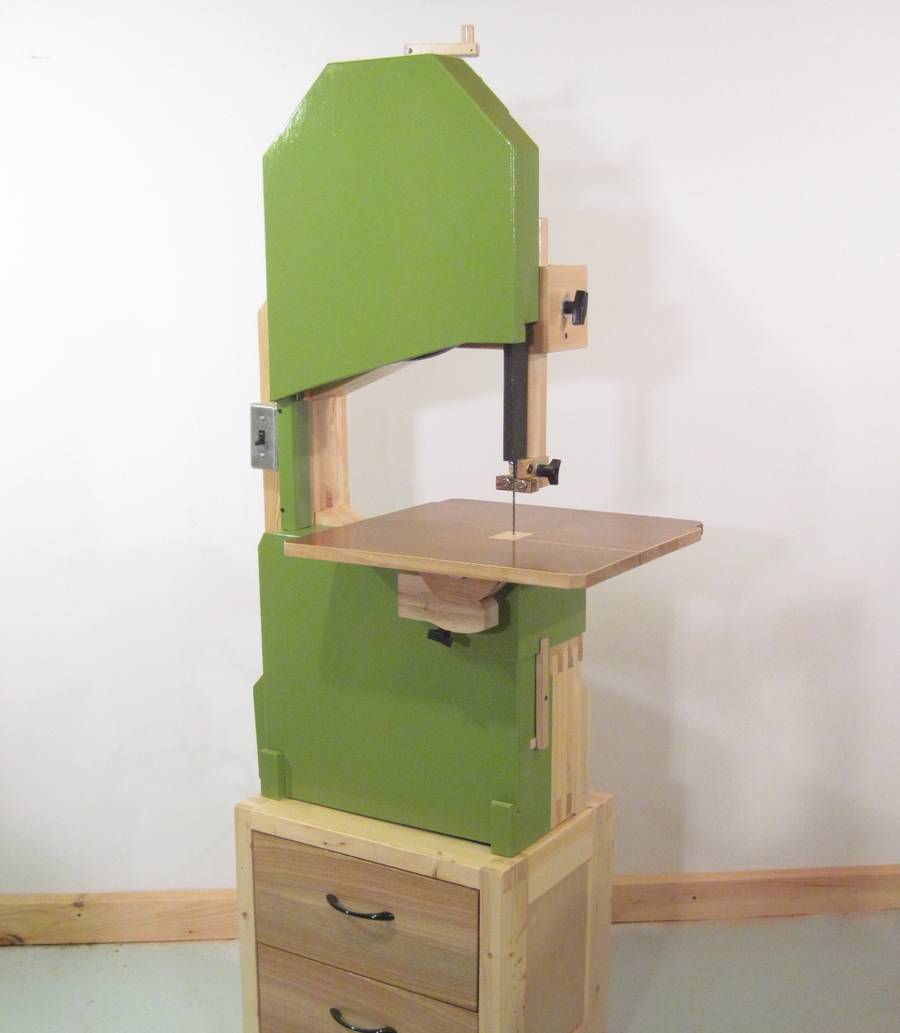 And here's the saw all put together and on a dedicated bandsaw stand. I actually held off writing about the bandsaw until
I had the plans all ready. I used this bandsaw in a number of projects
on this site so far:
carving canoe paddles on the bandsaw, building a kid's table,
dovetails joints on the bandsaw,
carving a 3D reindeer on the bandsaw and
how to make gears. I don't use my 14" cast
iron frame bandsaw anymore - I like this wooden one much more.
And here's the saw all put together and on a dedicated bandsaw stand. I actually held off writing about the bandsaw until
I had the plans all ready. I used this bandsaw in a number of projects
on this site so far:
carving canoe paddles on the bandsaw, building a kid's table,
dovetails joints on the bandsaw,
carving a 3D reindeer on the bandsaw and
how to make gears. I don't use my 14" cast
iron frame bandsaw anymore - I like this wooden one much more.
|
Buy the plans for this bandsaw |
Back to part 1 of the build
A more detailed description of the build is in the plans that I sell
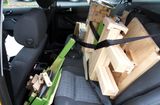 Moving the bandsaw
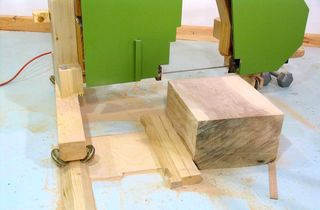 Building my 14"
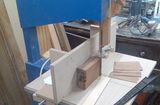 Reader built bandsaws
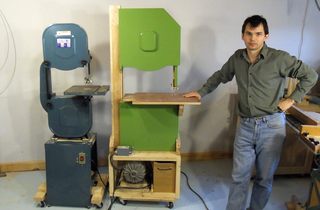 My first