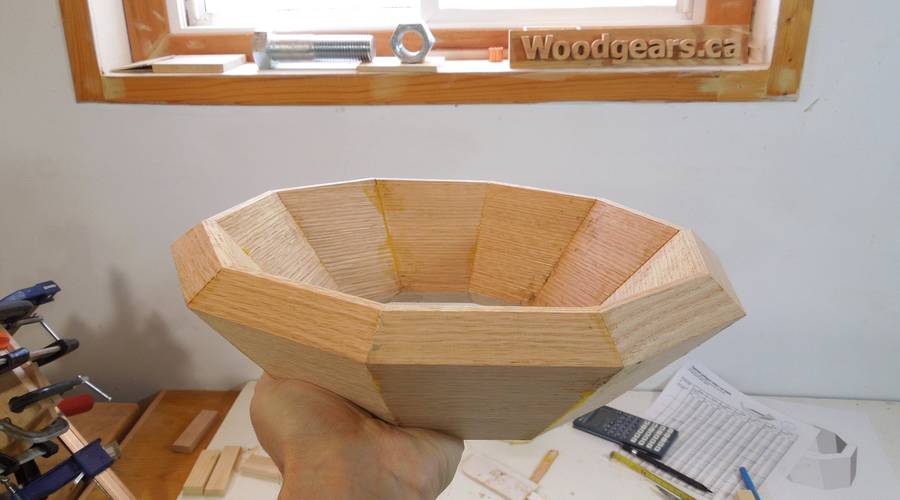
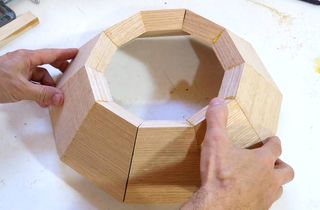
 This bowl started with my experimenting with figuring out how to
glue conical segmented shapes, or splayed miter
joints, as I like to think of them.
This bowl started with my experimenting with figuring out how to
glue conical segmented shapes, or splayed miter
joints, as I like to think of them.
This bowl started with my experimenting with figuring out how to
glue conical segmented shapes, or splayed miter
joints, as I like to think of them.
I made this test piece out of some nice oak, so I could then try to make a bowl out of it.
 The tricky thing is how to mount it for turning, and how to add a bottom.
Because the precision of this shape was less than perfect, I figured my best option
was to turn the inside bottom edge perfectly round and conical and match that with a
turned conical "plug".
The tricky thing is how to mount it for turning, and how to add a bottom.
Because the precision of this shape was less than perfect, I figured my best option
was to turn the inside bottom edge perfectly round and conical and match that with a
turned conical "plug".
But I don't have a lathe chuck for mounting a shape like this.
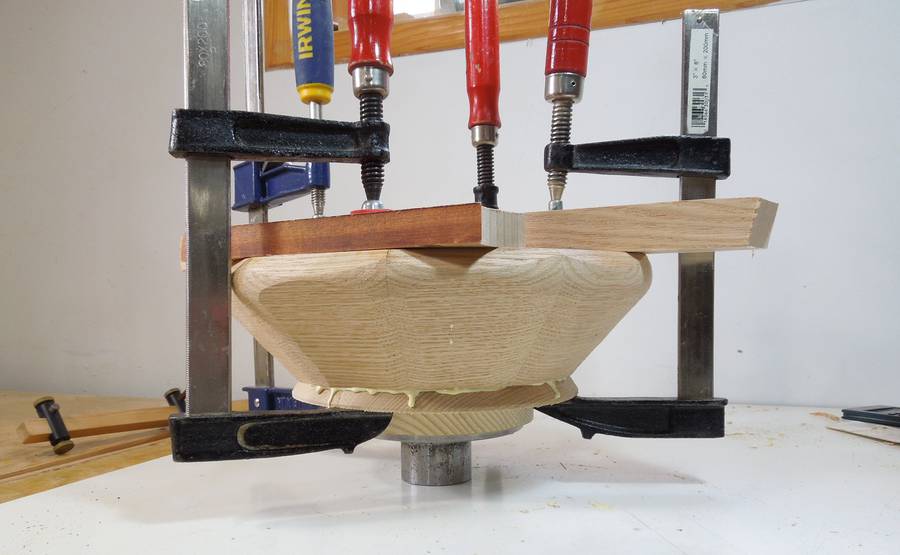
 So my solution was to just glue the workpiece onto a piece of plywood. I had previously
flattened the rim on my jointer. I applied a bead of glue (previous photo) and
then clamped it to the plywood.
So my solution was to just glue the workpiece onto a piece of plywood. I had previously
flattened the rim on my jointer. I applied a bead of glue (previous photo) and
then clamped it to the plywood.
 Next I screwed the plywood to the faceplate of my lathe, and then turned the inside
edge to be conical.
Next I screwed the plywood to the faceplate of my lathe, and then turned the inside
edge to be conical.
 Once the cone was turned, I had to get the plywood off again.
I used a thin saw blade in the table saw and cut all around.
I had to cut the narrow edge of the workpiece back a little anyway,
so I wasn't wasting any material.
Once the cone was turned, I had to get the plywood off again.
I used a thin saw blade in the table saw and cut all around.
I had to cut the narrow edge of the workpiece back a little anyway,
so I wasn't wasting any material.
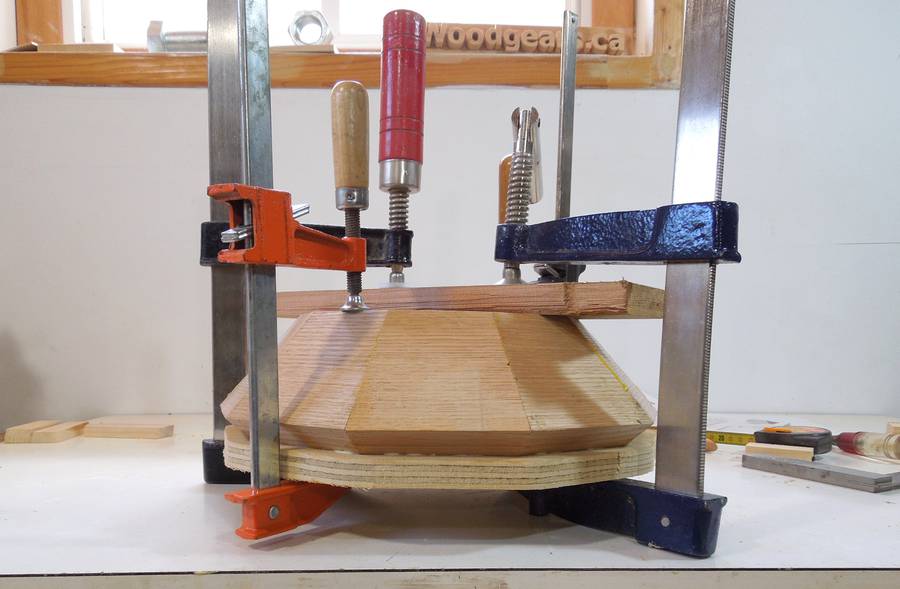
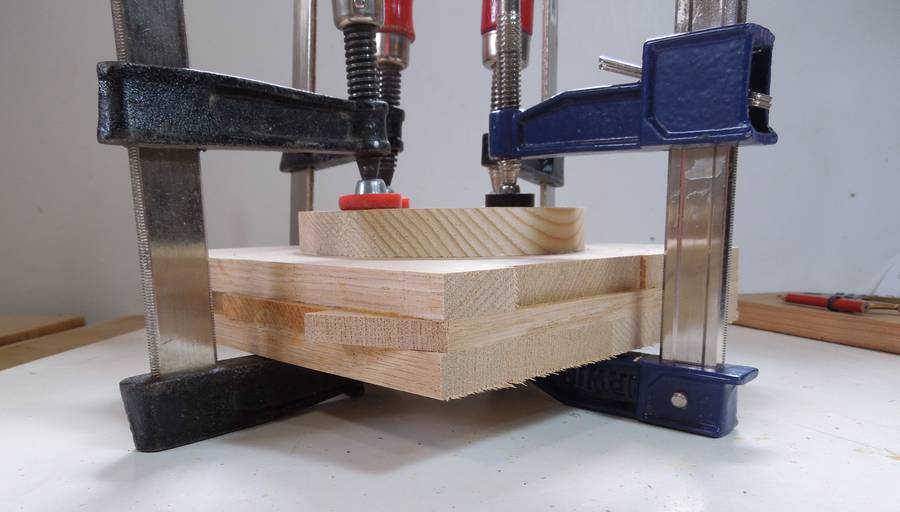
 I didn't want to make the bottom of the bowl out of a solid piece of wood, because,
with seasonal shrinkage, that might cause it to warp or pull away from two sides of the rim.
So I made a sandwich of three layers, with alternating grain directions. It's
hard to see the wood with all the clamps on it.
I didn't want to make the bottom of the bowl out of a solid piece of wood, because,
with seasonal shrinkage, that might cause it to warp or pull away from two sides of the rim.
So I made a sandwich of three layers, with alternating grain directions. It's
hard to see the wood with all the clamps on it.
When I made my plywood for the bowl lids this way, many people suggested using some sort of press for the glue. But I much prefer individual clamps. That way, I can be sure that pressure is applied everywhere.
 I glued a disk onto the bottom to screw the lathe's faceplate on.
That way, I won't end up with screw holes in the bottom of the bowl.
I glued a disk onto the bottom to screw the lathe's faceplate on.
That way, I won't end up with screw holes in the bottom of the bowl.
 Cutting the workpiece round.
 After I cut it round, I had the idea of cutting it conical on
the bandsaw. That would reduce how much turning I'd have to do next.
After I cut it round, I had the idea of cutting it conical on
the bandsaw. That would reduce how much turning I'd have to do next.
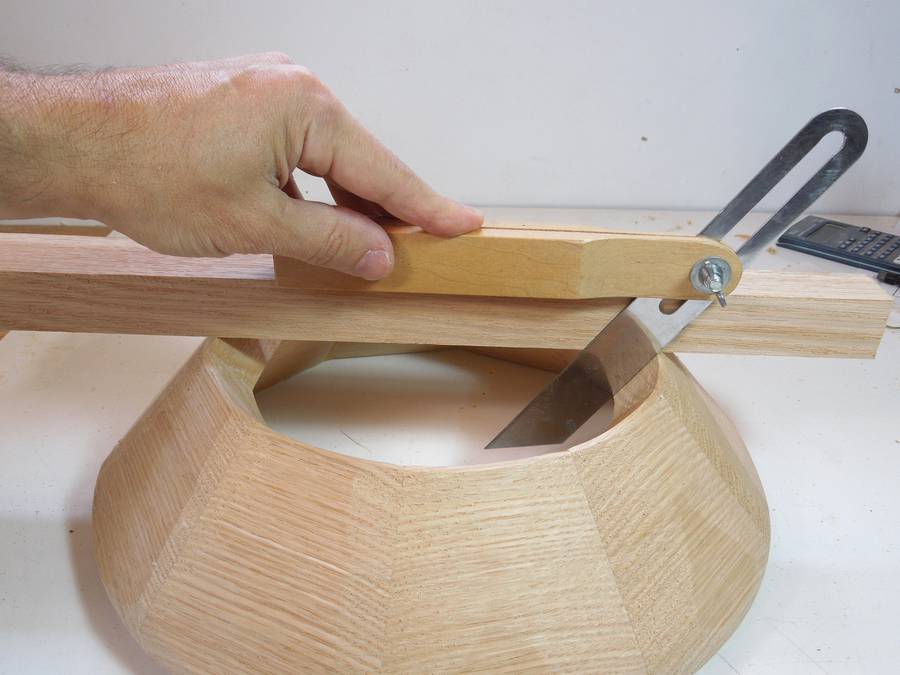 Next I set the bevel gauge to the angle that I had turned into the bottom of the rim...
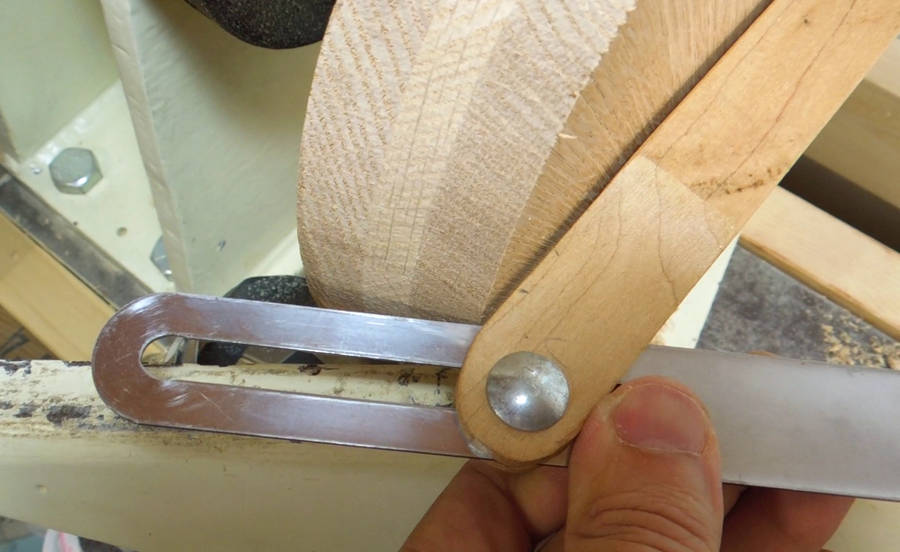 ... and used the bevel gauge to check my angle on the disk. This photo was taken
before I started turning.
... and used the bevel gauge to check my angle on the disk. This photo was taken
before I started turning.
 Turning the cone. I set the tool rest to be the exact same angle that
the cone needed to be. That made it easy to get the angle right.
Turning the cone. I set the tool rest to be the exact same angle that
the cone needed to be. That made it easy to get the angle right.
 Checking the fit. It took a few tries to get a fit I was happy with.
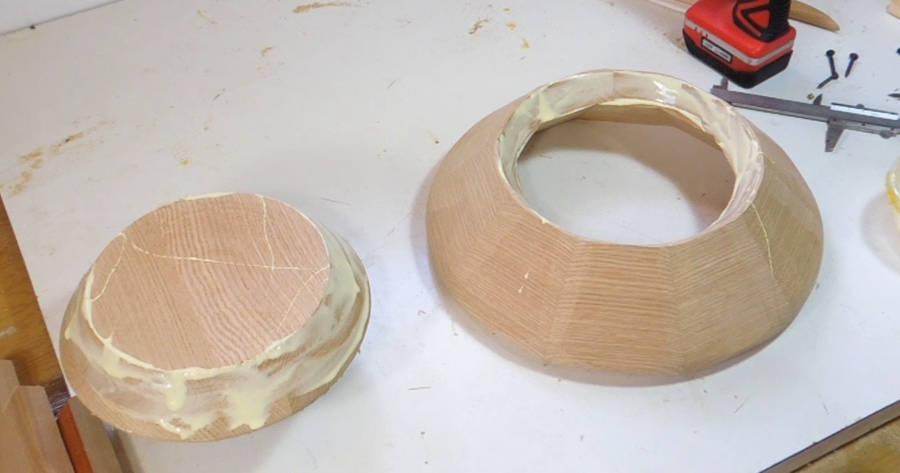 Once I decided the fit was good enough, I prepared for gluing.
I put lots of glue on both parts because the joint isn't really that tight.
Once I decided the fit was good enough, I prepared for gluing.
I put lots of glue on both parts because the joint isn't really that tight.
 Clamping it together. Note how the lathe's faceplate is still attached to
the bowl bottom.
Clamping it together. Note how the lathe's faceplate is still attached to
the bowl bottom.
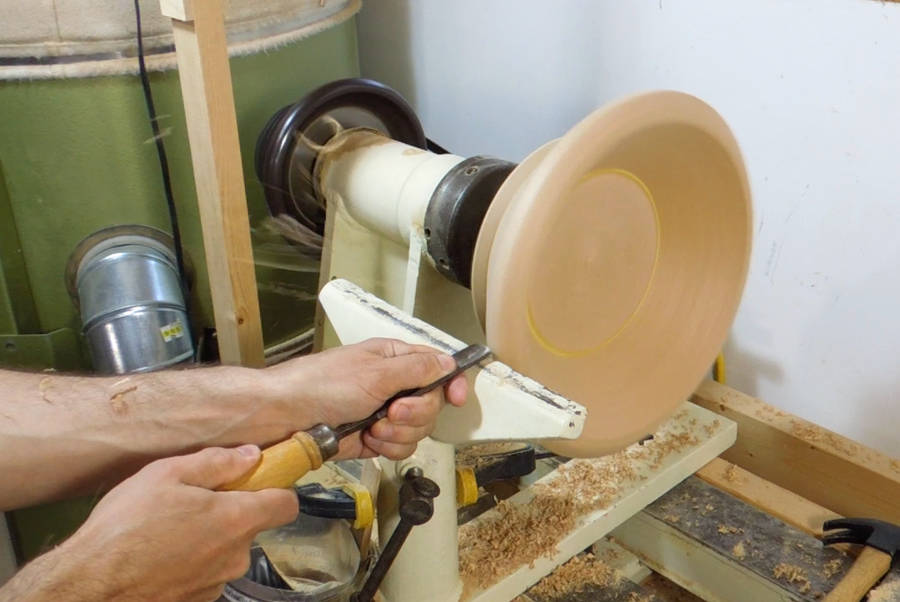 Now back on the lathe.
I found I didn't have the rim on as straight as I would have liked, so I added a shim on one side between the faceplate and the bowl to offset the crookedness a little.
 Chips flying...
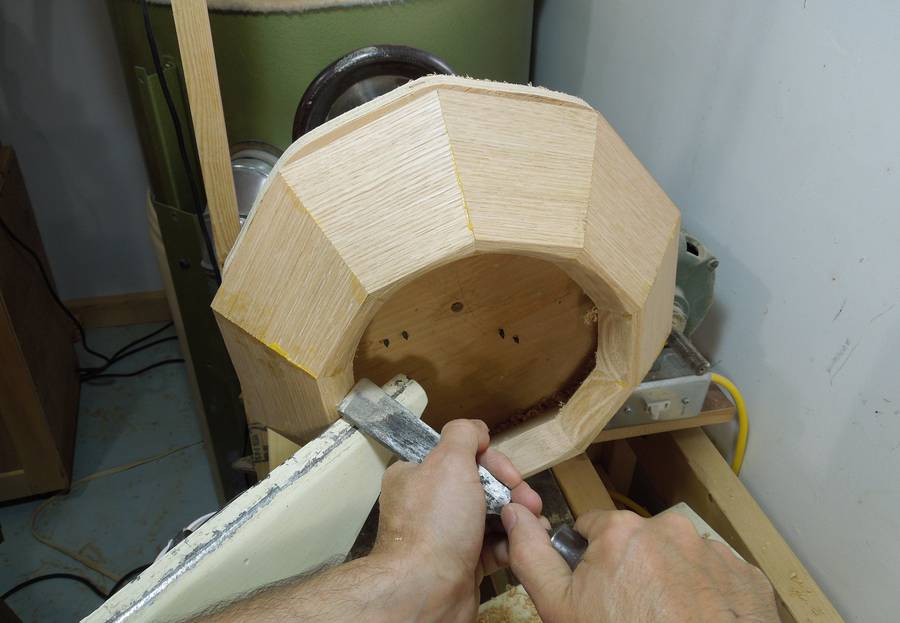
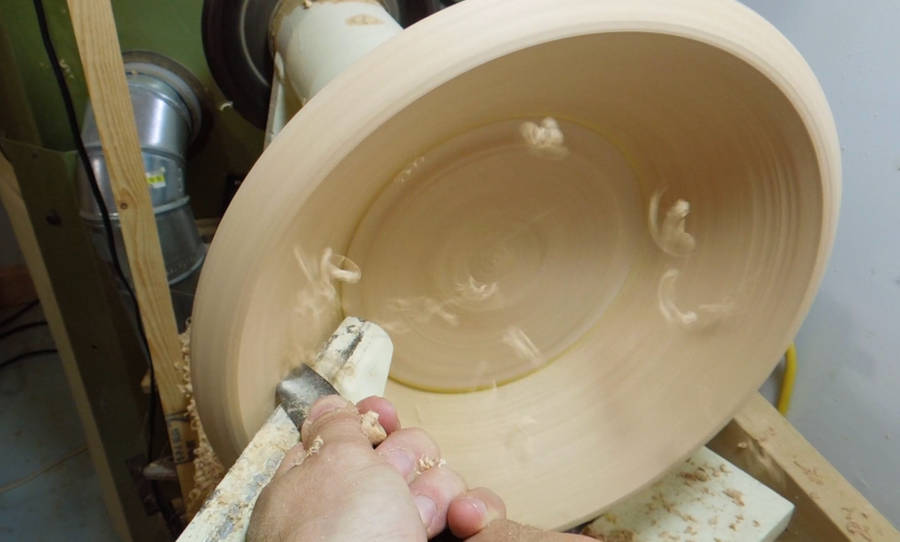
 The inside is mostly round, except for two joints around the rim
and the circular joint between the sides and the bottom.
Fortunately, I have lots of thickness left, so I can afford to turn it
down some more.
The inside is mostly round, except for two joints around the rim
and the circular joint between the sides and the bottom.
Fortunately, I have lots of thickness left, so I can afford to turn it
down some more.
 Turning the outside. Once I got it round, with the chisel cutting
along the grain all the way around the bowl, I get nice
long shavings just flying from the chisel, with relatively little dust.
Turning the outside. Once I got it round, with the chisel cutting
along the grain all the way around the bowl, I get nice
long shavings just flying from the chisel, with relatively little dust.
I don't like wood turning much, but this part was fun.
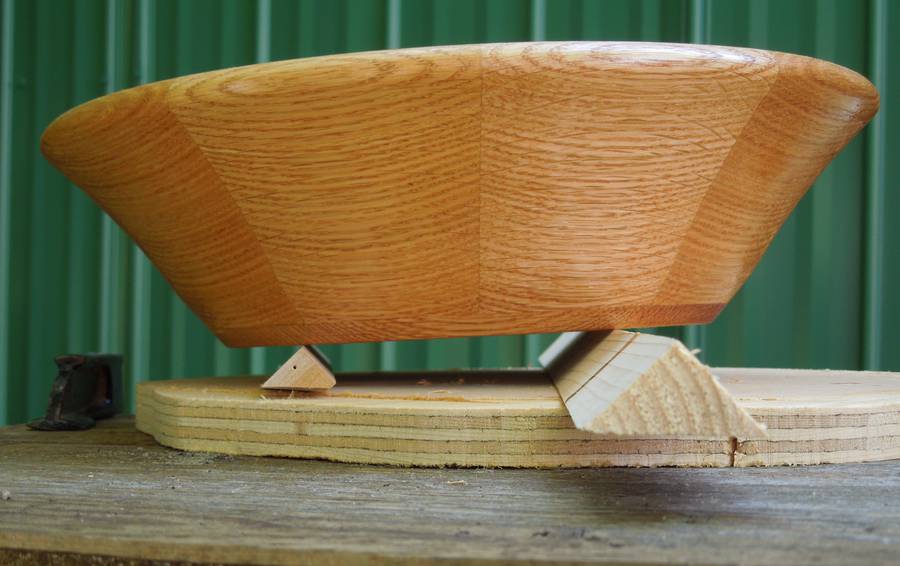
 The bowl fully rounded. I had plenty of thickness left to work with, so
I thinned it to about 10 mm, and gave the sides a slight curve
reminiscent of a bell.
The bowl fully rounded. I had plenty of thickness left to work with, so
I thinned it to about 10 mm, and gave the sides a slight curve
reminiscent of a bell.
 Then sanding it all. I'm no fan of sanding,
but on a lathe, at least it's motorized.
Then sanding it all. I'm no fan of sanding,
but on a lathe, at least it's motorized.
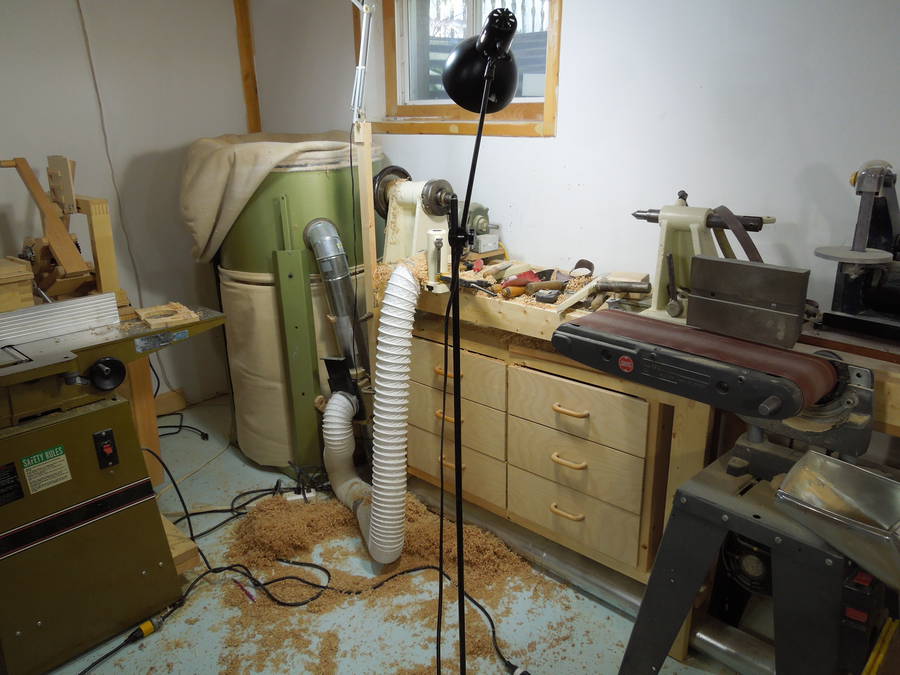 The mess at my lathe. I had the dust extractor running the whole time, with the
end of the hose near the chisel. This didn't catch many shavings, but it sucked
up most of the airborne dust.
The mess at my lathe. I had the dust extractor running the whole time, with the
end of the hose near the chisel. This didn't catch many shavings, but it sucked
up most of the airborne dust.
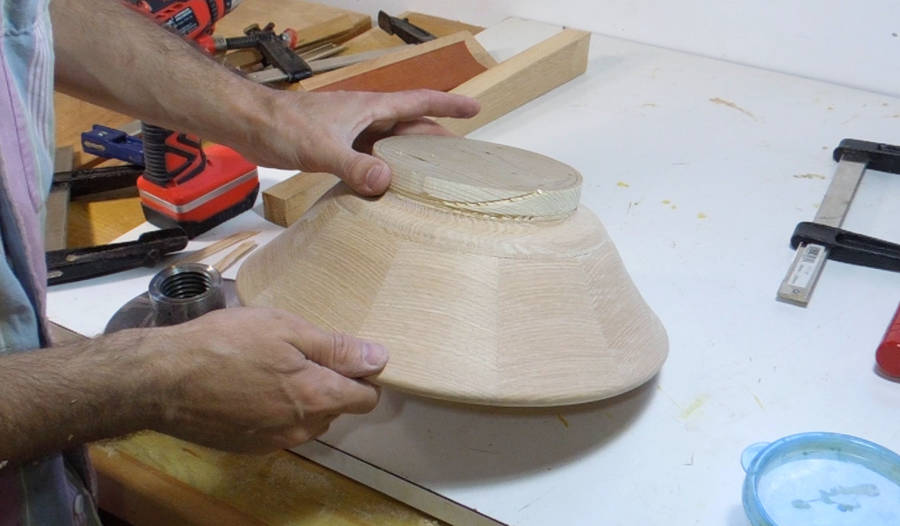 I still needed to figure out how to remove that temporary piece of wood
that I had glued on. I hadn't really thought this out ahead of time.
I still needed to figure out how to remove that temporary piece of wood
that I had glued on. I hadn't really thought this out ahead of time.
A good solution that people have pointed out is to glue on a piece of paper to the bottom of the bowl before gluing on the extra piece. The paper is strong enough for turing, but the bottom can still be pried off with a chisel, essentially splitting the paper in two.
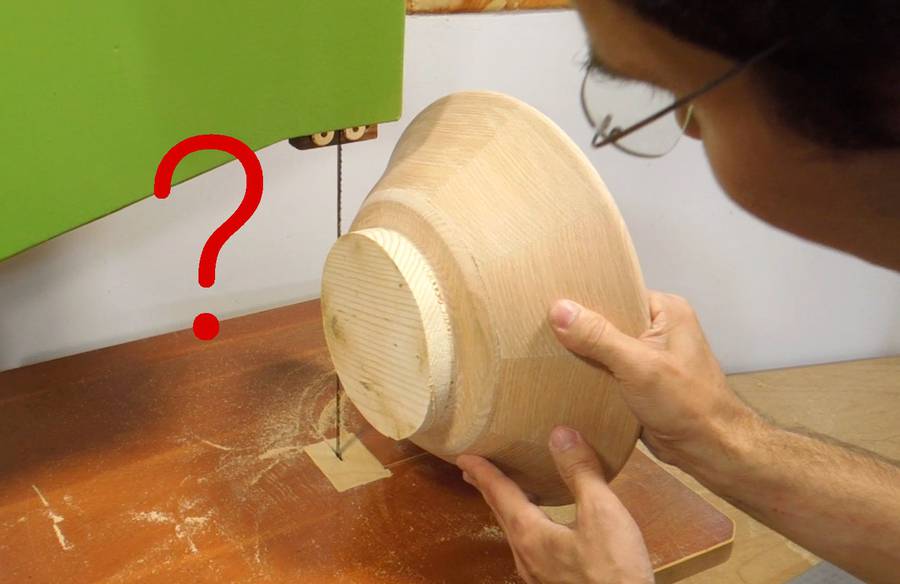 But my bottm was glued on solid. My
first thought was to maybe build a bandsaw jig to cut the bottom off.
My homemade bandsaw has enough headroom
to make this doable.
But my bottm was glued on solid. My
first thought was to maybe build a bandsaw jig to cut the bottom off.
My homemade bandsaw has enough headroom
to make this doable.
 But then I realized, if I just put the bowl on my jointer,
I wouldn't need to build a jig at all.
But then I realized, if I just put the bowl on my jointer,
I wouldn't need to build a jig at all.
I wouldn't have tried this sort of thing on my homemade jointer when I first built it, because I didn't trust it right away. But it has served me well for a year now, without exploding. The jointer only has a 2" (50 mm) diameter cutter head, and a relatively narrow opening around the cutter head, so I was able to plane the bottom off the bowl without a problem.
 After several passes, checking that the bottom is still level. I put the flat bottom
on the jointer table and spun the bowl around while watching the bowl's rim
against the fence. If the bottom was crooked, I would have had to do a
tapered cut to correct. That would have involved
slightly lifting one side of the bowl as I passed it over the jointer.
After several passes, checking that the bottom is still level. I put the flat bottom
on the jointer table and spun the bowl around while watching the bowl's rim
against the fence. If the bottom was crooked, I would have had to do a
tapered cut to correct. That would have involved
slightly lifting one side of the bowl as I passed it over the jointer.
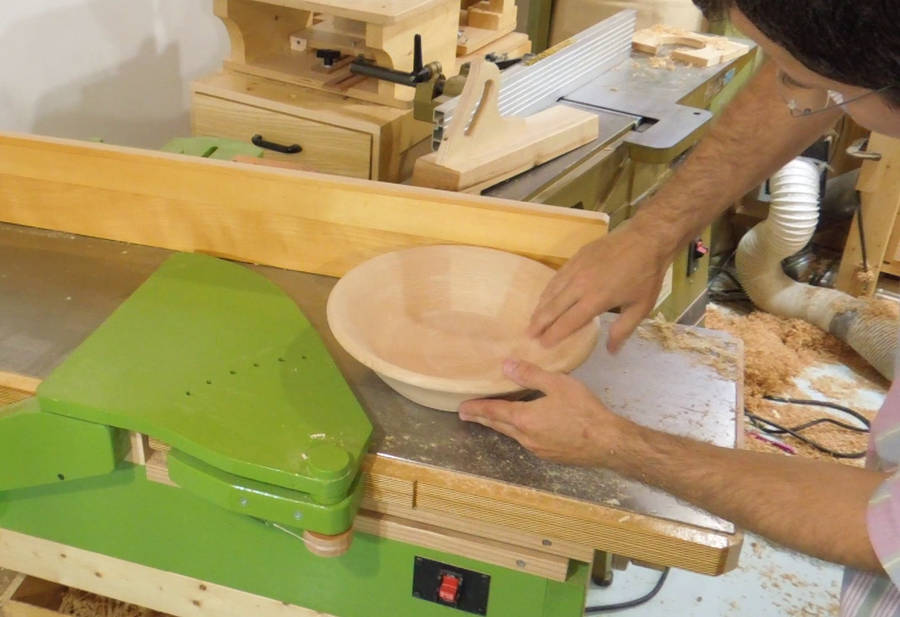
 After the jointer work, I had a bowl with a perfectly flat bottom. But I wanted
the bottom to be slightly hollow. The solution would have been some large
faceplate chuck to hold the rim of the bowl on the lathe,
but I don't have such a chuck.
After the jointer work, I had a bowl with a perfectly flat bottom. But I wanted
the bottom to be slightly hollow. The solution would have been some large
faceplate chuck to hold the rim of the bowl on the lathe,
but I don't have such a chuck.
So I decided to carve it out on the table saw. I attached a back-stop to the fence, and raised the blade to about 2 mm above the table...
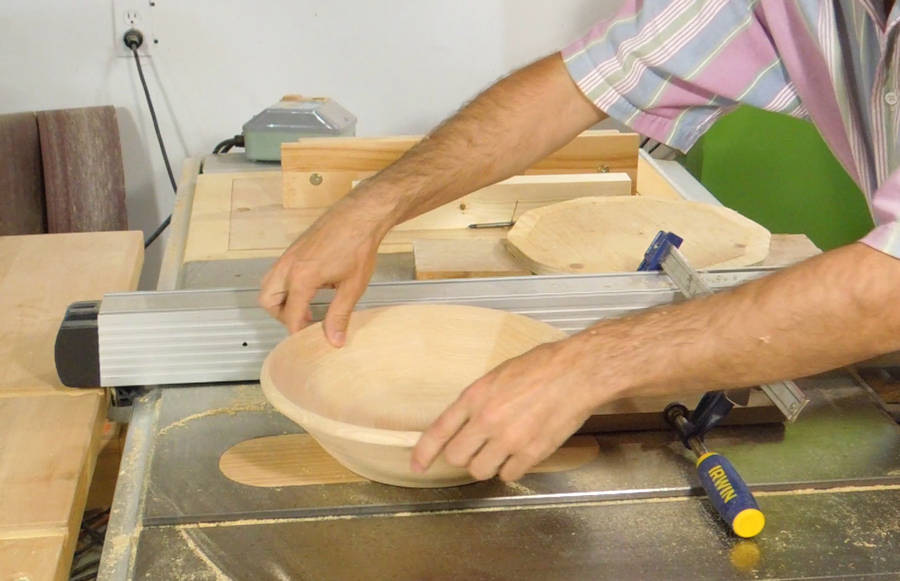 ...then, placing the bowl over the blade, I slowly spun it around to carve out the bottom.
I had to take several passes, each time moving the back-stop back a little to carve out a sufficiently large area.
 The bottom hollowed out.
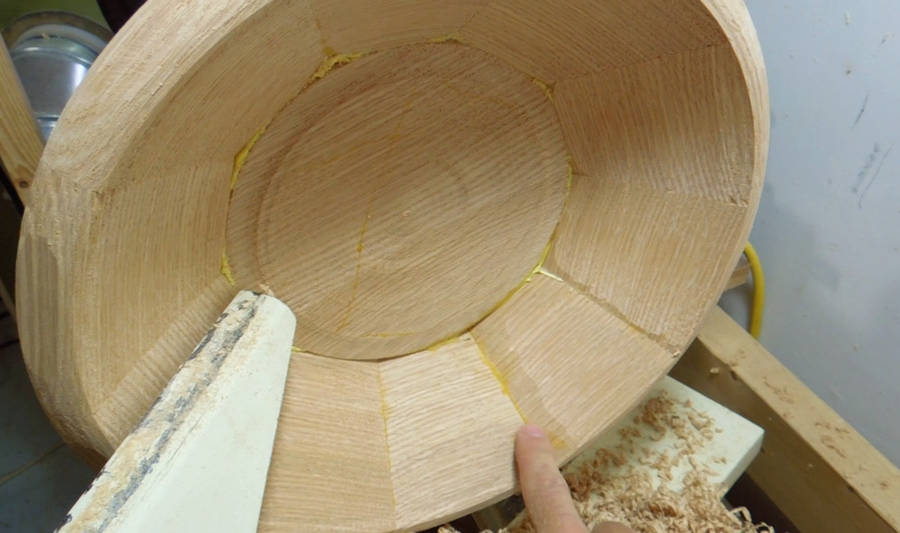
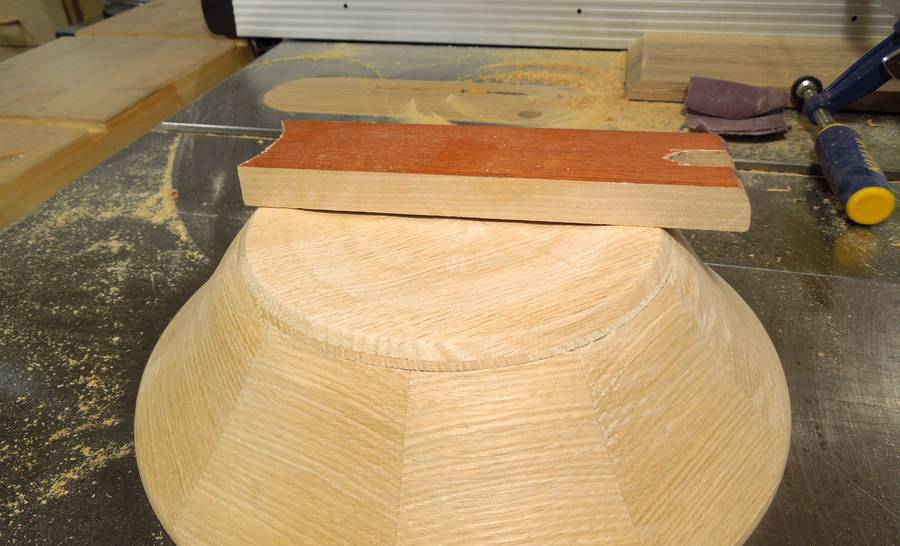
 The turned bowl, seen from the top. Note the circle of grain going at 90-degrees in the
bottom of the bowl. The way I had turned it, I went completely through the top layer of
my three layer sandwich for the bottom. If I was doing it again,
I would have made the top layer thicker so I wouldn't end up going through it.
The turned bowl, seen from the top. Note the circle of grain going at 90-degrees in the
bottom of the bowl. The way I had turned it, I went completely through the top layer of
my three layer sandwich for the bottom. If I was doing it again,
I would have made the top layer thicker so I wouldn't end up going through it.
That circle of perpendicular grain is slightly off center. That's because I had mounted the bowl slightly crooked to compensate for the fact that I glued the rim on slightly crooked.
 Because this is a bowl, I should expect that at some point, somebody might put a
salad or something else wet into it, so I needed a finish that wouldn't let water
penetrate. Oil-based finishes are best for this. I don't use oil-based finishes
much, but I still had some Varathane finish left over.
I originally bought it to varnish some
canoe paddles two years ago, then used it again
to varnish the tables for the jointer and
then the wheels and frame for my bandsaw/sawmill
Because this is a bowl, I should expect that at some point, somebody might put a
salad or something else wet into it, so I needed a finish that wouldn't let water
penetrate. Oil-based finishes are best for this. I don't use oil-based finishes
much, but I still had some Varathane finish left over.
I originally bought it to varnish some
canoe paddles two years ago, then used it again
to varnish the tables for the jointer and
then the wheels and frame for my bandsaw/sawmill
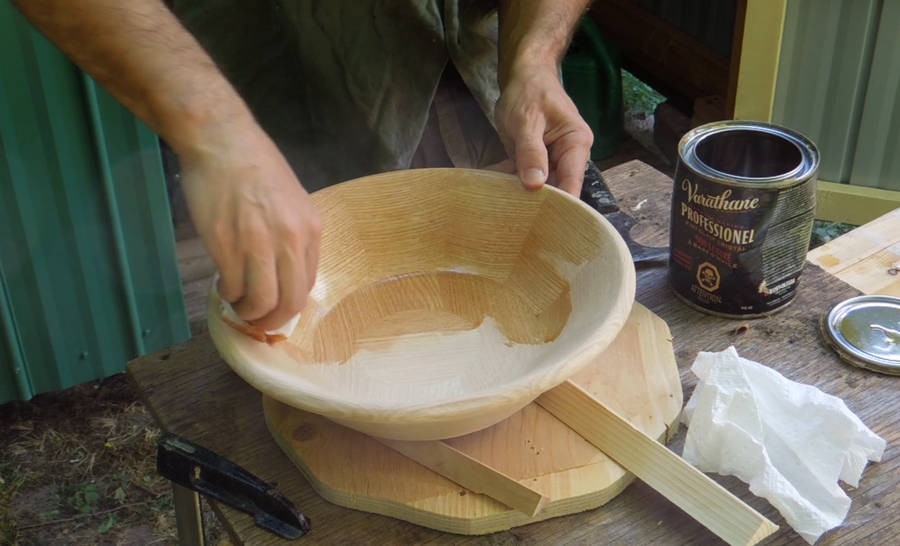
I always use oil based finishes outside. This time, in front of my new shed. That way, I could just put the piece inside the shed to let it dry overnight.
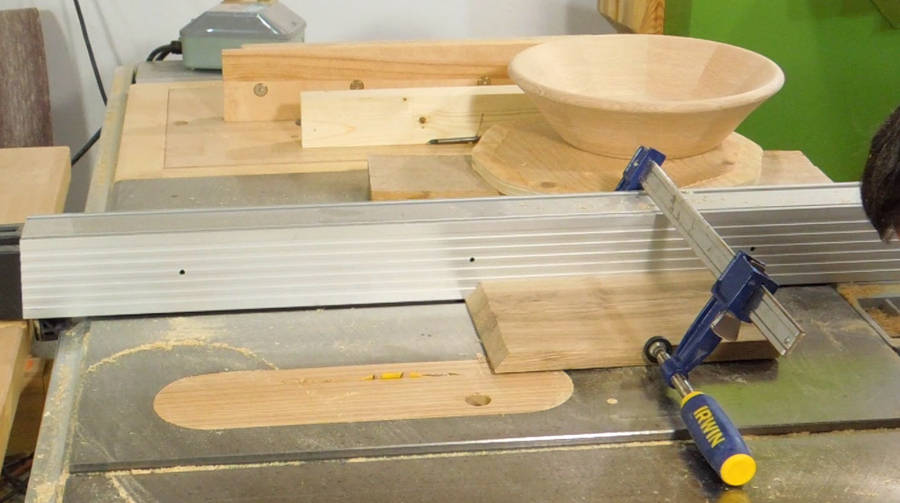
 Some people really like to use these "painters triangles" for supporting work.
Personally, I just use some triangular rails and put the work on that
instead. They sometimes leave a slight line on the workpiece, but there's no
risk of leaving a divot in it either. Whatever line might end up on it
can be scraped off with a chisel.
Sometimes I cut notches in the edge of the rails, but usually I don't bother.
Some people really like to use these "painters triangles" for supporting work.
Personally, I just use some triangular rails and put the work on that
instead. They sometimes leave a slight line on the workpiece, but there's no
risk of leaving a divot in it either. Whatever line might end up on it
can be scraped off with a chisel.
Sometimes I cut notches in the edge of the rails, but usually I don't bother.
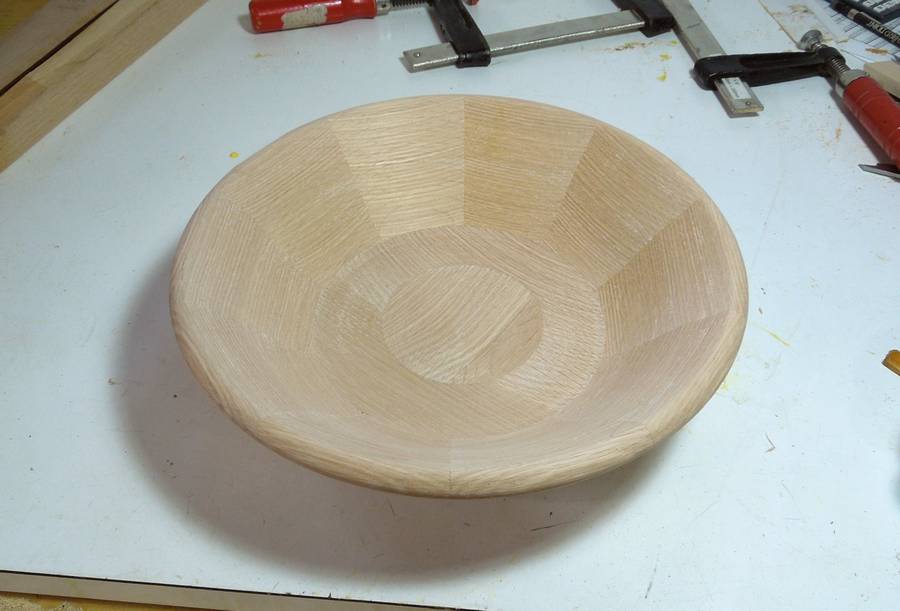
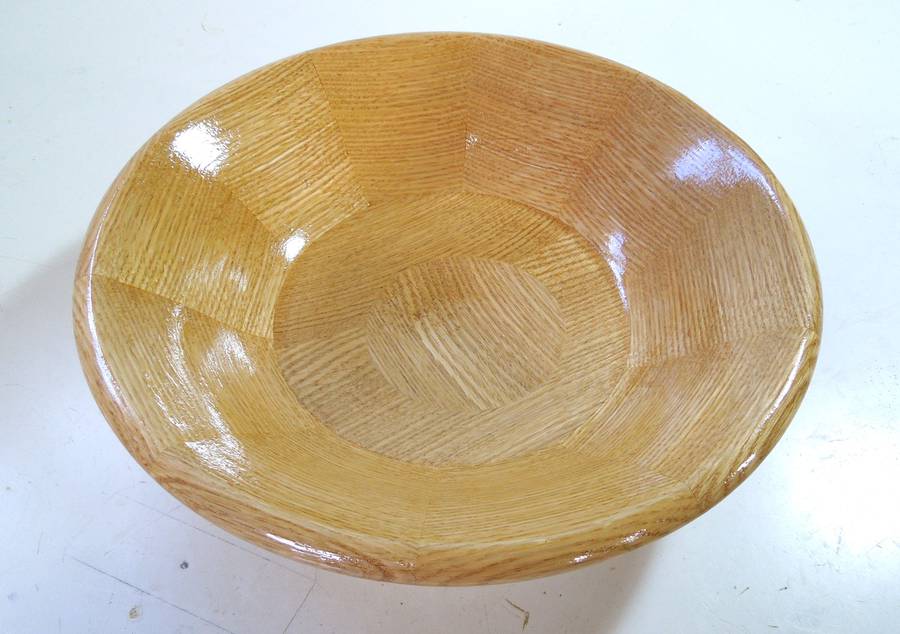 With five coats of varnish, the bowl turned out nice and glossy.
And looking at the joints, it looks as though it was made with incredible precision.
With five coats of varnish, the bowl turned out nice and glossy.
And looking at the joints, it looks as though it was made with incredible precision.
I'm sure there's better varnishes for bowls, but the Varathane I already had, and looking around on the net, people don't seem to be worried about it being poisonous.
 making splayed miter joints
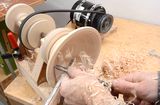 Bowl on the
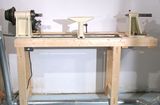 My lathe stand
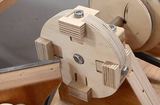 Homemade 4-jaw lathe chuck
 Ball on the lathe
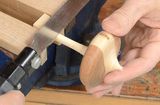 Spinning to pon the lathe
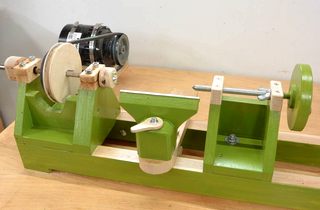 Homemade wooden lathe, from scratch