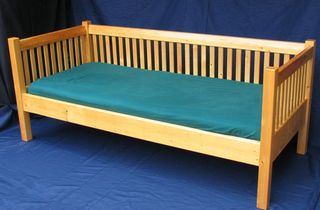
Under-daybed drawers
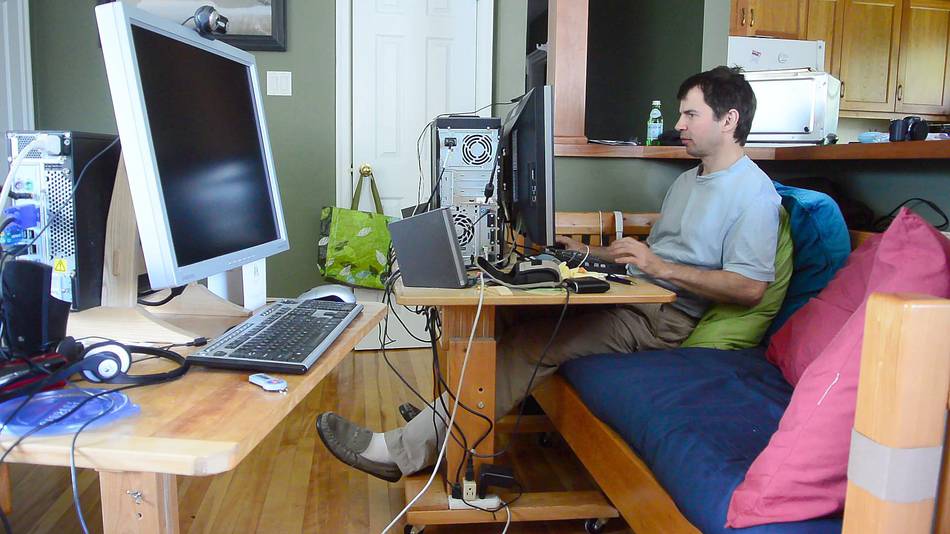 Rachel and I moved the daybed into the living room,
where we use it as seating with our computers on our
"wheely desks".
Earlier, I made a drawer to go under that daybed, but
the legs of the desks extend underneath when pulled up to the daybed,
so I couldn't use that drawer anymore.
Rachel and I moved the daybed into the living room,
where we use it as seating with our computers on our
"wheely desks".
Earlier, I made a drawer to go under that daybed, but
the legs of the desks extend underneath when pulled up to the daybed,
so I couldn't use that drawer anymore.
 I wanted to build some new drawers which would
still allow the legs of the desks to fit under them.
I wanted to build some new drawers which would
still allow the legs of the desks to fit under them.
I used some pine that I picked up from the garbage. I seem to find free wood as fast as I can use it up.
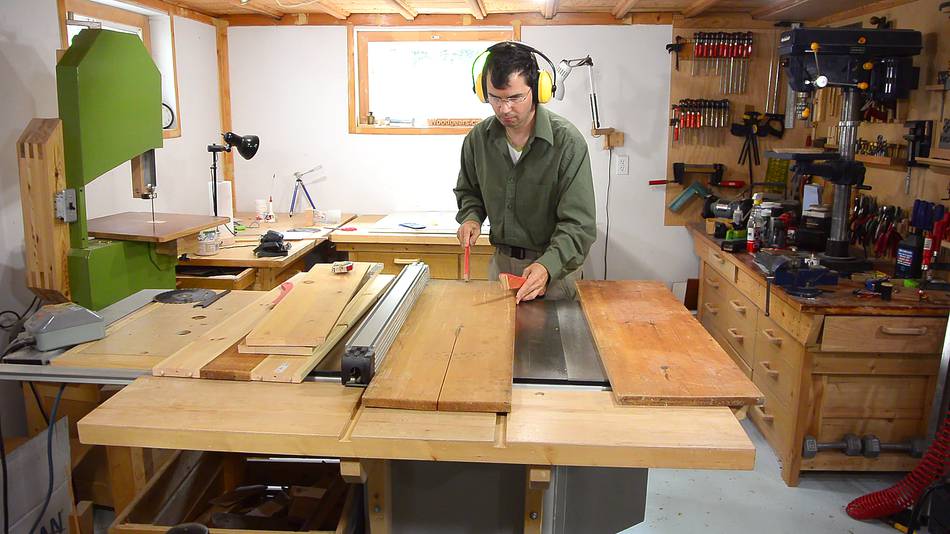 Ripping the boards down to the right width.
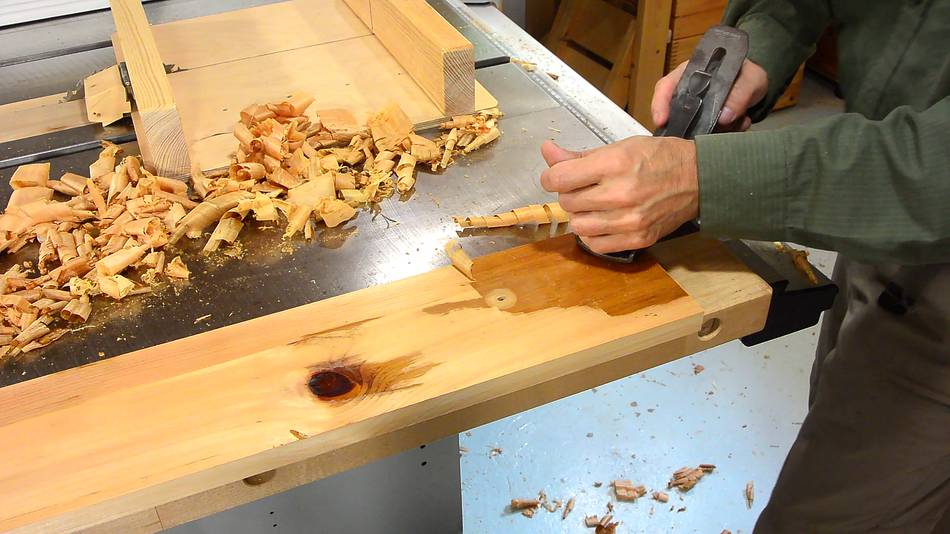 One board had varnish on it, others turned dark from aging. I planed off the varnish
and layer of dark wood. I know it's fashionable to make new wood look old and banged up these days,
but it's not my thing. I prefer to take old wood and make it look new.
I used a hand plane because I only wanted to plane off just enough to get the varnish
off without making the boards noticeably thinner.
One board had varnish on it, others turned dark from aging. I planed off the varnish
and layer of dark wood. I know it's fashionable to make new wood look old and banged up these days,
but it's not my thing. I prefer to take old wood and make it look new.
I used a hand plane because I only wanted to plane off just enough to get the varnish
off without making the boards noticeably thinner.
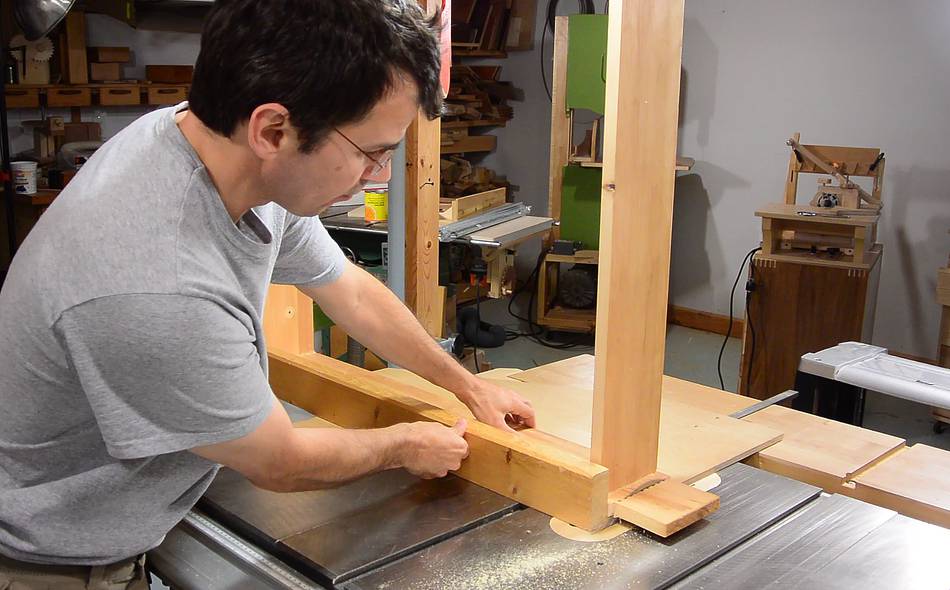
 Then using my screw advance box joint jig to
cut box joints for the corners.
Then using my screw advance box joint jig to
cut box joints for the corners.
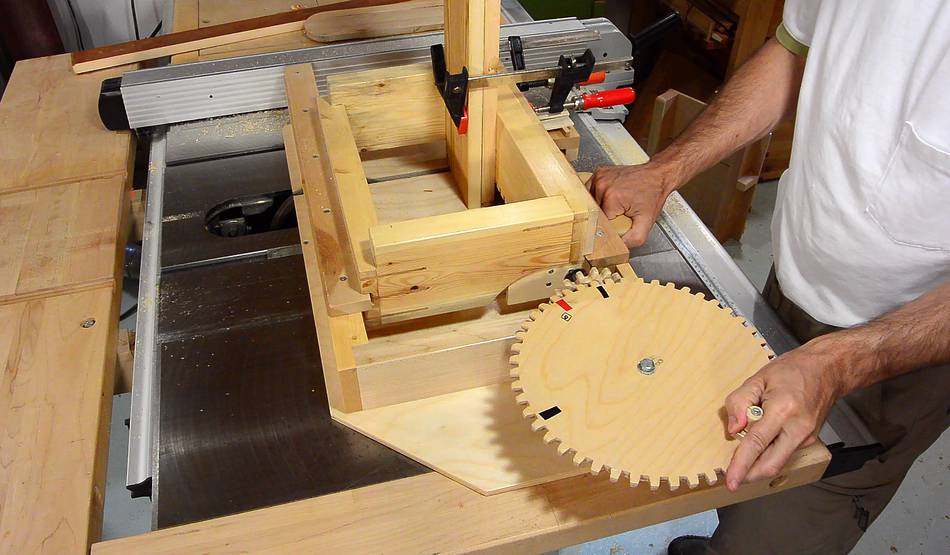 I'm cutting 1/4" box joints, but with just a regular saw blade,
using this method.
I'm cutting 1/4" box joints, but with just a regular saw blade,
using this method.
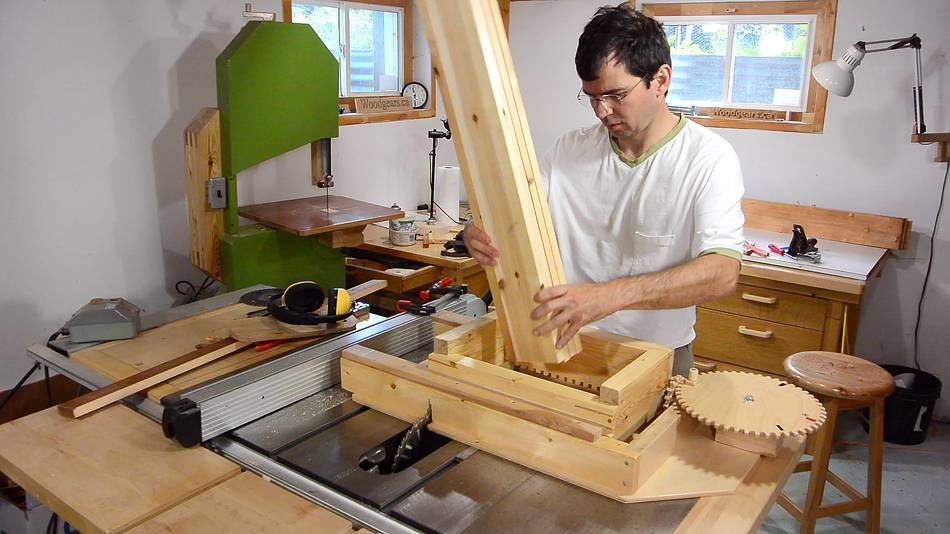
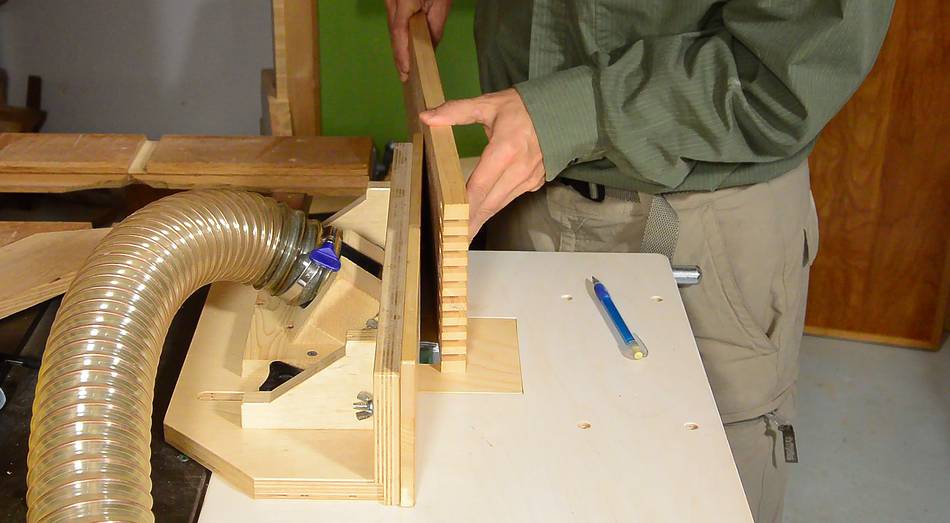
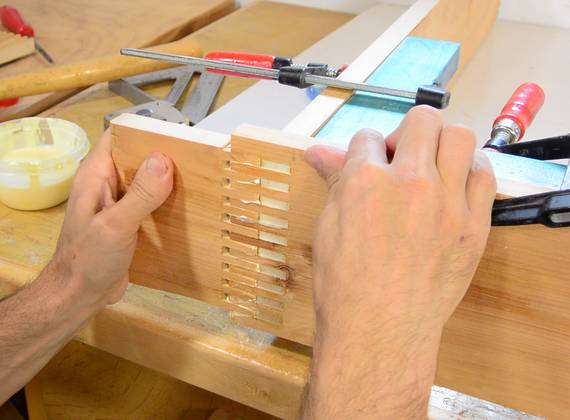
 I wanted the drawer fronts to be a bit wider than the drawer itself to hide the
metal slides on the sides.
This time, I cut really deep box joints on the front piece. A filler piece will
later fill the gaps.
I'd previously used this method here
for this workbench.
I wanted the drawer fronts to be a bit wider than the drawer itself to hide the
metal slides on the sides.
This time, I cut really deep box joints on the front piece. A filler piece will
later fill the gaps.
I'd previously used this method here
for this workbench.
 Before assembling the drawer, I need to route a rabbet on the bottom of the
front. The drawer bottom will fit into this. The bottom is glued
flat on the other three sides - no need to hide it from the back and sides.
Before assembling the drawer, I need to route a rabbet on the bottom of the
front. The drawer bottom will fit into this. The bottom is glued
flat on the other three sides - no need to hide it from the back and sides.
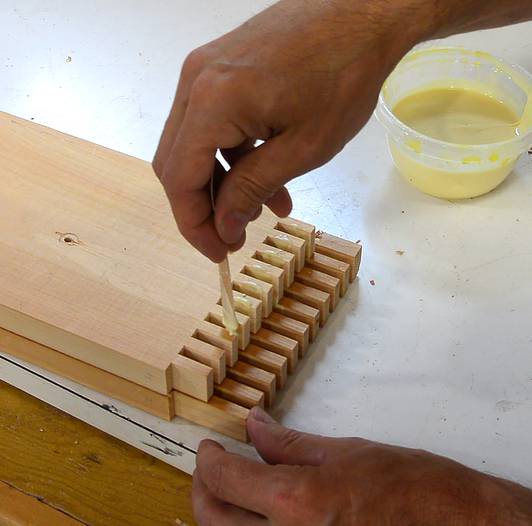 Applying glue. I put the two pieces on top of each other so I could apply glue
to both parts at once.
Applying glue. I put the two pieces on top of each other so I could apply glue
to both parts at once.
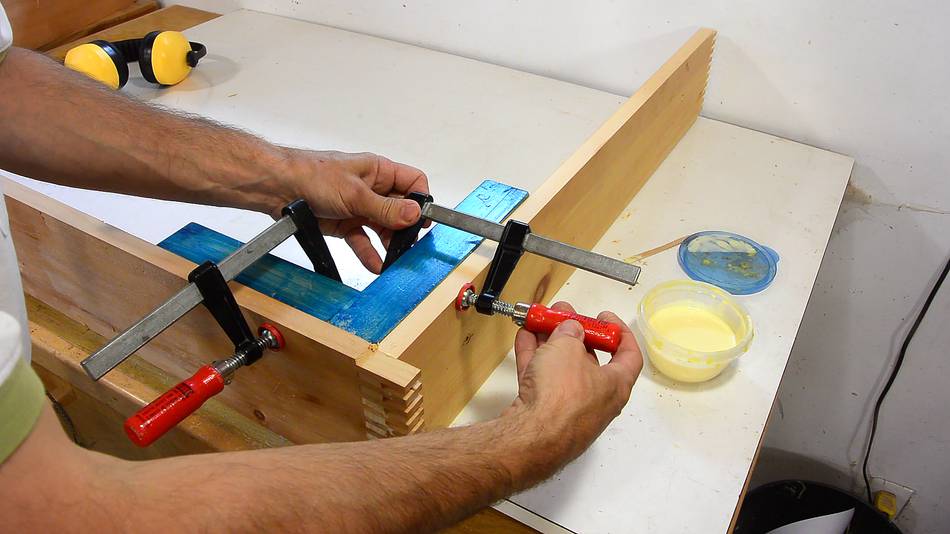
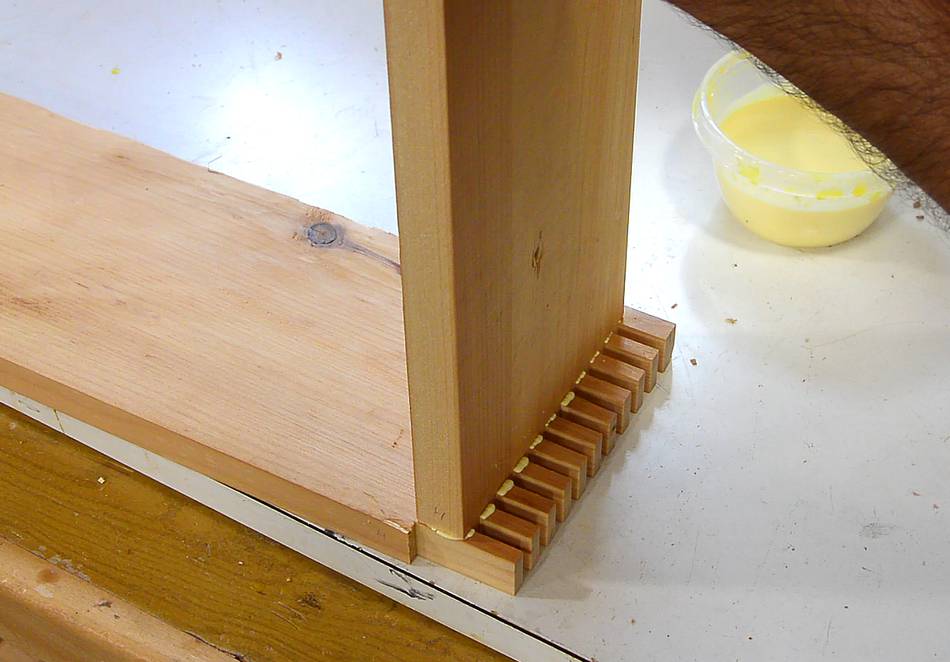
 A clamping square ensures that the joint stays square as I work on the next one.
I also glue another piece in between the extended fingers to make a sort of T-joint.
A clamping square ensures that the joint stays square as I work on the next one.
I also glue another piece in between the extended fingers to make a sort of T-joint.
 Then trimming the excess off on the table saw.
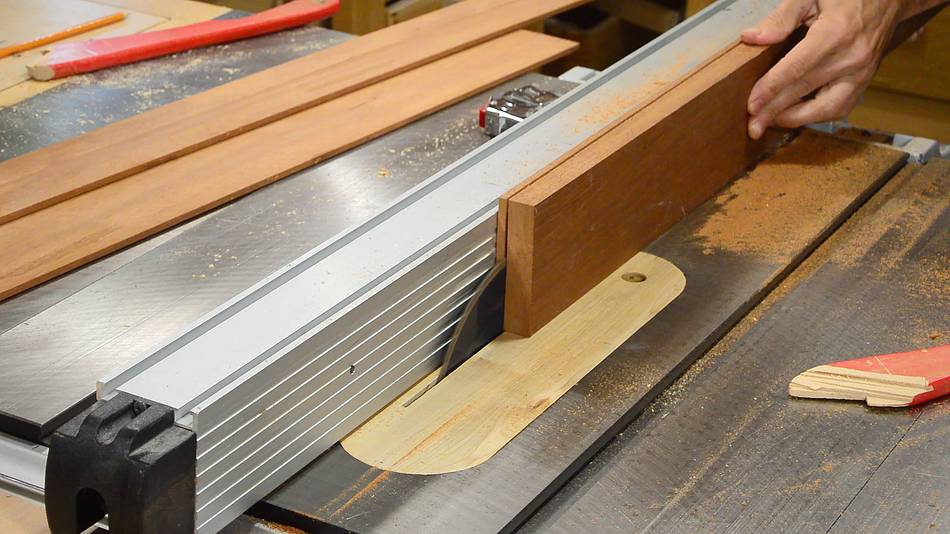 I'm cutting some mahogany veneer for the front, on the table saw. I'm using
a thin 7 1/4" (185 mm) blade, cutting from both sides.
I'm cutting some mahogany veneer for the front, on the table saw. I'm using
a thin 7 1/4" (185 mm) blade, cutting from both sides.
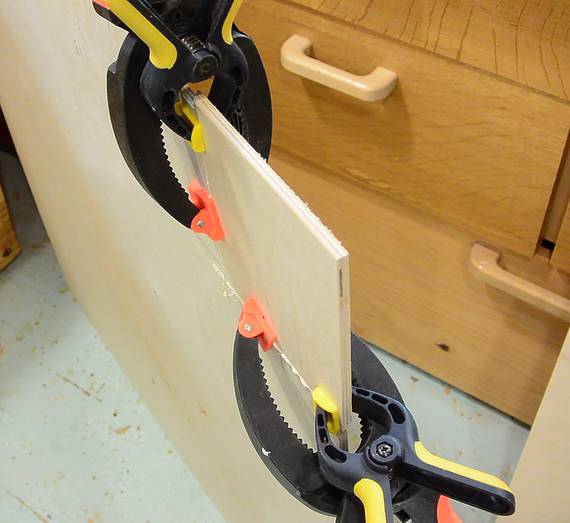
 The mahogany wasn't wide enough so I had to glue two pieces side to side
to get enough width. I'm using my long
reach C clamps to ensure the layers are lined up in the middle.
The mahogany wasn't wide enough so I had to glue two pieces side to side
to get enough width. I'm using my long
reach C clamps to ensure the layers are lined up in the middle.
 Then spreading glue on the veneer and drawer front.

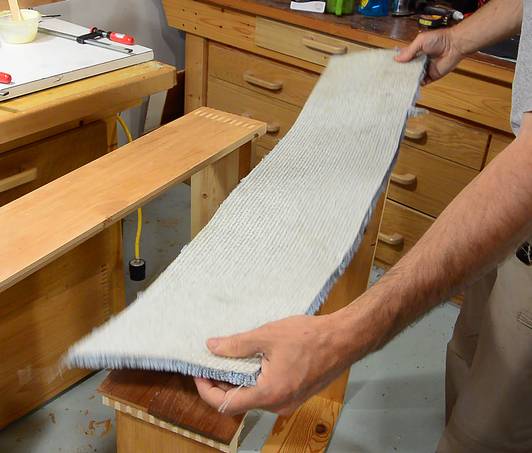 With the veneer in place, I put a piece of carpeting on it, then a board,
and then lots of clamps to press down on the whole surface.
With the veneer in place, I put a piece of carpeting on it, then a board,
and then lots of clamps to press down on the whole surface.
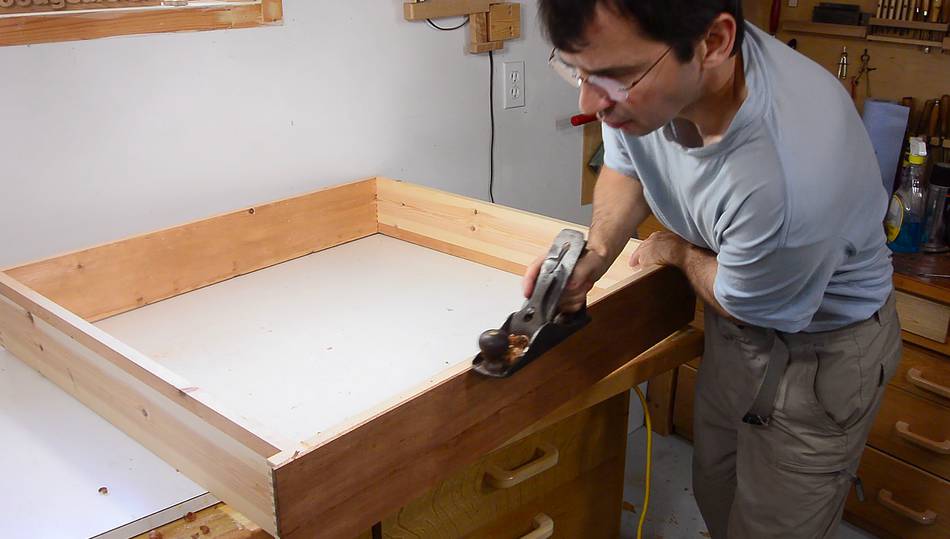 Afterwards, I used a hand plane to flush trim the veneer on the top and bottom.
I could have done this with a machine, but for two drawers it wasn't worth the trouble to set something up.
I also flush trimmed the ends (sides of the drawer) on the table saw, using a large table saw sled.
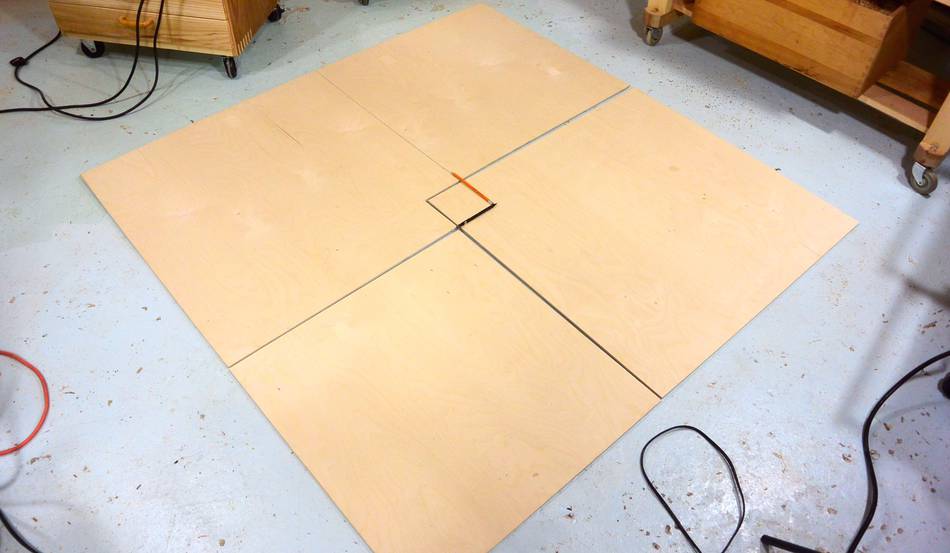 My drawers were 80x85 cm. My local hardwood store has 6 mm birch plywood in 150x150 cm
sheets. There's no way to get two full pieces out of a sheet that size.
So I laid it out with the two pieces overlapping. One of the bottoms has a corner missing.
My drawers were 80x85 cm. My local hardwood store has 6 mm birch plywood in 150x150 cm
sheets. There's no way to get two full pieces out of a sheet that size.
So I laid it out with the two pieces overlapping. One of the bottoms has a corner missing.
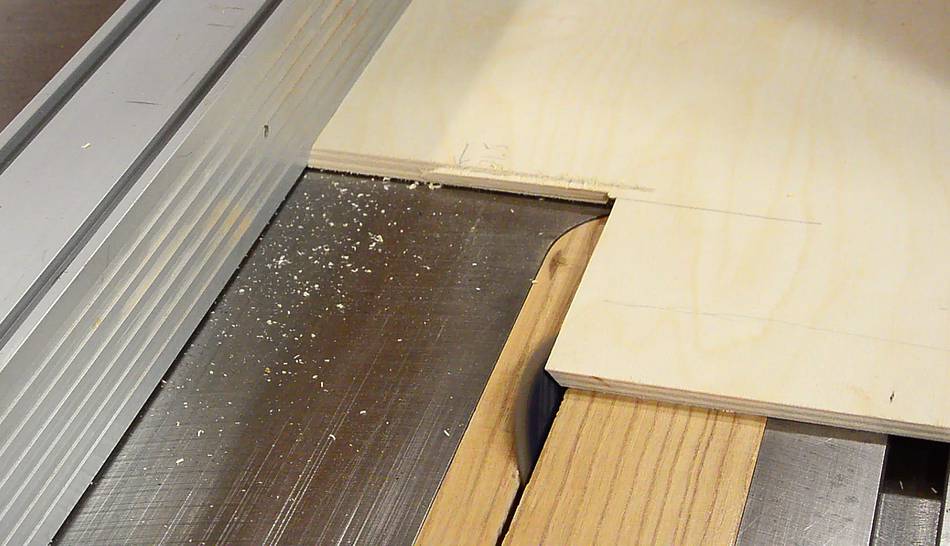
 I cut the edges of the corner at a 45-degree angle, then glued a piece in.
For just the corner, this will be ok. This sort of joint wouldn't
be strong enough if I had a seam running down the middle of the drawer bottom
I cut the edges of the corner at a 45-degree angle, then glued a piece in.
For just the corner, this will be ok. This sort of joint wouldn't
be strong enough if I had a seam running down the middle of the drawer bottom
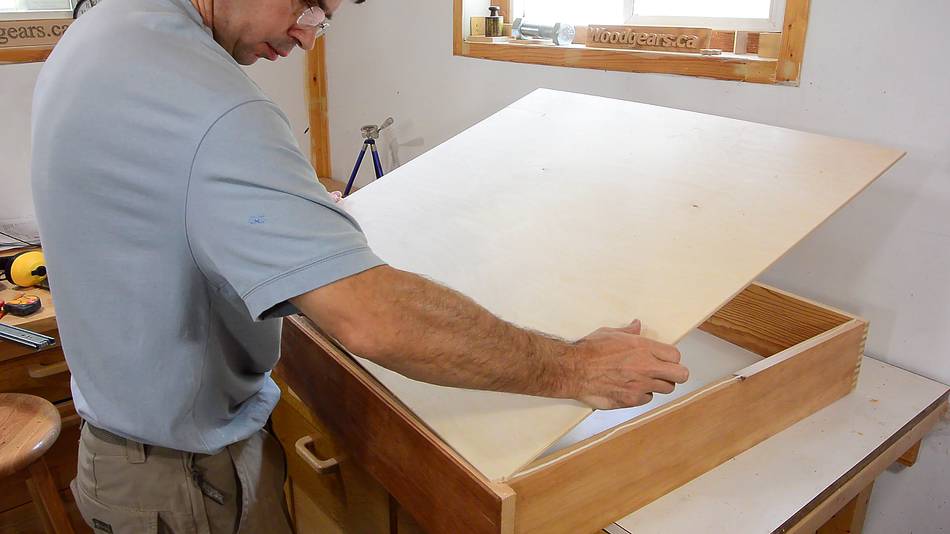 Finally, installing the bottom. The bottom fits into a rabbet on the front and
flat on the sides. I put down a bead of glue before putting the bottom on.
Finally, installing the bottom. The bottom fits into a rabbet on the front and
flat on the sides. I put down a bead of glue before putting the bottom on.
 Then adding 1" brad nails. The strength will come mostly from the glue, but brad
nails help keep it in place while the glue dries.
Then adding 1" brad nails. The strength will come mostly from the glue, but brad
nails help keep it in place while the glue dries.
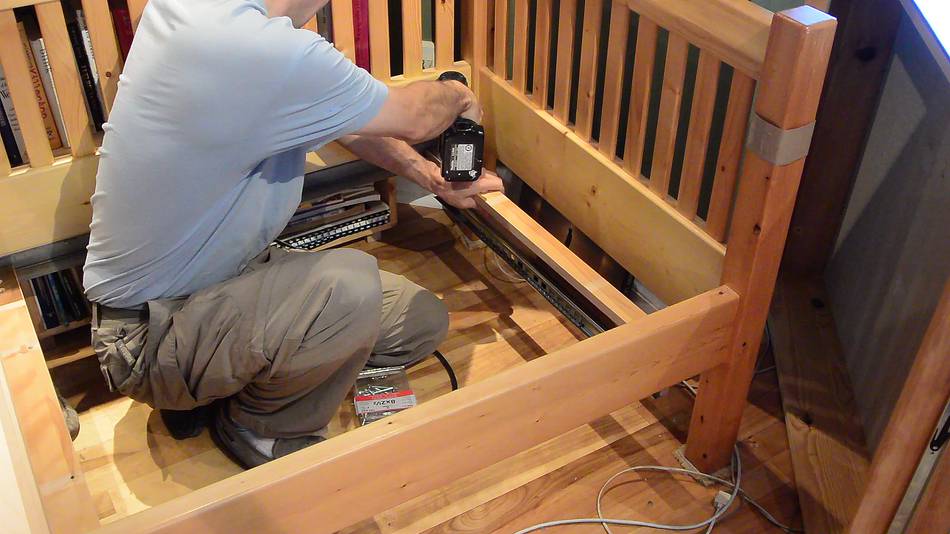
 I made some wooden brackets to hold the drawer slides to the angle iron rails
in the bottom of the daybed. These brackets clamp onto the rails with wood screws
I made some wooden brackets to hold the drawer slides to the angle iron rails
in the bottom of the daybed. These brackets clamp onto the rails with wood screws
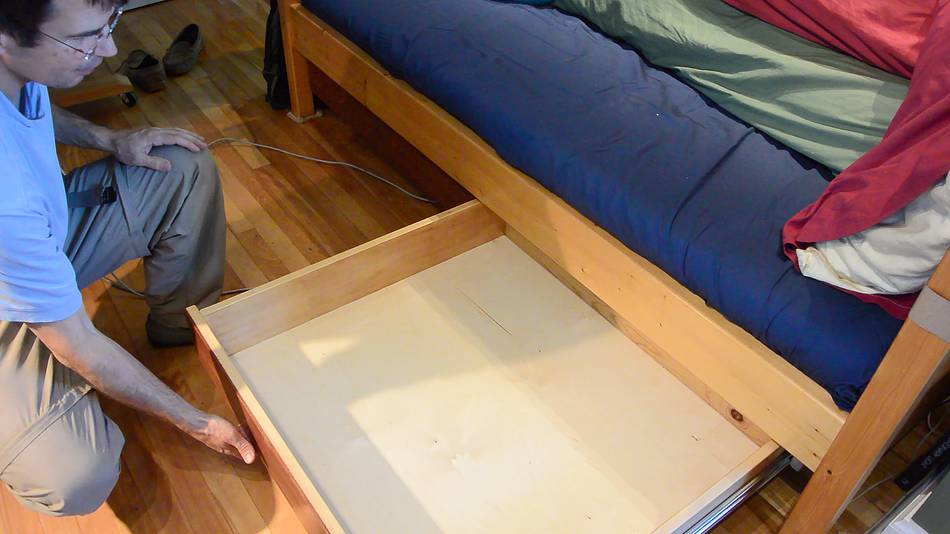
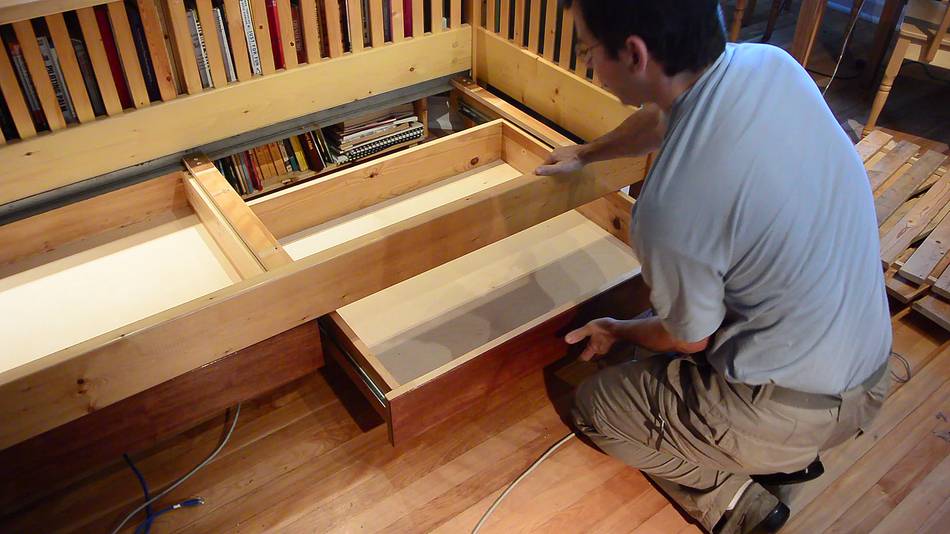 Then installing the drawers. The nice thing was, I didn't have to worry
about getting the distance between the mounts just right. I just left the
screws loose, then inserted the drawers, and the brackets
slid to perfect alignment on the angle irons. After that I tightened the screws,
locking the brackets in place.
Then installing the drawers. The nice thing was, I didn't have to worry
about getting the distance between the mounts just right. I just left the
screws loose, then inserted the drawers, and the brackets
slid to perfect alignment on the angle irons. After that I tightened the screws,
locking the brackets in place.
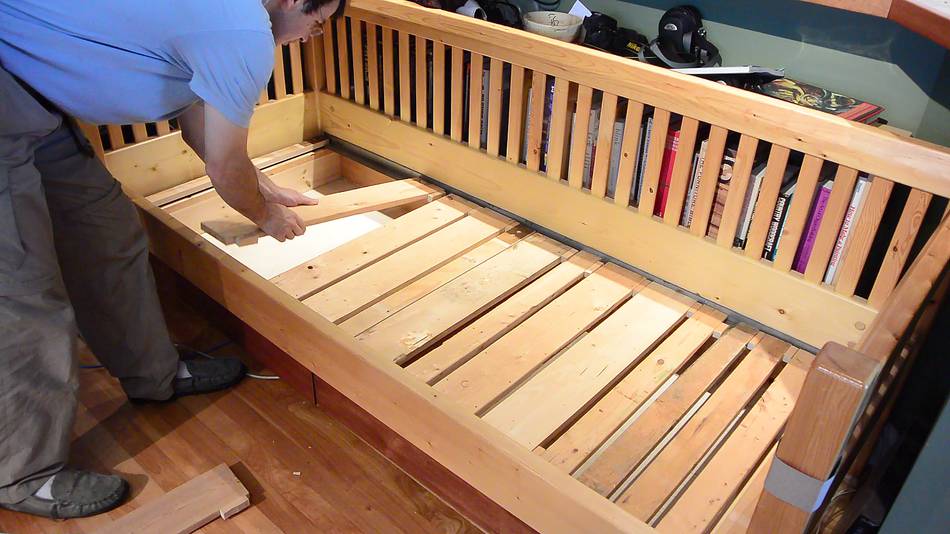 Then putting the slats back in the daybed.
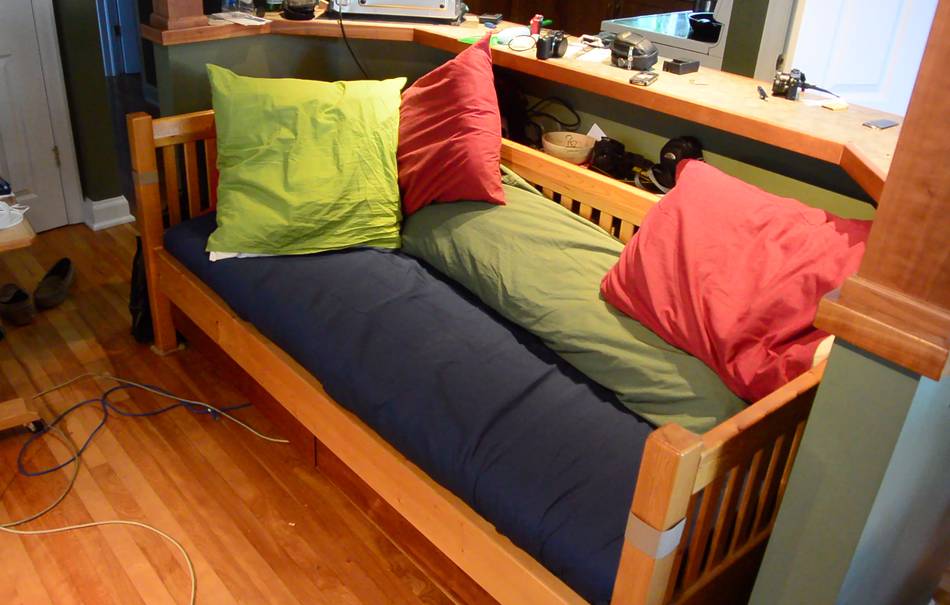 And with the mattress and pillows back on, it looks much like before. The dark colour of
the drawers kind of hides them in the shadow...
And with the mattress and pillows back on, it looks much like before. The dark colour of
the drawers kind of hides them in the shadow...
 ... but they add a lot of storage space!
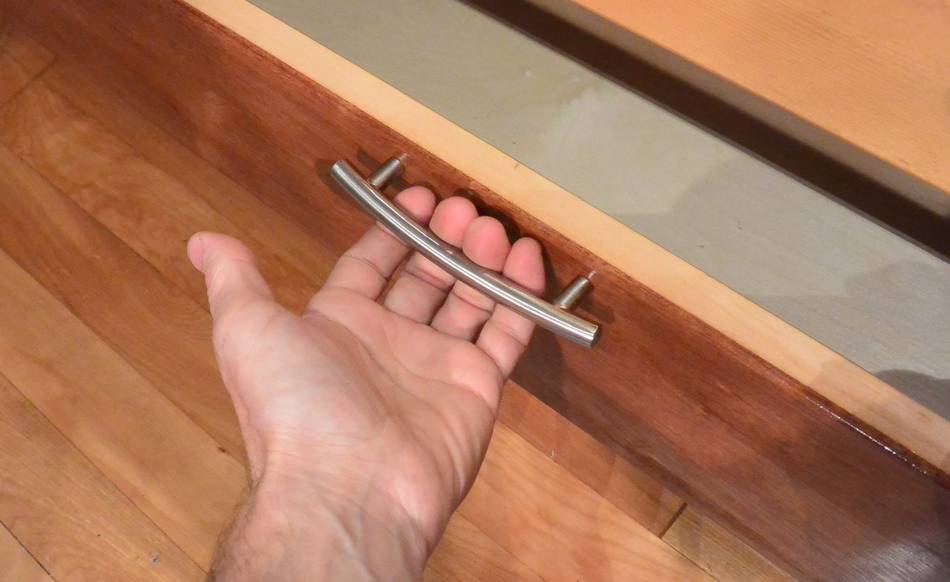 Initially I figured on opening the drawers just by reaching under them
to pull, but then I bought some handles. The handles are mounted
near the top, and with the drawers slightly recessed the handles don't stick out
past the bed rail when the drawers are fully closed.
Initially I figured on opening the drawers just by reaching under them
to pull, but then I bought some handles. The handles are mounted
near the top, and with the drawers slightly recessed the handles don't stick out
past the bed rail when the drawers are fully closed.
See also:
 Building this daybed
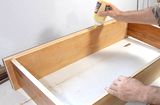 Building dresser drawers (very similar design)
 Best way to attach drawer bottoms: destructive test
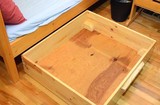 Rolling under-bed
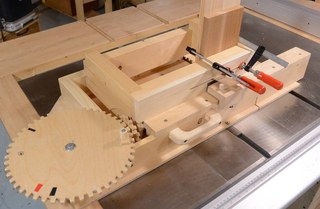 Screw advance
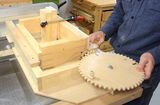 Box joints without a
 "Wheely desk" laptop
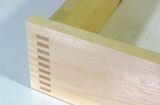 Box joined drawers
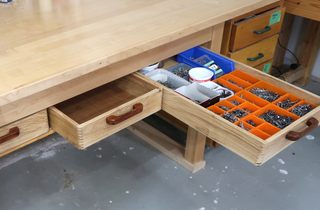 Adding drawers under a table (video only)
Back to my Woodworking website