Rachel wanted a bigger
dresser to store stuff in. Dressers can be found
for free from time to time, but they are usually banged up and ugly,
not the right size, and most don't make very good use of the internal
space for storage. So I'm building one.
The one I'm building is to be seven drawers high, and that takes up a
lot of wood for the drawers. I had been picking stuff up off the curb
that could be cut up into drawers, and I had enough wood without
having to buy any.
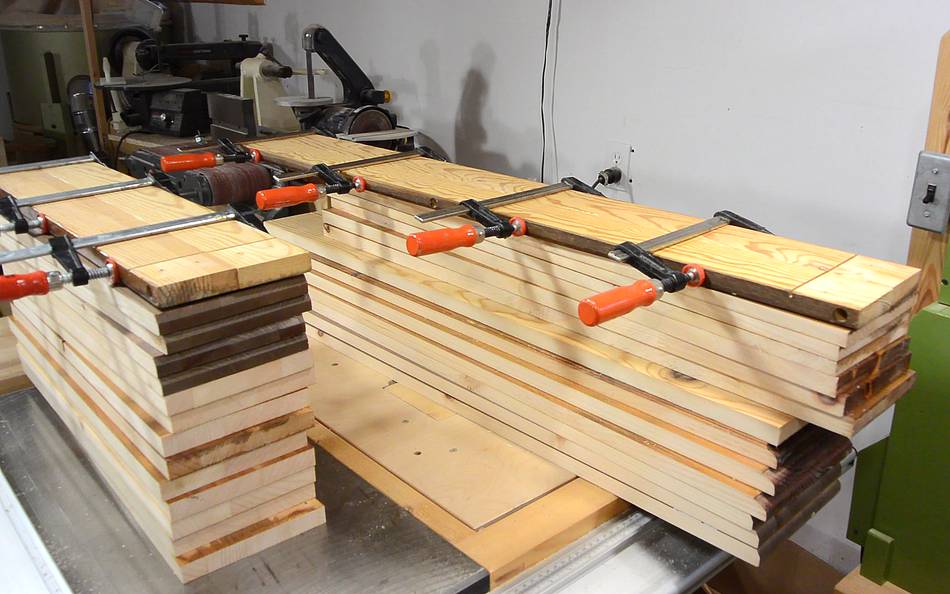
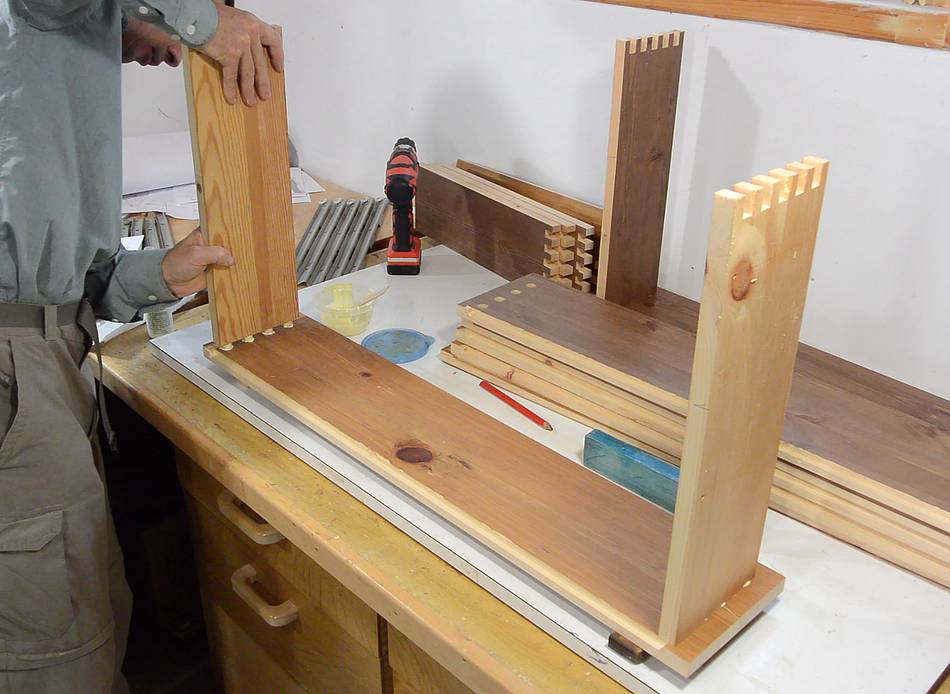
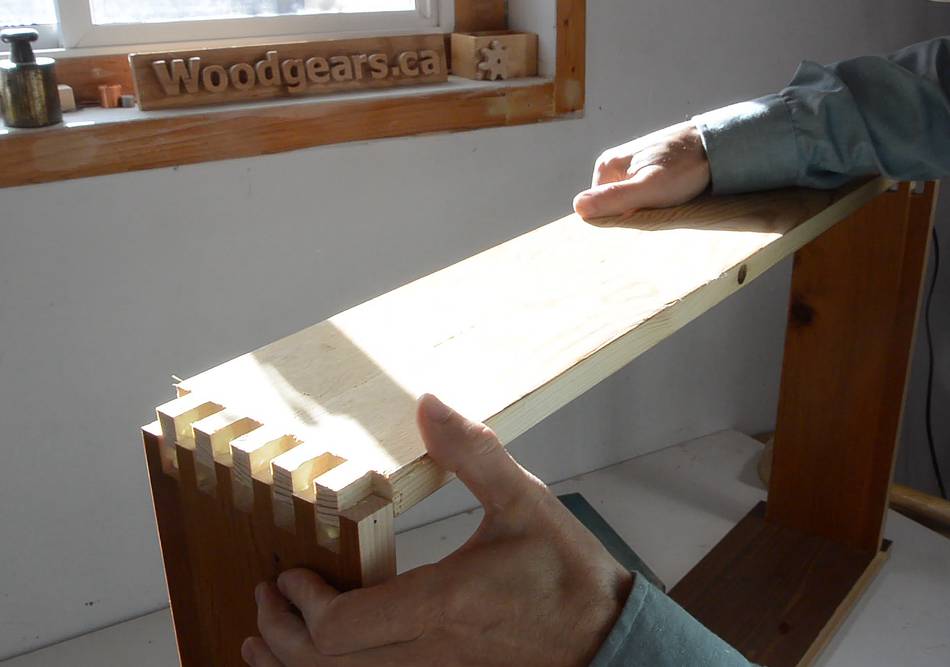
Seven drawer fronts, seven backs, and fourteen sides cut out. The last two
pieces glued together from scraps that weren't wide enough.
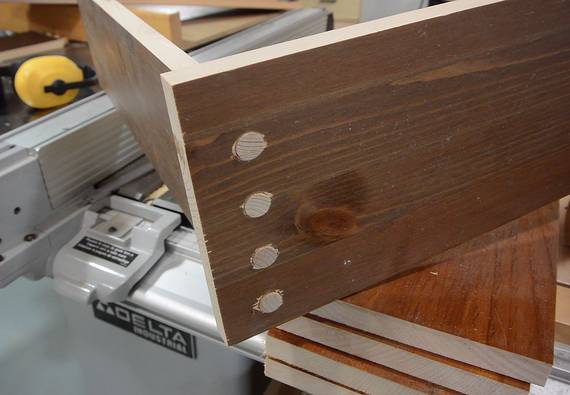
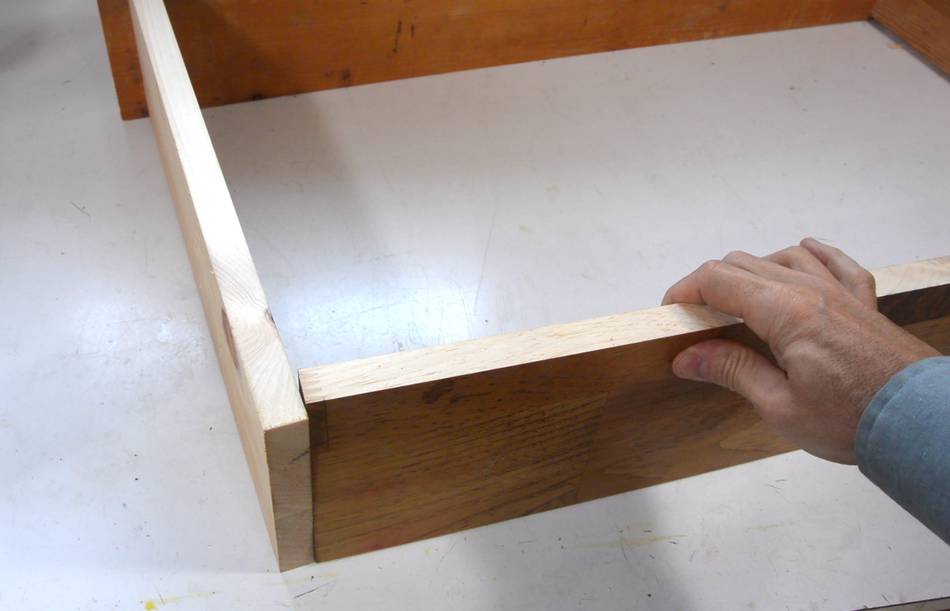
Dowel-tenon joints
First challenge: How to join the drawer sides to the front. I want the
front of the drawer to extend past the sides to hide the drawer slides.
In better quality furniture, this joint is often made as a sliding dovetail
joint, but it's hard to get it right, and the deep dovetail
really weakens the drawer front.
Box joints are much stronger, but a box joint is not ideal this far from
the corner. I
have used box joints for this joint before, but it was a lot of work.
Another super strong option, which I used for my
tool stand drawers
is a lot of narrow tenons. But again, lots of work.
I figured I'd try fewer, larger tenons, and then I thought
I might as well make them round, so I could drill holes instead
cutting mortises.
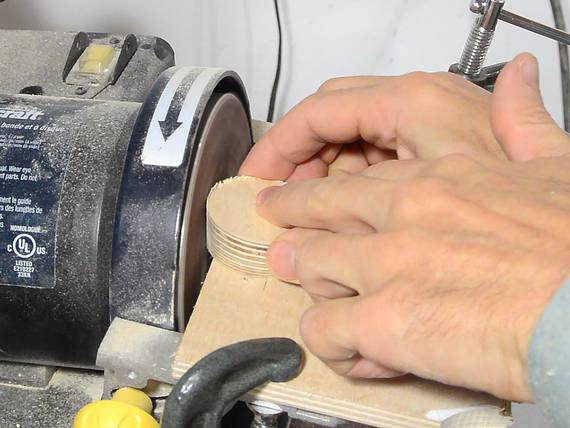
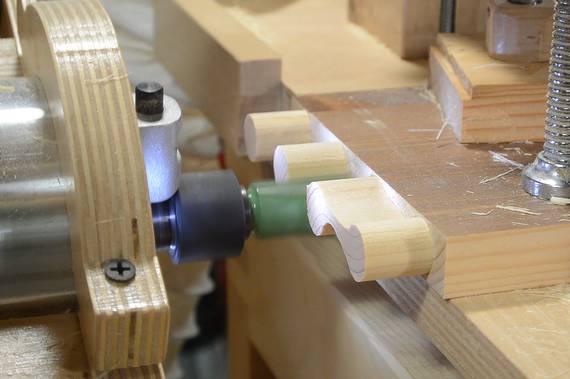
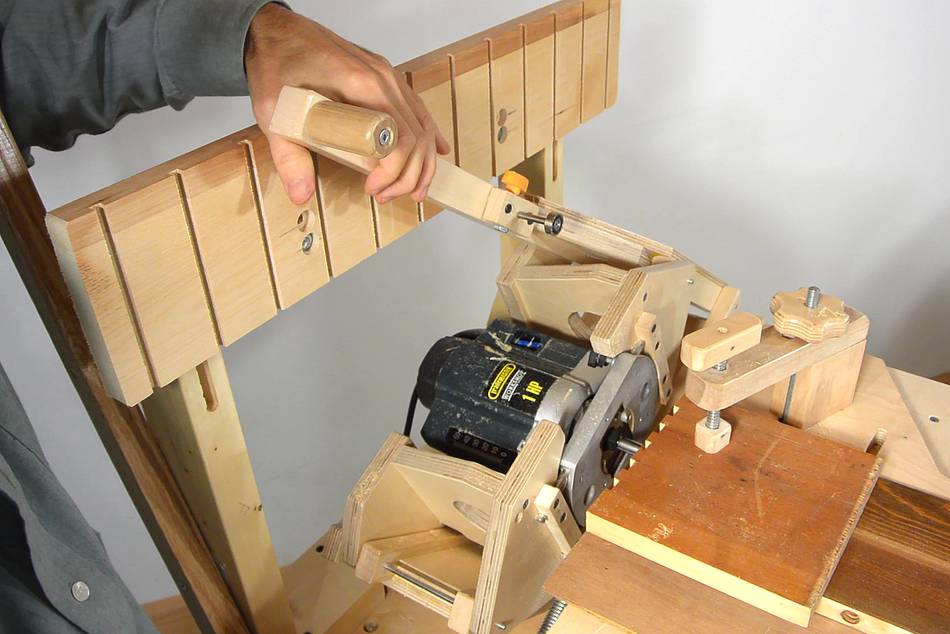
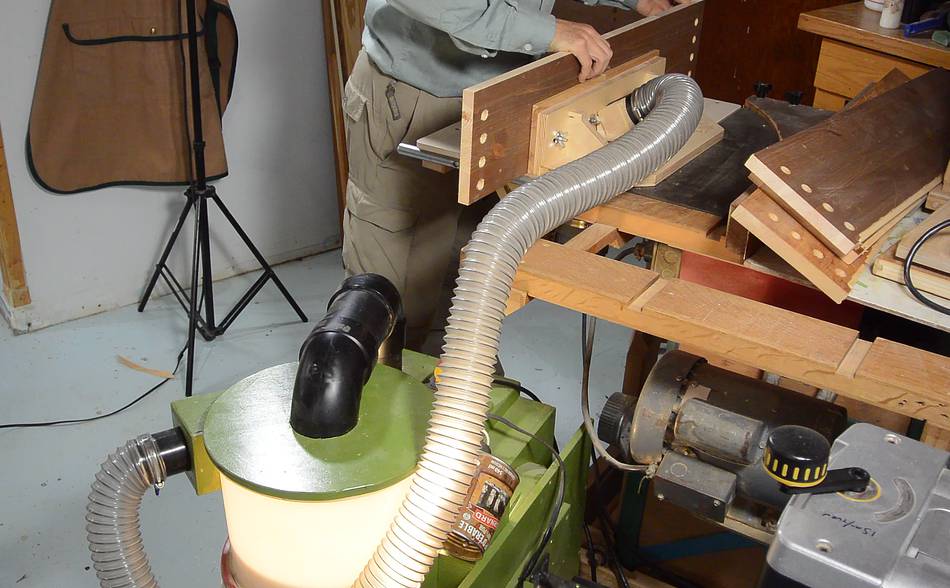
To make the round tenons, I needed a template for my
pantorouter.
I cut out some circles with the bandsaw table at an angle to make some cones, then
made a jig to sand them perfectly round on my disk sander.
These cone shaped templates are then screwed onto one piece of plywood to
use as a template.
The template is then attached to the pantorouter. I designed it for
5/8" dowels with a 3/4" space between them so I could cut them with
my 3/4" router bit.
But part-way through cutting the 14 joints, I realized I hadn't
tightened the follower clamp, so it drifted and some
of the tenons were under-sized.
So I re-cut them all to 9/16" (14 mm). That's still
larger than any dowel one would normally put into the 18 mm thick
boards. But with the dowels cut from the board itself, I don't
have to worry about whether there is enough wood around the dowels.
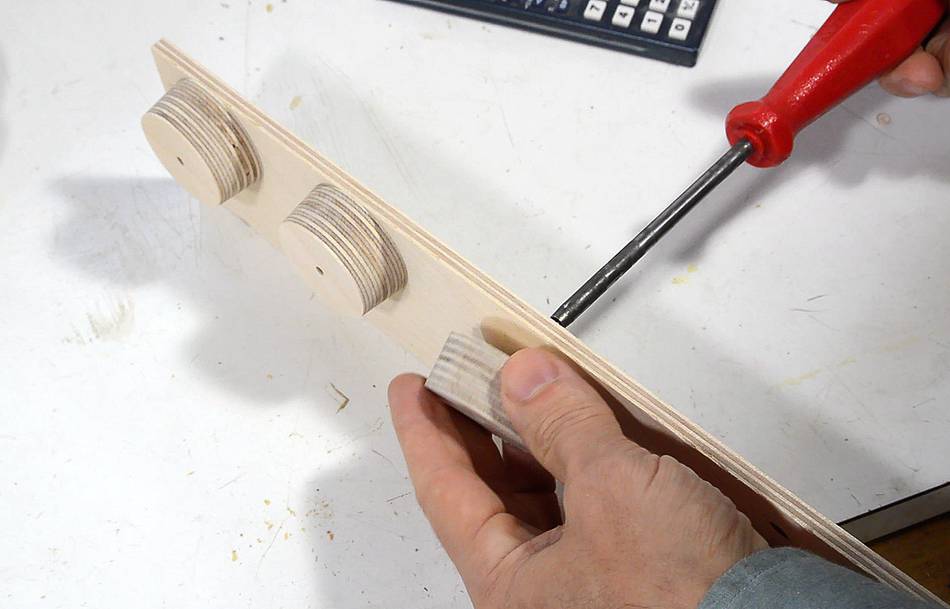
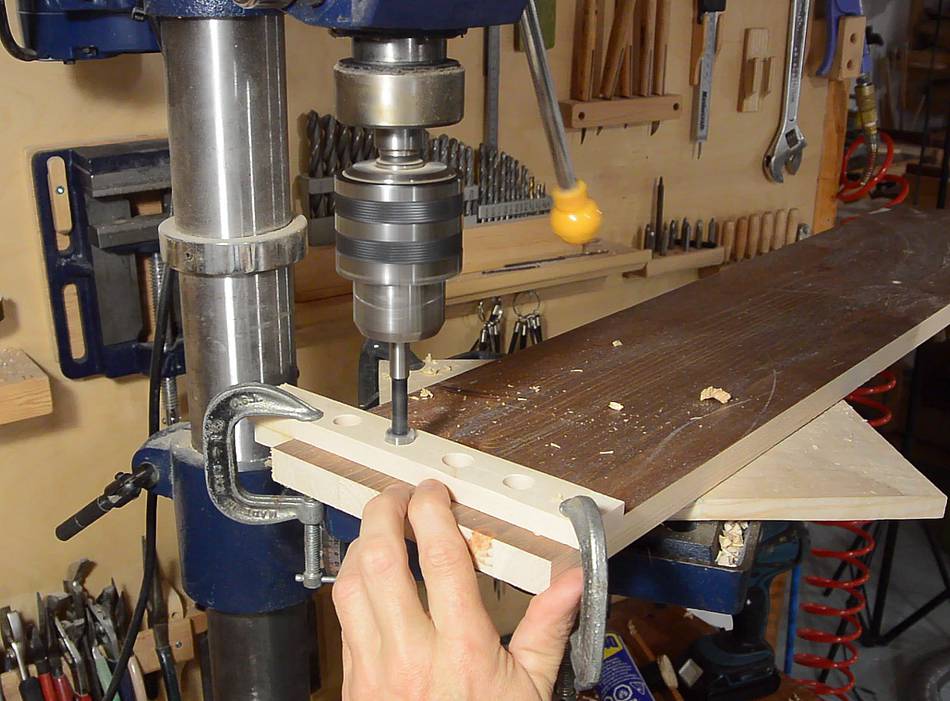
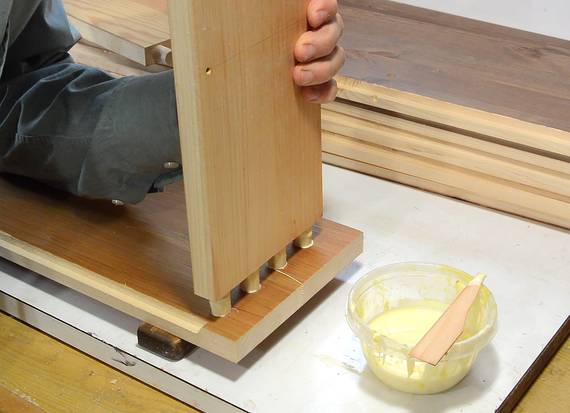
I very carefully measured the hole spacing on a piece
of hardwood, then drilled it to use as a drill guide.
I clamped that to the end of each board and drilled the holes.
I had to swing the drill press table out of the way, with just a corner
reaching under the drill so as not to interfere with the
clamps I used. That's why I don't use
a fancy drill press table. Though in retrospect, if I used a wider
piece of wood for the drill guide, I could have moved the C-clamps further
away from where I drilled.
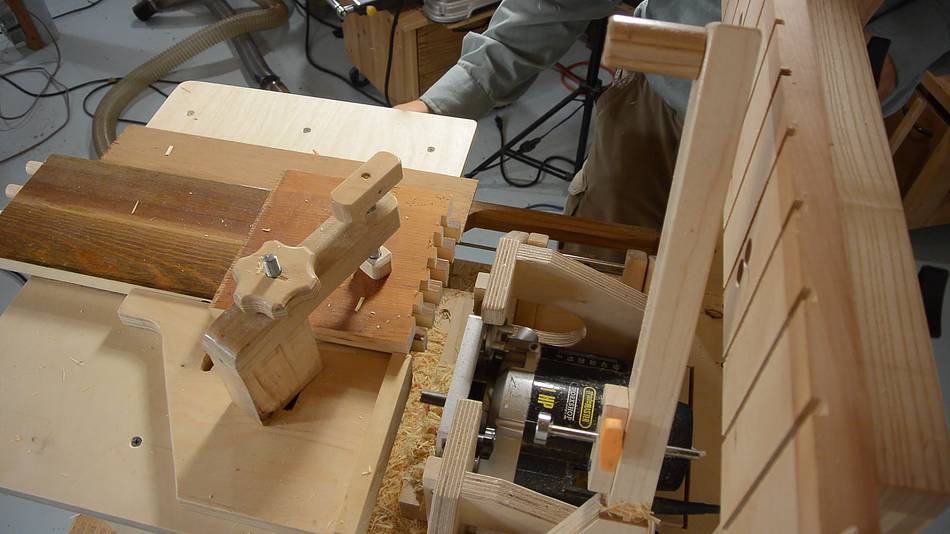
Box joints for the back corners
Next question: How to join the back corner?
I'd normally use my screw advance box joint jig for this, but having just recently
made a box joint template for my
pantorouter XL, I figured I might as well
use that.
Here's my setup, with a sacrificial piece of wood above and below the workpiece
to prevent tearout.
It's more intuitive to make the cuts from the top down, but cutting them
bottom-up throws the shavings down instead. That makes for less
of a mess around the machine, though I need to clean the shavings out
from time to time.
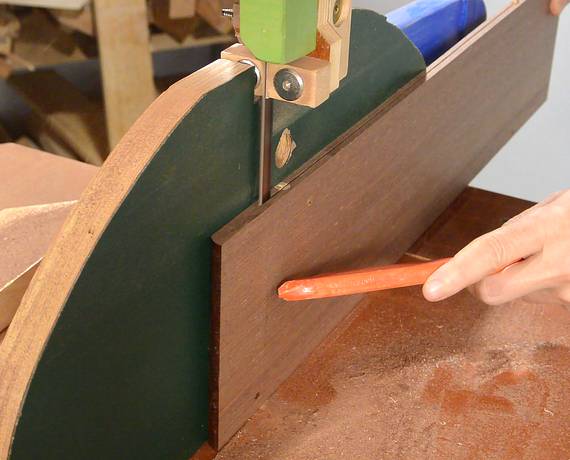
Before assembling the drawers, I needed to cut a rabbet on the bottom edge of the
front boards. The drawer bottoms will just glue flat on the drawers, visible from
the side, but it goes in a rabbet on the front to hide it.
Normally, drawer bottoms are put in a dado, but by gluing them flat on, construction
is simplified, and I get more space inside the drawers. The glue is as strong as
the wood, so it's stronger this way because I get a better glue area and I
don't have to weaken the sides with a slot.
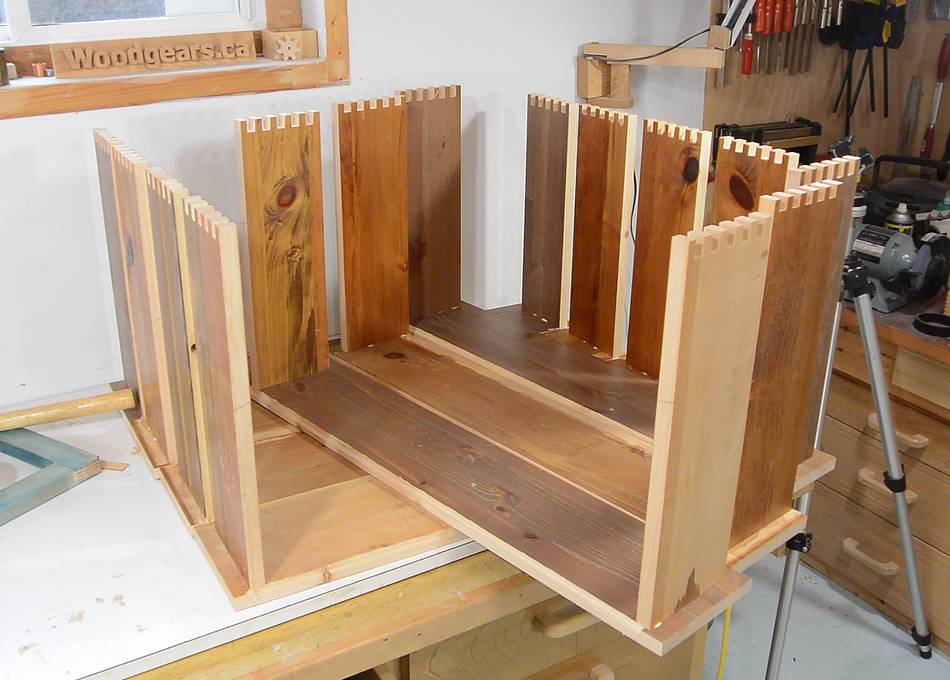
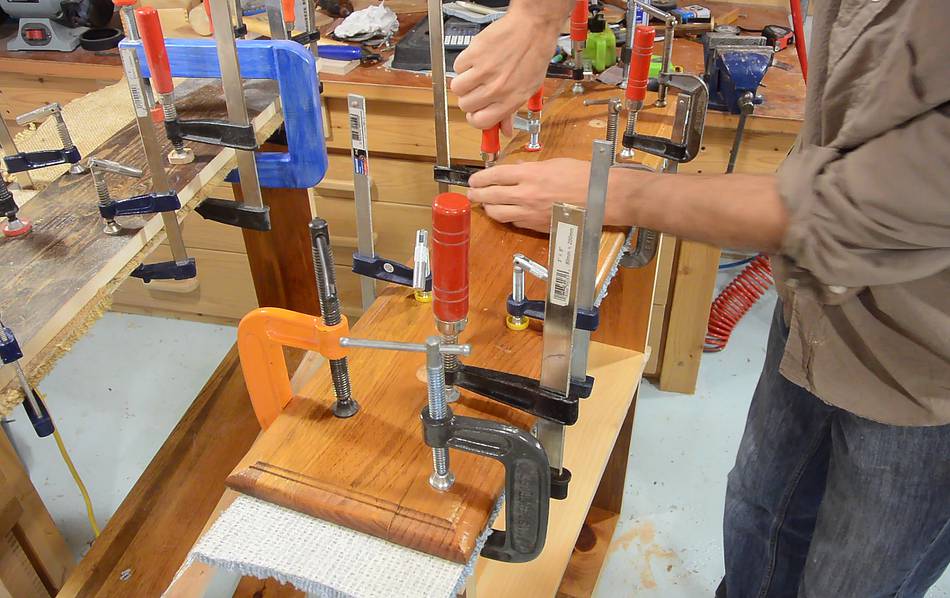
Gluing the drawers together.
All seven drawers, without backs. They take up quite a bit of space!
Next, cutting the box joints in the back pieces...
... and gluing those in place.
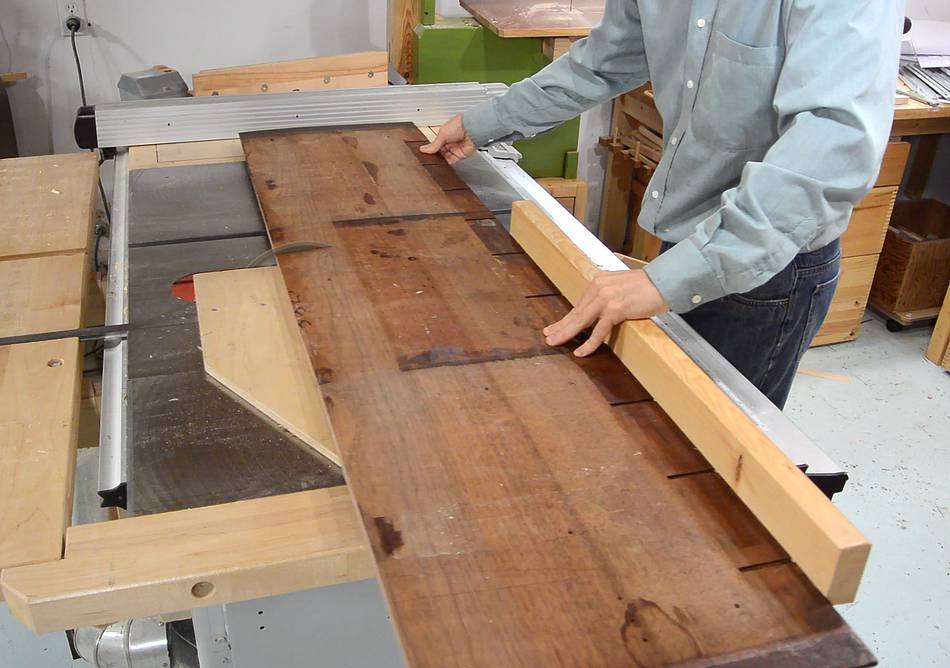
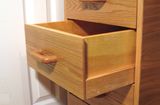
Veneer for the drawers
I wanted some nice veneer for the drawer fronts. I had some pieces of an old mahogany
desk top, which I picked up along with these antique drawers,
from the garbage.
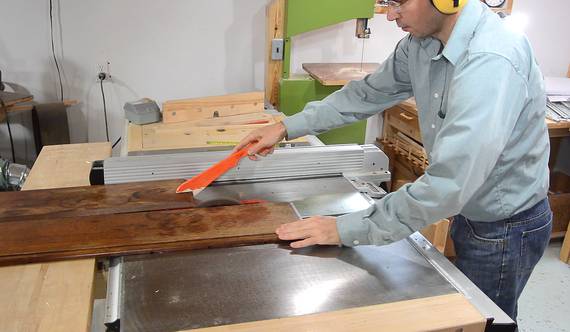
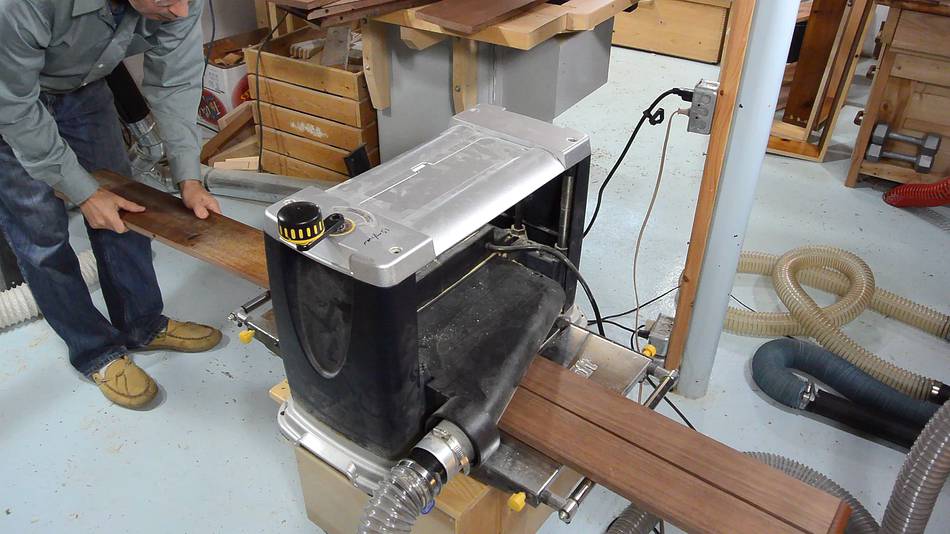
After cutting pieces to the right length, and cutting it apart where the boards
were joined, I planed the pieces on both sides.
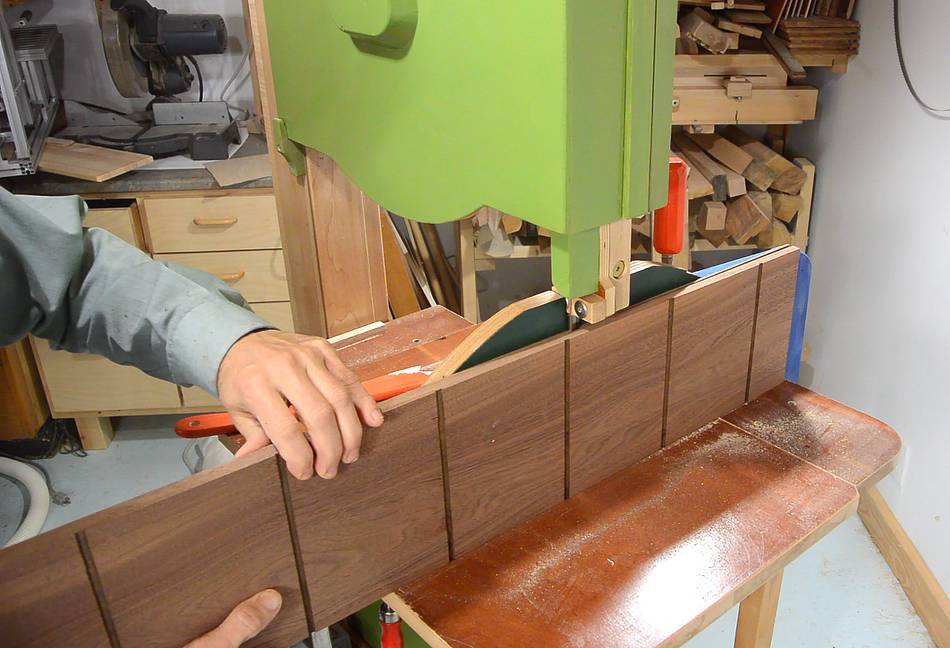
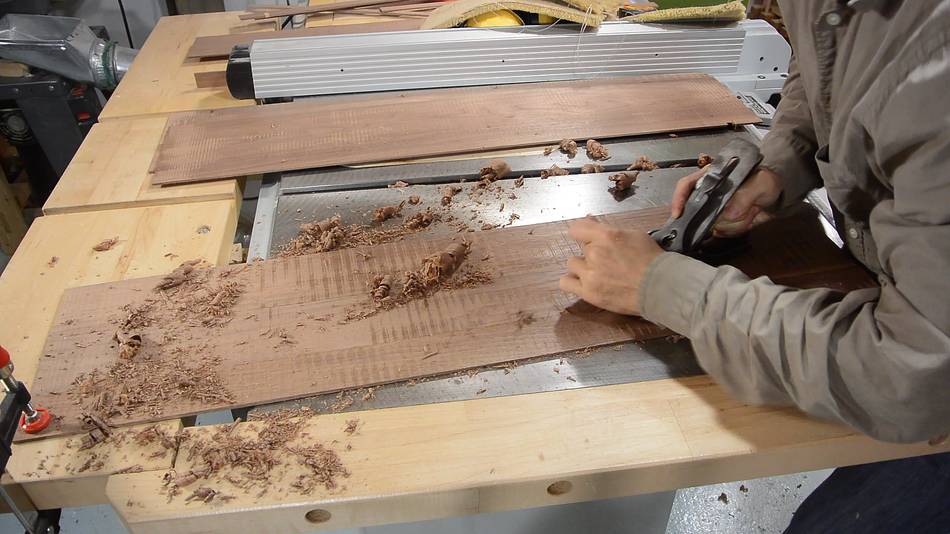
Then cut them to veneers, about 4 mm thick on my
18" bandsaw
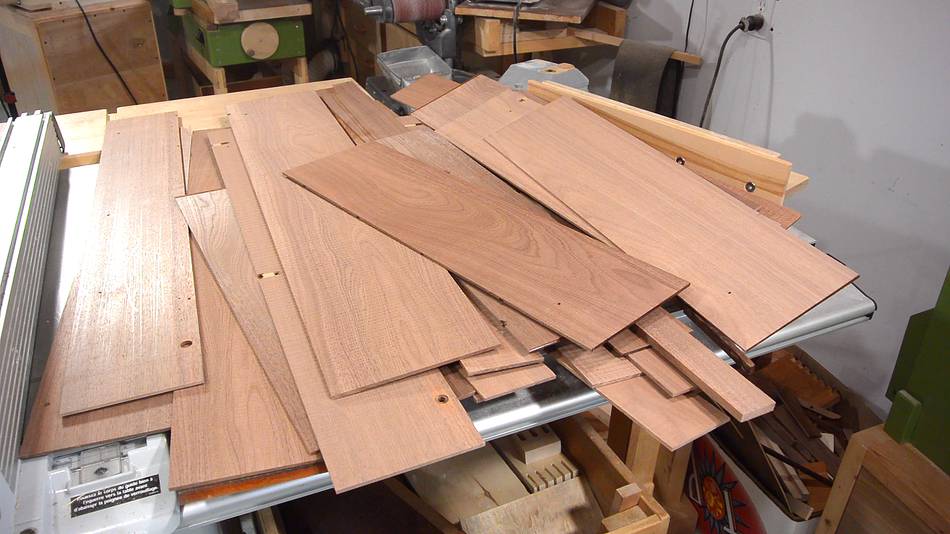
The yield was not as good as I had hoped. Some of the boards had these
slots cut in the bottom side, and a lot were joined edge to edge with dowels,
which made for a lot of waste. The boards were not long enough for two
drawer widths. With the poor yield, I figured I'd have to splice some pieces
end to end to get enough material, so I also cut the shorter pieces into veneer
while I was at it.
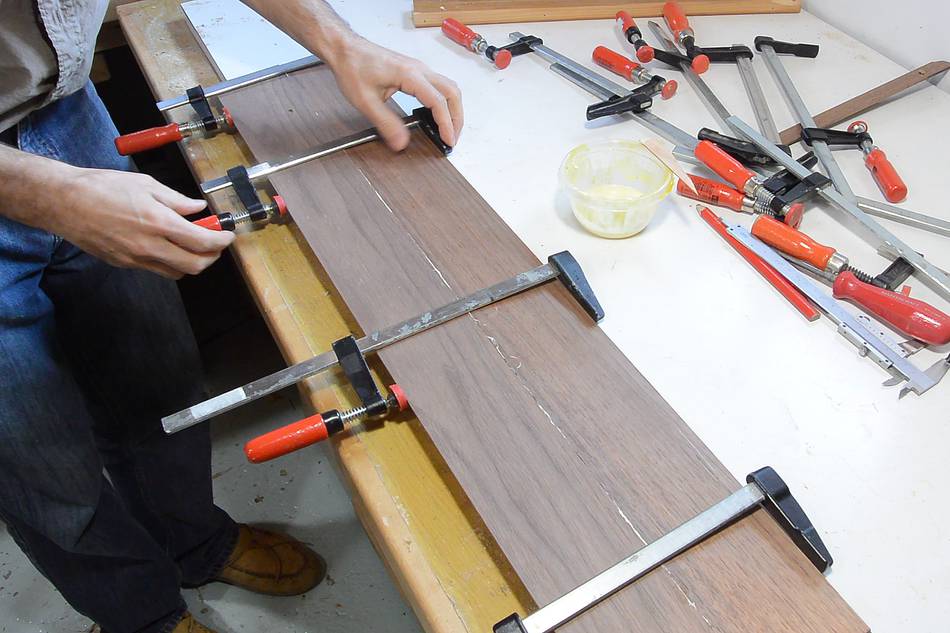
Re-gluing the pieces of wood to get pieces wide enough for the drawers.
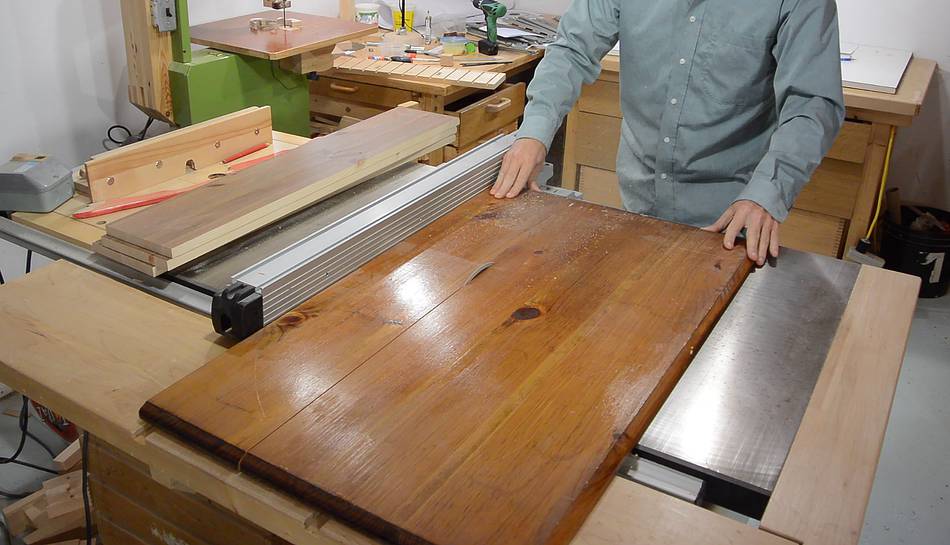
The wood I used had finish on both sides, and wood glue won't stick to that.
So I had to plane the front of the drawers to expose the bare wood.
I used a hand plane for that, just to avoid planing too much
material off the wood. That, and I wasn't sure
if the varnish would dull the jointer knives. But I think I would have been
ok, because it didn't dull the hand plane very fast. If you ever tried
to plane white paint off a piece of wood, you will know what I'm referring to.
I also hand planed the bandsawed side of the veneers so that I'd have a
flatter surface to glue to. It would not have been much more work
to smooth it all the way.
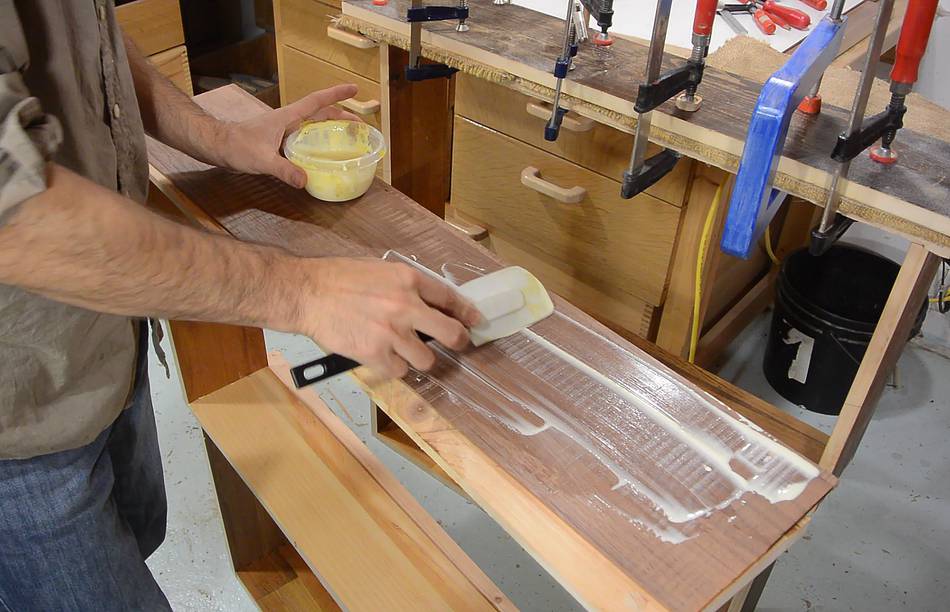
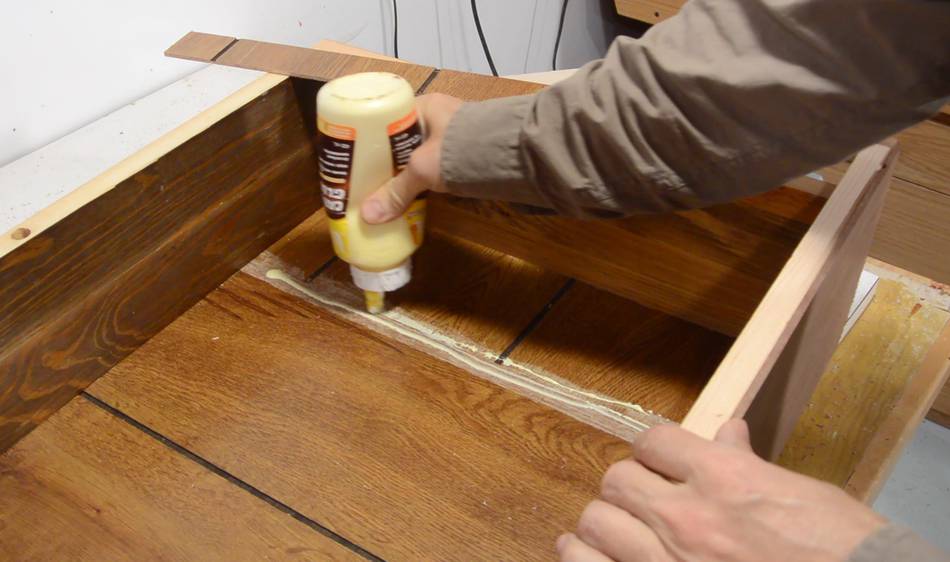
I spread glue on the back of the veneer with a rubber spatula...
... and also on the front of the drawer, then placed the glued surfaces
together.
A scrap of carpeting serves as a pad to get even pressure.
I previously used towels for
gluing thin layers and
veneers on drawer fronts, but the carpeting is better because one
layer is enough and I don't have to worry about ruining it.
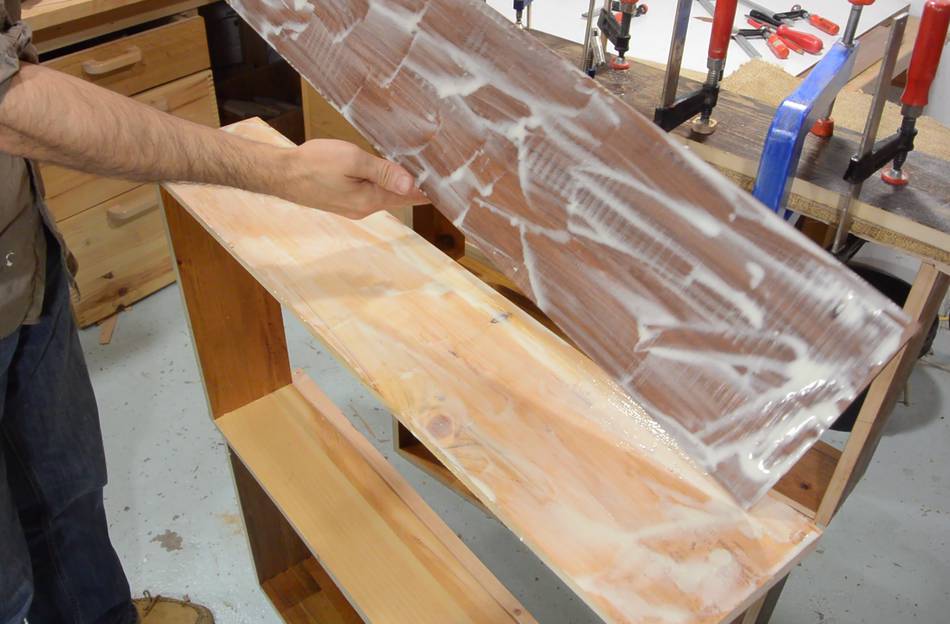
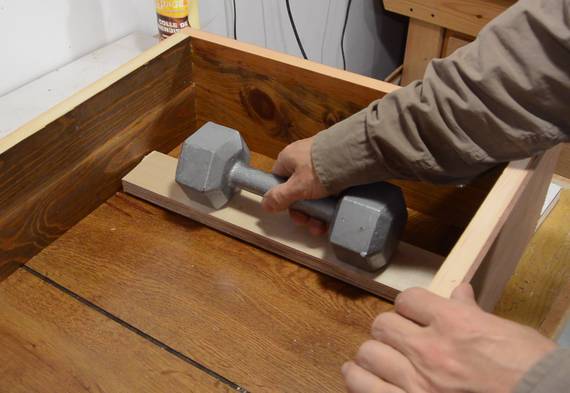
A board on top of the carpeting spreads out the clamping force,
then lots of clamps. Ironically, the board I'm using is from an
old drawer!
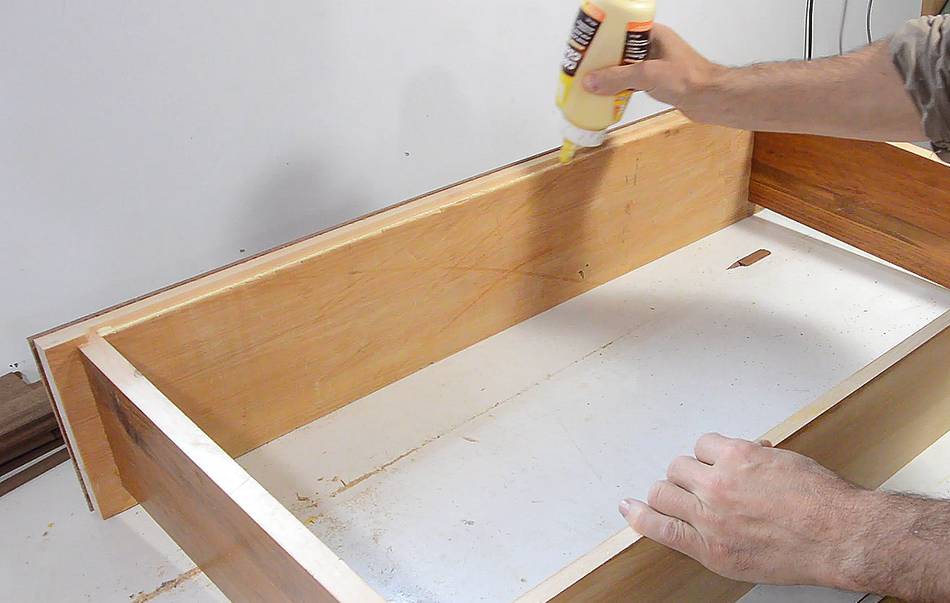
Attaching the bottoms
Next, applying glue for the bottom. The bottom is glued straight on the
edge of the drawers, except for the front, which has a rabbet cut into
it (the front extends down a bit further than the rest of the drawer).
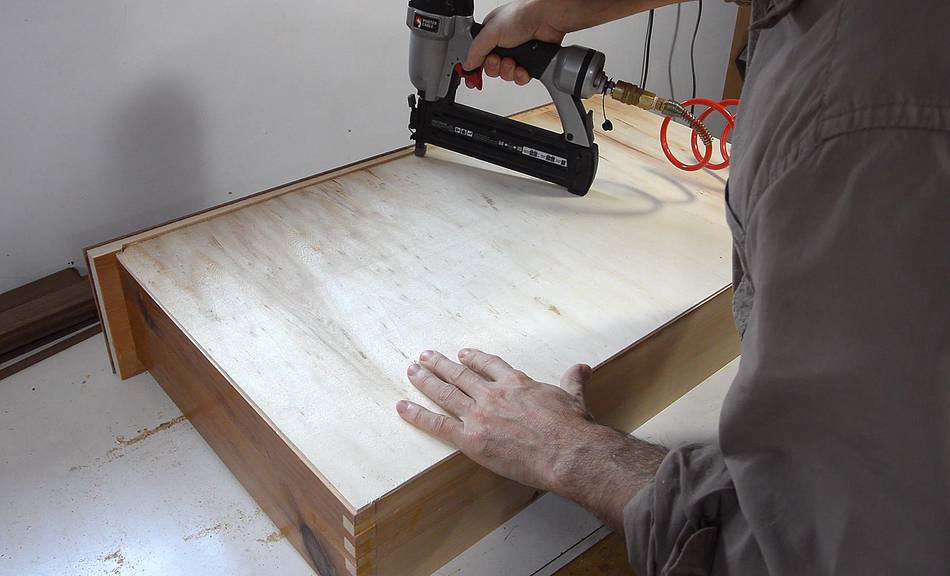
Brad nailing on a thin piece of plywood. The brad nails aren't
ideal for holding thin plywood, but I'm mostly using them to hold it on while the glue
dries. The glue is what makes it strong.
I was running out of scraps of thin plywood and paneling, so I made do
with pieces that didn't cover the whole drawer.
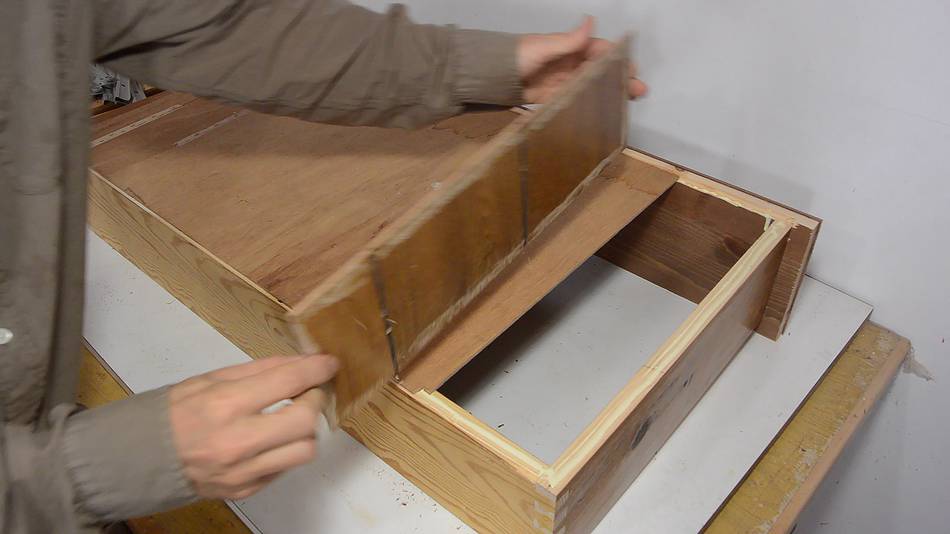
I scraped the plastic coating off the paneling wherever it needed to
be glued. Here, I'm applying glue to add a strip of plywood over
the joint. I then put another piece of plywood on top of the strip
and weighed it down while the glue dried.
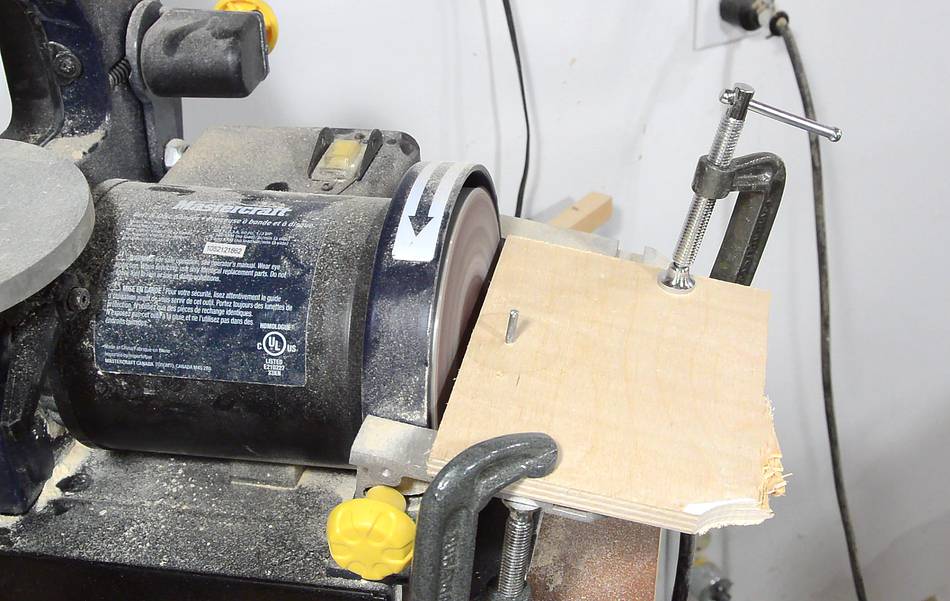
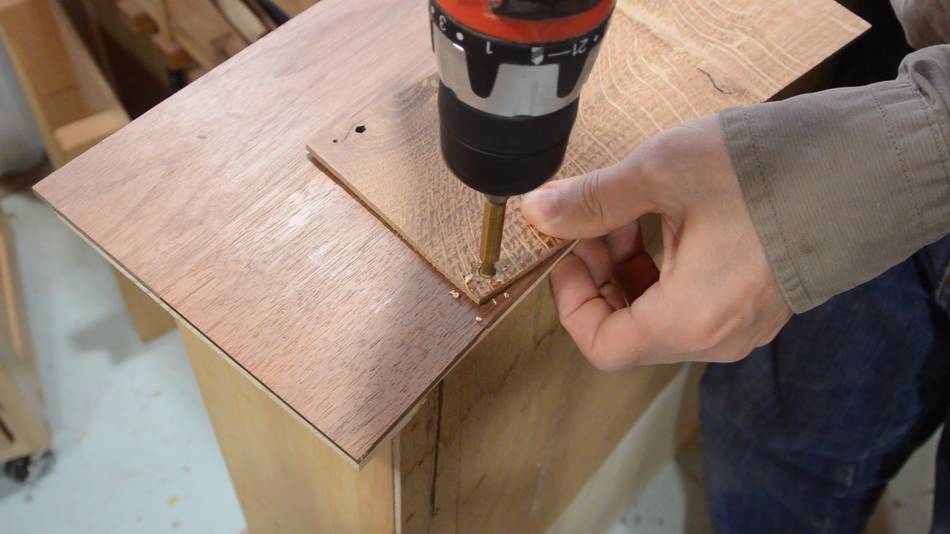
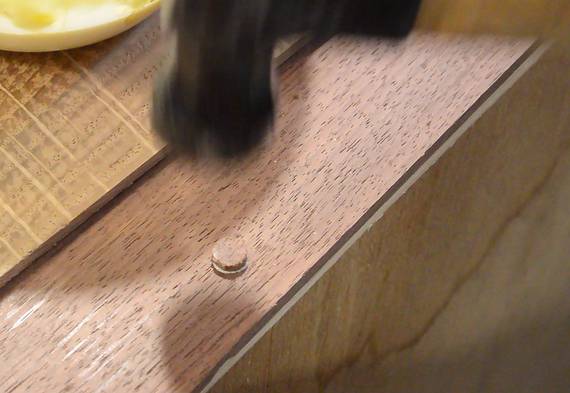
Plugs for the screw holes
Some of the veneer had some screw holes in it. I have some plug
cutters for making plugs to fill holes, but the smallest I have is 3/8"
(10 mm), and I didn't want to drill that large a hole. So I made some
1/4" (6 mm) plugs on my pantorouter.
A scrap of wood with a 1/4" hole helps guide the drill. The point
of the drill is where the old screw hole is, so it would wander if
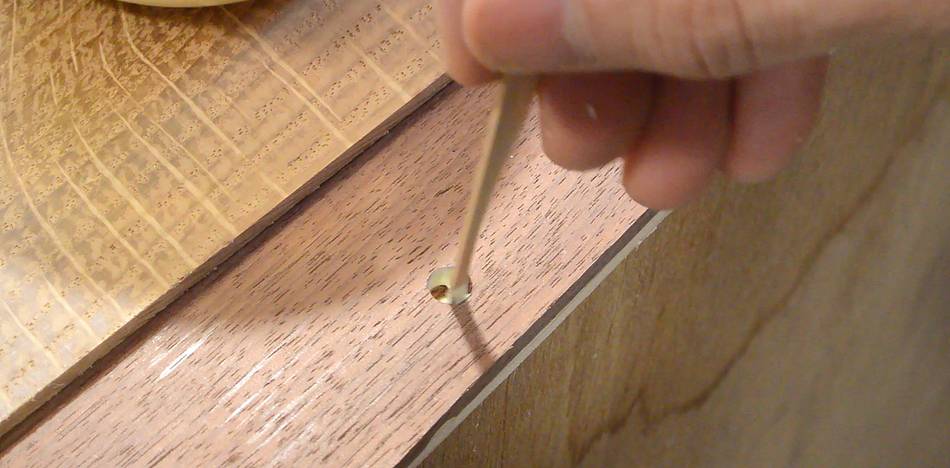
it wasn't guided.
Then some glue applied to the hole with a wooden splint, and tapping
the plug in place.
I flush trimmed the plugs with a chisel.
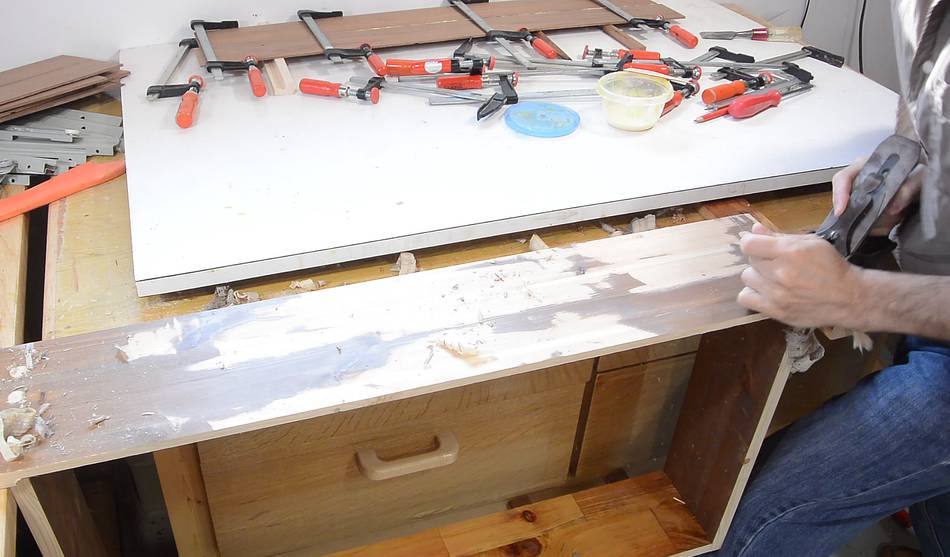
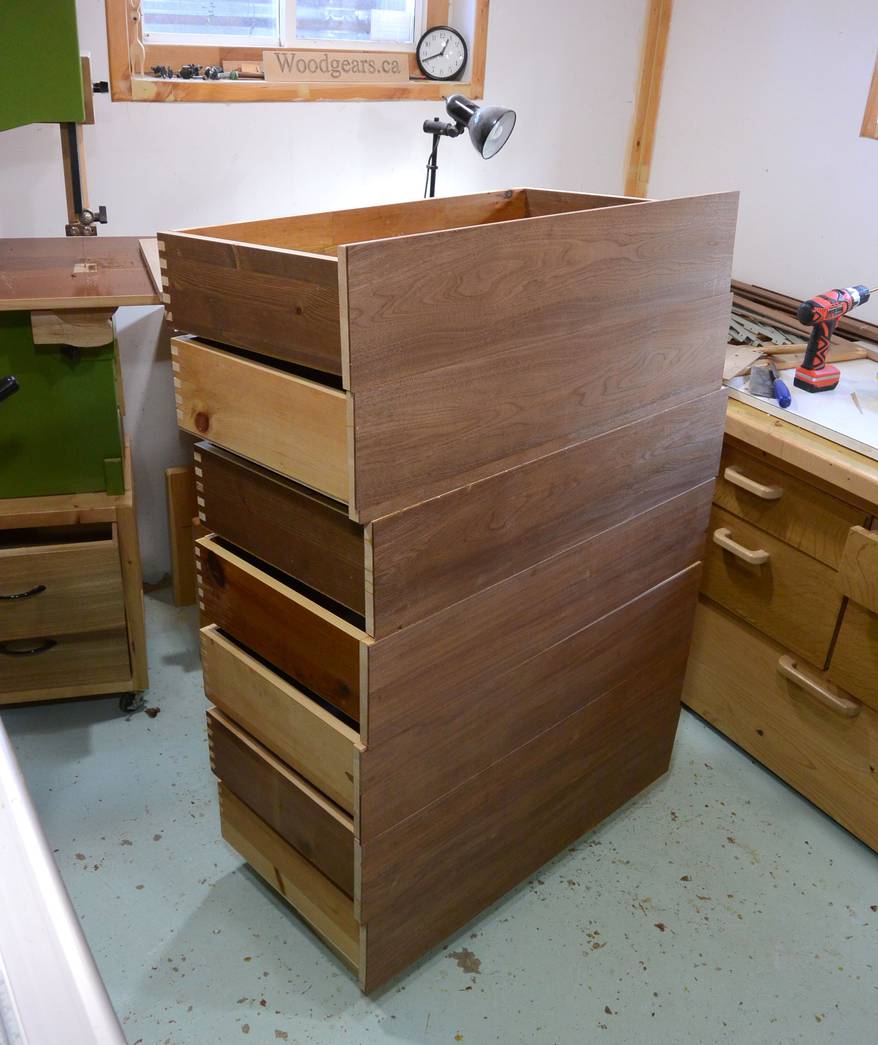
Seven drawers complete. Next I need to build the body of the dresser.
Hopefully, that will go a bit faster.
I was plaing around with a timelapse camera while making the drawers. So you
can see all the action. But just straight up work is really not that exciting.
If it's interesting, I shoot video of it.
 Rachel wanted a bigger
dresser to store stuff in. Dressers can be found
for free from time to time, but they are usually banged up and ugly,
not the right size, and most don't make very good use of the internal
space for storage. So I'm building one.
Rachel wanted a bigger
dresser to store stuff in. Dressers can be found
for free from time to time, but they are usually banged up and ugly,
not the right size, and most don't make very good use of the internal
space for storage. So I'm building one.


 On wooden drawer slides
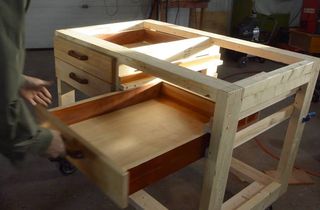 Drawers for the work-
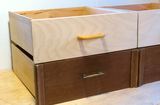 Refacing drawers
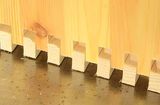 Box joints on the
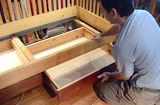 Under bed drawers
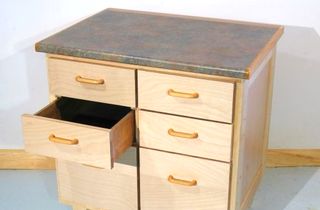 A previous dresser build
 Knock-down dresser
 Dresser made from junk
 Storage cabinet