Router Wheel Lathe
Stephen Barnes sent some pictures of his "router lathe" for cutting small wheels using a router:
I thought I should share with you, and your readers, a small router lathe I designed for making wooden wheels for toys.
Background - first try
I initially built a router support, that used the router's two metal fence support bars, and installed dowels on the bottom of these. The idea was that the router would follow a circular template. However, it proved hazardous in use!I help people with learning needs to develop woodworking skills, in the hope of making them more independent. I felt the operation was quite dangerous around them, for several reasons, even though it caused them great entertainment, laughing at me endlessly whilst I got in a pickle using it!
Since it is important for them to be involved in doing workshop jobs, this jig has enabled them to make wheels etc. Some can use it with no supervision, though I much prefer to be on hand, ensuring their safety at all times.
On the prototype, I had these disadvantages:
- In rotating the router about the large circular base, the power chord wrapped round the router; the guys found this amusing. But I thought "Oh God, this won't do!"
- The dust extraction hose kept jumping off the extraction port of the router
- The unit proved cumbersome
- It had way too much play, resulting in highly inaccurate wheels, or circles that weren't anywhere near round! I didn't wish to make toys that were travel sick!
The geared jig
 So, I designed a frame ( glued and nailed together out of
old bits of treated wood!) which:
So, I designed a frame ( glued and nailed together out of
old bits of treated wood!) which:
a) supports the router with its two guide bars, so that they can be locked and held secure, but allows lateral movement of the router along the guide bars, to change wheel sizes easily.
b) enables the router to remain static whilst the work piece revolves on a turntable. This makes it possible to have dust extraction rigged up, prevents the power chord from getting tangled up or wrapped round the unit, and is way safer to use!
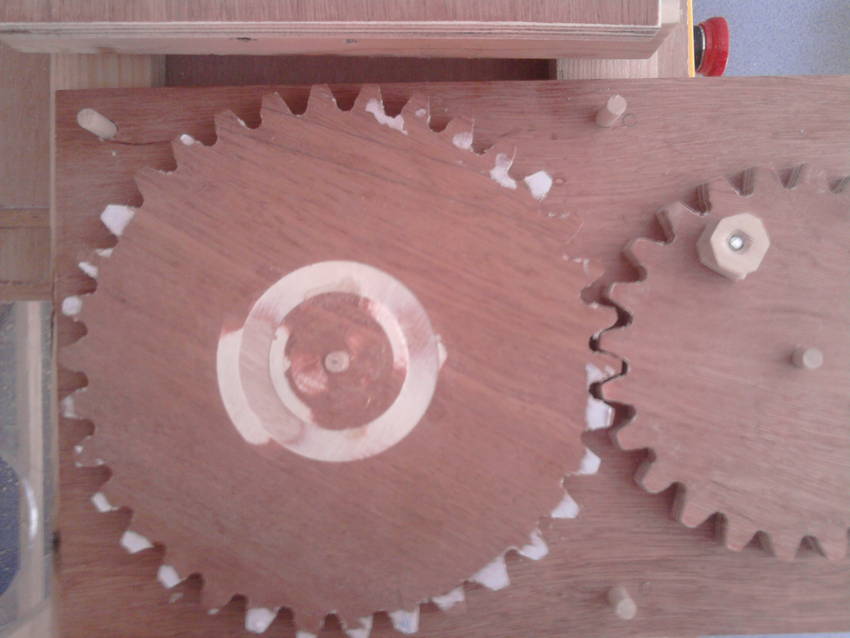
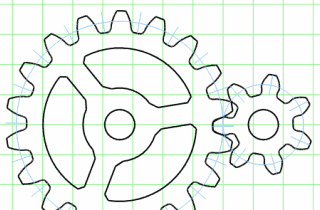
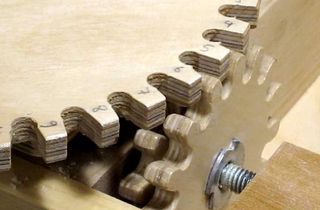
I made a simple ply base for the two gears, then used the Gear Generator program to design and print out one 24 tooth, and one 56 tooth gear. I made these reasonably well using a jigsaw, which, despite having its baseplate locked, still tends to wander well off square while in use!
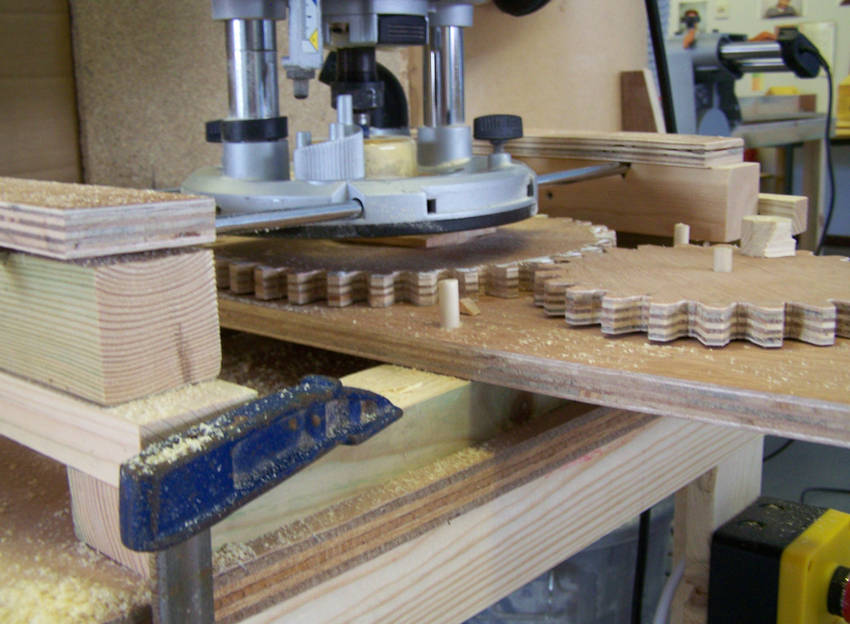 The ply I used for all was far from flat, which makes the gears
a little ( or a great deal!) wonky when the unit is in use.
But I love the way it merrily 'bobbles' around! The resulting wheels,
or whatever, appear to turn very accurately with no problems!
As for rosettes, well, its unlikely they'd be expected to revolve....
but there's a first time for everything! It's consoling to know
that they would be concentric at least!
The ply I used for all was far from flat, which makes the gears
a little ( or a great deal!) wonky when the unit is in use.
But I love the way it merrily 'bobbles' around! The resulting wheels,
or whatever, appear to turn very accurately with no problems!
As for rosettes, well, its unlikely they'd be expected to revolve....
but there's a first time for everything! It's consoling to know
that they would be concentric at least!
 I put a small handle on the smaller gear, then turned them in place,
adjusting for smooth running where needed. They run very quietly
and smoothly, considering how I made them!
I put a small handle on the smaller gear, then turned them in place,
adjusting for smooth running where needed. They run very quietly
and smoothly, considering how I made them!
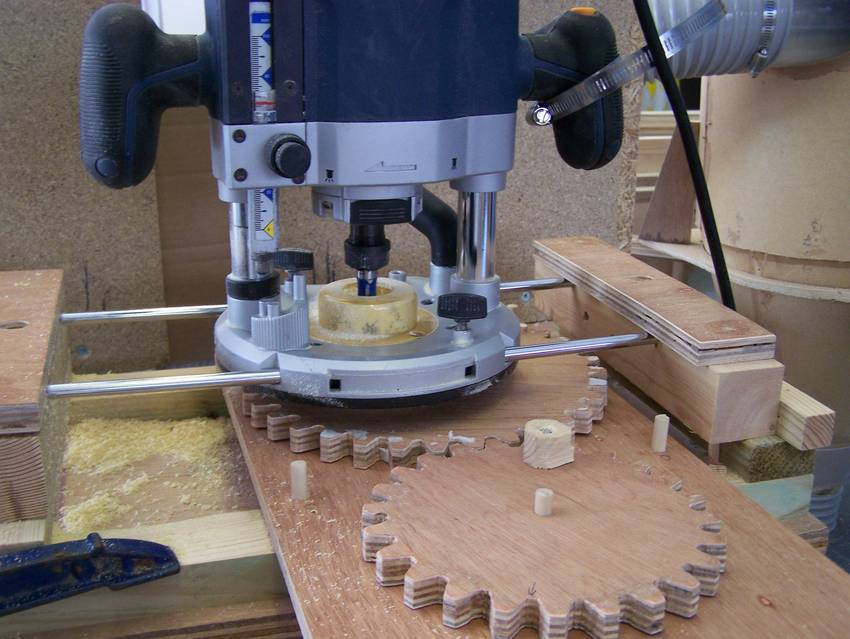
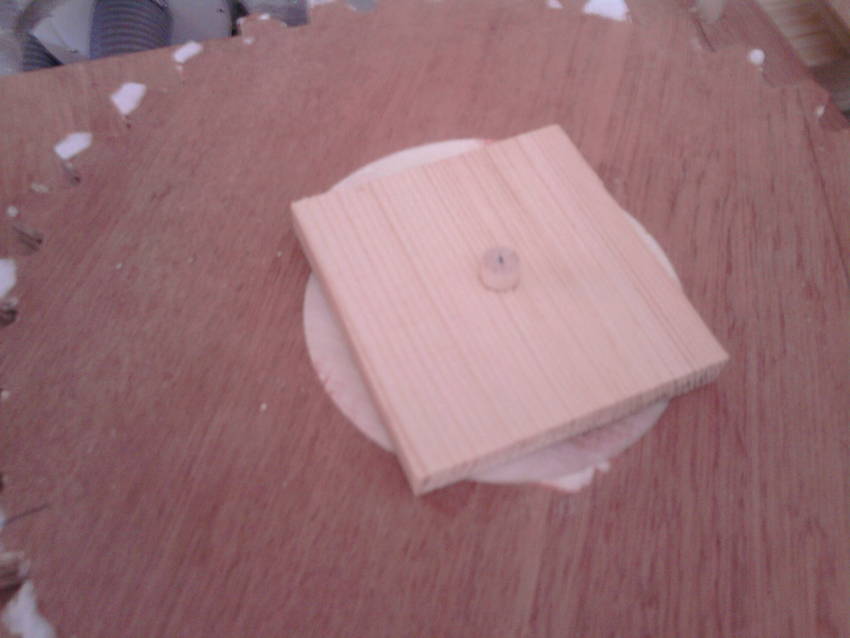
 I then drilled 3 location holes, in which I place short 8mm dowels to
locate the gear support board. That way, when a wheel has been
completed, the gear assembly can easily be slid out from under
the router, the cut wheel removed, and new wheel blank put on.
I then drilled 3 location holes, in which I place short 8mm dowels to
locate the gear support board. That way, when a wheel has been
completed, the gear assembly can easily be slid out from under
the router, the cut wheel removed, and new wheel blank put on.
This appears very accurate and repeatable. The blanks ideally need double sided tape, to secure them to the turntable gear, which runs underneath the router when all is located.
Both hands are needed: one to lower the router cutter gently, using the micro adjuster, to steadily cut the wheel, and the other to turn the smaller gear to drive the larger turntable one.
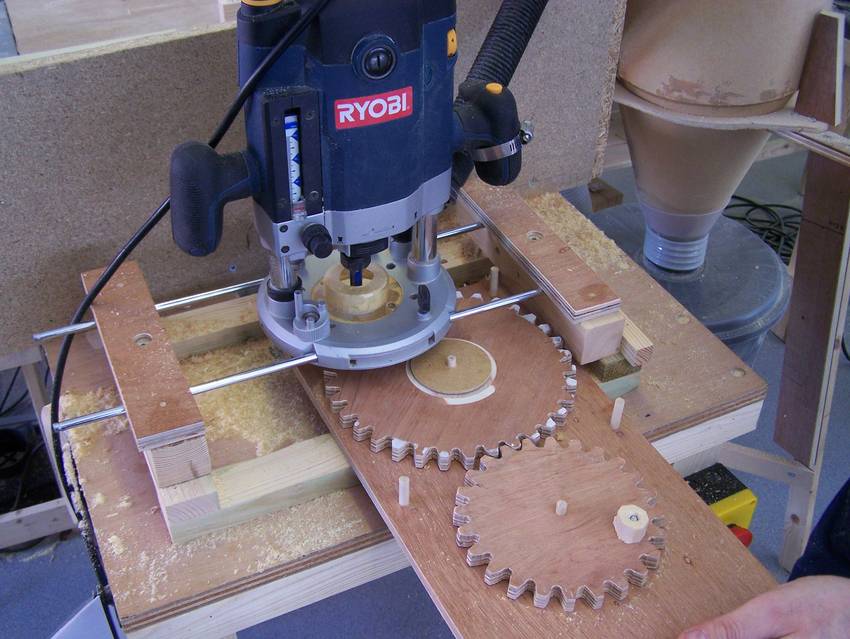
 It's also easy to add embellishments to the wheels if
needed, by using other cutters. Any end-cutting, veining, vee groove,
cove, or chamfer cutters could be used to advantage. Depends on what
you want your wheels to look like. It also enables me to make excellent
rosettes, which can be applied to door plinths, and for embellishing
furniture should the need arise.
It's also easy to add embellishments to the wheels if
needed, by using other cutters. Any end-cutting, veining, vee groove,
cove, or chamfer cutters could be used to advantage. Depends on what
you want your wheels to look like. It also enables me to make excellent
rosettes, which can be applied to door plinths, and for embellishing
furniture should the need arise.
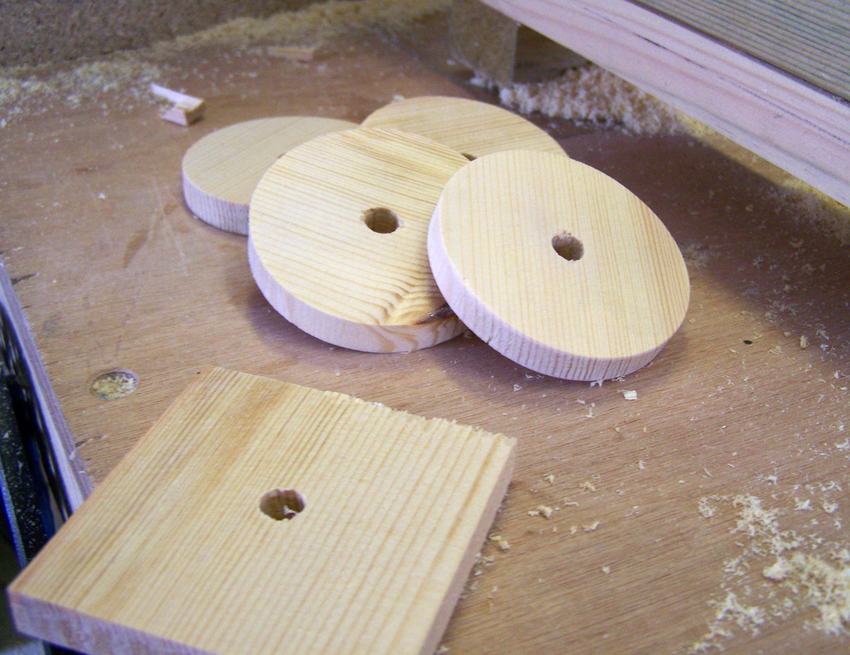
 The only limit to the wheel/ circle size is the gear size, which
can easily be made bigger, with smaller, or larger dowel sizes
for the center axis as needed. I would need to build a larger
frame structure to accommodate the larger gears. It has opened up
endless possibilities for my creative side! And its such a joy to
use that everyone wants to have a go!
The only limit to the wheel/ circle size is the gear size, which
can easily be made bigger, with smaller, or larger dowel sizes
for the center axis as needed. I would need to build a larger
frame structure to accommodate the larger gears. It has opened up
endless possibilities for my creative side! And its such a joy to
use that everyone wants to have a go!
See also:
Gear generator program |
Cutting circles with my router pantograph |
How to make wooden gears |
Richard Contreras's Homemade table saw |
More reader projects on woodgears.ca