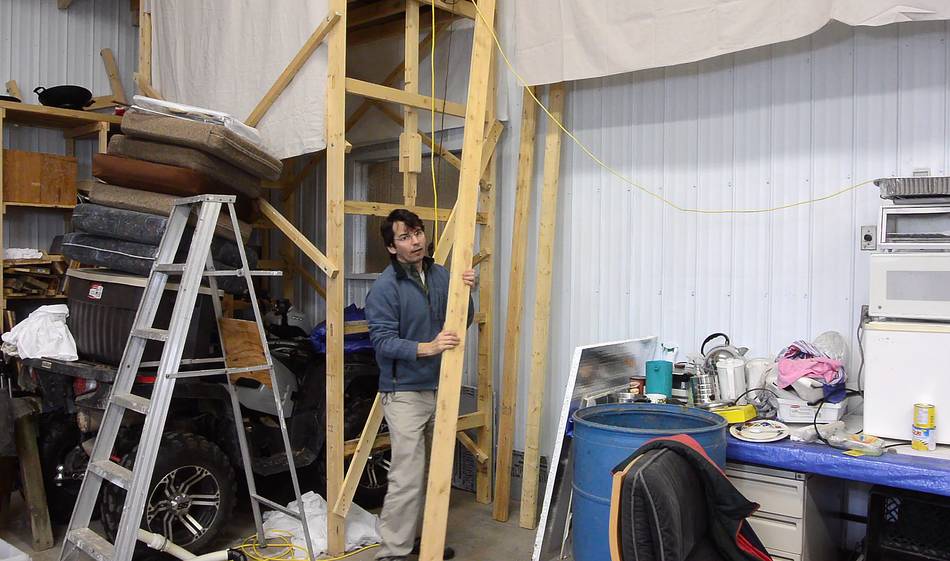
 Last time I built shelves in my big garage I demonstrated
how to make them without fancy tools.
But for these shelves I used my fancy tools to make the work go quicker.
Last time I built shelves in my big garage I demonstrated
how to make them without fancy tools.
But for these shelves I used my fancy tools to make the work go quicker.
Last time I built shelves in my big garage I demonstrated
how to make them without fancy tools.
But for these shelves I used my fancy tools to make the work go quicker.
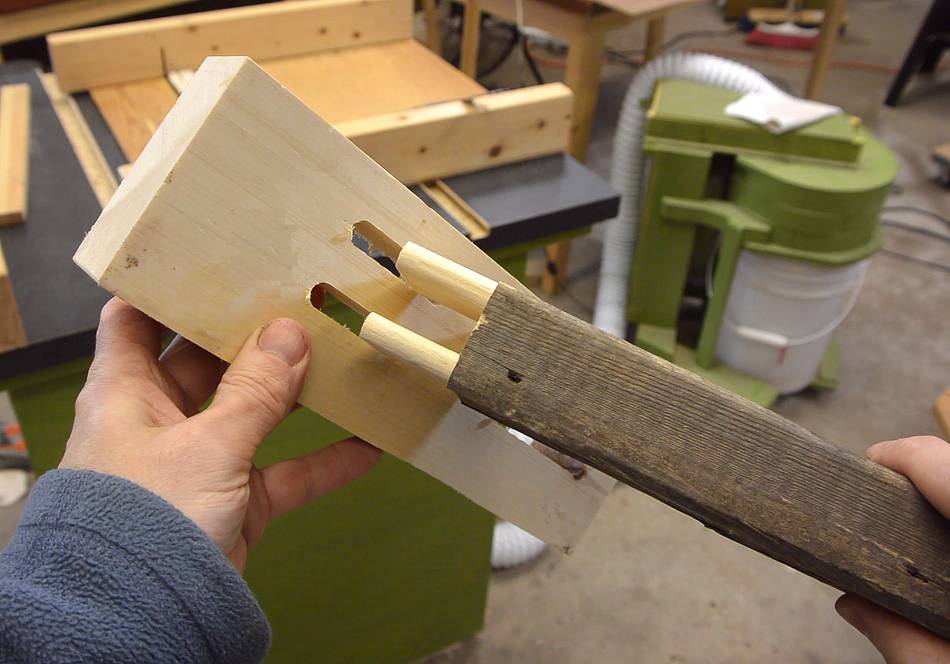
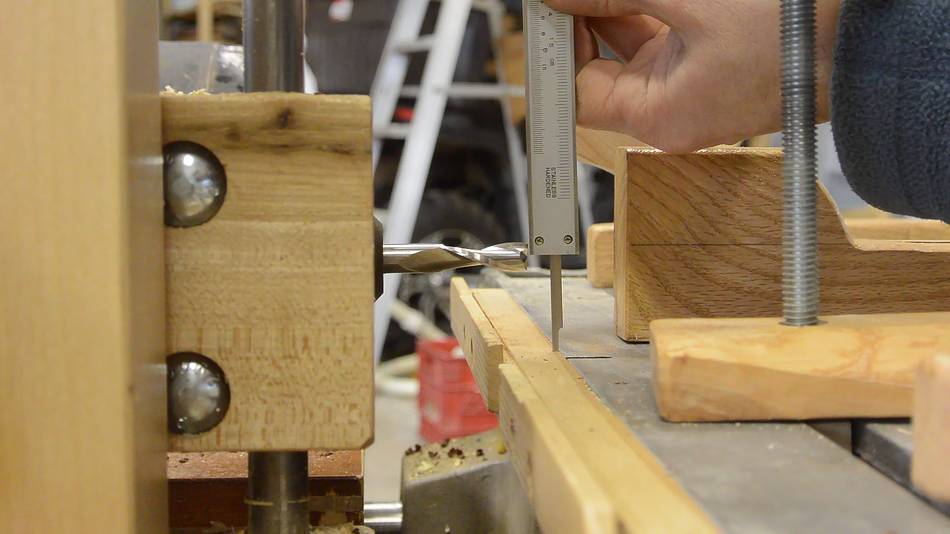
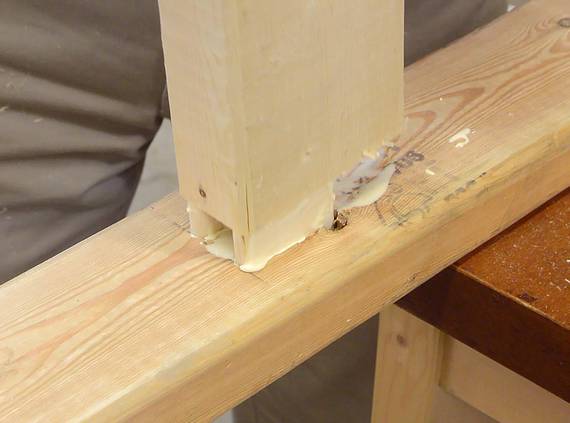
I figured just joining pieces of 2x4 into the flat side of an upright 2x4 with a double tenon joint would be quite strong. (like here) I made a test joint in some scrap lumber, here I'm checking the fit.
 For the uprights, I used some 10' (3m) 2x4s that I found in the garbage.
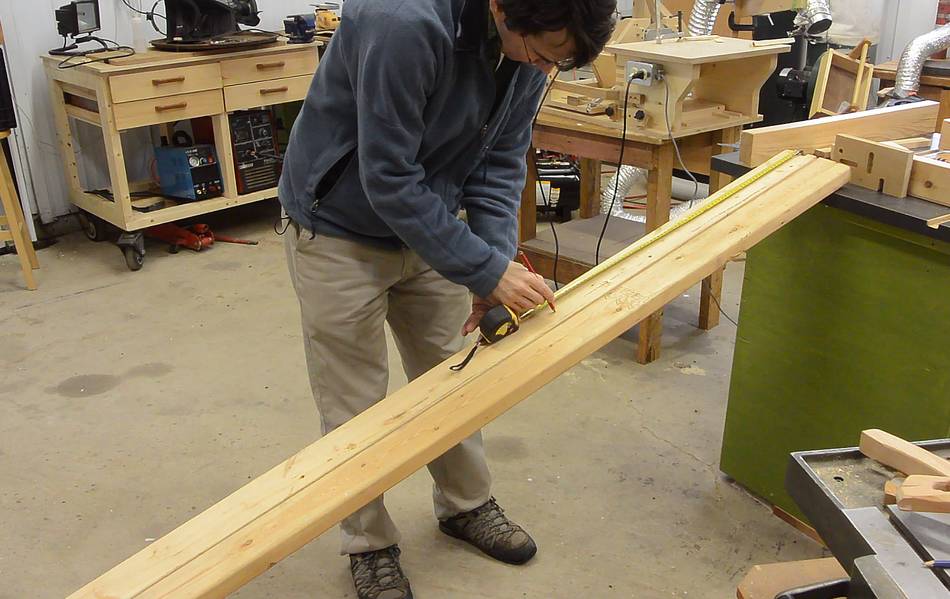
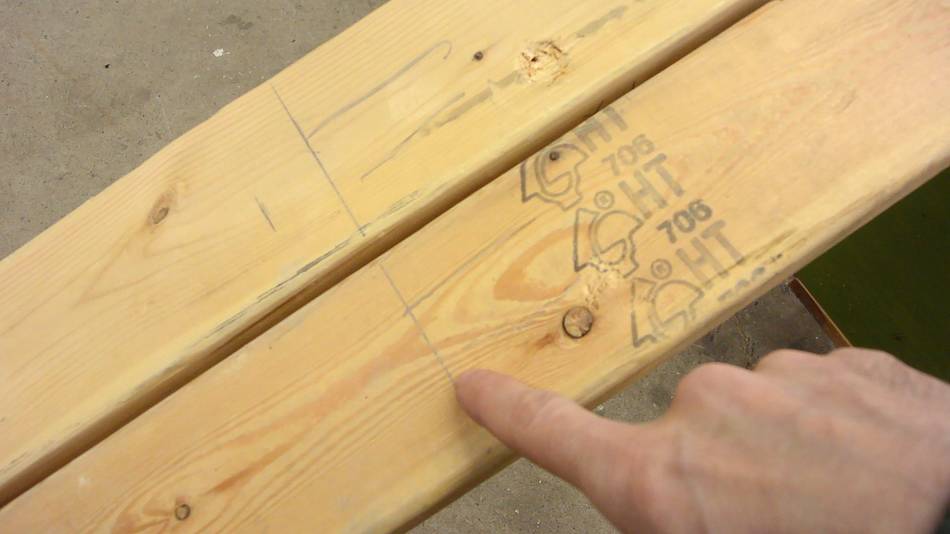 Marking where the shelves will go on the 2x4s. The shelves are spaced
58 cm apart to give me 6 shelf positions and leave a bit of wood at
either end.
Marking where the shelves will go on the 2x4s. The shelves are spaced
58 cm apart to give me 6 shelf positions and leave a bit of wood at
either end.
I also marked which side of the line the mortises go on. Otherwise, it's too easy to put them on the wrong side!
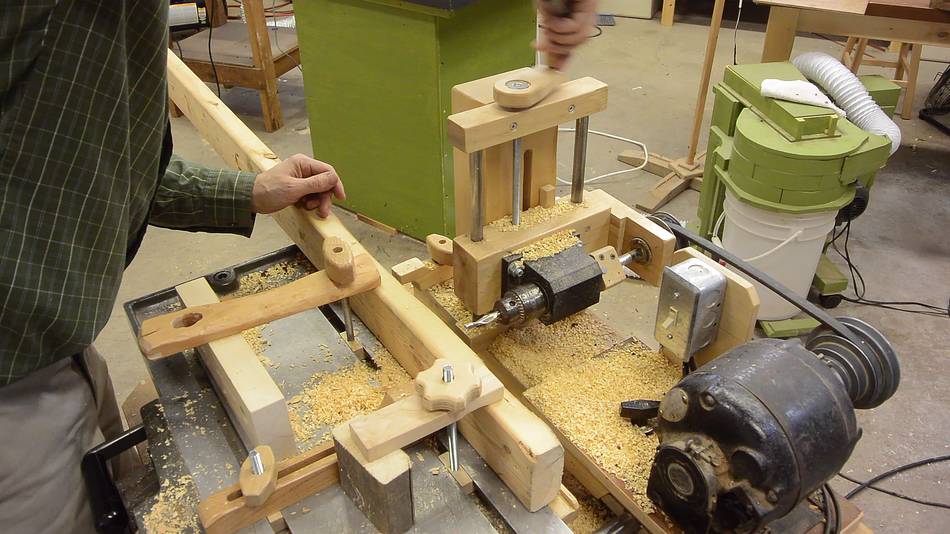
 Setting the height of the bit on my
horizontal boring machine.
I set it at 1.75" (to the center of a 2x4), then lowered the bit by 1/2"
by turning the adjustment crank eight turns (it uses a 16 threads per
inch threaded rod).
Setting the height of the bit on my
horizontal boring machine.
I set it at 1.75" (to the center of a 2x4), then lowered the bit by 1/2"
by turning the adjustment crank eight turns (it uses a 16 threads per
inch threaded rod).
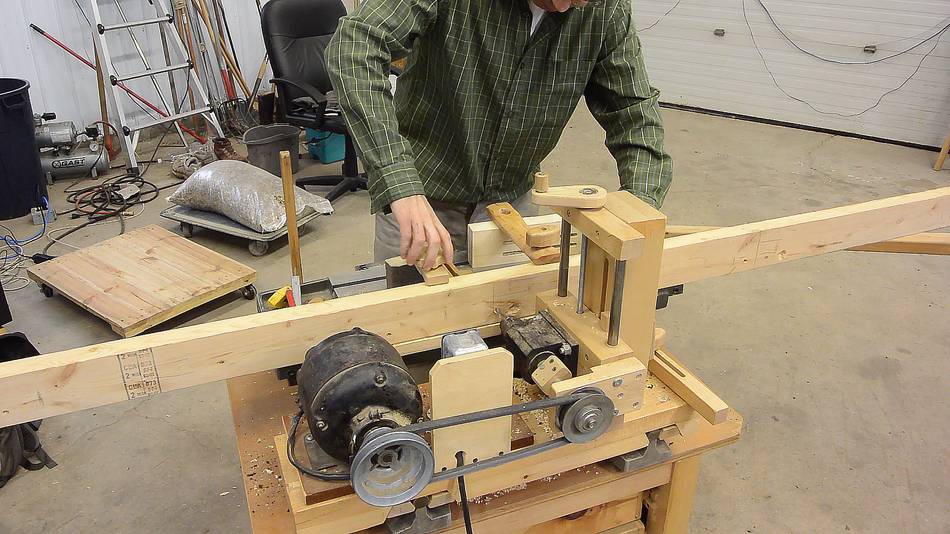 Cutting the mortises with the horizontal boring machine.
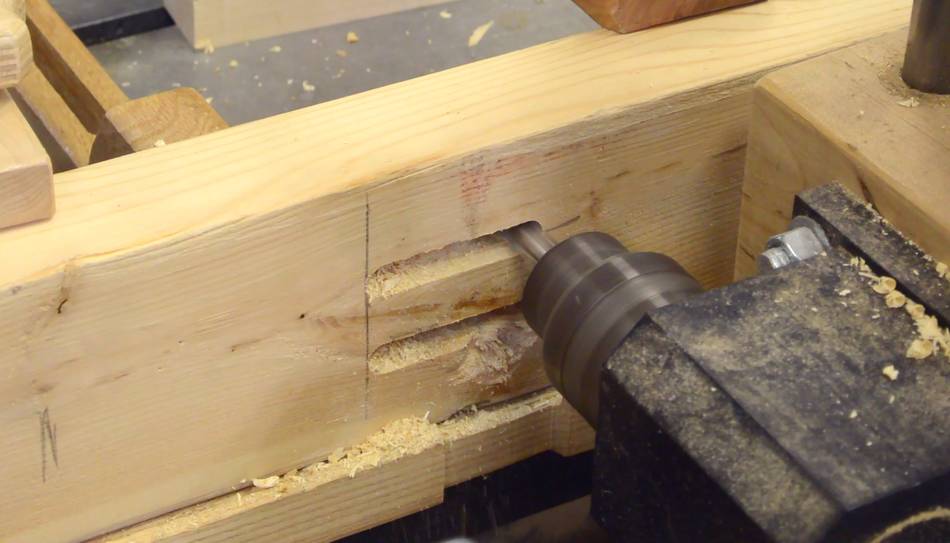
 I make the mortises by making a series of plunge cuts to remove most of
the material. The spiral bit cuts much better plunging into side grain
than it does milling end grain when moving side-to-side.
I make the mortises by making a series of plunge cuts to remove most of
the material. The spiral bit cuts much better plunging into side grain
than it does milling end grain when moving side-to-side.
After removing most of the material with plunge cuts, I move side-to-side while slowly plunging to turn the series of holes into a slot.
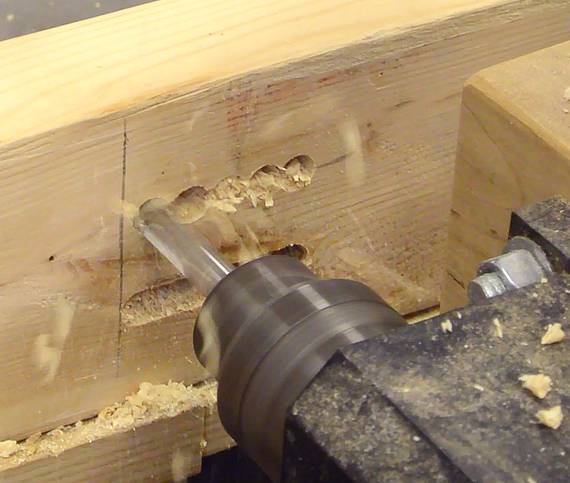
 I cut the mortises all the way through. Here you can see the
clamping. Also note the block next to the slot, which helps support the
workpiece against the force of plunging.
I cut the mortises all the way through. Here you can see the
clamping. Also note the block next to the slot, which helps support the
workpiece against the force of plunging.
 I space the two mortises 1" apart. This means adjusting the vertical
crank by 16 turns between the two mortises. I have to be careful not to
lose count of the turns.
I space the two mortises 1" apart. This means adjusting the vertical
crank by 16 turns between the two mortises. I have to be careful not to
lose count of the turns.
My slot mortiser solves this problem with a counter wheel next to the crank.
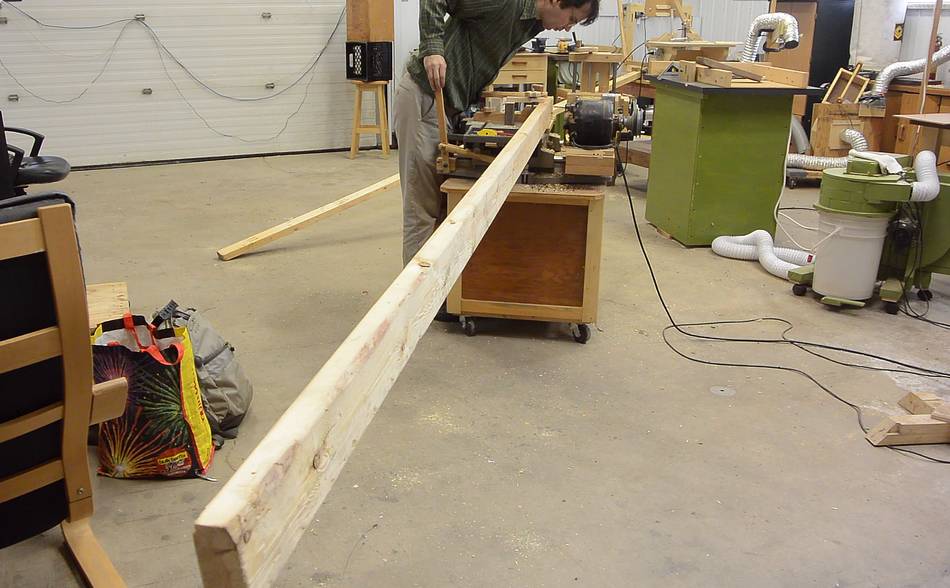 On my slot mortiser and my pantorouter the workpiece stays stationary,
which makes it easy to support the end of a long piece separately. But
on this machine, the workpiece moves. Fortunately, the table is
very sturdy, so having the wood overhang by 8' (2.4m) off the end
isn't a problem.
On my slot mortiser and my pantorouter the workpiece stays stationary,
which makes it easy to support the end of a long piece separately. But
on this machine, the workpiece moves. Fortunately, the table is
very sturdy, so having the wood overhang by 8' (2.4m) off the end
isn't a problem.
When I built the machine, it was tempting to make it so the drill mechanism is mounted to the table, but that would have made the machine bigger, and the table, with its T-slots, is excellent for mounting stock to.
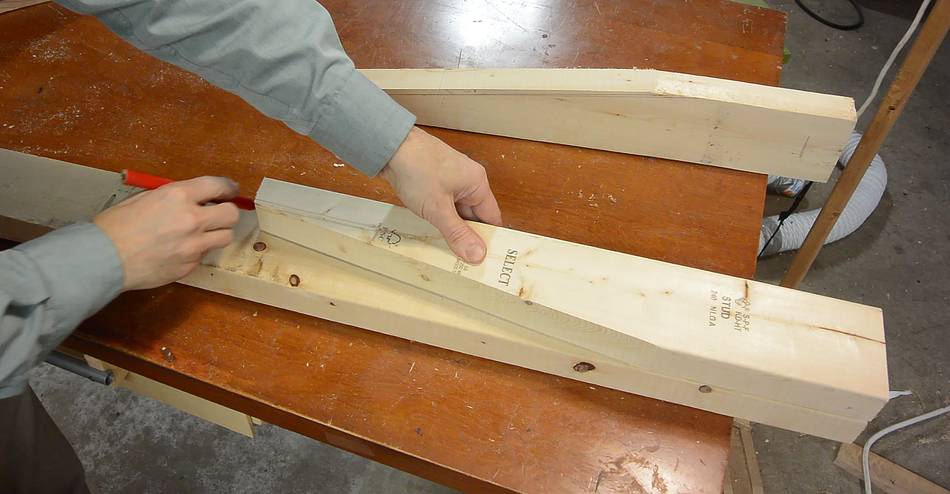 With all the mortises cut, I started on the shelf supports. I cut one
piece to the right shape, then outlined that against more pieces of 2x4
to mark the outline of the rest of the pieces. These were new 2x4s,
I didn't have enough used ones kicking around.
With all the mortises cut, I started on the shelf supports. I cut one
piece to the right shape, then outlined that against more pieces of 2x4
to mark the outline of the rest of the pieces. These were new 2x4s,
I didn't have enough used ones kicking around.
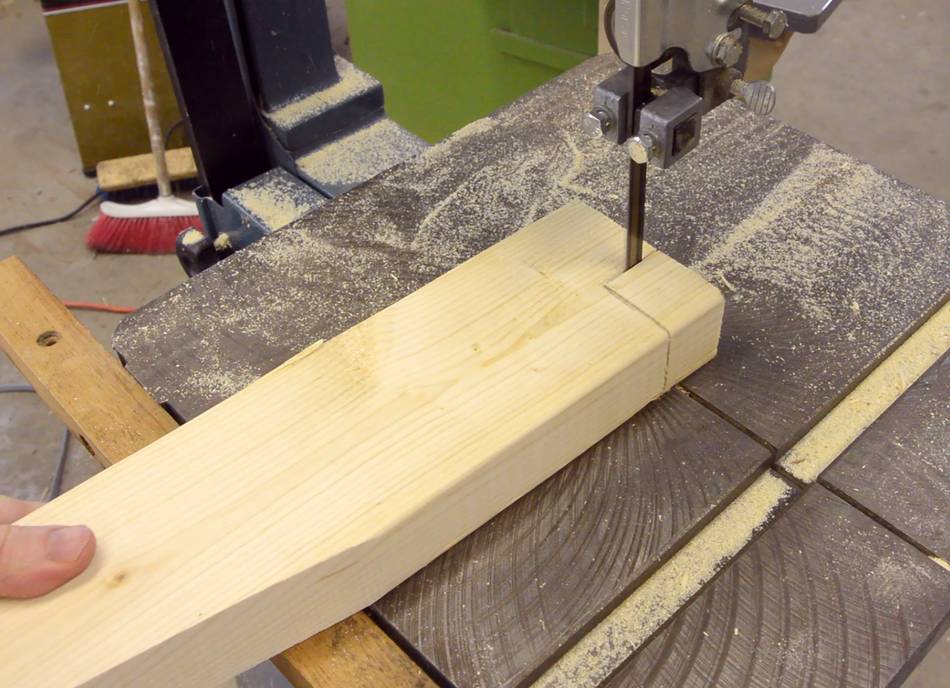
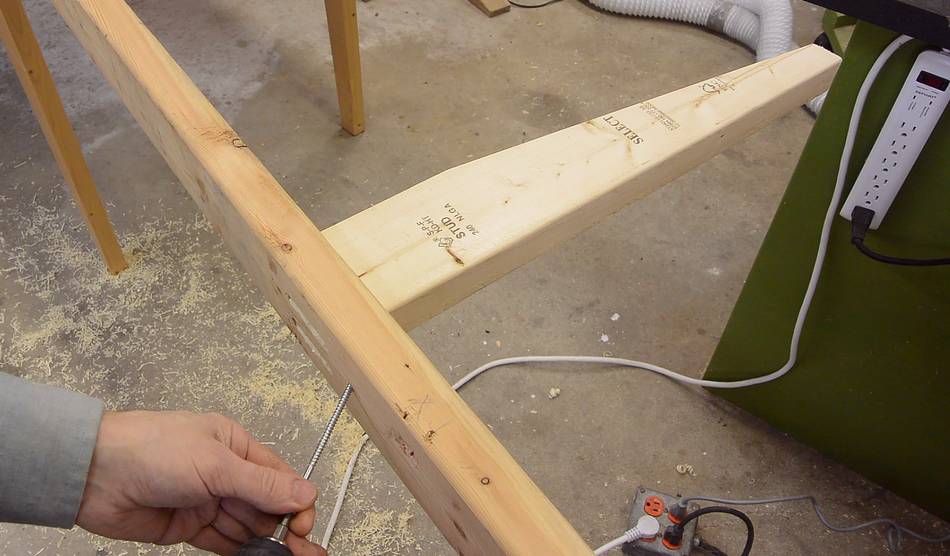
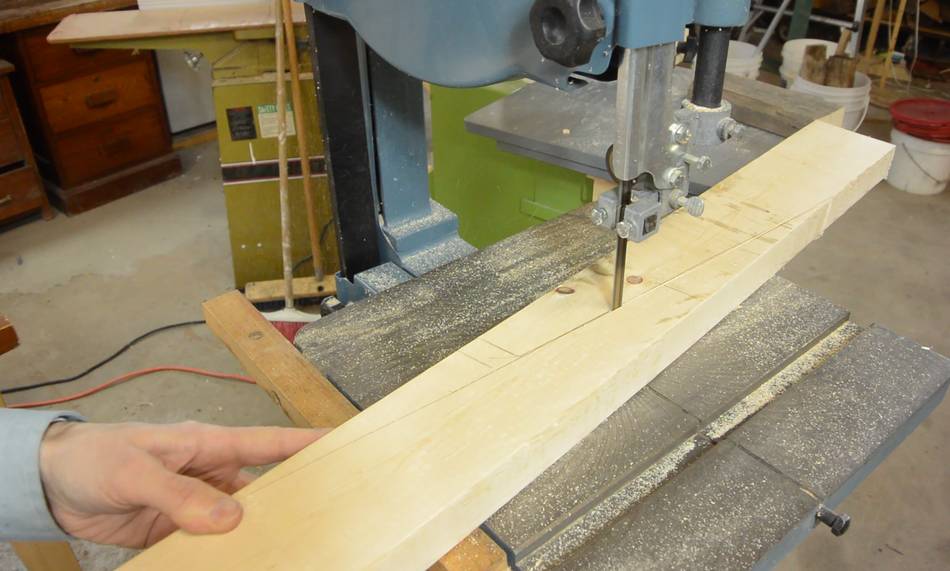 The tapered ends of two workpieces overlap by about 10 cm, saving some wood.
I cut them out on the bandsaw.
The tapered ends of two workpieces overlap by about 10 cm, saving some wood.
I cut them out on the bandsaw.
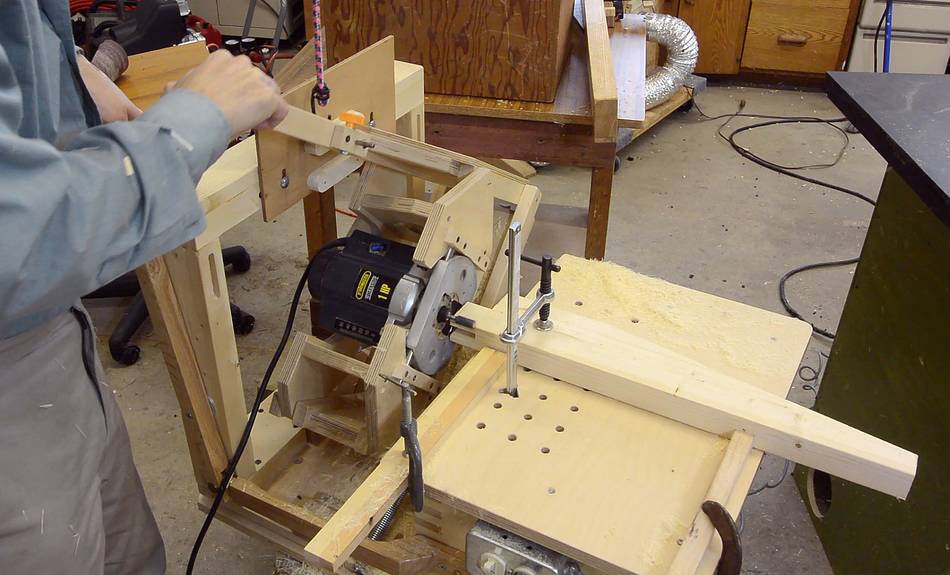 Then using my Pantorouter XL to
cut the tenons.
Then using my Pantorouter XL to
cut the tenons.
The router on this one is just a small one with a 1/4" collet. I used a 1/2" template follower bit with the guide bearing removed. With the bit extending from the collet, I can cut mortises 35 mm long.
 The tenons don't go all the way across the width of the 2x4 —
no need for a tenon on the side where it pushes into the wood.
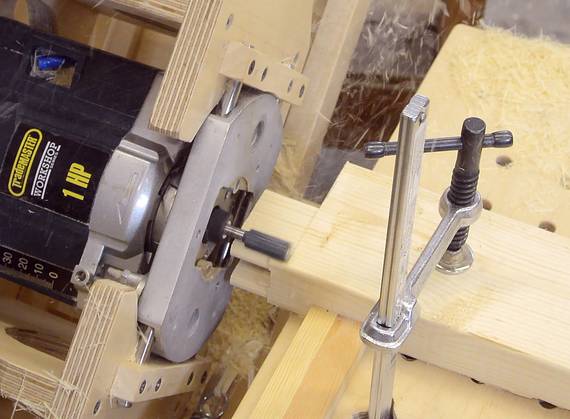
I cut a notch out of the pieces before cutting the tenons
to cut down on how much wood I had to mill away with the router.
The tenons don't go all the way across the width of the 2x4 —
no need for a tenon on the side where it pushes into the wood.
I cut a notch out of the pieces before cutting the tenons
to cut down on how much wood I had to mill away with the router.
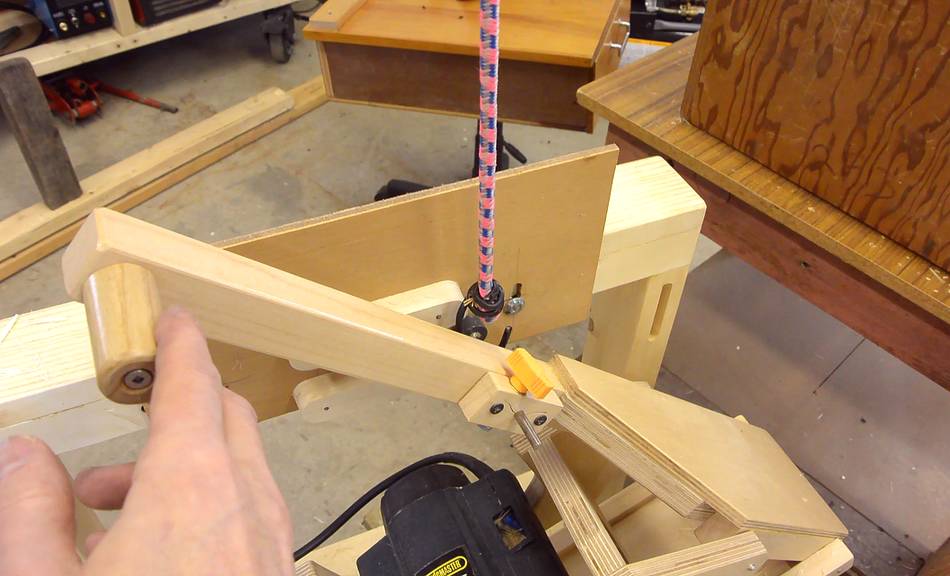 A downside of the Pantorouter XL is that it's difficult to find springs
strong enough to support the weight of the router across the long links.
On mine, the springs only compensate for two thirds of the weight of the
router, even though it's only a small router.
A downside of the Pantorouter XL is that it's difficult to find springs
strong enough to support the weight of the router across the long links.
On mine, the springs only compensate for two thirds of the weight of the
router, even though it's only a small router.
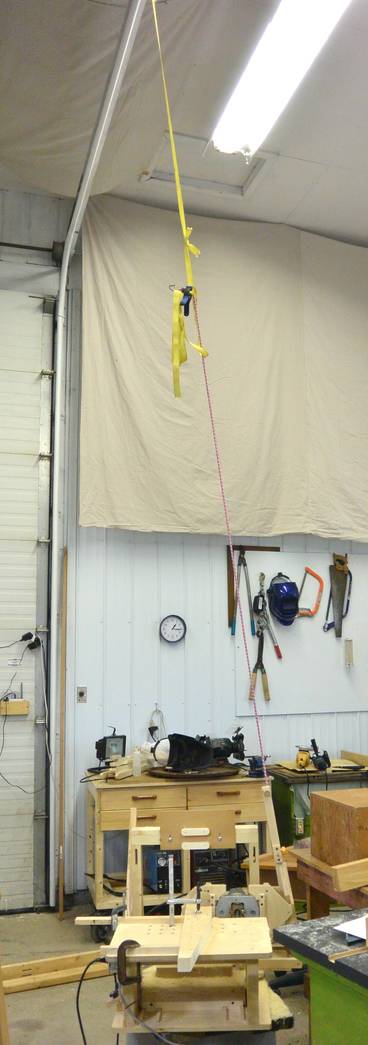
So I had the idea of using a bungee cord, tied to the ceiling, to provide the remainder of the lift. This worked well, though it does make the machine less mobile.
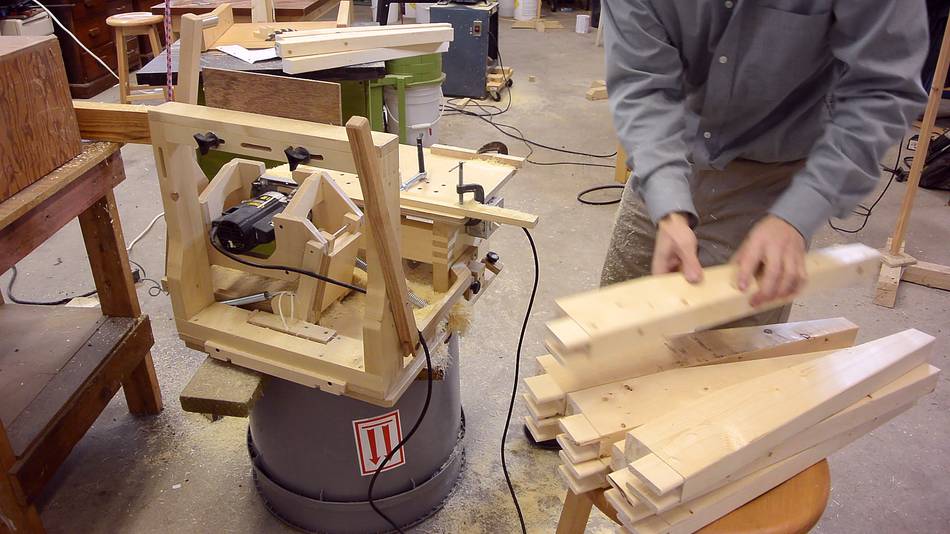
 Twelve double tenons in all. This would be quite a bit of work if I had
to hand-fit every one of them. But with machines set up to do the work,
I only need to adjust the fit during set-up, and the rest will be
identical.
Twelve double tenons in all. This would be quite a bit of work if I had
to hand-fit every one of them. But with machines set up to do the work,
I only need to adjust the fit during set-up, and the rest will be
identical.

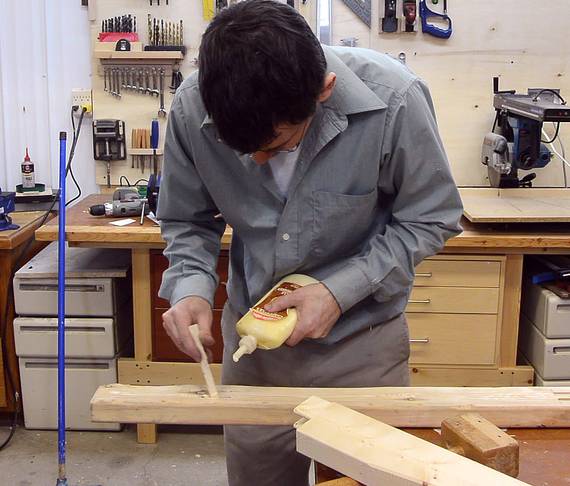 I used a thin strip of wood to apply glue to the insides of the mortises
and all sides of the tenons, then inserted them.
I used a thin strip of wood to apply glue to the insides of the mortises
and all sides of the tenons, then inserted them.
 And for good measure, I added a 4" #10 screw at an angle from behind.
That way, if for whatever reason the glue should fail, this screw
will keep the tenon from falling out.
And for good measure, I added a 4" #10 screw at an angle from behind.
That way, if for whatever reason the glue should fail, this screw
will keep the tenon from falling out.
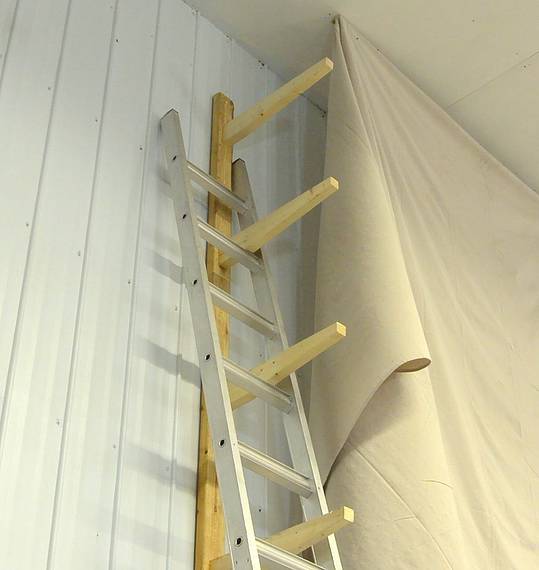
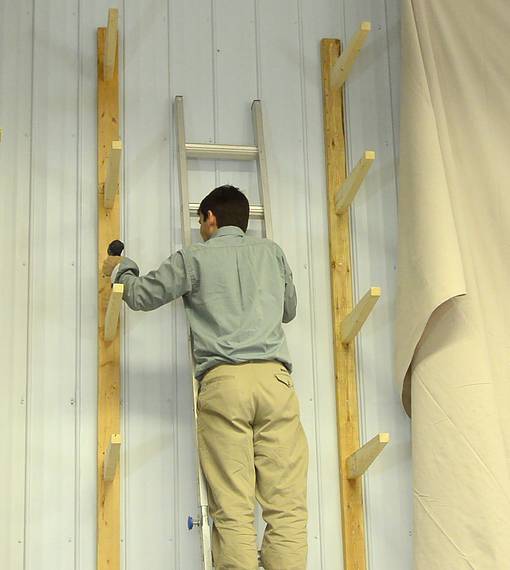
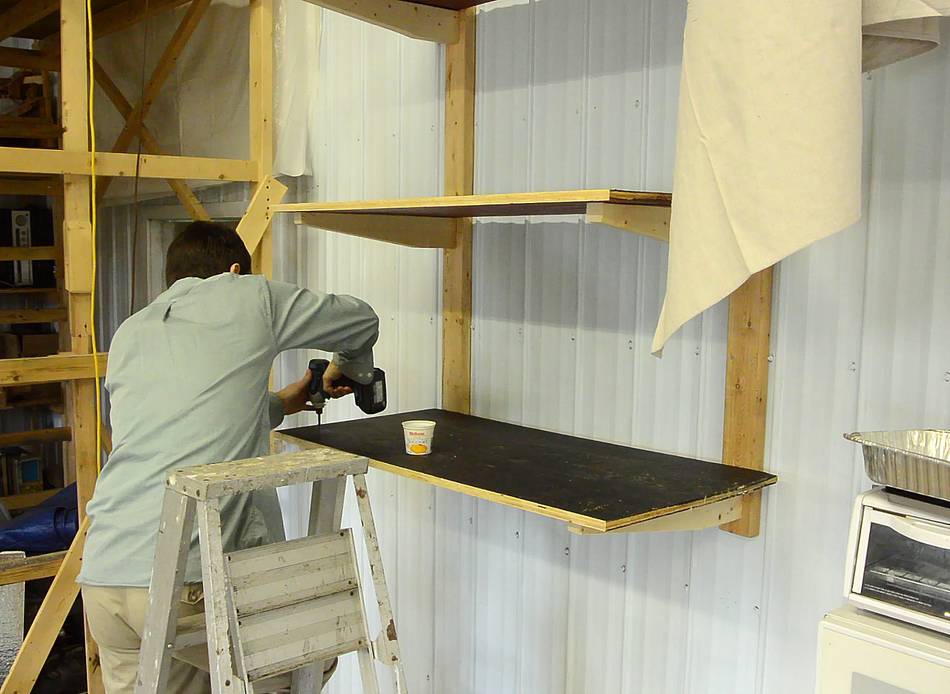
I had some help from my wife Rachel to install the supports on the walls. We put the ladder against the wall, then Rachel pulled the ladder away from the wall while I held a shelf support in place while Rachel tipped the ladder back onto the wall, over the shelf support. The rungs of the ladder caught the shelf supports. I put the first screws in with the shelf supports still poking through the ladder (very awkward). The rest of the screws were easier to screw in.

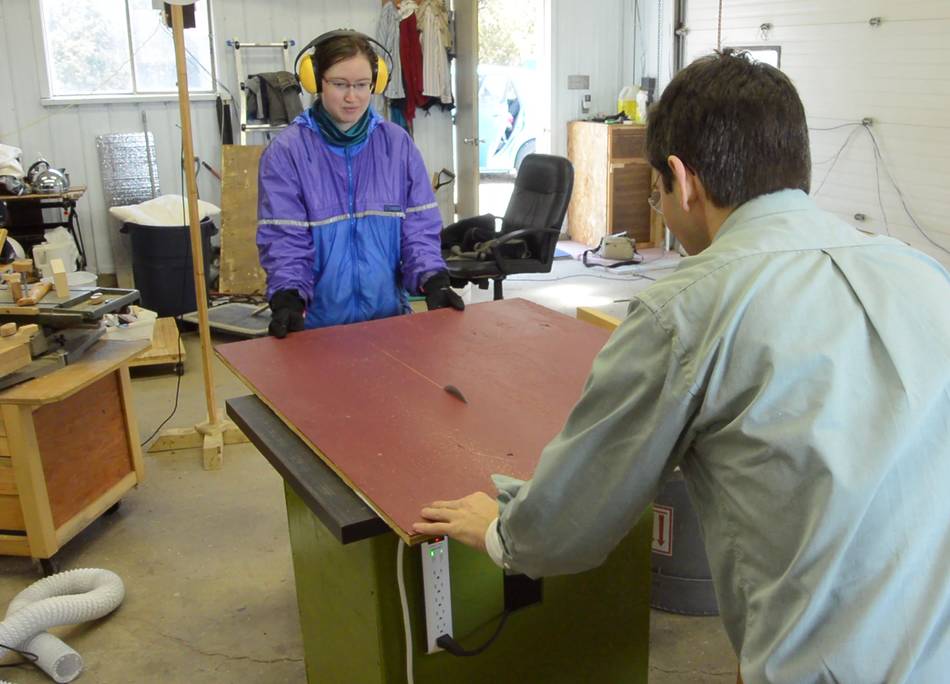 For the shelves themselves, I used some 3/4" plywood that I found in the garbage.
The plywood was painted, so it wasn't of much use for anything else.
Rachel helped with cutting it apart on the
table saw
For the shelves themselves, I used some 3/4" plywood that I found in the garbage.
The plywood was painted, so it wasn't of much use for anything else.
Rachel helped with cutting it apart on the
table saw
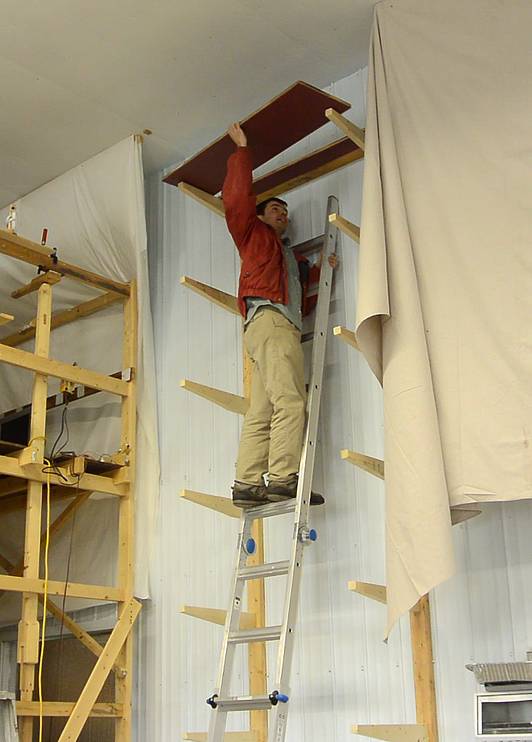 I didn't have enough plywood to make all the shelves out of single pieces, so I used
the offcuts for the top shelves. This made it easier to get the tops on while standing
on the ladder.
I didn't have enough plywood to make all the shelves out of single pieces, so I used
the offcuts for the top shelves. This made it easier to get the tops on while standing
on the ladder.
Then screwing the shelves on. The long 2x4's I used for the verticals had a bit of twist to them, so I forced them straight while I screwed them on.
 The pantorouter is perhaps a complicated machine for just building shelves, and
I built these cantileverd shelves without any fancy machine,
but I have to say, the double tenon shelves with the pantorouter went together much
quicker. If you have a pantorouter, once yhou have it set up, it can save a lot
of time for each joint.
The pantorouter is perhaps a complicated machine for just building shelves, and
I built these cantileverd shelves without any fancy machine,
but I have to say, the double tenon shelves with the pantorouter went together much
quicker. If you have a pantorouter, once yhou have it set up, it can save a lot
of time for each joint.
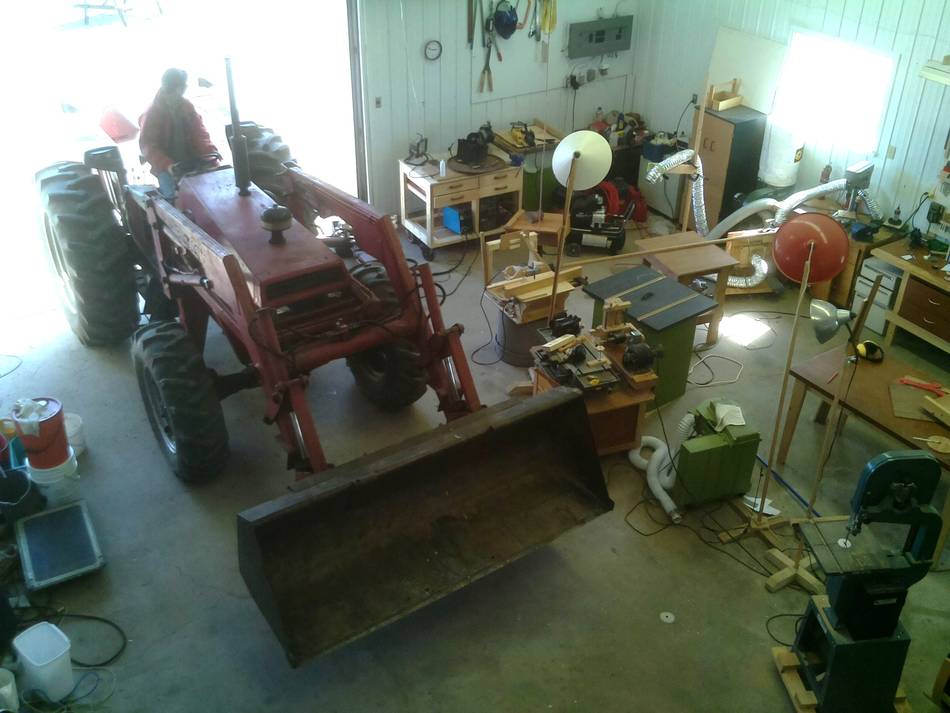
And here's one of the reasons for the shelves. I bought a
big old tractor, and I need
a place to park it, so floor space is getting precious. I'm questioning
my sanity with this purchase, but I always wanted a tractor, and there are a few things
I want to do around the property that would be hard to do without one.
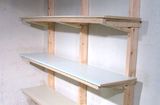 Basement shelving
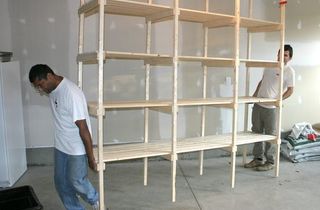 Building storage shelves
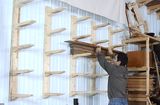 Triple tenon joined lumber rack
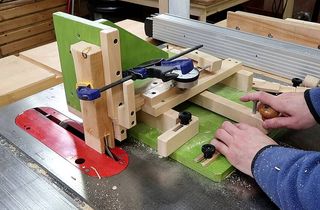 Double tenon shelf brackets
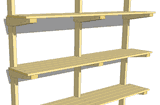 Garage shelves
 Mortised shelves
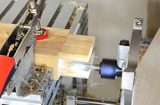 Double tenon with the metal pantorouter
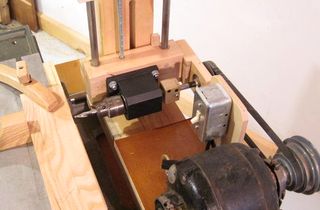 Horizontal boring machine
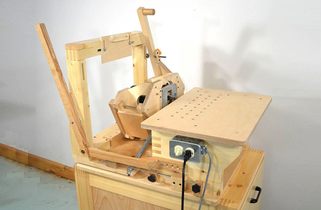 Pantorouter XL
 About my big garage workshop
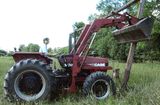 My big tractor