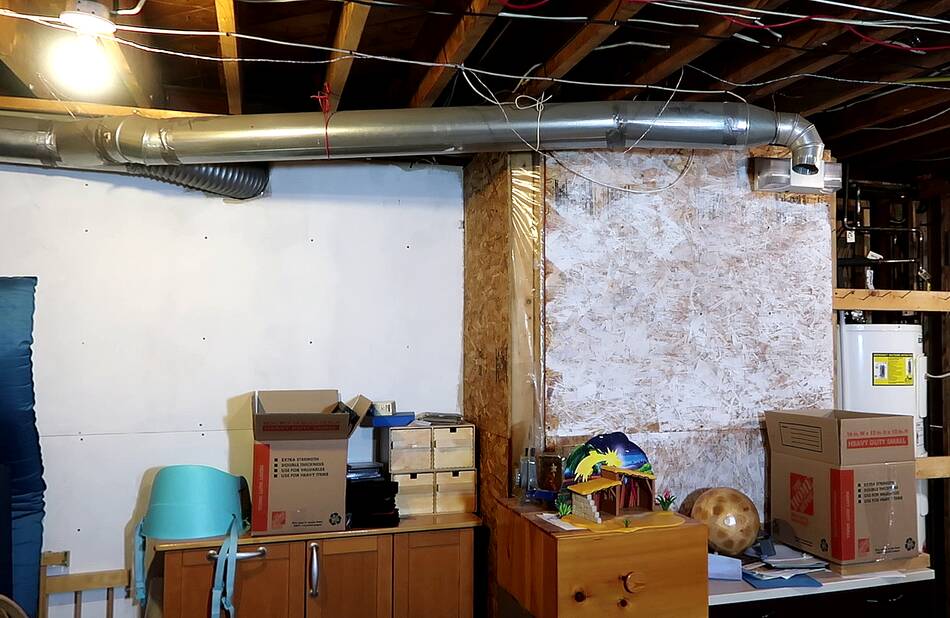
 I wanted to add high shelves on this wall, out of reach of
small children. I figured I'd make some double tenon joined shelf
brackets for this.
I wanted to add high shelves on this wall, out of reach of
small children. I figured I'd make some double tenon joined shelf
brackets for this.
I wanted to add high shelves on this wall, out of reach of
small children. I figured I'd make some double tenon joined shelf
brackets for this.
 I started by cutting two 5/16" wide mortises 1" apart using my
slot mortiser. The crank
and screw adjustment and turns counter wheel made it easy to ensure
that these were exactly 1" apart.
I started by cutting two 5/16" wide mortises 1" apart using my
slot mortiser. The crank
and screw adjustment and turns counter wheel made it easy to ensure
that these were exactly 1" apart.
 I then used a scrap of wood and made a test tenon using my
tenon jig that fit snugly in one of the slots.
I then used a scrap of wood and made a test tenon using my
tenon jig that fit snugly in one of the slots.
The dial indicator showed that I had to move the jig 0.412" side to side between the two cuts to make a tenon with the right fit.
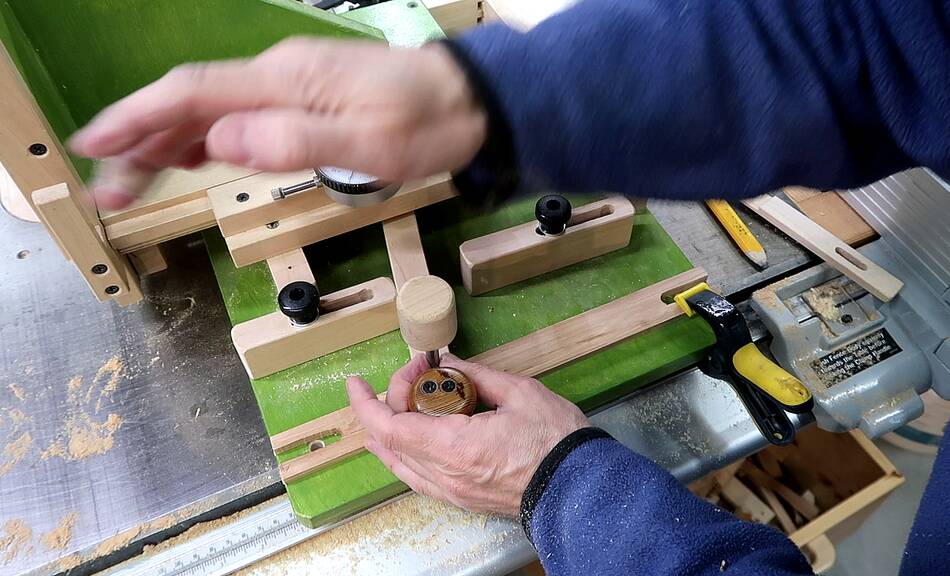 I used the stops on the jig for either side for the test tenon, but the
stops are only useful for single tenons. For a double tenon, I need
stops for either side of either tenon, so four positions in total.
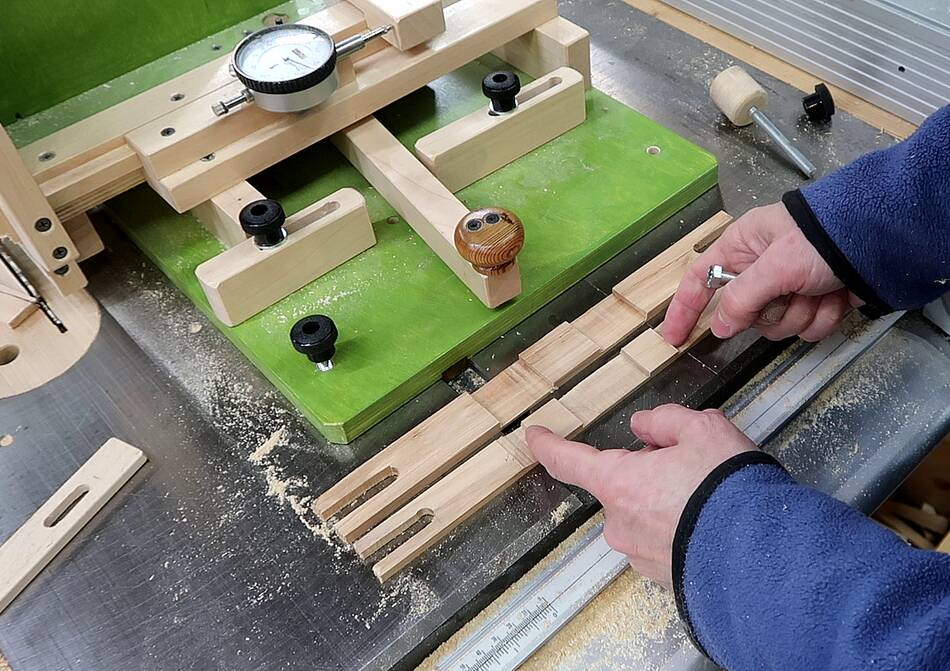
So I'm using the template feature of this jig for the first time
in a project for this.
I used the stops on the jig for either side for the test tenon, but the
stops are only useful for single tenons. For a double tenon, I need
stops for either side of either tenon, so four positions in total.
So I'm using the template feature of this jig for the first time
in a project for this.
I place a blank template on the front, then position the lever against each stop and whack down the marking tool (a bolt with sharp edges on the end) onto the template to leave marks on it.
 Then extending those marks to a line for where I need to cut a notch.
 The second tenon will be exactly 1" over and the lever magnifies by
3x, so I'm using a calliper, set to 3" to make a copy of the marks 3" over.
The second tenon will be exactly 1" over and the lever magnifies by
3x, so I'm using a calliper, set to 3" to make a copy of the marks 3" over.
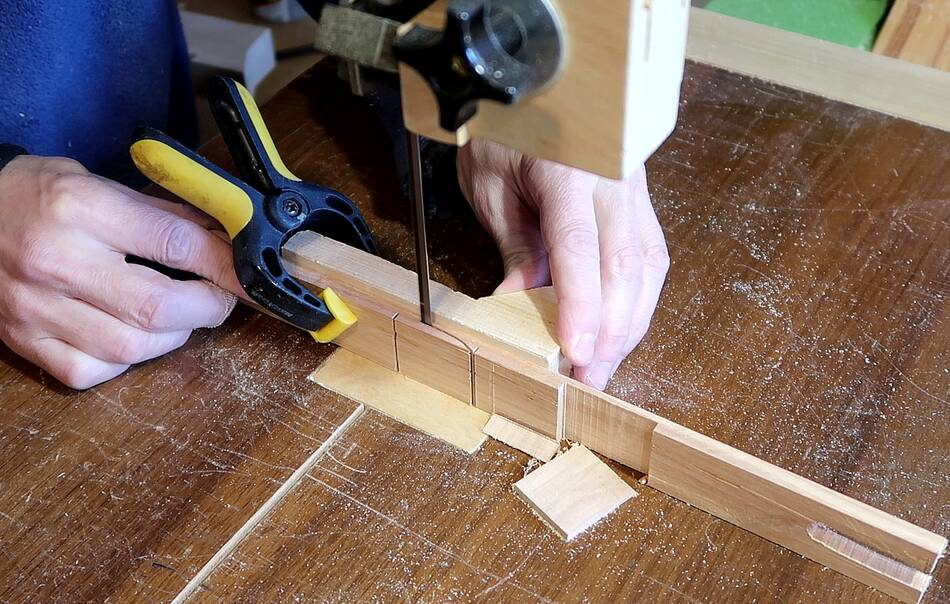 Then cutting two notches for the two stops on the bandsaw.
Each edge of the two notches will mark a cut position.
Then cutting two notches for the two stops on the bandsaw.
Each edge of the two notches will mark a cut position.
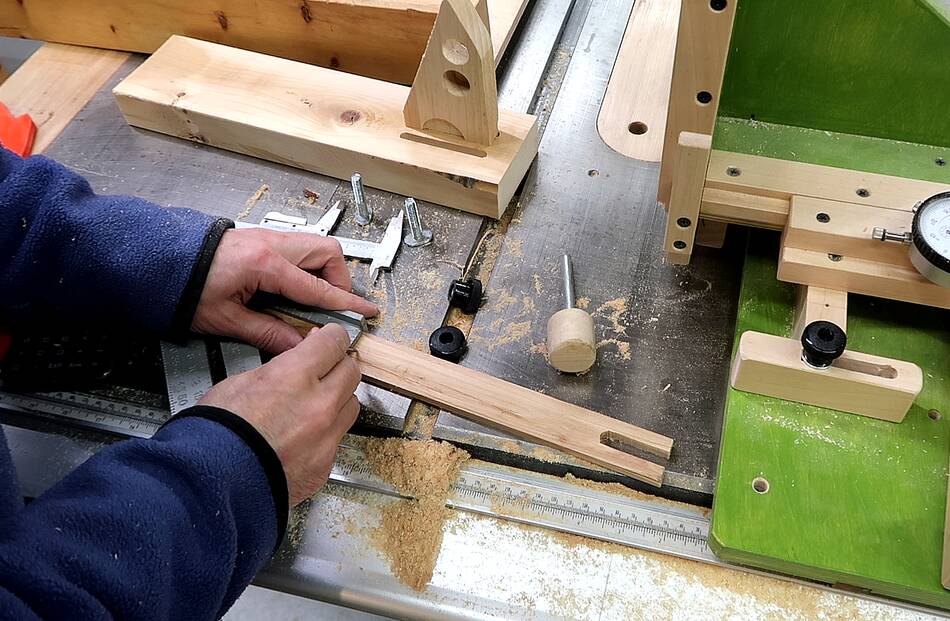
 But then I realized I got it backwards. It will be much easier to
make a series of cuts between the two tenons if the area between the
tenons is low and the tenons are high parts of the template. So I made
another template, (nearer to me in the picture). The raised parts of
this new template are narrower than the notches in the first template
because the 5/16" bolt I'm using to follow the template has a width
of its own.
But then I realized I got it backwards. It will be much easier to
make a series of cuts between the two tenons if the area between the
tenons is low and the tenons are high parts of the template. So I made
another template, (nearer to me in the picture). The raised parts of
this new template are narrower than the notches in the first template
because the 5/16" bolt I'm using to follow the template has a width
of its own.
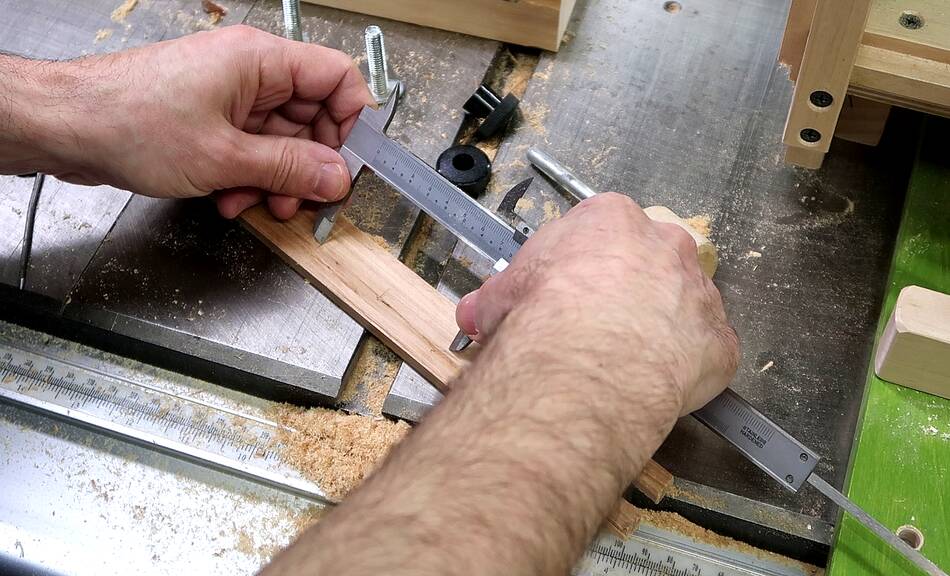
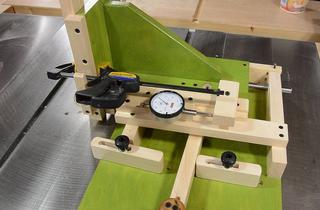
 Then checking the stops of the template. I used my dial indicator to make
sure the two stopping points are the right distance apart. But the dial
indicator read 0.420" between the stops, but I wanted it at 0.412". So I
took the template off and cut it down on the bandsaw a little bit. The 0.008"
That I was off is actually 0.024" on the template, more than half a millimeter.
The template is three times as big as the joint because the lever makes for a
3x reduction from the template to the jig.
Then checking the stops of the template. I used my dial indicator to make
sure the two stopping points are the right distance apart. But the dial
indicator read 0.420" between the stops, but I wanted it at 0.412". So I
took the template off and cut it down on the bandsaw a little bit. The 0.008"
That I was off is actually 0.024" on the template, more than half a millimeter.
The template is three times as big as the joint because the lever makes for a
3x reduction from the template to the jig.
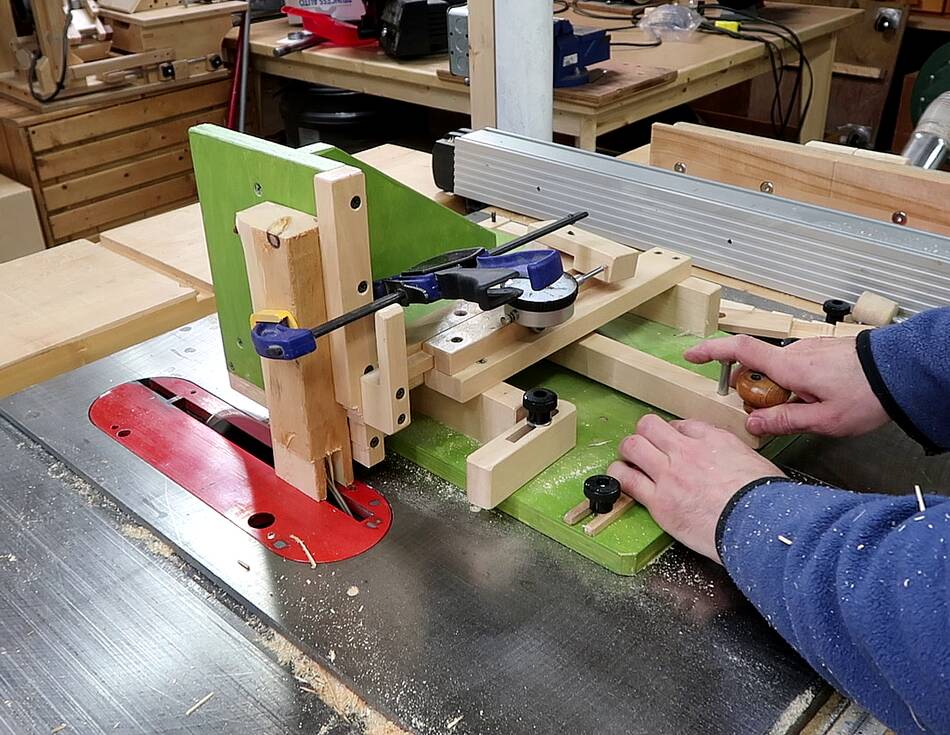 Cutting a test double tenon, and using the table saw to clear out the space
between the two tenons.
Cutting a test double tenon, and using the table saw to clear out the space
between the two tenons.
 Test fitting it.
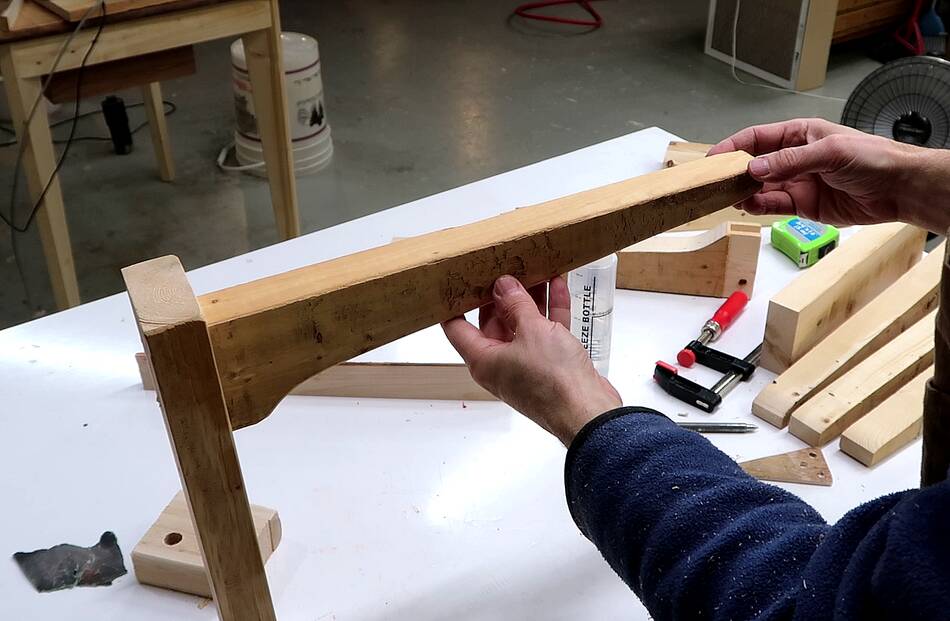
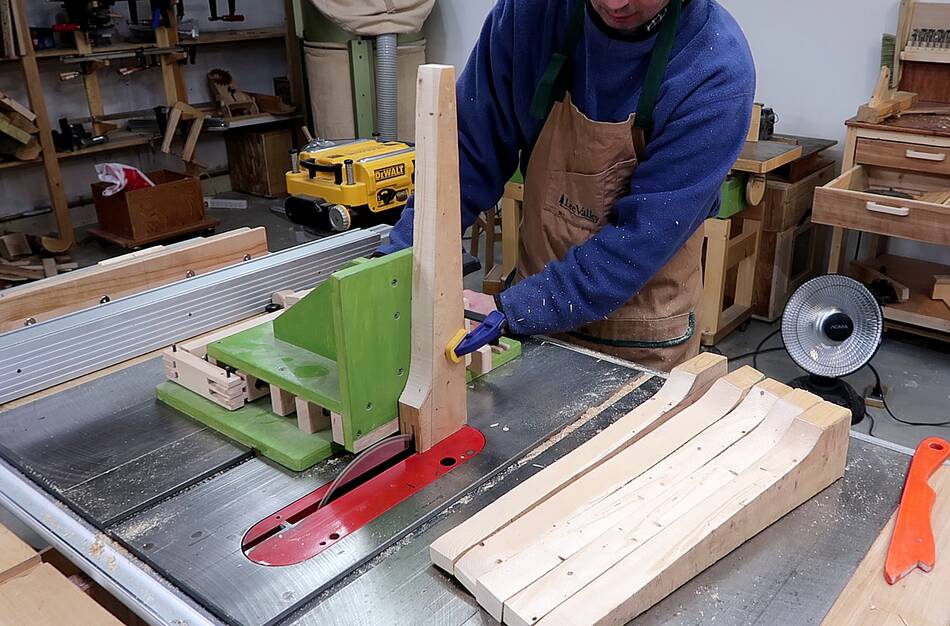 After that, I cut the tenons on the parts for the shelf brackets. These are tapered
because they don't need to be as wide towards the front. The taper allowed me to
cut two of them side by side out of a piece of 2x4.
After that, I cut the tenons on the parts for the shelf brackets. These are tapered
because they don't need to be as wide towards the front. The taper allowed me to
cut two of them side by side out of a piece of 2x4.
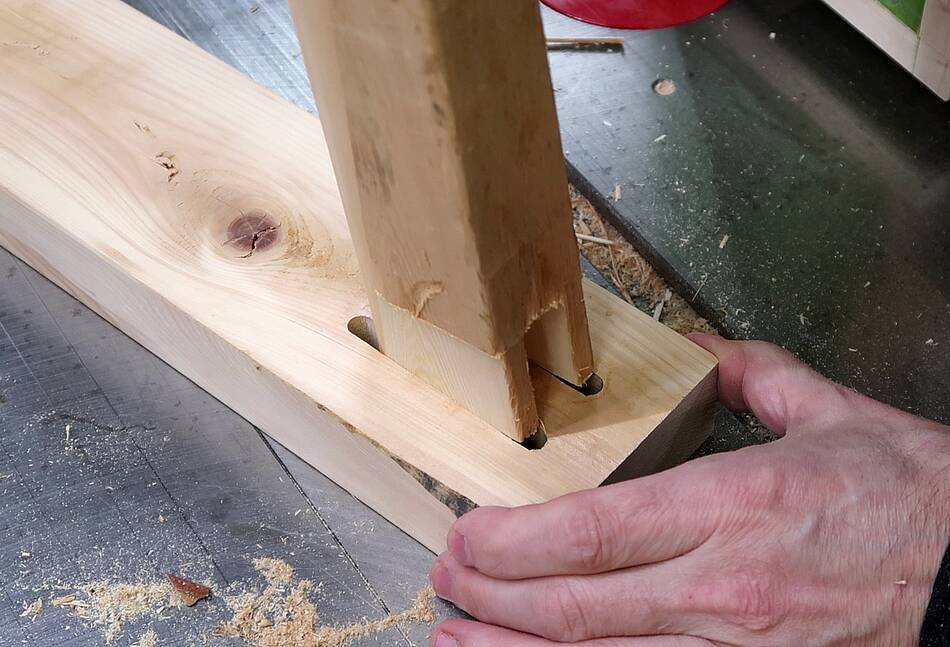
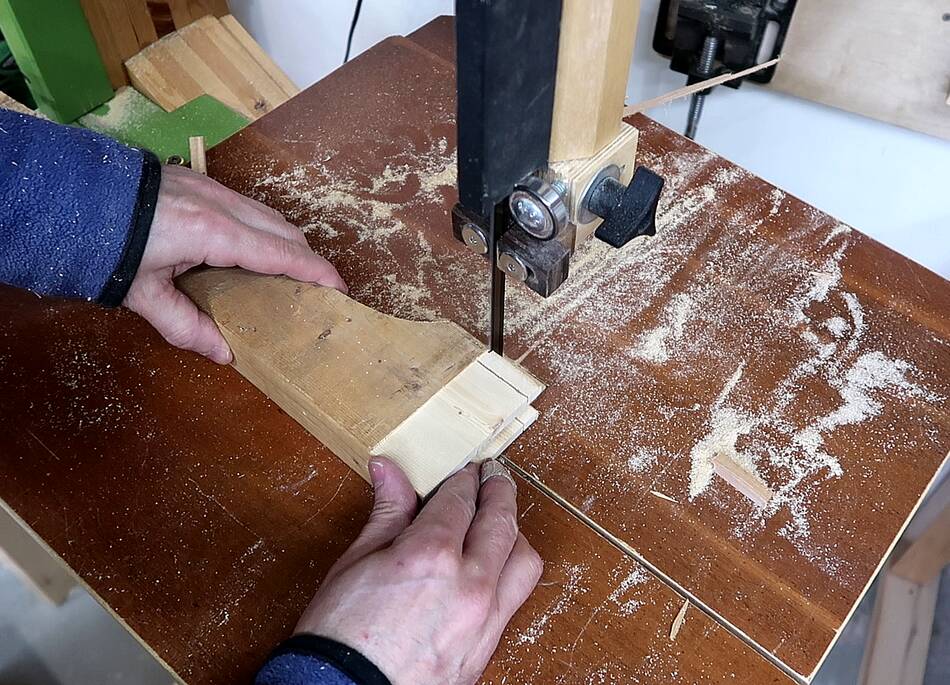 The mortise is not quite as long as the 2x4 is wide, so I cut a little bit off
the end of the tenon. The remaining shoulder of this workpiece will press
against the 2x4.
The mortise is not quite as long as the 2x4 is wide, so I cut a little bit off
the end of the tenon. The remaining shoulder of this workpiece will press
against the 2x4.

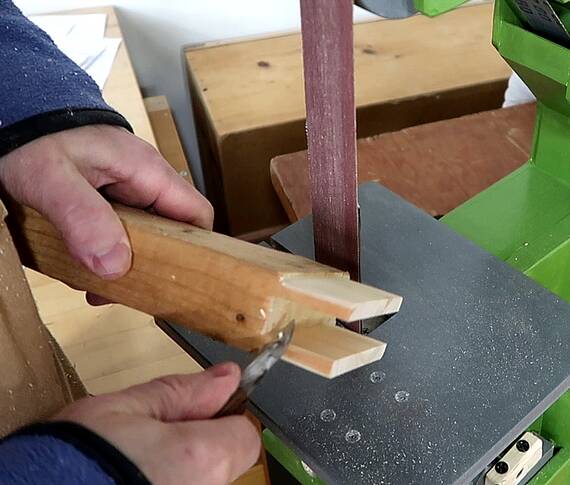 The edges of the tenons need to be rounded over to fit into the rounded
ends of the slot mortises.
My strip sander XL is great for
rounding single tenons and the outside corners of double tenons, but I
had to use a carving knife on the inside edges.
The edges of the tenons need to be rounded over to fit into the rounded
ends of the slot mortises.
My strip sander XL is great for
rounding single tenons and the outside corners of double tenons, but I
had to use a carving knife on the inside edges.
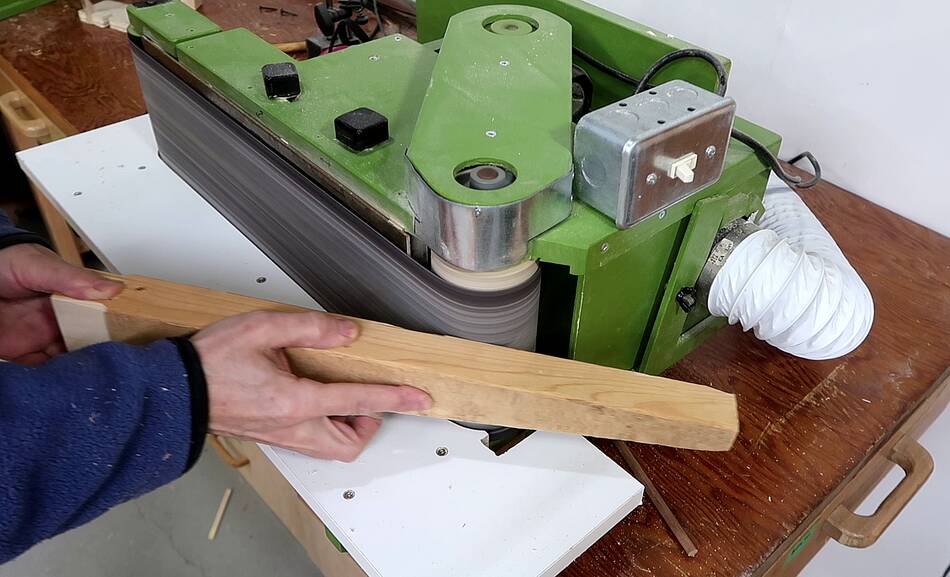 Then sanding the shelf brackets to make them look nicer.
The 2x4s I used for these were quite warped
and old, but the way the double tenons were spaced, I needed nearly the full
thickness of the 2x4, so I didn't plane them like I usually do.
Then sanding the shelf brackets to make them look nicer.
The 2x4s I used for these were quite warped
and old, but the way the double tenons were spaced, I needed nearly the full
thickness of the 2x4, so I didn't plane them like I usually do.
 Shelf bracket dry fit.
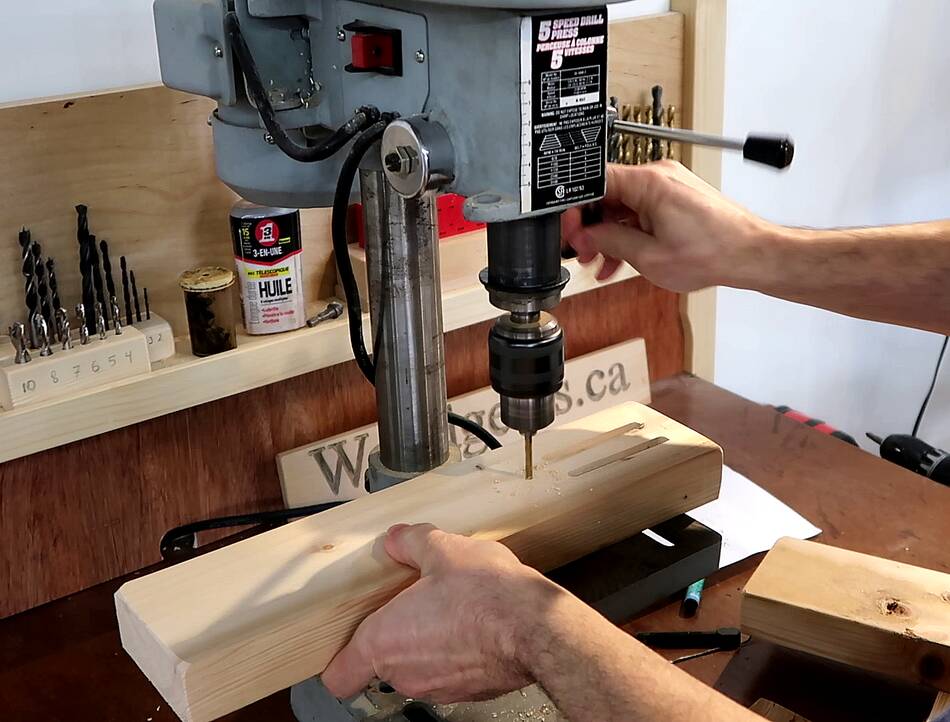 Drilling mounting holes is much easier before gluing them together.
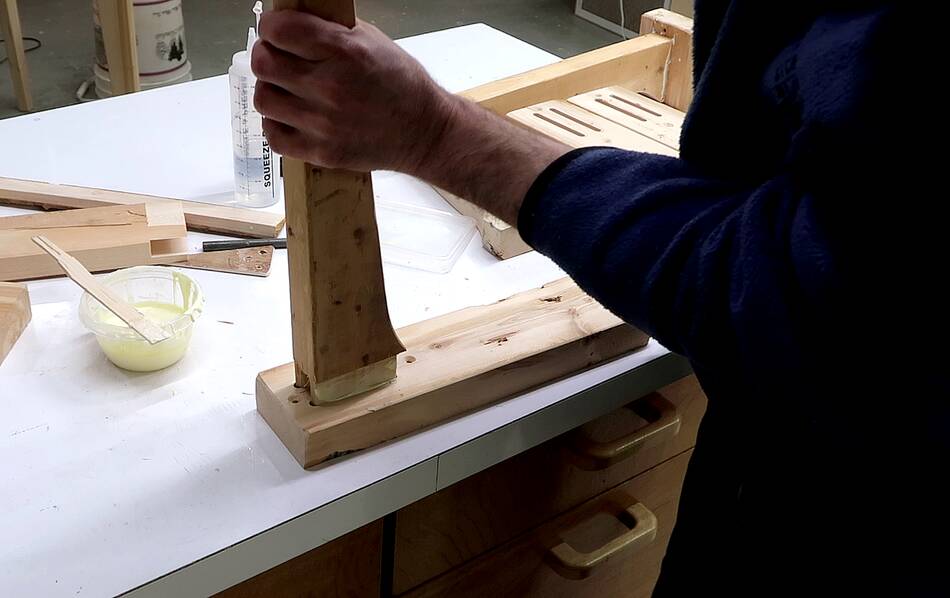 Then gluing them.
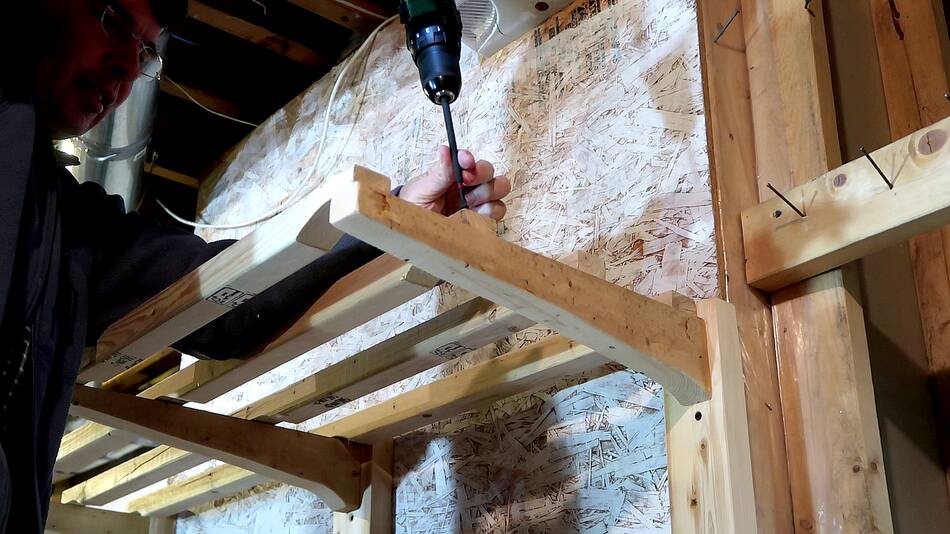
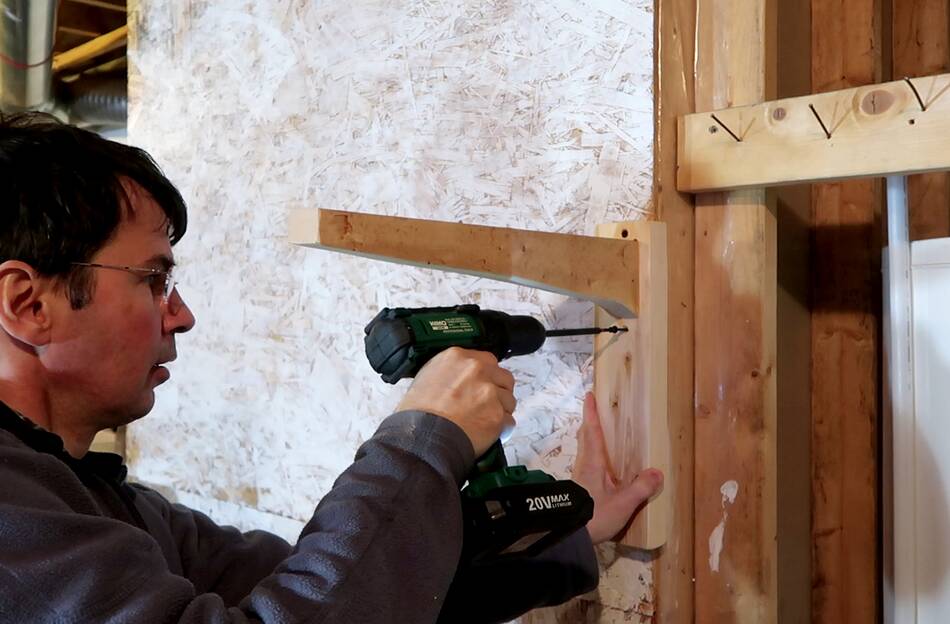 And screwing them against the wall.
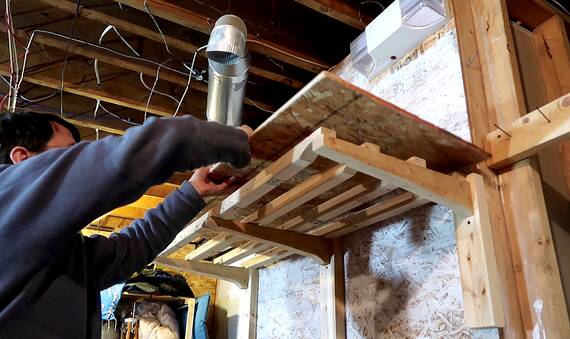 I cut up some 2x2 that I had lying around. these could have been
the base for the shelf for larger items, but I had some scrap OSB
to put on it too. The OSB on its own would not have been stiff
enough to span between the shelf brackets.
I cut up some 2x2 that I had lying around. these could have been
the base for the shelf for larger items, but I had some scrap OSB
to put on it too. The OSB on its own would not have been stiff
enough to span between the shelf brackets.
 And testing it by climbing up on the shelves, near the front edge.
I had some doubt, not about the strength of the shelf brackets, but
whether I screwed them to the wall securely enough!
And testing it by climbing up on the shelves, near the front edge.
I had some doubt, not about the strength of the shelf brackets, but
whether I screwed them to the wall securely enough!
 Slot mortising machine (2009)
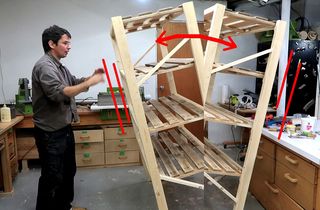 A shelf so stiff it rocks (video, 2011)
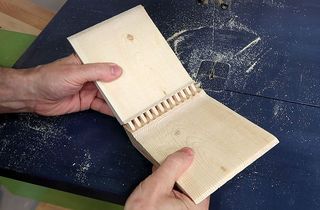 Making shelf brackets (video only)
To my woodworking website
 More about the quick set tenon jig
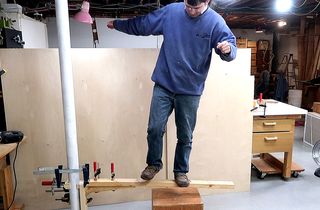 Shelf brackets: Double tenons vs. screwed vs pocket holes
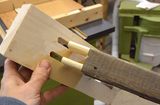 Double tenon shelves with the pantorouter
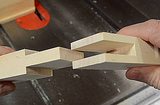 Bridle joint with the tenon jig
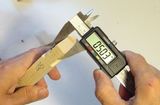 Mortise and tenon joint accuracy
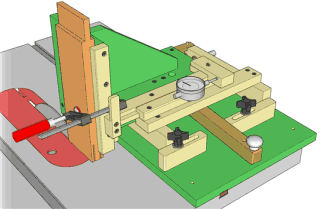 Buy plans for the tenon jig