Finger jointing cabinet corners
 I wanted my storage cabinet to have good lateral stability at the front.
The back would be held rigid by the back panel, but the front of the cabinet would have no bracing
and no face frame. To keep the cabinet rigid against twisting, I wanted a rigid means of connecting
the corners together.
I wanted my storage cabinet to have good lateral stability at the front.
The back would be held rigid by the back panel, but the front of the cabinet would have no bracing
and no face frame. To keep the cabinet rigid against twisting, I wanted a rigid means of connecting
the corners together.
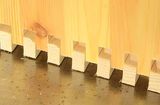
I made the bottom part of the front out of a solid 2x6 (cut down to about 13 x 3.5 cm) and finger jointed that to the sides. With the sides thinner than the bottom, I figured it would make sense to make the fingers for the sides wider than those of the bottom piece.
I thought a while about how to make this joint. My screw advance box joint jig would be the logical choice, but the side panels were 40 cm wide, and my box joint jig can only take stock up to 31 cm. I could have cut the fingers with my slot mortiser. The turns counter on my vertical adjustment crank would have been good for spacing the cuts precisely. But clamping the panel upright to the machine would also have been awkward.
 Or maybe I was looking for an excuse to try making another type of wood joint on my
pantorouter.
Or maybe I was looking for an excuse to try making another type of wood joint on my
pantorouter.
So I set out to make a template for making cuts spaced at 3/4" intervals. The fingers on the side panel would be 1/2" wide, and the fingers on the bottom rail would be 1/4", for a total of 3/4" per finger. Templates for the pantorouter are at twice the size, so I carefully measured intervals of 1.5" on a piece of wood, drew lines to those marks, and glued blocks of wood in place.
I checked the intervals with calipers after the glue dried, and the accuracy was not as good as I thought it should be. Somehow I had messed it up. I think there were too many steps involved from taking the ruler measurements to having blocks glued onto my board.
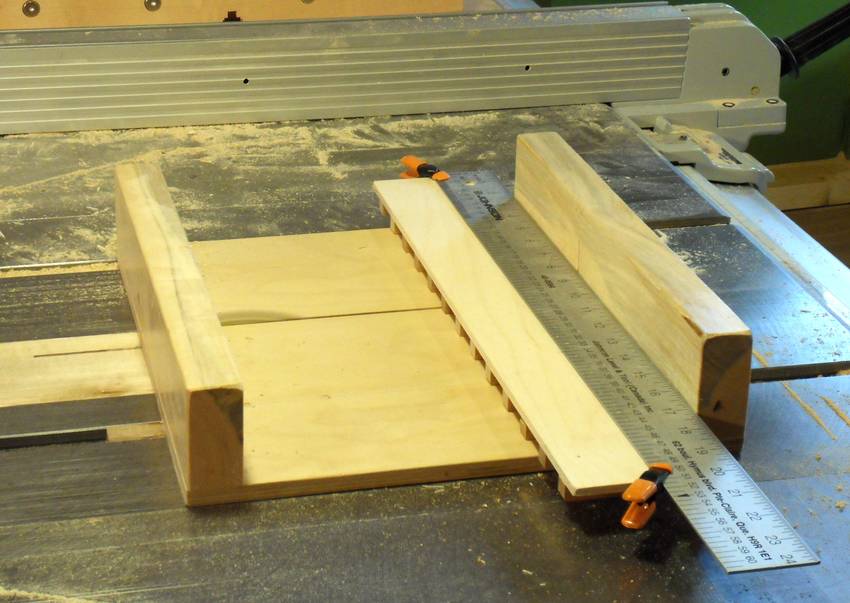 Thinking about how to "fix" this template, I came up with a cool method of getting my spacing much
more accurate. Basically, I decided to shave a tiny bit off the side of each block on the table saw.
Thinking about how to "fix" this template, I came up with a cool method of getting my spacing much
more accurate. Basically, I decided to shave a tiny bit off the side of each block on the table saw.
I did this by placing the template blocks-down on the table saw sled, with a ruler clamped to it in such a way that my cut positions would all be with the ruler's half inch increments aligned with an edge of the slot on the sled. I set the blade low so It would cut the block, but but not the plywood base.
 Doing it this way meant that my accuracy was strictly a function of how accurately I could line up
the marks on the ruler with the slot in the sled. That was one step, instead of measuring,
marking on the wood, drawing a line, and then lining up a block of wood to that as I glued it down.
Doing it this way meant that my accuracy was strictly a function of how accurately I could line up
the marks on the ruler with the slot in the sled. That was one step, instead of measuring,
marking on the wood, drawing a line, and then lining up a block of wood to that as I glued it down.
When I re-checked the accuracy after this procedure, I was within something like .005" (about a tenth of a millimeter) consistently. Lesson learned - lining things up with a ruler can be accurate enough as long as it's the only step.
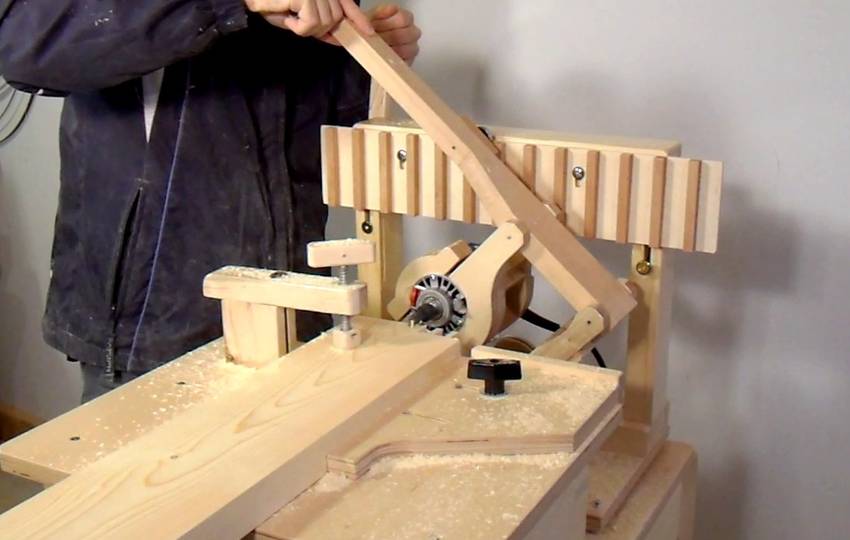
 Here's my template mounted on the Pantorouter, with the big side panel clamped
down.
Here's my template mounted on the Pantorouter, with the big side panel clamped
down.
The slots in my template are about three millimeters wider than my guide bearing, seeing that I trimmed some material off both sides of the blocks. So the key was to always keep the bearing on one side of the slot. I unhooked one of my springs that help hold the router up, which unbalanced the mechanism and caused it to naturally press the guide bearing to one side of the slot.
 Cutting the slots. Using the plunge mechanism, of the
pantorouter, I can cut in a
little bit at a time. This means the depth of cut is only constrained by the length of the
router bit and not its maximum cutting depth.
Cutting the slots. Using the plunge mechanism, of the
pantorouter, I can cut in a
little bit at a time. This means the depth of cut is only constrained by the length of the
router bit and not its maximum cutting depth.
 More articles about the pantorouter |
 I cut the fingers on the rail the same way, but using a 1/4" bit instead.
A bit hard to see in this picture, but you can enlarge it by clicking on it.
I cut the fingers on the rail the same way, but using a 1/4" bit instead.
A bit hard to see in this picture, but you can enlarge it by clicking on it.
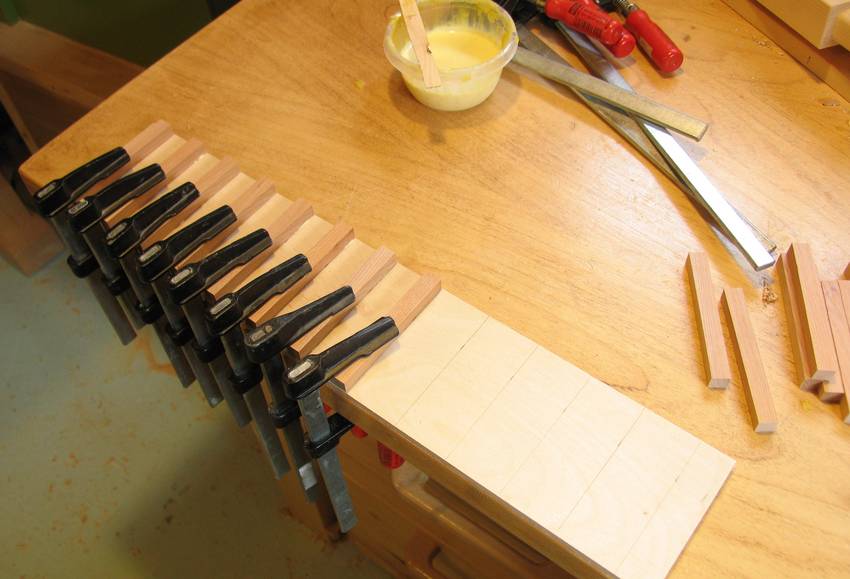
 Gluing the joint together...
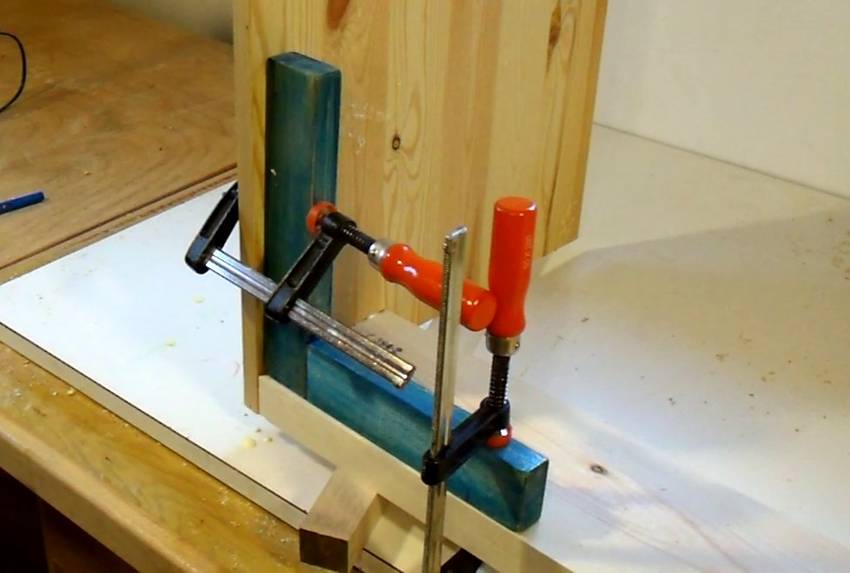 And using a clamping square to make sure it's square
while the glue dries.
And using a clamping square to make sure it's square
while the glue dries.
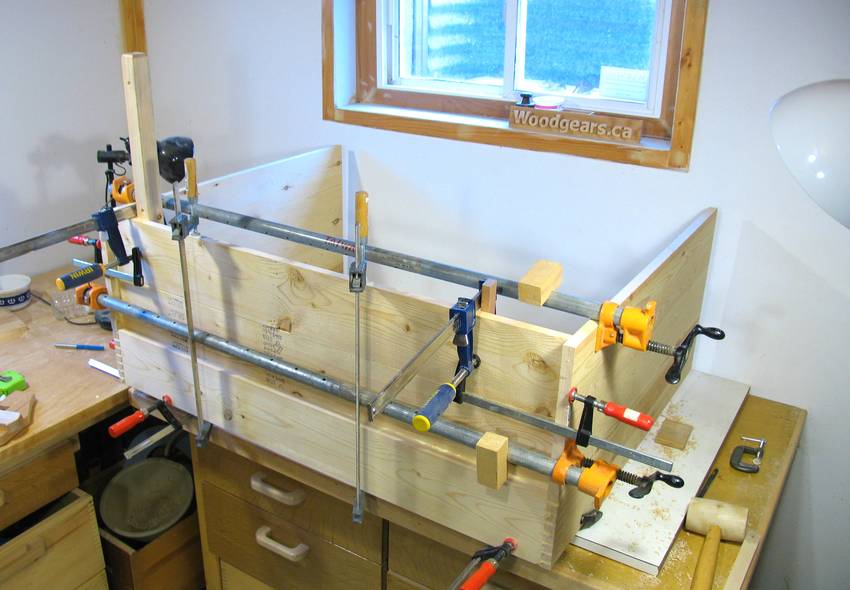 I then used regular thickness boards for the rest of the bottom of the cabinet.
I just butt joined these in, but after the glue dried, I drilled in from the side through both pieces
and glued in some wooden pegs. Wouldn't want to put too much faith in a butt-joint.
I then used regular thickness boards for the rest of the bottom of the cabinet.
I just butt joined these in, but after the glue dried, I drilled in from the side through both pieces
and glued in some wooden pegs. Wouldn't want to put too much faith in a butt-joint.
I only joined the front bottom corners this way. I joined the other panels together with dowel joints
See also:
 Box joints onthe pantorouter
Back to building a storage cabinet