Joining the wood panels for the storage cabinet
 I joined the panels of my storage cabinet
together with dowels. I'd previously
done this when I built my planer stand. But this time
I used my self centering dowel jig instead of my
horizontal boring machine. Part of the reason
was that the row of holes to go in the middle of my top would have been impossible to do
on the horizontal boring machine.
I joined the panels of my storage cabinet
together with dowels. I'd previously
done this when I built my planer stand. But this time
I used my self centering dowel jig instead of my
horizontal boring machine. Part of the reason
was that the row of holes to go in the middle of my top would have been impossible to do
on the horizontal boring machine.
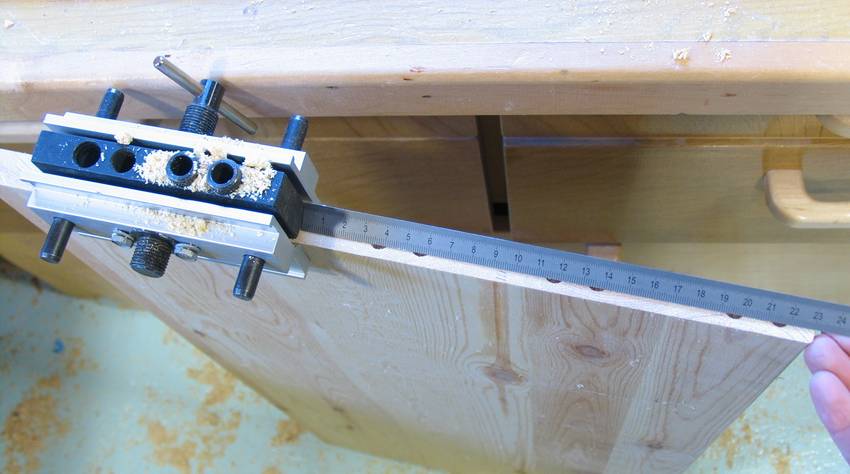 The dowel jig is very good at centering the holes in the panels. I found that
carefully measuring to the edge of my panel every time I placed the jig was accurate enough
for aligning the dowels.
The dowel jig is very good at centering the holes in the panels. I found that
carefully measuring to the edge of my panel every time I placed the jig was accurate enough
for aligning the dowels.
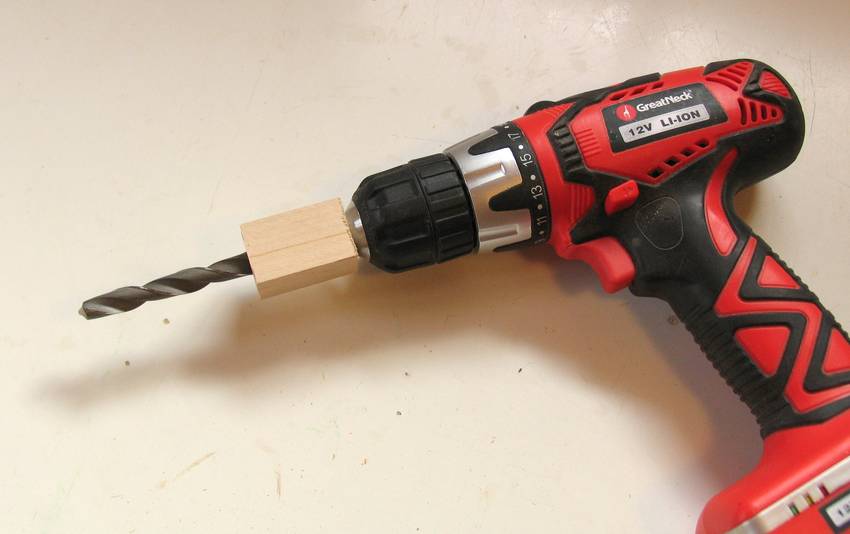 I stuck a piece of wood with a hole in it over my drill to act as a depth stop. That worked
out very well.
I stuck a piece of wood with a hole in it over my drill to act as a depth stop. That worked
out very well.
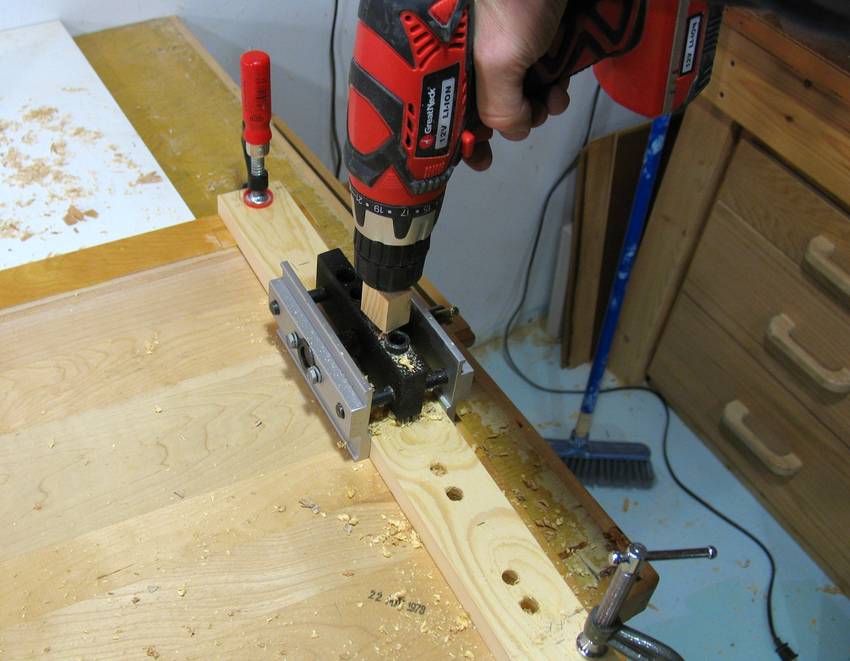 I also used the jig to drill the holes in the flat side of the panel. I clamped it over
a piece of wood that was as wide as the jig would go. I marked my jig positions
on this piece of wood, and drilled through it to drill the holes in the panel.
I also used the jig to drill the holes in the flat side of the panel. I clamped it over
a piece of wood that was as wide as the jig would go. I marked my jig positions
on this piece of wood, and drilled through it to drill the holes in the panel.
 I had previously built a T-square jig for my dowel jig
to drill holes like that, but, unfortunately, it was too short for the width
of my panels, so I couldn't use it this time. Clamping a piece of wood to both edges of the
panel was a little more awkward, but worked out OK.
I had previously built a T-square jig for my dowel jig
to drill holes like that, but, unfortunately, it was too short for the width
of my panels, so I couldn't use it this time. Clamping a piece of wood to both edges of the
panel was a little more awkward, but worked out OK.
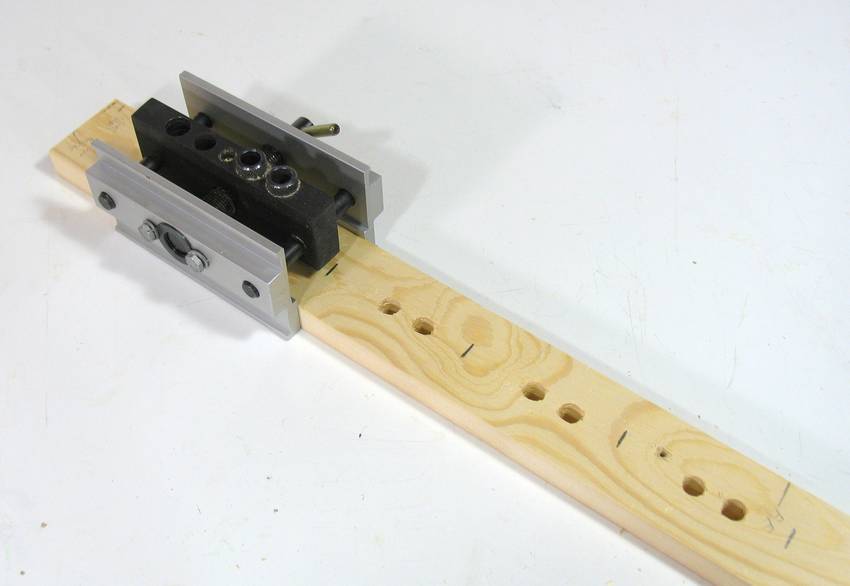
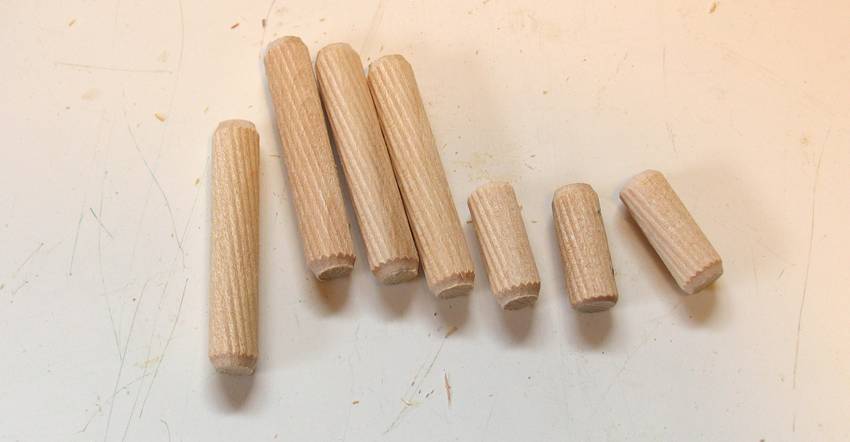 I used these pre-cut dowels. I got these by the bag from from Lee Valley Tools, but you
can get them from other stores dedicated to woodworking.
These pre-cut dowels are fairly accurate. Regular dowels from places like The Home Depot
are so inaccurate they aren't really usable. And even the "hardwood" ones seem to be made of
very soft wood.
I ran out of the short 1" (25 mm) dowels, so cut some of the 2" ones in half and
chamfered the edge on a belt sander.
I used these pre-cut dowels. I got these by the bag from from Lee Valley Tools, but you
can get them from other stores dedicated to woodworking.
These pre-cut dowels are fairly accurate. Regular dowels from places like The Home Depot
are so inaccurate they aren't really usable. And even the "hardwood" ones seem to be made of
very soft wood.
I ran out of the short 1" (25 mm) dowels, so cut some of the 2" ones in half and
chamfered the edge on a belt sander.
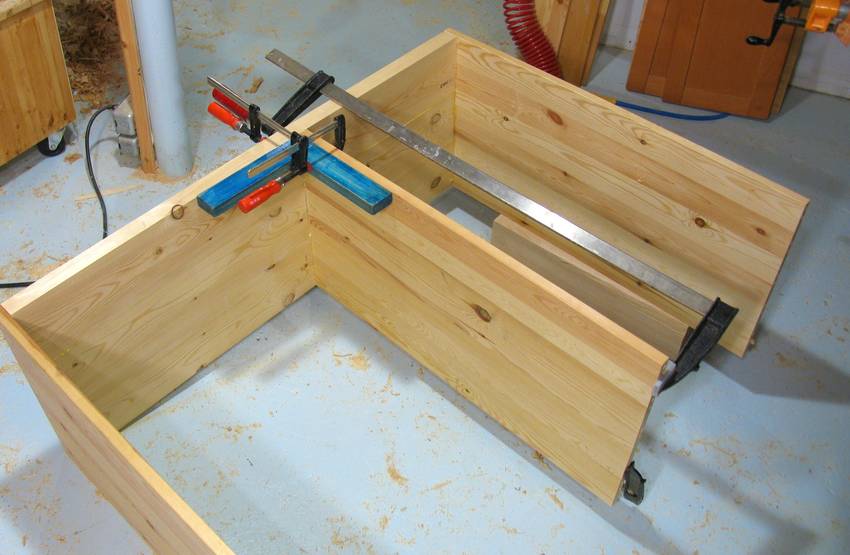 I used my wooden clamping square to make sure the panels
went together square as I glued them.
I used my wooden clamping square to make sure the panels
went together square as I glued them.
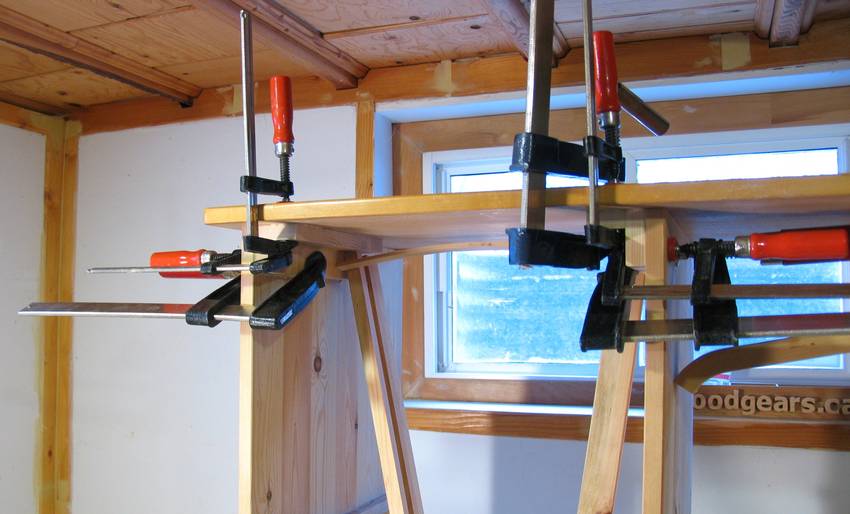
 Here I am ready to glue on the top. I didn't stop to take any photos of putting that on. No
time to lose when doing that sort of work - it takes long enough to put glue on all the surfaces,
so one has to be quick putting it all together before the glue dries.
Here I am ready to glue on the top. I didn't stop to take any photos of putting that on. No
time to lose when doing that sort of work - it takes long enough to put glue on all the surfaces,
so one has to be quick putting it all together before the glue dries.
 Because the sides of my drawers were not quite as high as the
drawer openings, I had to glue some blocks into the opening to keep the drawers
from tipping out of the hole when pulled half way out.
Because the sides of my drawers were not quite as high as the
drawer openings, I had to glue some blocks into the opening to keep the drawers
from tipping out of the hole when pulled half way out.
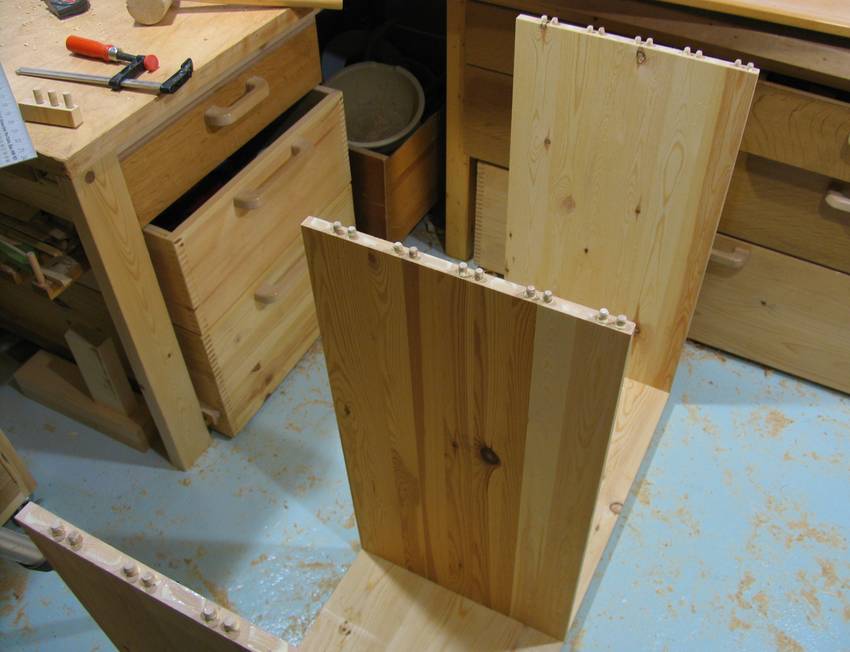
I had the idea of making L shaped braces instead of just blocks. The L-shaped braces are glued to the top panels and side panels to give the joint more rigidity.
 The L-shaped braces are finger joined on my screw advance
box joint jig, so they make for a very rigid corner connection when glued together and
then glued into the top corners.
The L-shaped braces are finger joined on my screw advance
box joint jig, so they make for a very rigid corner connection when glued together and
then glued into the top corners.
 Here's gluing the L-shaped braces in place.
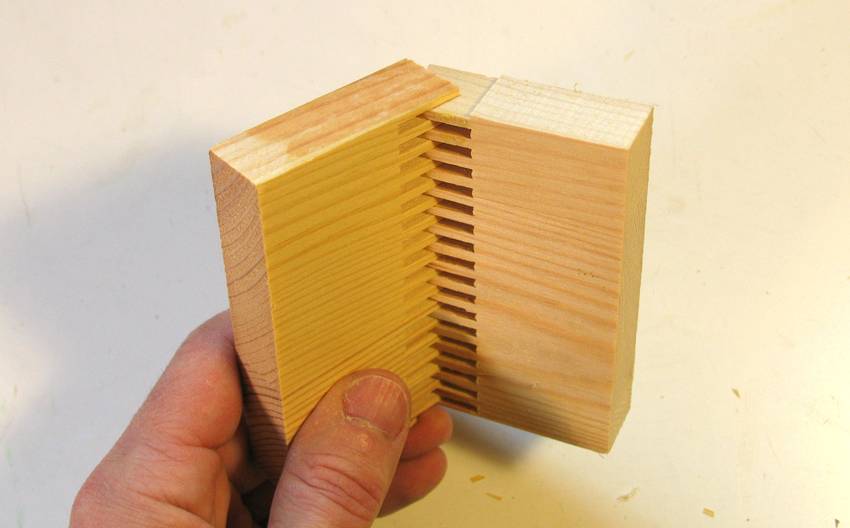
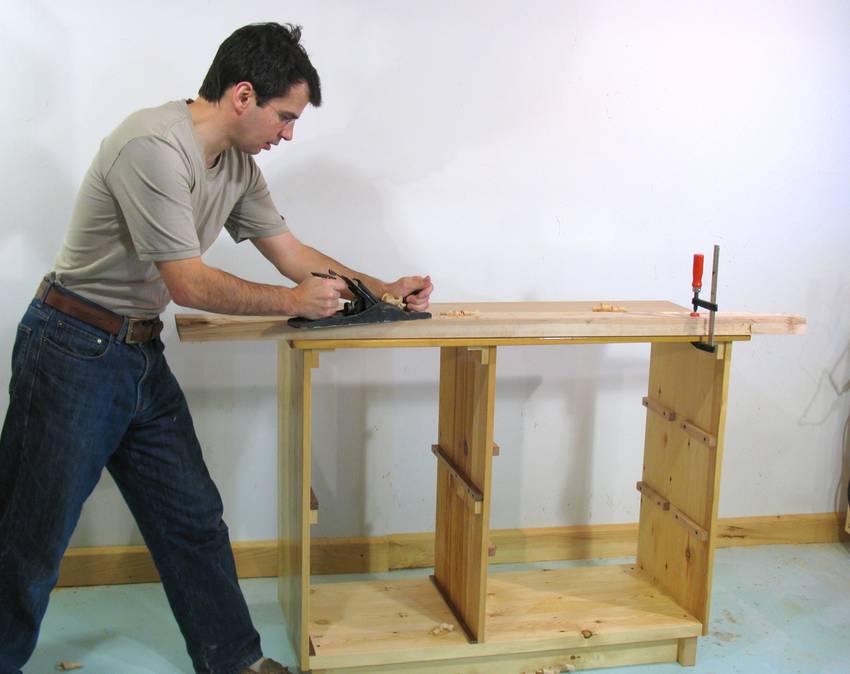 Between the dowel joints, the L-shaped braces, and the
finger joints on the front bottom corners,
this made for a very rigid frame, even though it's just made out of panels. The real rigidity
for a cabinet usually comes from the back, but even before I added that, I tried
using it as a "bench" for hand planing, and it was rigid enough!
Between the dowel joints, the L-shaped braces, and the
finger joints on the front bottom corners,
this made for a very rigid frame, even though it's just made out of panels. The real rigidity
for a cabinet usually comes from the back, but even before I added that, I tried
using it as a "bench" for hand planing, and it was rigid enough!
I also added some feet to the cabinet - these consisted of three pieces of 2x4 glued together and screwed to the bottom of the cabinet. Really straightforward, so I neglected to take photos of that.
More about Using dowels
Back to building a storage cabinet