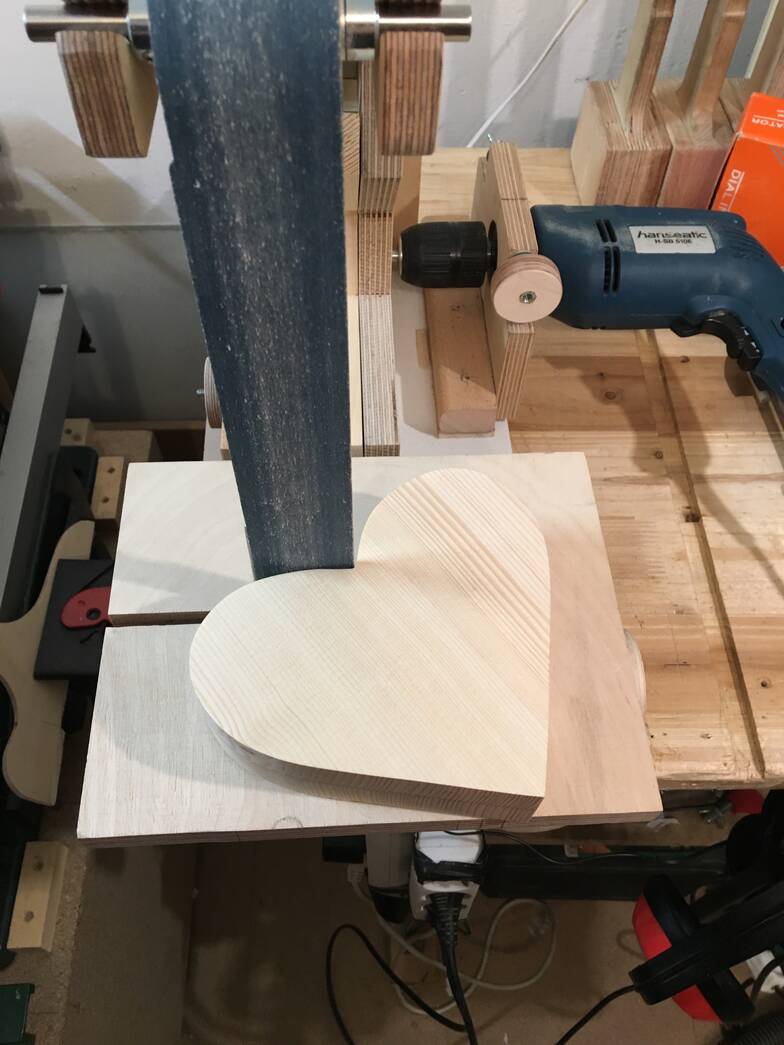
 Back in February I made a heart shaped box for my wife for Valentine's Day.
As I had cut it out on my bandsaw the edges had rough saw marks and needed sanding.
I have a small 6" disk sander that works quite well, but it was not possible to
sand inside the “V" at the top of the heart. I had bought
the plans for your
1"x42" / 1.5"x48"
sander plans sometime last year, however I had not built it yet.
I was able to sand the "V" in the heart by hand, but it took some time to get it
smooth and even. This prompted me to get off my but finally get the sander built.
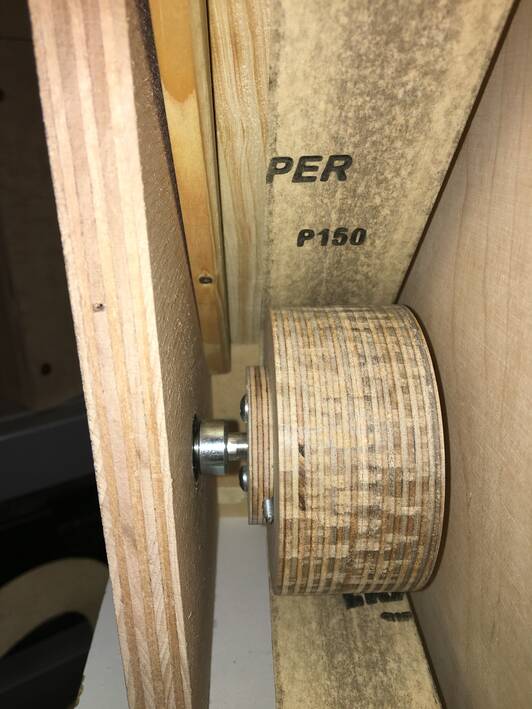
Photo shows how easy it would have been had I already built the strip sander.
Back in February I made a heart shaped box for my wife for Valentine's Day.
As I had cut it out on my bandsaw the edges had rough saw marks and needed sanding.
I have a small 6" disk sander that works quite well, but it was not possible to
sand inside the “V" at the top of the heart. I had bought
the plans for your
1"x42" / 1.5"x48"
sander plans sometime last year, however I had not built it yet.
I was able to sand the "V" in the heart by hand, but it took some time to get it
smooth and even. This prompted me to get off my but finally get the sander built.
Photo shows how easy it would have been had I already built the strip sander.
I did make three modifications from your plans.
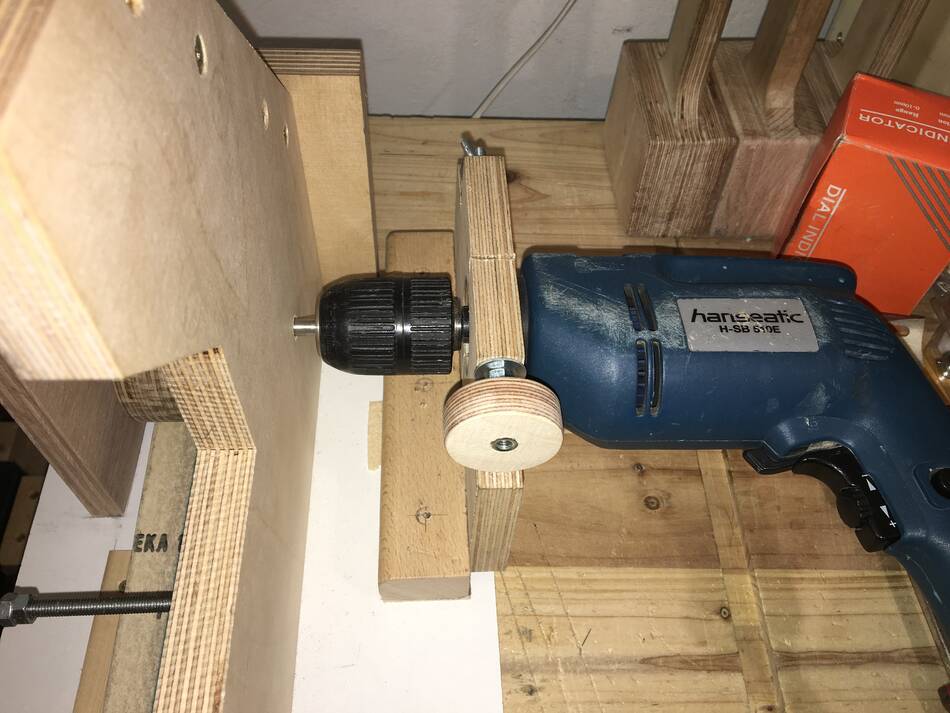
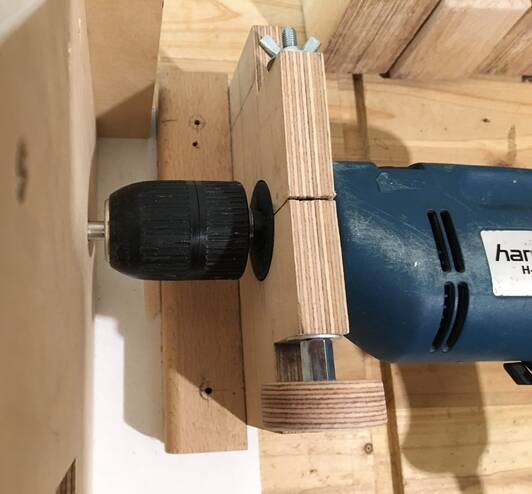 The first modification
I had no motor available so I powered it with an electric hand drill. The mount is Baltic birch plywood with a 35 mm hold drilled through and a slit cut vertically down across the hole, but not all the way to the bottom of the mount. There is a 6mm threaded rod through the top of the mount to clamp the drill tight in place. The knob on the near end of the mount in the photo makes it quick, easy and toolless to mount and remove the drill, as it is often needed for drilling purposes. One advantage of using the drill for power is that I can adjust the speed of the sanding belt.
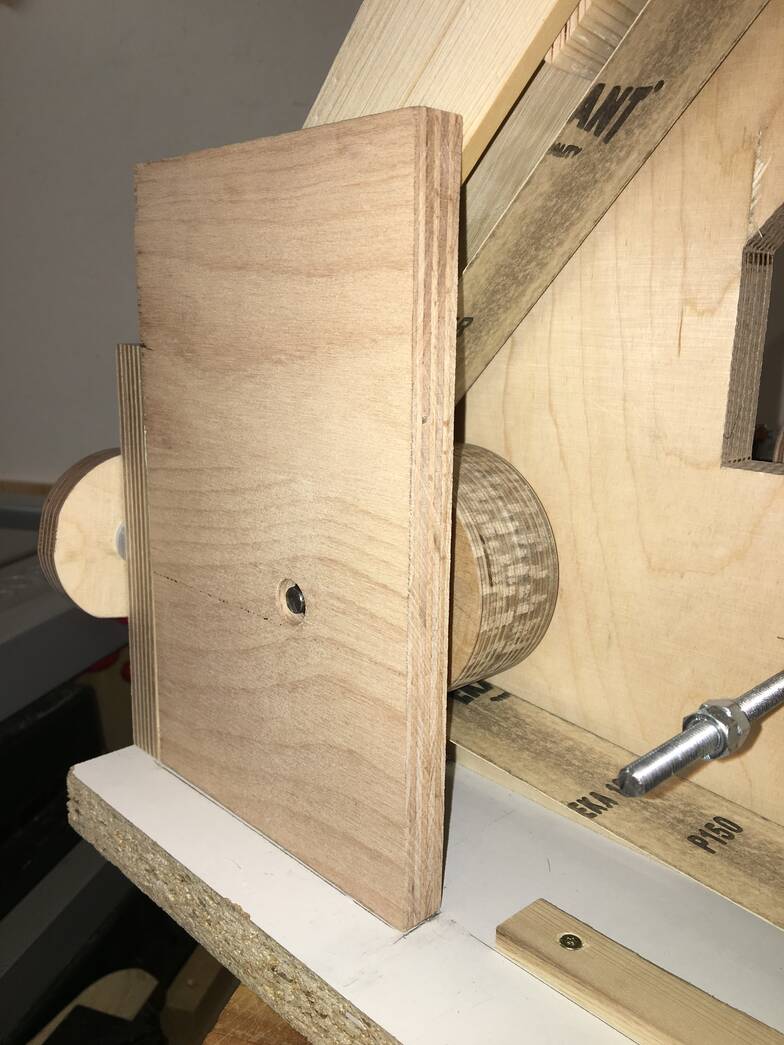
 The second modification
I wanted the drive wheel to be supported with bearings on both sides to take the sideways force off the hand drill, so there is one bearing in the main frame and a second one in a support piece on the other side of the wheel.
I considered the 2 bearings between the drill and the wheel instead, but I didn't want the drill taking up so much space to the side of the sander.
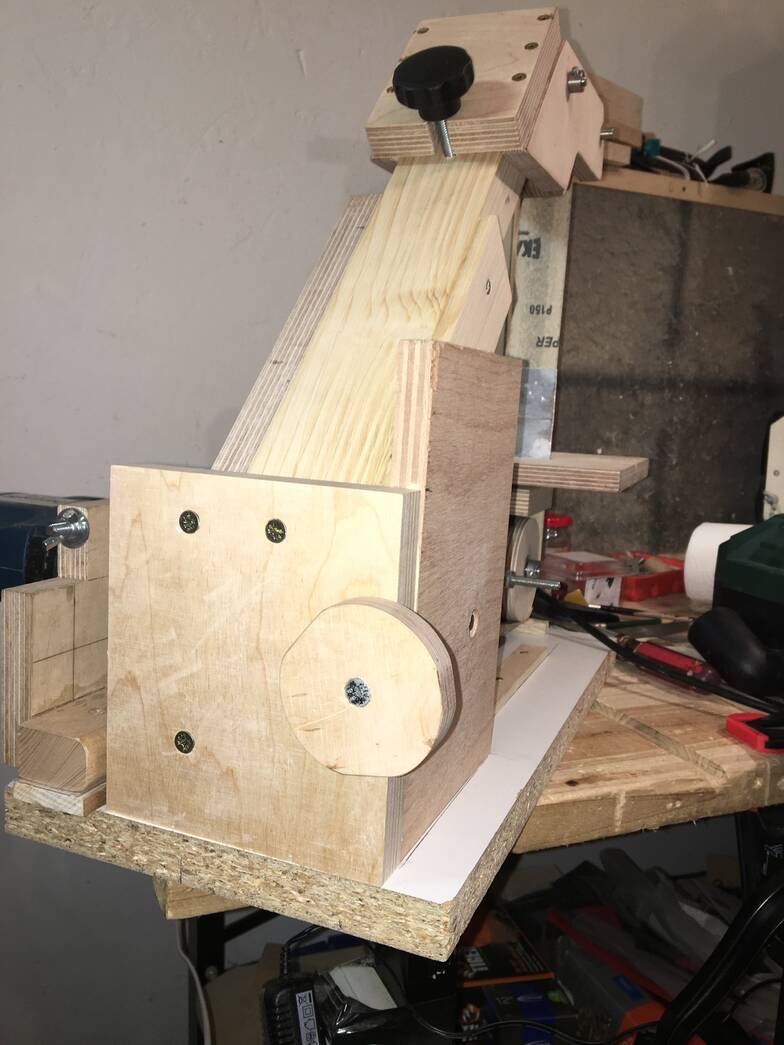 The support for the outside bearing for the drive wheel is held in place by a knob
with a 6mm bolt embedded in it that screws into a threaded insert in the edge of
the bearing support. The support fits tight on the base and this bolt pulls it
tight against the back plate of the sander. This one bolt holds the bearing mount
surprisingly stable. When changing the sanding belt you simply turn the knob to
remove the bolt and slide the support off the end of the axel. I did spend some
time and effort to ensure that the 2 bearings and the drill chuck were lined up
both vertically and horizontally.
The support for the outside bearing for the drive wheel is held in place by a knob
with a 6mm bolt embedded in it that screws into a threaded insert in the edge of
the bearing support. The support fits tight on the base and this bolt pulls it
tight against the back plate of the sander. This one bolt holds the bearing mount
surprisingly stable. When changing the sanding belt you simply turn the knob to
remove the bolt and slide the support off the end of the axel. I did spend some
time and effort to ensure that the 2 bearings and the drill chuck were lined up
both vertically and horizontally.

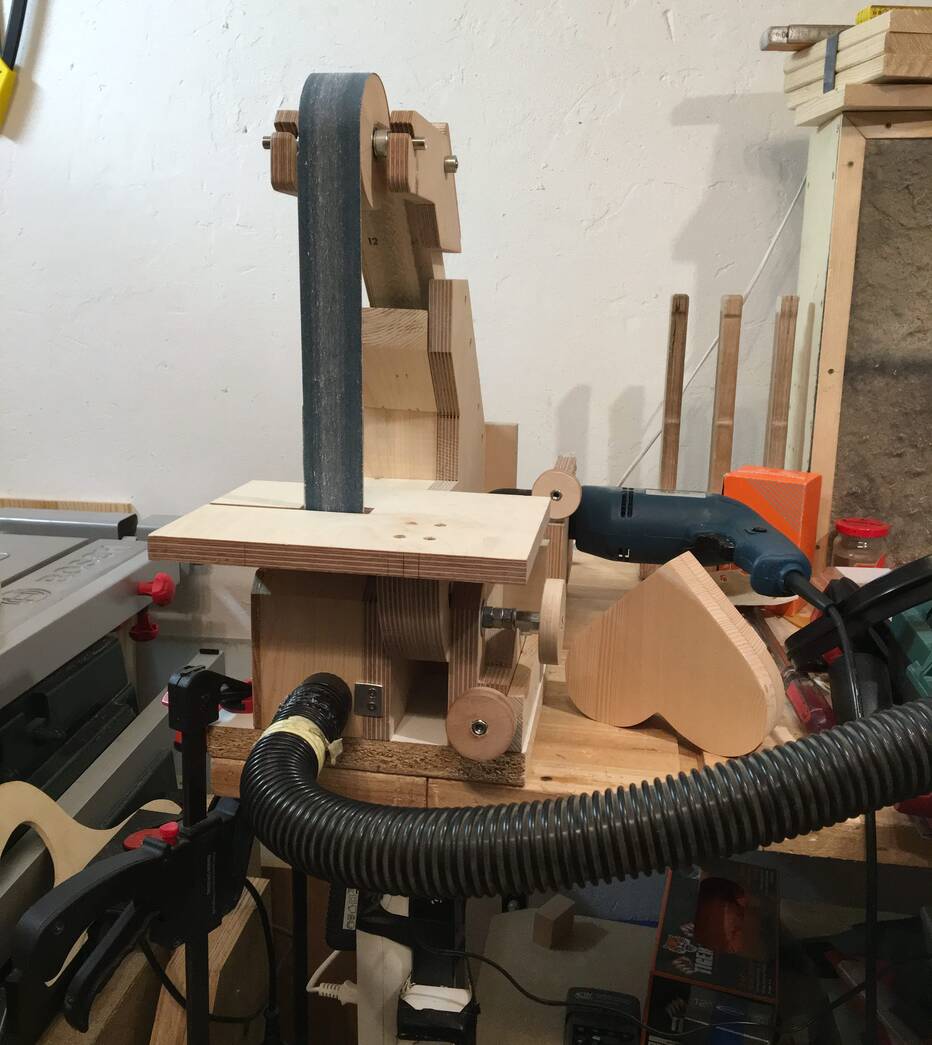
The third modification
While making one of the first sanding tests, before creating the enclosure, I had clamped the end of the vacuum hose under the bottom wheel to collect as much dust as possible. I was surprised to see that almost all of the dust was being sucked into the hose. So I tried putting the dust collection hole in the front. With the enclosure in place it appears that all the dust is sucked out with the flow of air moving through the sander from back to front. I did leave a small gap at the back when creating the enclosure to promote air to flow through the interior towards the vacuum hose. The dust collection system is not super powerful - it consists of 1.5" hose about 8 to 9 feet long that is connected to a "Dust Deputy" that is connected to a household vacuum cleaner (about 1200 watts / 220 volts). The hose is flexible enough so that it can be routed out of the way so as not to interfere with standing in front of the sander.
By the way, the bandsaw that I made the heart box with is your 14" design.
The frame is made entirely out of pallet wood. However I did have to buy
the MDF for the wheels. I also bought 20mm stainless steel rods and 20mm
bearings for the shafts. It is powered by a 3/4 HP motor that came out of a
jacuzzi bathtub pump. When I get a chance to organise the photos I'll send
some of them.
I have followed your youtube channel for several years and find it very interesting and informative, don't change what you're doing.
David Oakland
 Strip sander XL build
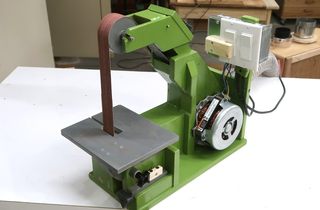 Strip sander XL
 1"x42" strip sander build
 Belt grinder build
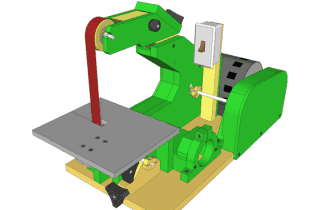 1.5"x48" Belt sander plans
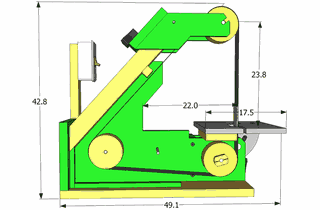 Specs for the 1.5x48" sander