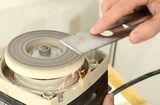
 My dad however, living in Northern Ontario, far away from a good sharpening service,
has been resharpening his jointer and planer blades himself using a high speed
grinder with a vertical axis, similar to the one shown at left, but bigger.
My dad however, living in Northern Ontario, far away from a good sharpening service,
has been resharpening his jointer and planer blades himself using a high speed
grinder with a vertical axis, similar to the one shown at left, but bigger.
My dad however, living in Northern Ontario, far away from a good sharpening service,
has been resharpening his jointer and planer blades himself using a high speed
grinder with a vertical axis, similar to the one shown at left, but bigger.
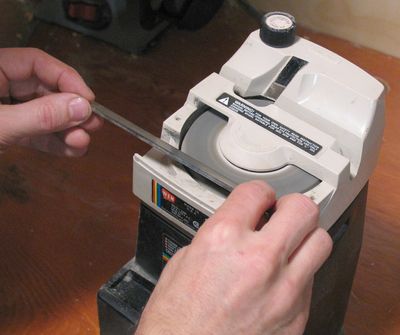
I found this grinder for cheap at a yard sale, so I decided that I should take another stab at resharpening jointer knives myself.
This time, with a fast running grinder, I had much better luck. The grinder is actually
a wet wheel, but it runs at 1700 rpm. The water pump on it is dead, so I always wet it
with my fingers. It's a very fine grit stone, so it's safe to touch while spinning.
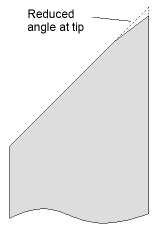
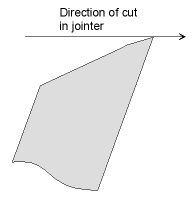 The stone however doesn't remove that much material, so I sharpen the edges to a lesser
angle, which means I only need to remove material near the edge. Of course, eventually
I'd have to cut away from the whole width of the blade, but I only use this technique to
resharpen the blades once or twice between sending them away for resharpening professionally.
That way, the edge does get straightened and cleanded up. My technique doesn't remove
nearly enough material to grind out nicks either. The whole idea is to use this
technique once or twice between getting the blades sharpened professionally.
The stone however doesn't remove that much material, so I sharpen the edges to a lesser
angle, which means I only need to remove material near the edge. Of course, eventually
I'd have to cut away from the whole width of the blade, but I only use this technique to
resharpen the blades once or twice between sending them away for resharpening professionally.
That way, the edge does get straightened and cleanded up. My technique doesn't remove
nearly enough material to grind out nicks either. The whole idea is to use this
technique once or twice between getting the blades sharpened professionally.
 Even with me grinding the blades at a slightly different angle, it still takes quite a bit
of grinding to restore the edge. The best way I found to check if I'm 'done' is to see if
Even with me grinding the blades at a slightly different angle, it still takes quite a bit
of grinding to restore the edge. The best way I found to check if I'm 'done' is to see if
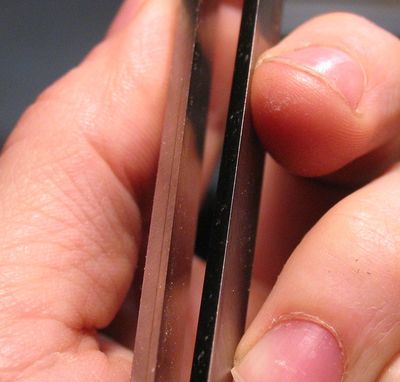
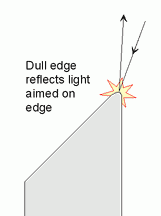 any light is reflected off the top of the blades. The blade at left is a professionally
sharpened with a good edge, while the blade at right is in need of sharpening. You can see
light reflected off the edge on the blade at right, but none on the very pointy edge at left.
any light is reflected off the top of the blades. The blade at left is a professionally
sharpened with a good edge, while the blade at right is in need of sharpening. You can see
light reflected off the edge on the blade at right, but none on the very pointy edge at left.
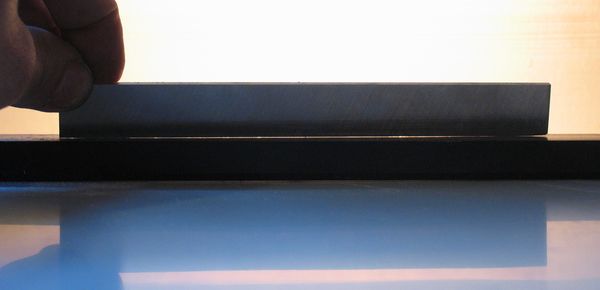 The other thing to check for is to make sure the blade's edge is still straight. Holding it
against something straight and flat, and shining light at it from the back easily reveals
if the blade is not straight. I use a piece of black anodized aluminium that came from some
piece of equipment I disassembled years ago. Aluminium extrusions are in general remarkably
straight, as is cold rolled steel. But a jointer table will certainly do also for checking
straightness. It's just a little less convenient.
The other thing to check for is to make sure the blade's edge is still straight. Holding it
against something straight and flat, and shining light at it from the back easily reveals
if the blade is not straight. I use a piece of black anodized aluminium that came from some
piece of equipment I disassembled years ago. Aluminium extrusions are in general remarkably
straight, as is cold rolled steel. But a jointer table will certainly do also for checking
straightness. It's just a little less convenient.
The blade shown here has nearly 0.1 mm deviation from straight, or about .004". It came with
my brother's used jointer. I did my best to resharpen it with my procedure for a test, but really,
these blades need professional resharpening. That said, when I put the blades back in,
they worked a lot better than before. But you could still see the effects of nicks in the
blades on the planed wood.
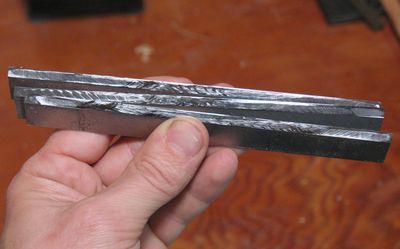 Here's what my resharpened blades look like. They are shiny, though not as consistently so.
Note that I'm shining the light on them so that the normal bevel reflects back at the camera,
as opposed to shining the light right onto the edge. So in this case, reflections are good.
Here's what my resharpened blades look like. They are shiny, though not as consistently so.
Note that I'm shining the light on them so that the normal bevel reflects back at the camera,
as opposed to shining the light right onto the edge. So in this case, reflections are good.
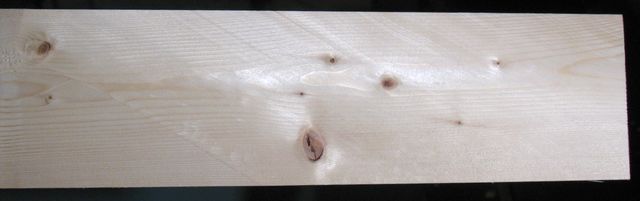 And finally, a really tough test of wether your jointer blades are good is to pass a piece of
soft wood over the jointer at a slight angle. That way, any streaks and nicks go at an angle
to the grain, and can be seen more easily. This shot was taken to maximize any look of inconsistency,
And finally, a really tough test of wether your jointer blades are good is to pass a piece of
soft wood over the jointer at a slight angle. That way, any streaks and nicks go at an angle
to the grain, and can be seen more easily. This shot was taken to maximize any look of inconsistency,
Running a piece of hardwood over the knives straight resulted in a surface that was silky smooth to the touch. So really, this check of running soft wood over at an angle is more for obsessive perfectionists, as it is likely to make you feel dissatisfied with perfectly adequate blades. Although I suppose this tough test could be useful for comparing different sharpening techniques, or maybe even different jointers.
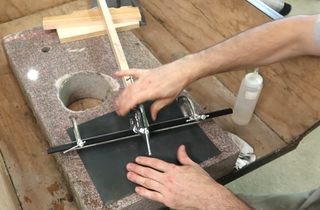
I was on more of a quest to get the blades exactly straight for my jointer some time later, so I used this method to get them really straight.
 Handplane sharpening
Back to my woodworking website
 Another sharpening method
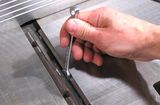 Setting and adjusting
 Hand sharpening
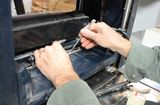 Changing planer knives
 Honing jointer knives
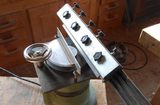 Planer blade sharpening machine
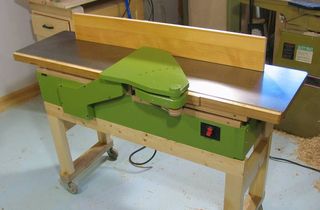
 Sharpening drill bits
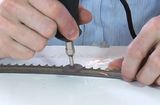 Sharpening bandsaw
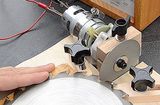 Circular saw blade