Carving a wooden chain with only power tools
 I last carved a chain out of solid wood when I was 17 years old.
But ever since I built the pantorouter,
I have been thinking about using it to carve a chain.
I last carved a chain out of solid wood when I was 17 years old.
But ever since I built the pantorouter,
I have been thinking about using it to carve a chain.
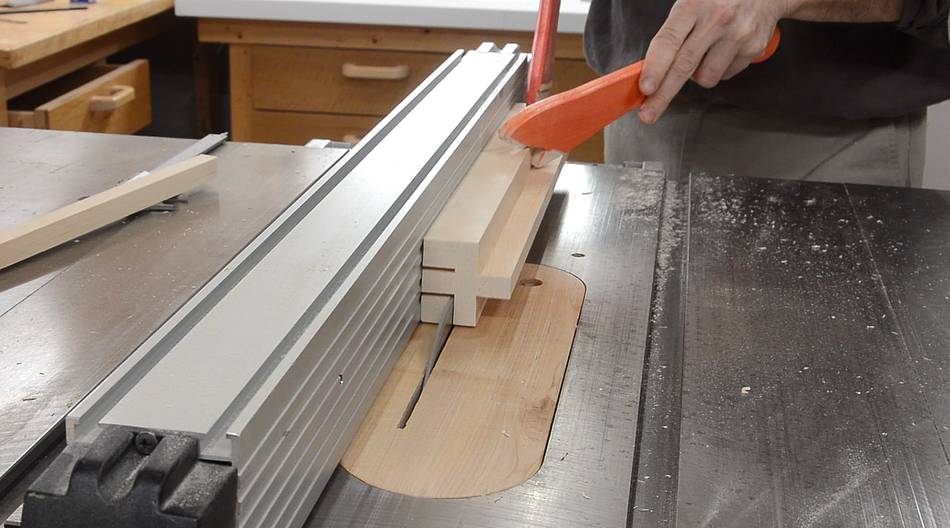
I started by cutting out a cross-shape on the table saw. This removes much of the wood that won't be part of the chain.
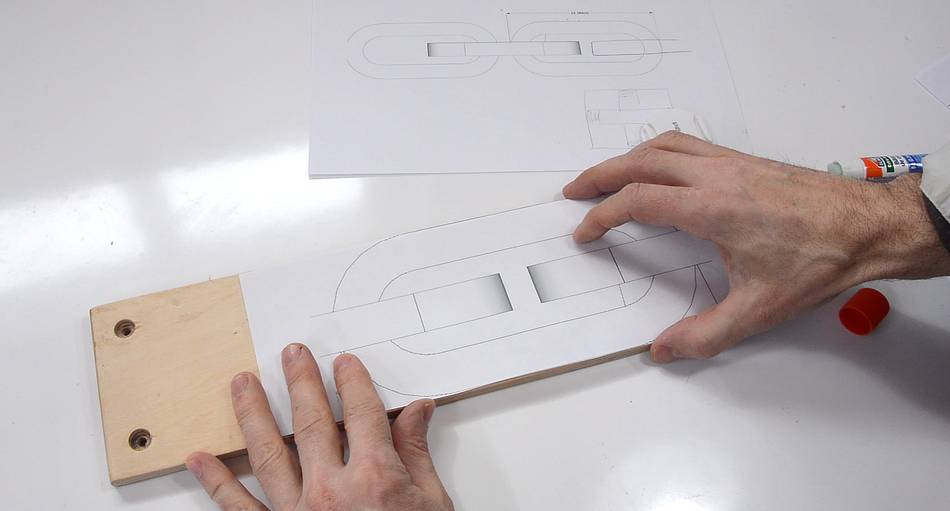 I drew the chain in CAD (SketchUp) to work out the dimensions, then printed out
a picture of the links shown face on at 2x size for making a
pantorouter template. I stuck this on a scrap of plywood...
I drew the chain in CAD (SketchUp) to work out the dimensions, then printed out
a picture of the links shown face on at 2x size for making a
pantorouter template. I stuck this on a scrap of plywood...

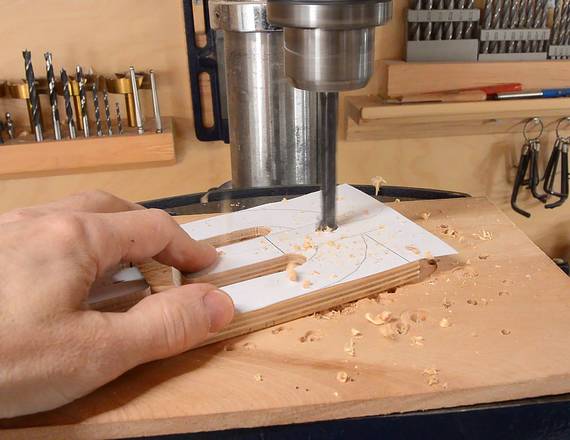
 ...and then I drilled the corners out and cut it out on the bandsaw.
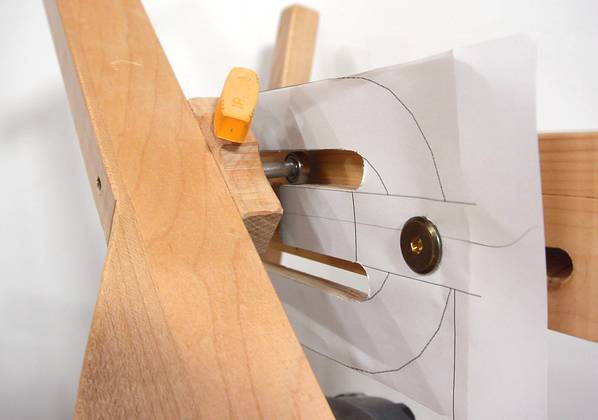
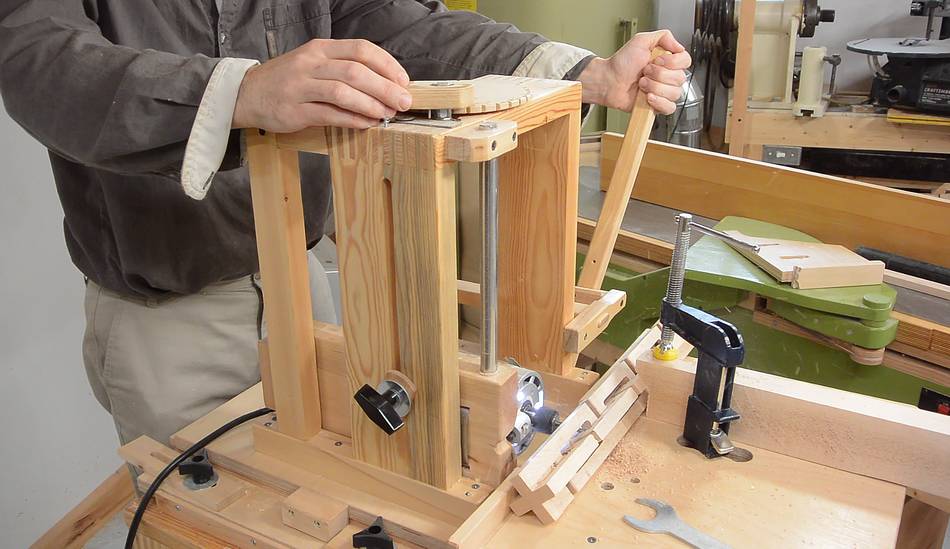
At right, making sure the 1/2" follower bearing fits in all the slots.
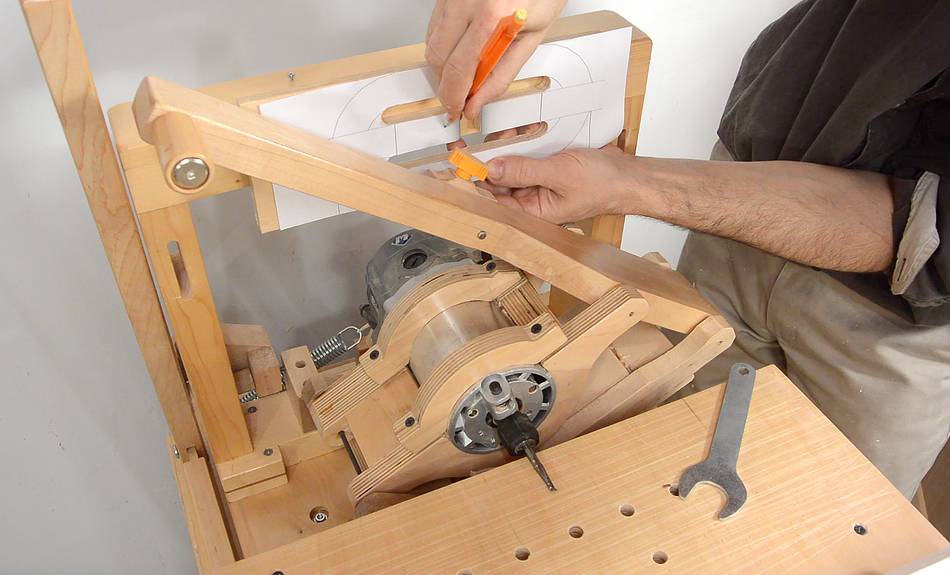
 At right, installing the follower bearing in the pantorouter. With a 1/4" (6
mm) bit in the router, and the bit resting on the table, the bottom
of the follower bearing should end up flush with the bottom edge
of the template. I then mark the height I need for the mounting holes.
At right, installing the follower bearing in the pantorouter. With a 1/4" (6
mm) bit in the router, and the bit resting on the table, the bottom
of the follower bearing should end up flush with the bottom edge
of the template. I then mark the height I need for the mounting holes.

 I drilled the mounting holes and used some bolts with large flat
heads to attach it to the pantorouter's template holder.
I drilled the mounting holes and used some bolts with large flat
heads to attach it to the pantorouter's template holder.
 Checking the alignment. With the follower bearing in the upper slot, the
router bit should be just above the wide part of the blank.
Checking the alignment. With the follower bearing in the upper slot, the
router bit should be just above the wide part of the blank.
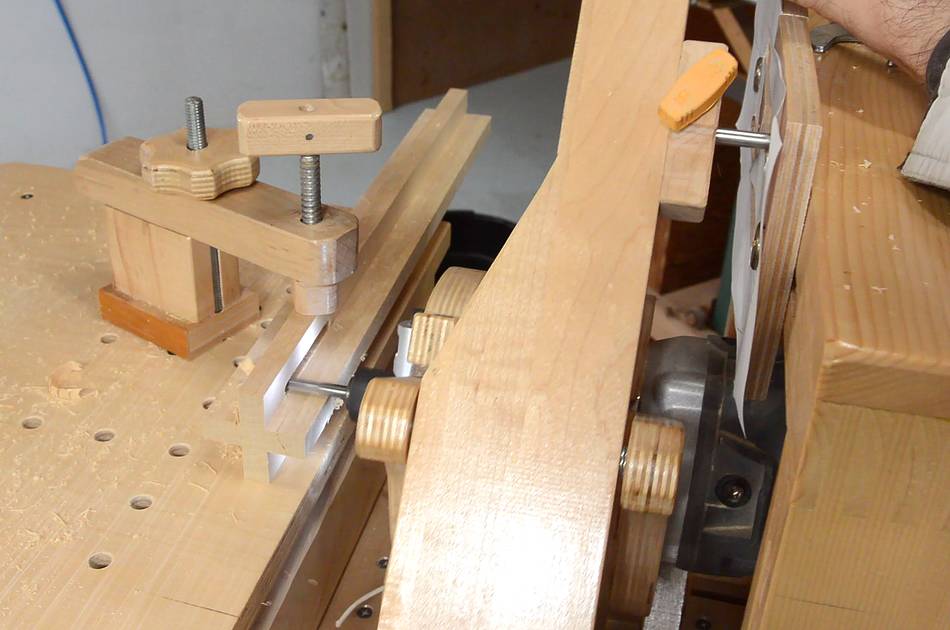 The workpiece is clamped down with a
hold down clamp.
The workpiece is clamped down with a
hold down clamp.
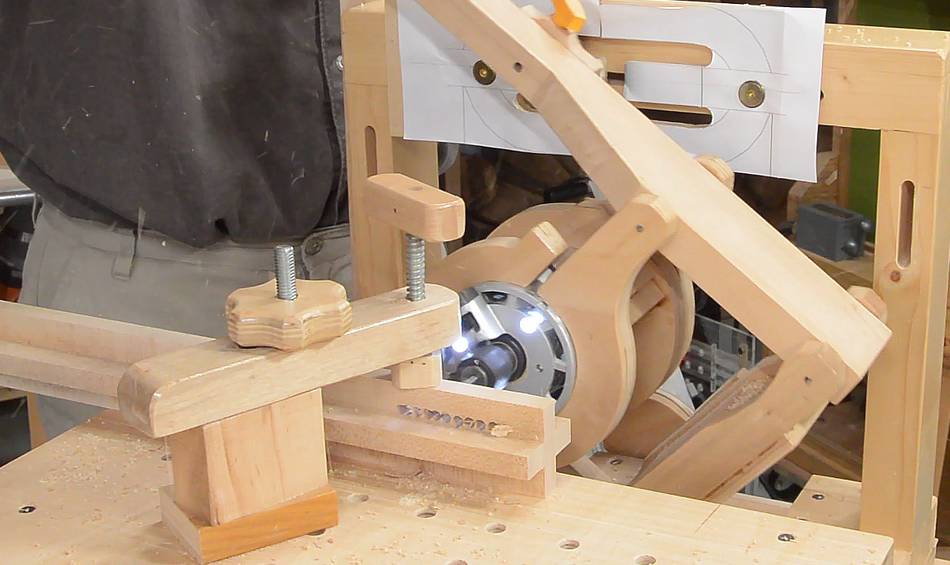
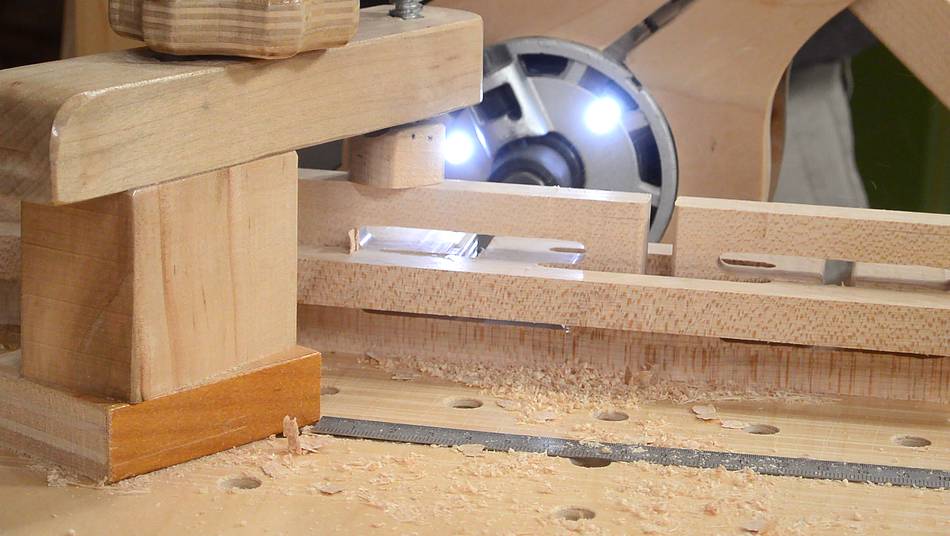
Using the template, I route a sideways "H" shape into the workpiece, with a long slot top and bottom, and a vertical slot in the middle.
 With 10 cm from one link to the next, I rotated the stock by 90 degrees,
advanced it by 10 cm, and routed the next set of slots.
With 10 cm from one link to the next, I rotated the stock by 90 degrees,
advanced it by 10 cm, and routed the next set of slots.
But then I realized my mistake - 10 cm is actually two links. I should have moved it by 5 cm and rotated, and the cut 10 cm further should be at the original orientation. I had cut up half my workpiece by the time I realized. But I was still able to make three interlocking links with what was left.
 Starting over with a new workpiece. I did most of the cutting
by making a series of plunge cuts. Plunge cuts into side grain work much
better than trying to slide the bit side-to-side (which would result in
cutting end-grain). After making a series of holes, I clean it up
by sweeping side-to-side.
Starting over with a new workpiece. I did most of the cutting
by making a series of plunge cuts. Plunge cuts into side grain work much
better than trying to slide the bit side-to-side (which would result in
cutting end-grain). After making a series of holes, I clean it up
by sweeping side-to-side.
 Proceeding with cutting the slots.
 Here's what it looks like after machining on the pantorouter.
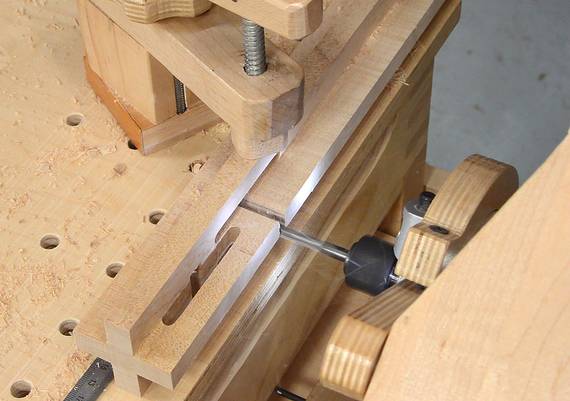
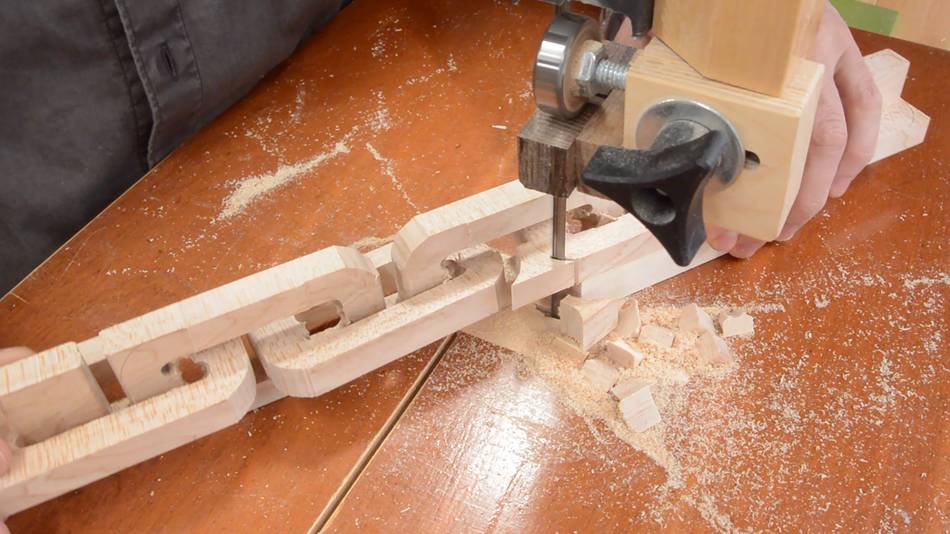
 The next step is to separate the links on the inside.
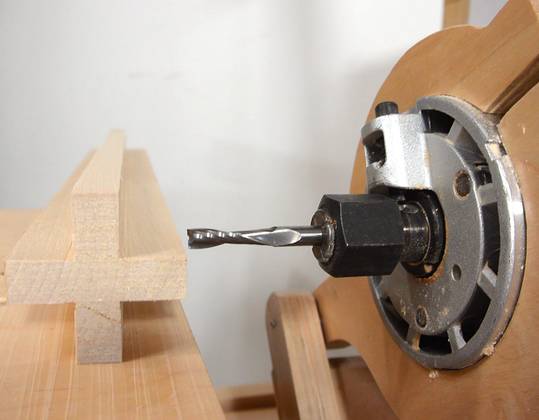
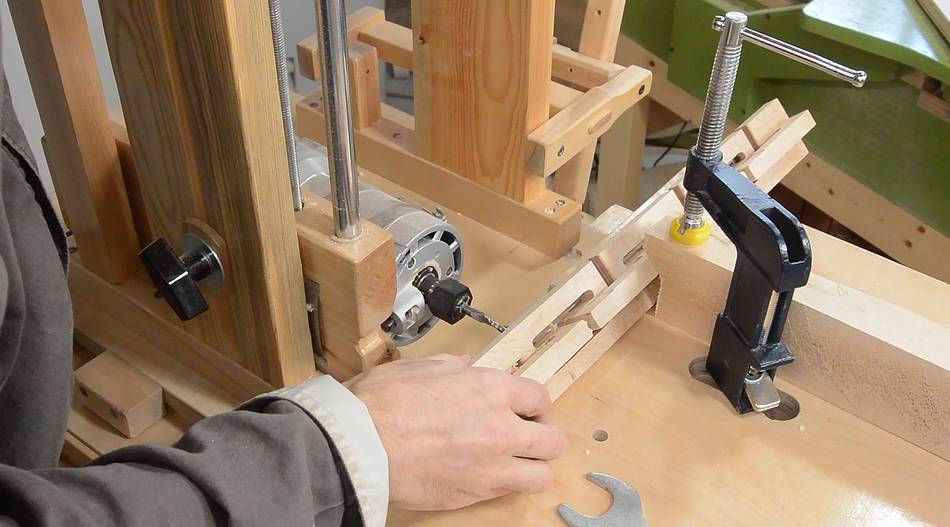
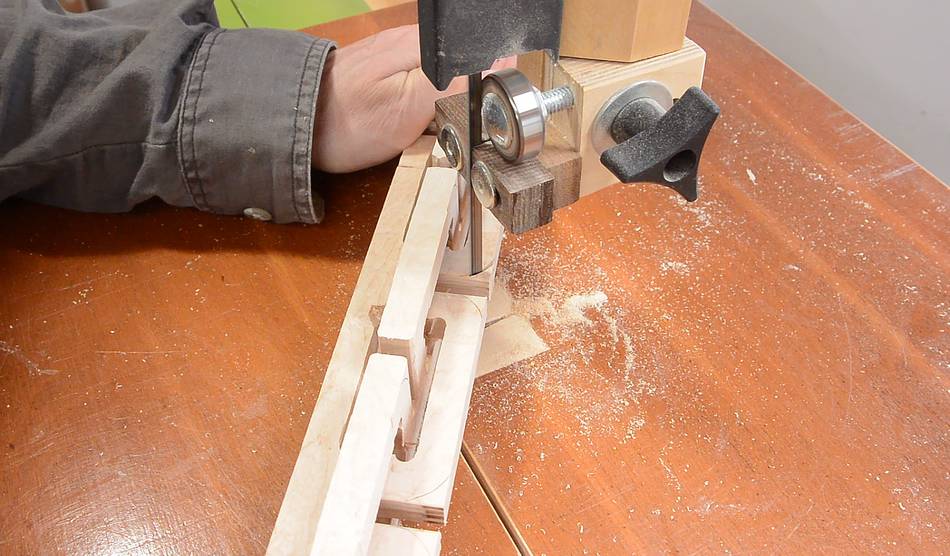
I did this by mounting the workpiece diagonally on my slot mortiser and using a 1/4" bit to plunge in. I had to make two plunge cuts, separated vertically by 1/8" (3 mm), and another set of plunge cuts from the other diagonal to fully separate the pieces.
 I used the height adjustment crank to space the holes vertically.
The counter wheel counts the turns I'm making on the crank so
I don't have to worry about tracking where I am and counting turns.
I used the height adjustment crank to space the holes vertically.
The counter wheel counts the turns I'm making on the crank so
I don't have to worry about tracking where I am and counting turns.
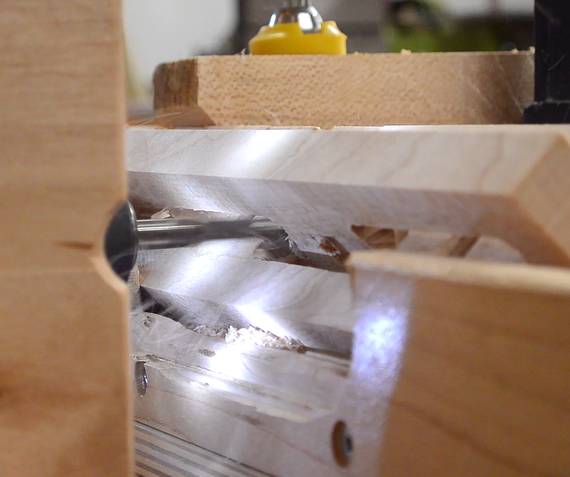
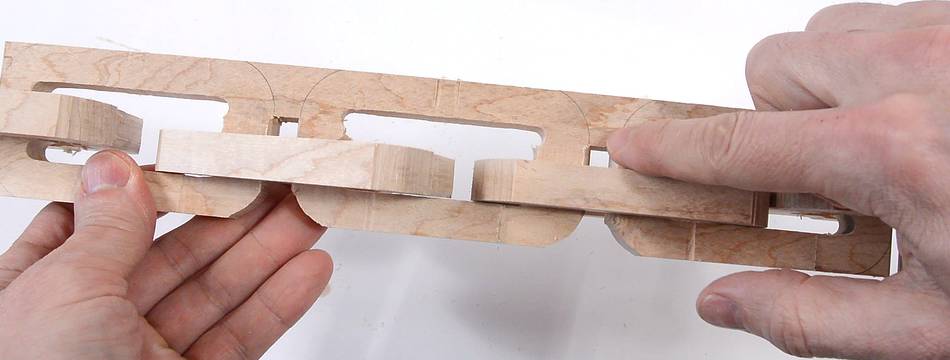
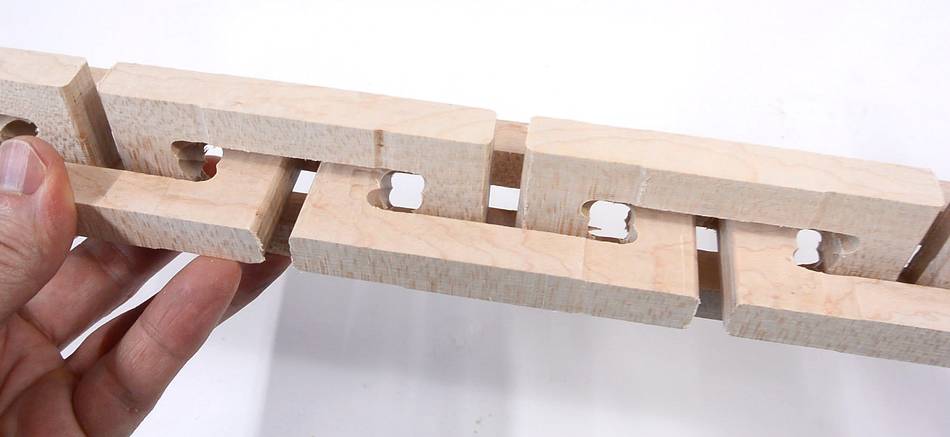 Links now mostly separated, but they are still held together
because the cut between links, which I made on the pantorouter,
didn't go all the way across the workpiece.
Links now mostly separated, but they are still held together
because the cut between links, which I made on the pantorouter,
didn't go all the way across the workpiece.
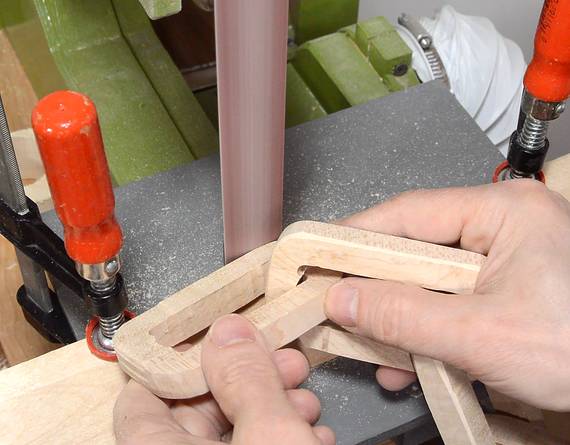
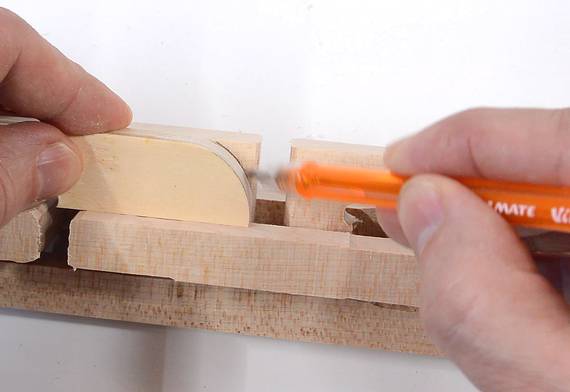 I made a small marking gauge out of plywood to mark the curvature
of the links, then cut that on the bandsaw.
I made a small marking gauge out of plywood to mark the curvature
of the links, then cut that on the bandsaw.
I don't have any support directly under the workpiece, so I have to hold it firmly to keep it from flipping down unexpectedly.
 Cutting the notches into the long straight edge. This starts
to free the links. At this point, I had to hold a piece
of wood under where I'm cutting to give it support.
Cutting the notches into the long straight edge. This starts
to free the links. At this point, I had to hold a piece
of wood under where I'm cutting to give it support.
 Every other link is now free. The other links are still held together
by a straight piece of wood.
Every other link is now free. The other links are still held together
by a straight piece of wood.
 Cutting the notches in the other rail. This frees up the links,
turning it into an actual chain.
Cutting the notches in the other rail. This frees up the links,
turning it into an actual chain.
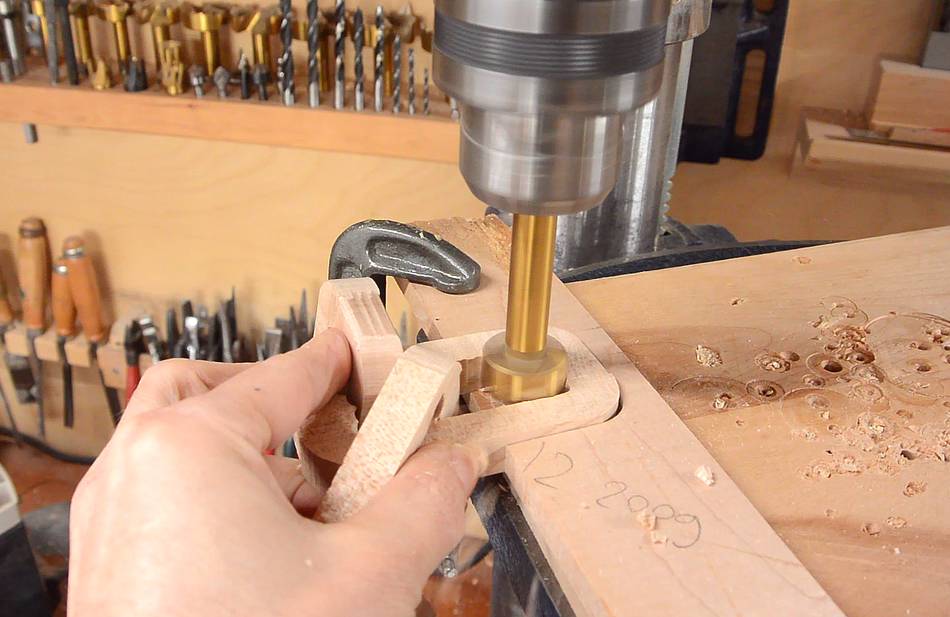 The inside corners of the links are kind of rough. I used a Forstner
bit, and a jig on the drill press to round those out a bit more.
The inside corners of the links are kind of rough. I used a Forstner
bit, and a jig on the drill press to round those out a bit more.

 Then it's time for sanding, lots of sanding. The
strip sander comes in very handy for this.
Then it's time for sanding, lots of sanding. The
strip sander comes in very handy for this.
I clamped a strip of wood onto the table, so that I can better sand the edges of the interlocked links.
I'm also sanding a chamfer on all the outside edges.
 The inside edges still need chamfering.
Seeing that I only used power tools so far, I figured I might as well do that with a power tool as well.
 But sanding with a Dremel is a tedious activity.
A chip carving knife chamfers the
edges quicker, quieter, and with less dust.
But sanding with a Dremel is a tedious activity.
A chip carving knife chamfers the
edges quicker, quieter, and with less dust.
 Chain all done.
My intention was that the ends of the links would be more round than this. I cut away too much from the ends of the links when I freed them, or maybe I cut the slots inside a bit too long. At any rate, I didn't have enough length left at the ends to make a nice semicircular shape.
I rubbed some salad bowl finish onto the links for a varnish. I figure baby Harriet will probably put the chain in her mouth eventually, and that seems like a quick, safe and easy finish choice.
Tools and machines used:
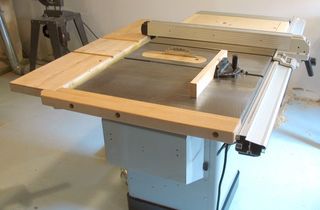 Table saw
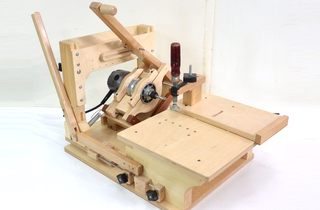 The Pantorouter
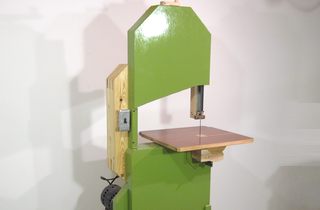 Bandsaw
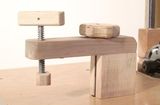 Hold down clamp
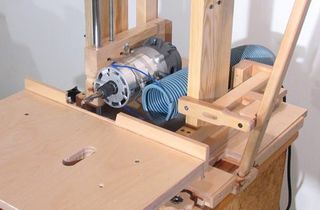 Slot mortiser
 Strip sander
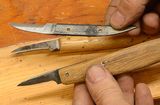 Chip carving knife
See also:
 More toy projects
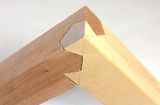 Clever 3-way joint
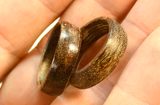 Making wooden rings
Back to my Woodworking website