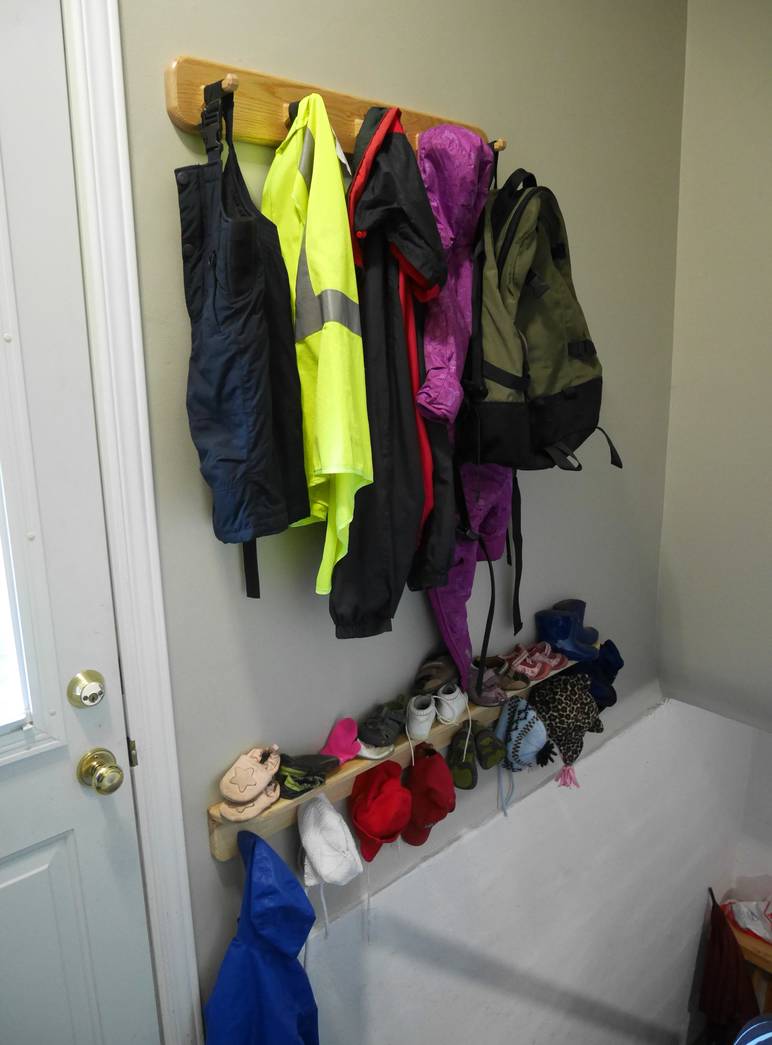
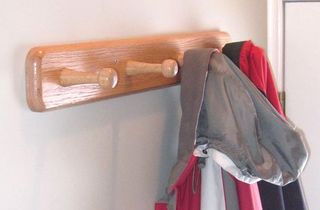
I previously made these coat hooks in 2010,
then this boot nook and
these ones in 2014 after Rachel moved in.
Rachel then added these mitt hooks,
but thanks to baby, we are out of places to hang stuff by the back door again,
so I made more coat hooks.
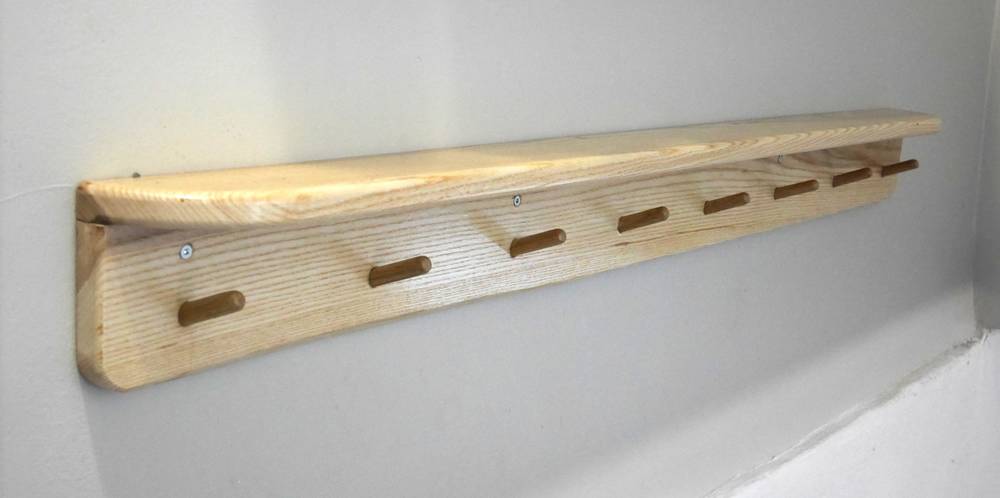
The coat hooks consist of a board with dowels in it, with another board
above it as a shelf for baby's shoes. The dowels stick out at an angle.
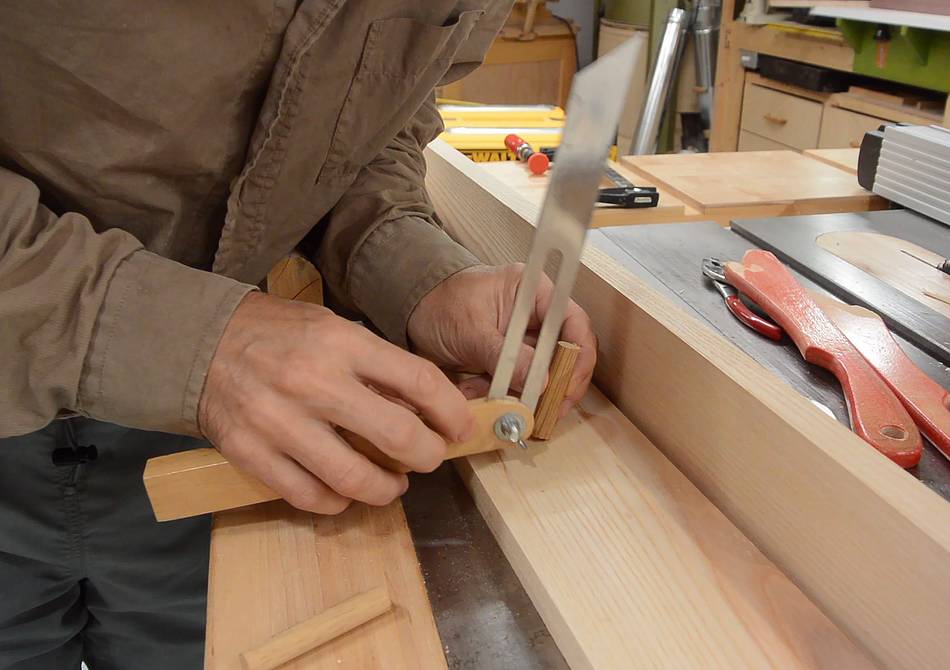
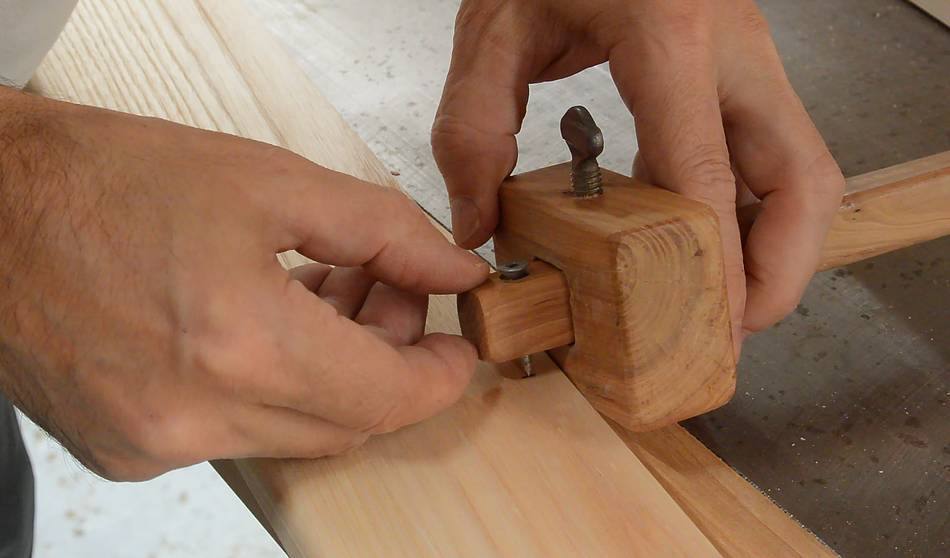
Here I'm eyeballing what angle would look good and setting the bevel
gauge to that angle.
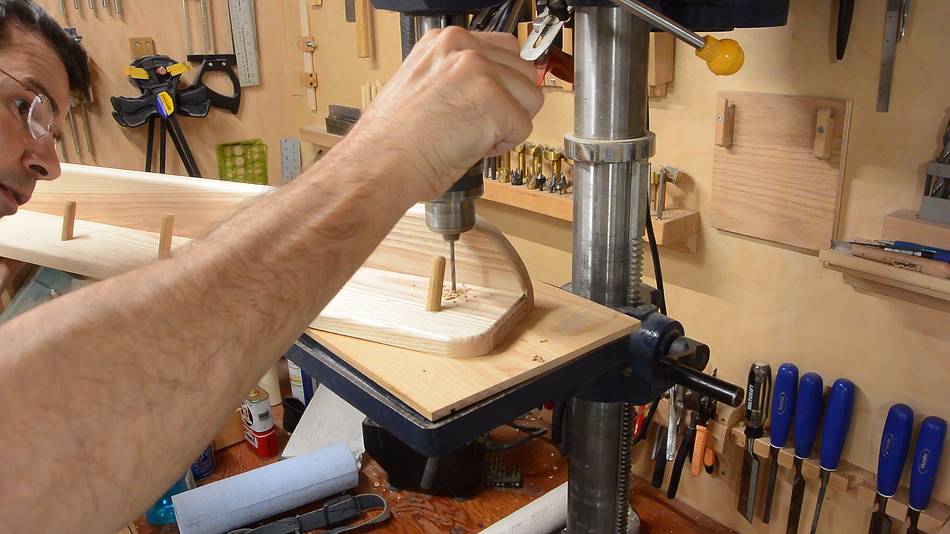
I need to drill some angled holes for the dowels. But if I try to drill
in at an angle the drill will probably make a mess when entering the wood,
so I want to build a drilling guide to help me.
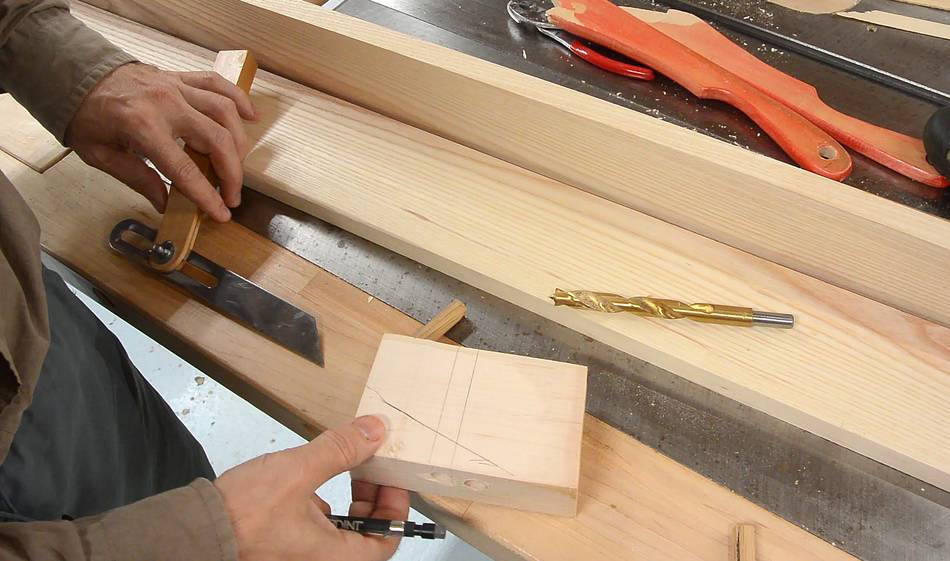
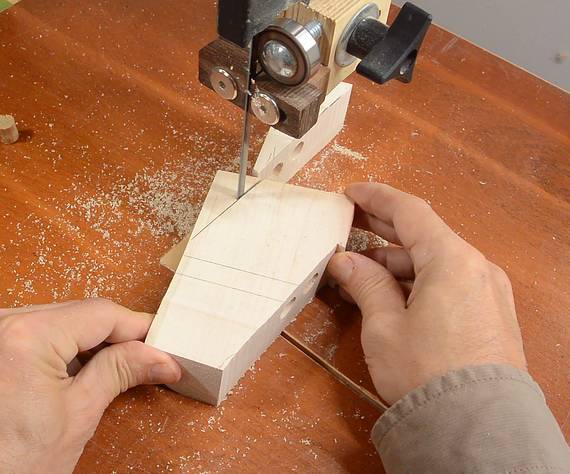
This block of wood will be my drill guide. I started by drilling
a hole through it. Now I just need to cut it so it rests against
the wood at an angle.
I left a small "hook" on one side to help position it.
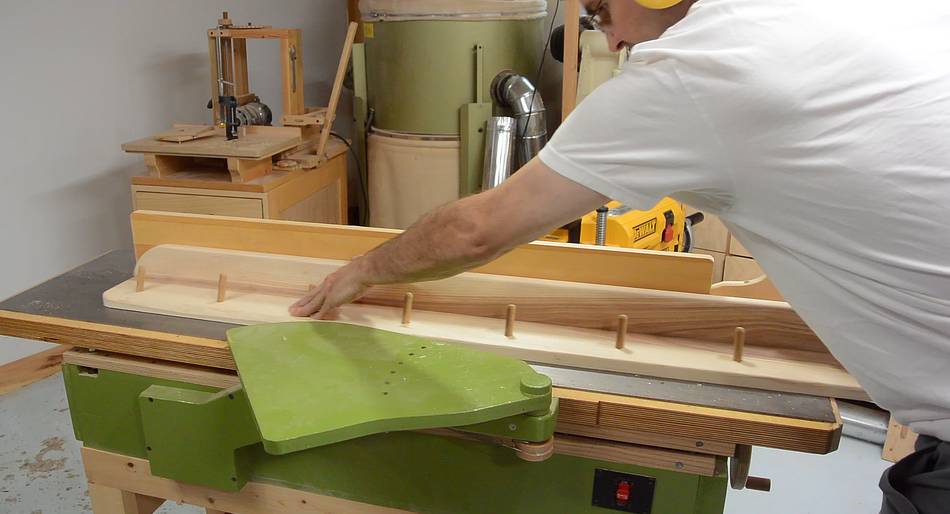
Laying out where the dowels will be. I'm spacing them 16 cm apart.
I'm using my calculator to work out the positions along the board.
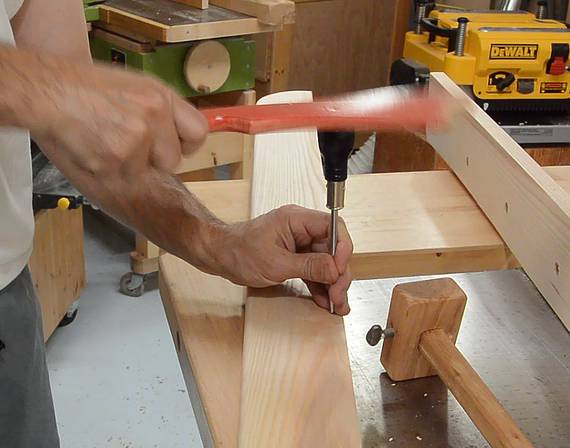
Then drilling the holes, with a hand drill. Ash is a very hard wood
and I really had to lean on the drill to make the holes.
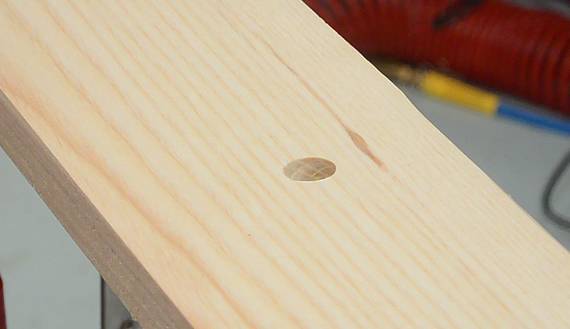
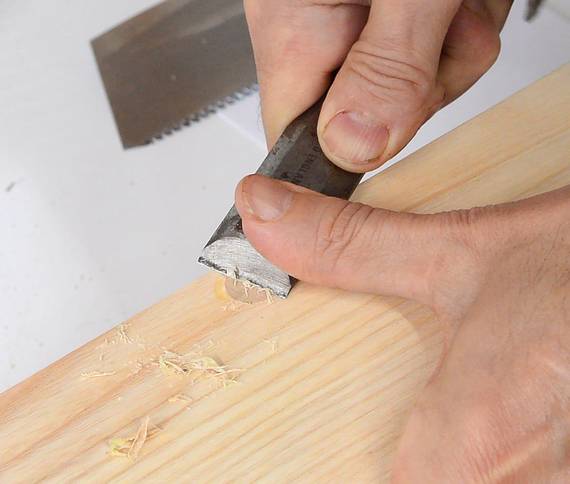
The jig worked, leaving very clean holes where the drill entered.
There was some chip-out on the back. I used
a scraper to cut off anything that stuck out.
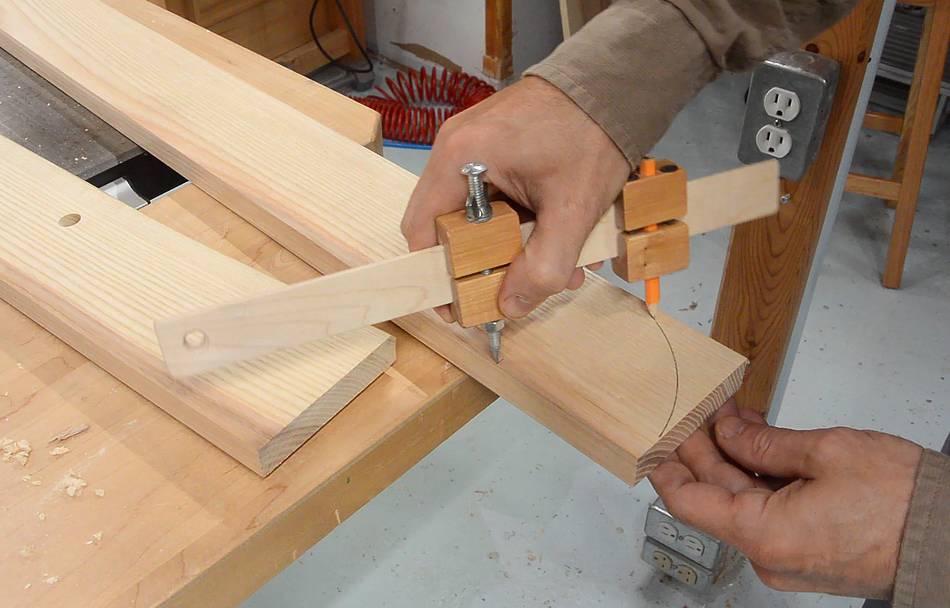
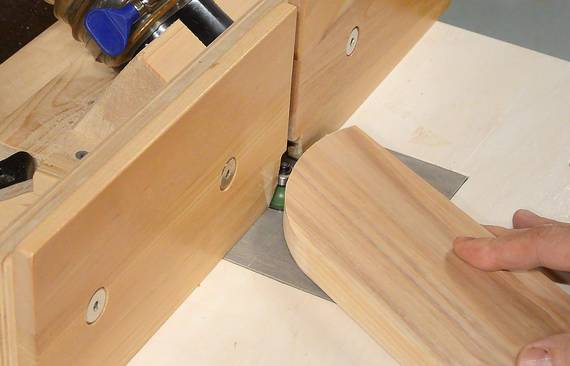
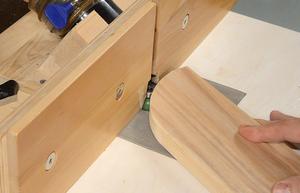
Laying out rounded ends for the shelf using my
beam compass...
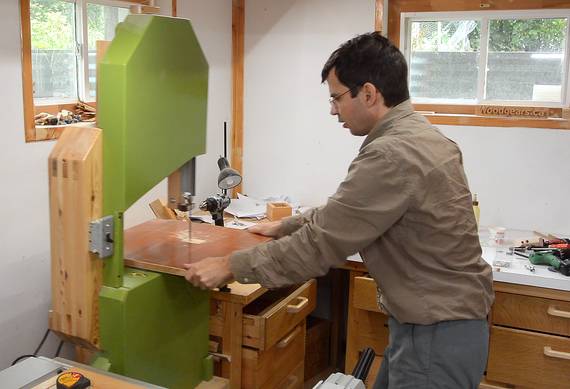
...then cutting it on the bandsaw.
As usual for longer workpieces,
I have to pull the bandsaw out from the wall to have room for the cut.
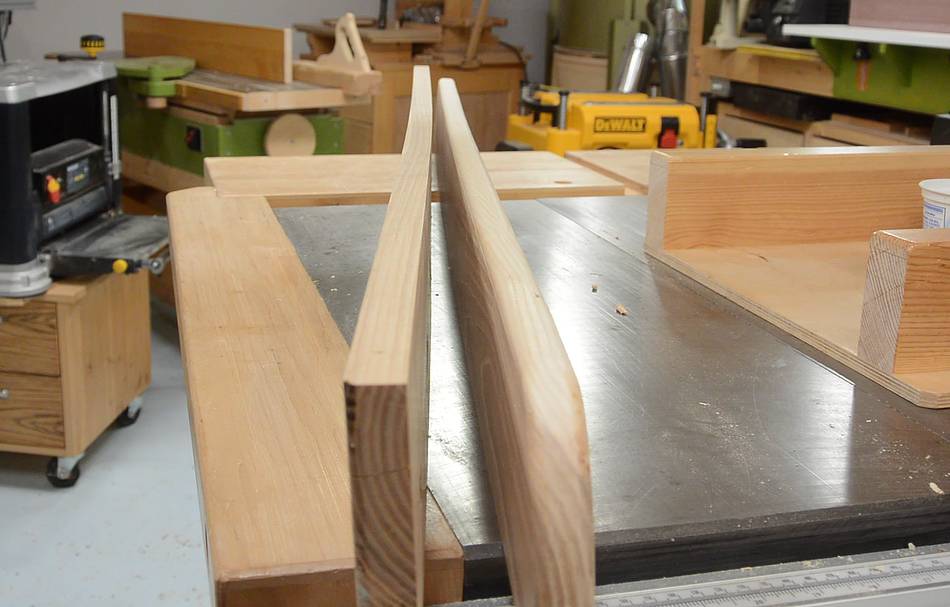
Unfortunately, the boards were not entirely flat, and too warped
to try to plane that out on the jointer. My plan was to force them straight
when joining them. To help with that, I reinforced the joint with dowels.
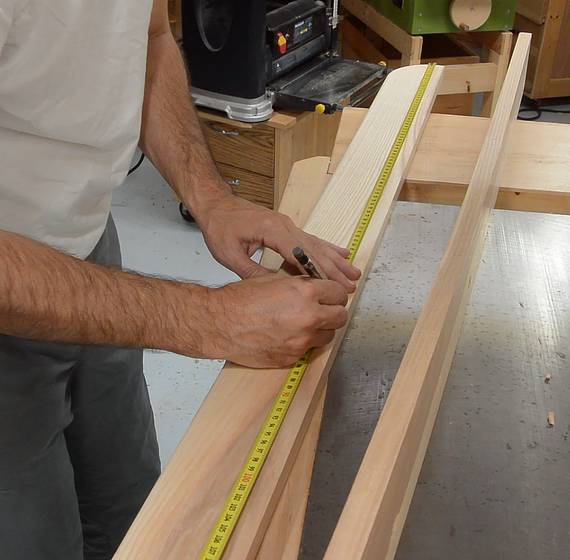
I start by carefully measuring along both boards for where the dowels
will be.
Then using a marking gauge to fix the lateral position and making a small
divot at the correct location. I then deepened those divots with
an awl. I'm whacking the back of my awl with a
push stick.
Drilling the dowel holes.
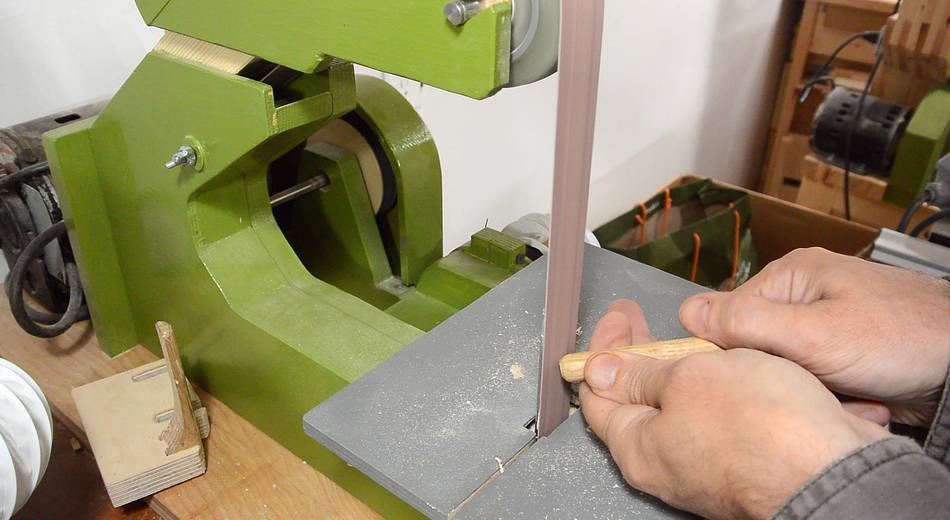
Because I'll be forcing the board straight as I glue them, the dowel holes
won't line up very well. So I sanded a taper on the dowels
with my strip sander
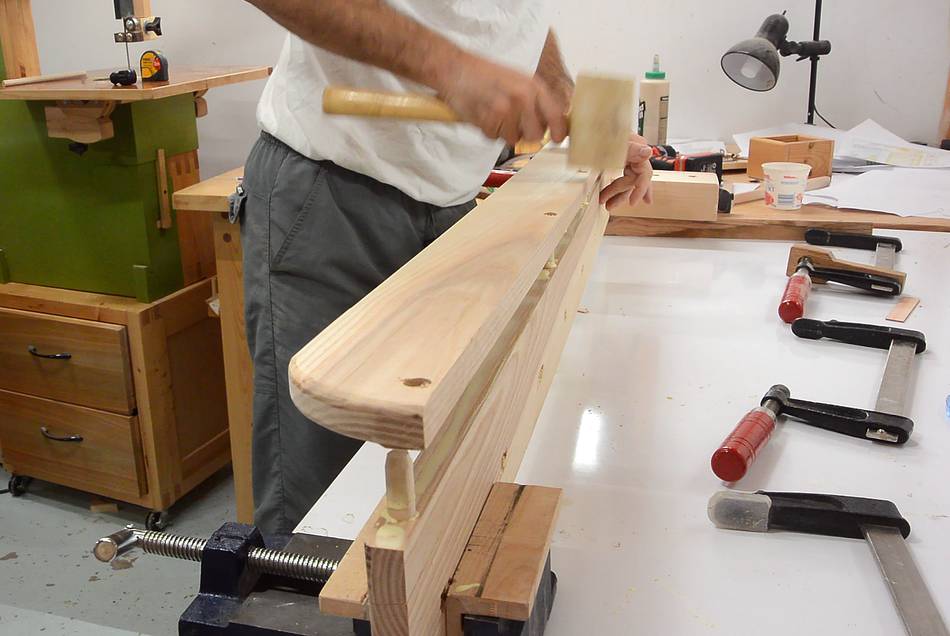
I wasn't sure how well this would go together, but the taper
was enough to force the pieces into alignment as I banged them
together.
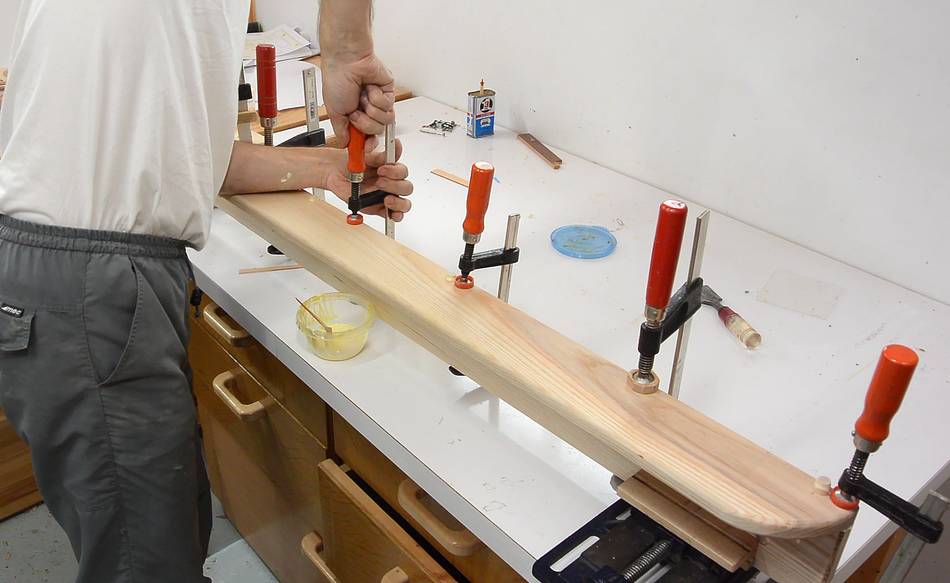
Then lots of clamps to make sure the glue joint is tight.
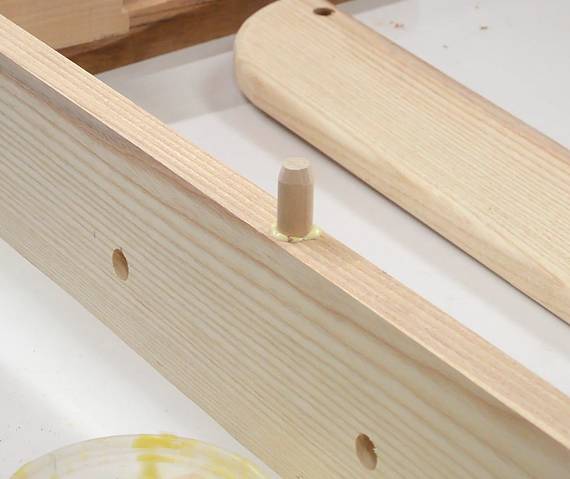
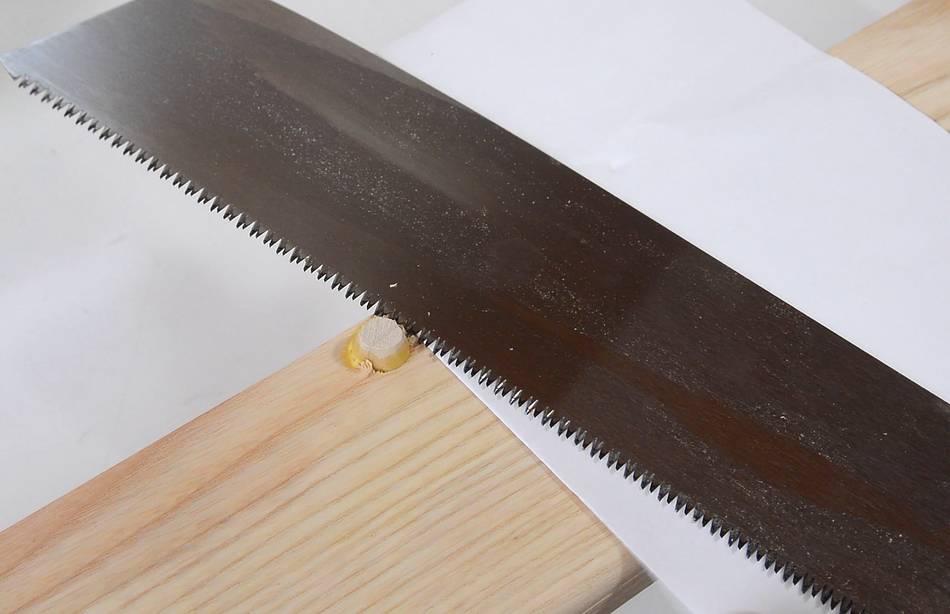
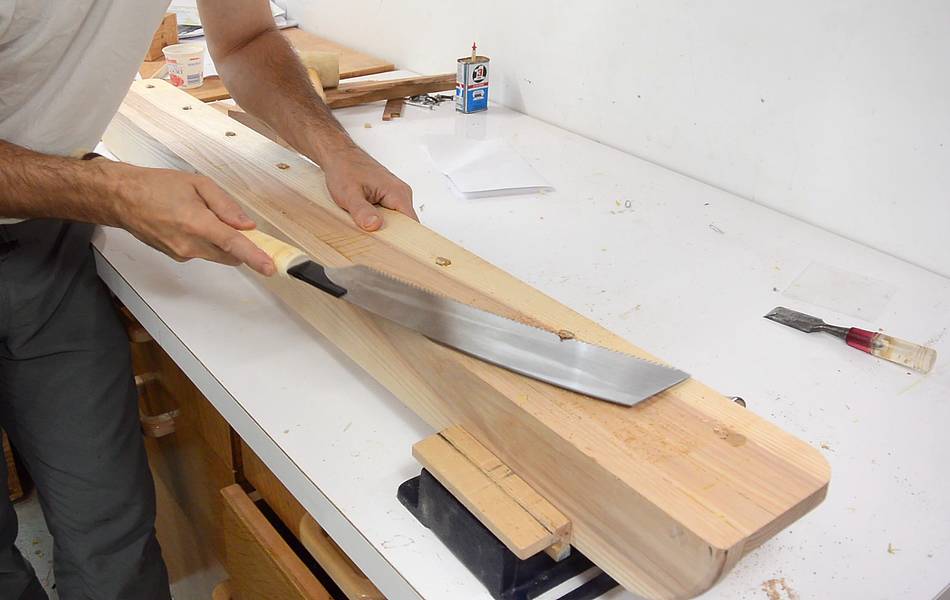
After the glue dried, I cut the dowels nearly flush using a dozuki
saw (which is on a piece of paper to keep it just above the workpiece),
then flush trimed them with a chisel
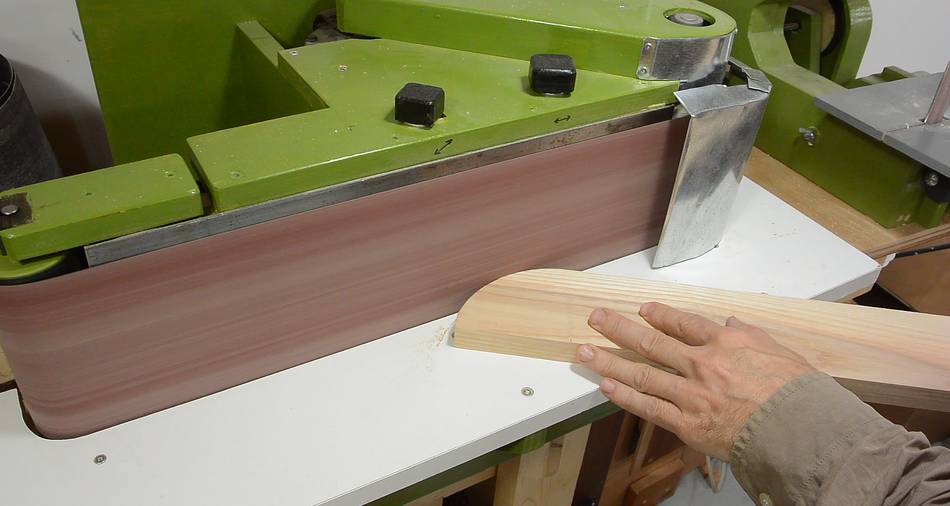
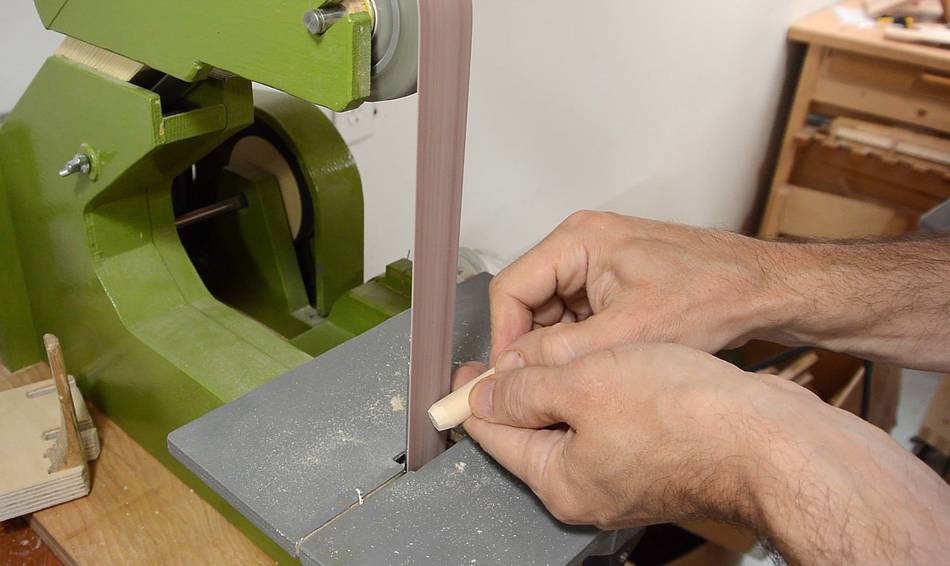
I rounded the tops of the dowels using my strip sander.
It was tempting to use a 1/4" router bit on my pantorouter to do
it like we did for these mitt hooks,
but for just eight dowels, it wasn't worth setting it up for this.
Gluing in the dowels. I put the board on top of a spacer to allow
the dowels to protrude out the back a little.
Flush cutting the dowels on the back.
And a pass over the jointer to make sure the back is really flat.
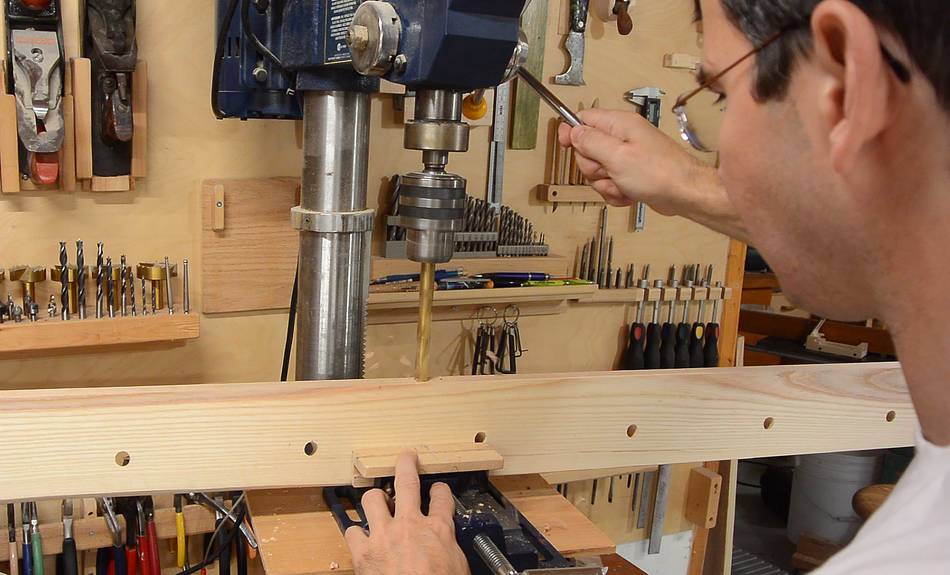
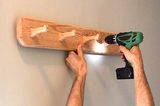
Drilling mounting holes in the shelf. I put them right behind the pegs to hide
them a bit. But this meant I couldn't use a countersinking bit, so I added
a countersink using the tip of a larger longer drill.
I varnished it using three coats of three coats of
water borne varnish. An oil based
varnish would probably be better for this application, but oil based varnishes
take much longer to apply.
The hooks are mounted low on the wall. Baby's stuff is all fairly
small, and this way baby can reach them. And with the stairs below,
towards the right, longer coats can be hung too.
 I previously made these coat hooks in 2010,
then this boot nook and
these ones in 2014 after Rachel moved in.
Rachel then added these mitt hooks,
but thanks to baby, we are out of places to hang stuff by the back door again,
so I made more coat hooks.
I previously made these coat hooks in 2010,
then this boot nook and
these ones in 2014 after Rachel moved in.
Rachel then added these mitt hooks,
but thanks to baby, we are out of places to hang stuff by the back door again,
so I made more coat hooks.


 More coat hooks
 Coat hooks made
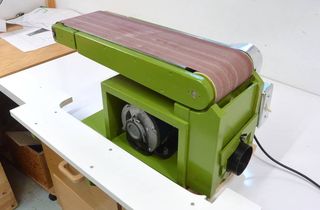 Homemade belt sander
 Homemade belt sander
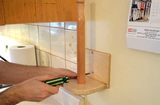 Paper towel holder
 New treads for old stairs
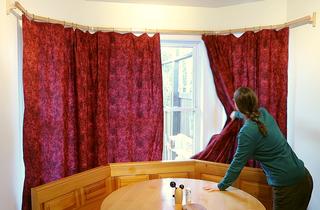 Curtain rod around
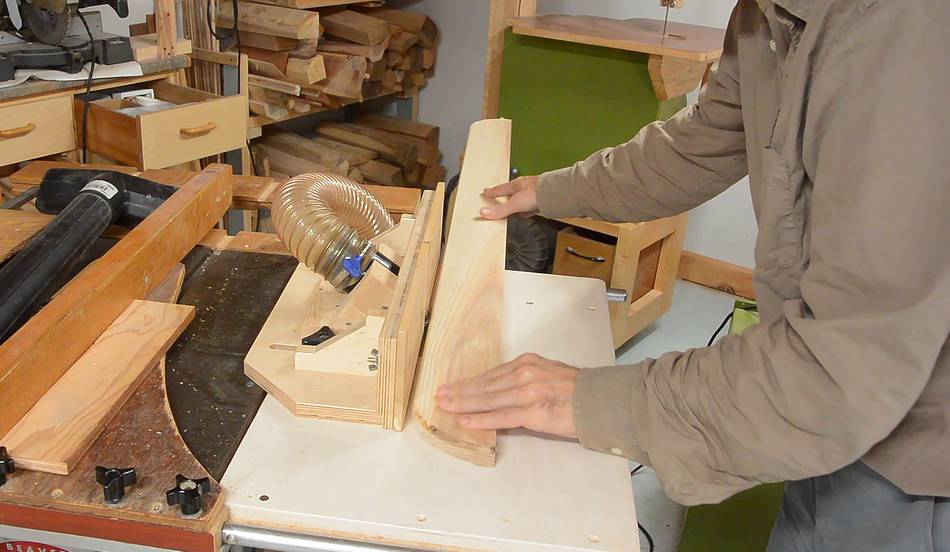