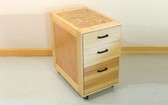
 Having built the drawers for the dresser,
it was time to build the cabinet for them.
Most people prefer to build the cabinet before making the drawers, but for a cabinet
that just holds drawers, I like to start with the drawers.
Having built the drawers for the dresser,
it was time to build the cabinet for them.
Most people prefer to build the cabinet before making the drawers, but for a cabinet
that just holds drawers, I like to start with the drawers.
Having built the drawers for the dresser,
it was time to build the cabinet for them.
Most people prefer to build the cabinet before making the drawers, but for a cabinet
that just holds drawers, I like to start with the drawers.
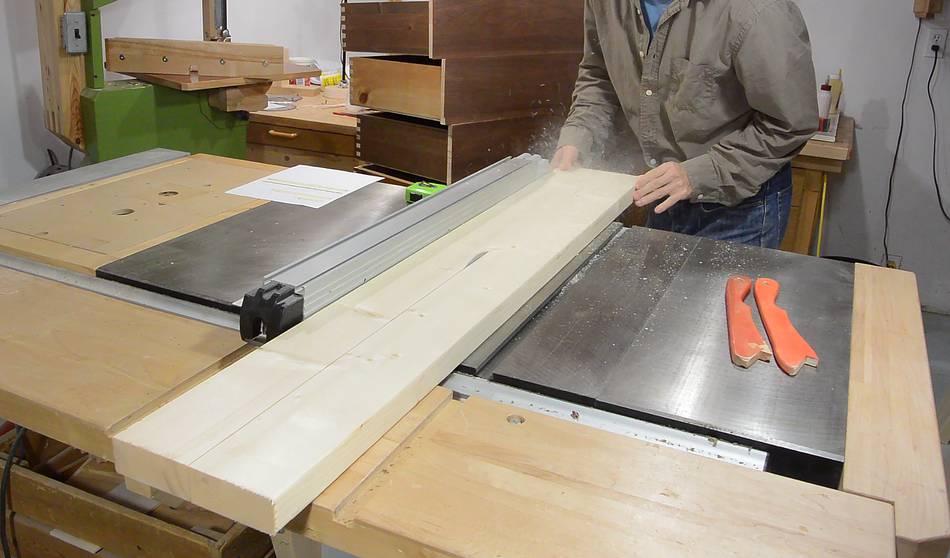
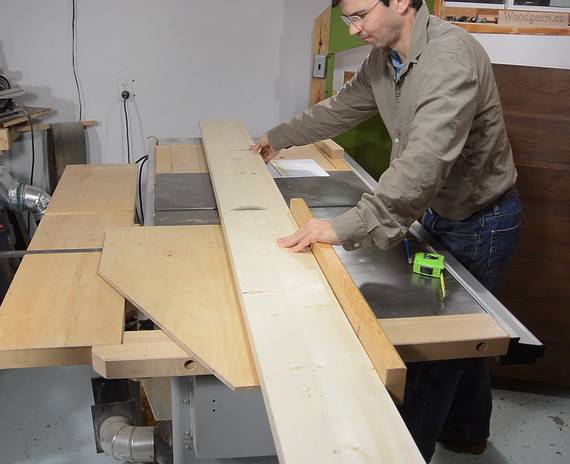
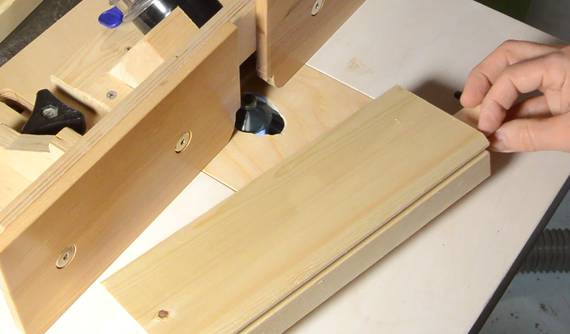
I'm using some 2x8 lumber I bought at The Home Depot. I really only need 2x4 sized lumber, but if you buy 2x8s and rip them in half, you can get much better quality lumber.
 Although the lumber is already planed, it's not planed very smooth, so it helps
to plane a millimeter off each side. After cutting the pieces to their
approximate length, I run them across the
jointer. I cut to length
first because the wood was slightly bowed, and you lose much less wood when planing
a bow out of a short piece.
Although the lumber is already planed, it's not planed very smooth, so it helps
to plane a millimeter off each side. After cutting the pieces to their
approximate length, I run them across the
jointer. I cut to length
first because the wood was slightly bowed, and you lose much less wood when planing
a bow out of a short piece.
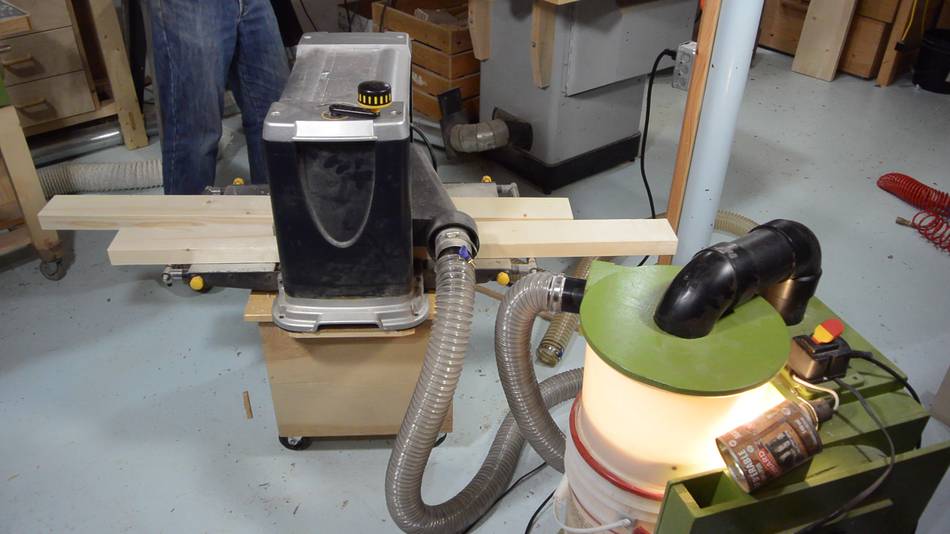 Then through the thickness planer, catching the shaving with my
small dust collector.
This sure fills up the collection bucket fast. A
cheap dust collector can hold four times as much shavings, but I'd much rather
swap the bucket four times than struggle with putting that plastic bag back on just once.
Then through the thickness planer, catching the shaving with my
small dust collector.
This sure fills up the collection bucket fast. A
cheap dust collector can hold four times as much shavings, but I'd much rather
swap the bucket four times than struggle with putting that plastic bag back on just once.
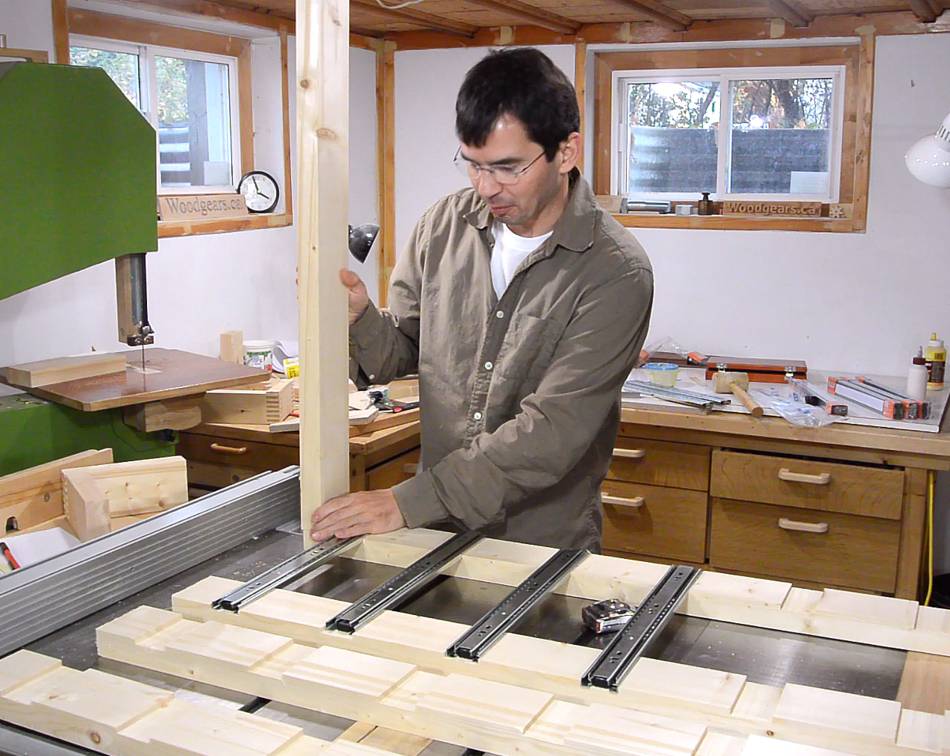
 Next I cut the dadoes in the pieces that will form the vertical corners.
I clamped two pieces together to cut them at once.
Next I cut the dadoes in the pieces that will form the vertical corners.
I clamped two pieces together to cut them at once.
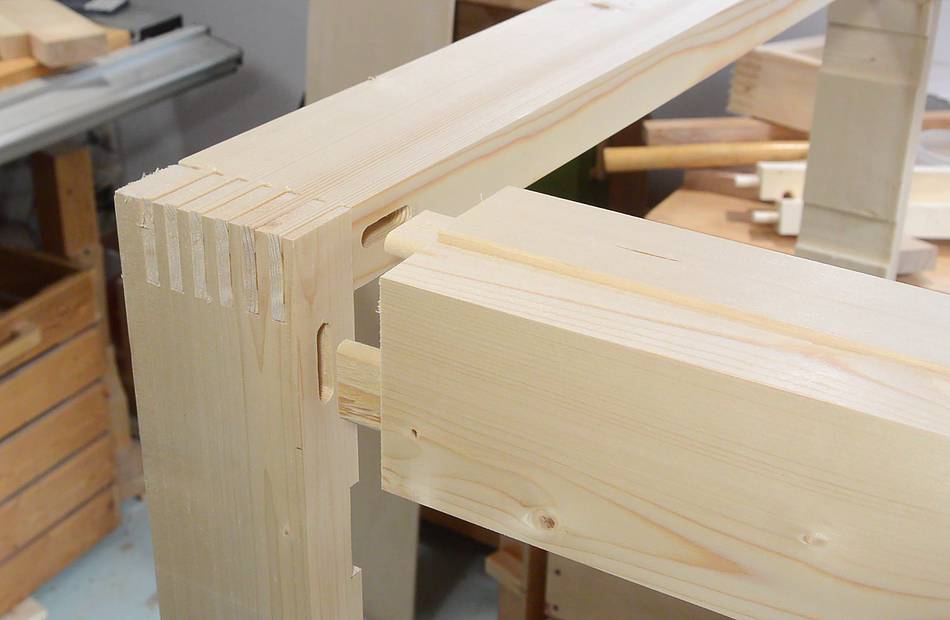
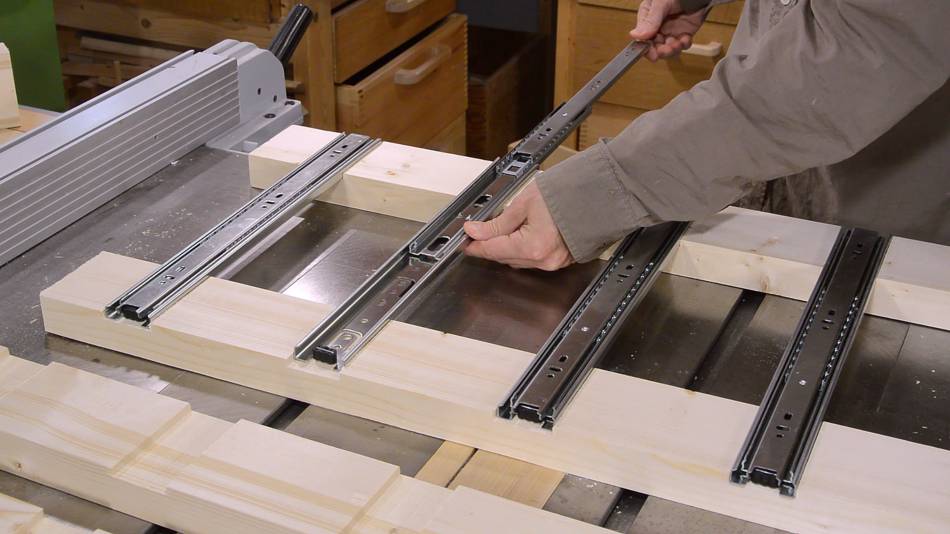 The dadoes are for the drawer slides. With the slides recessed into the sides,
I can make the cabinet a bit smaller for the same size drawers.
The dadoes are for the drawer slides. With the slides recessed into the sides,
I can make the cabinet a bit smaller for the same size drawers.
I measured the dado position very carefully, because these dadoes now determine the positions for the drawer slides.
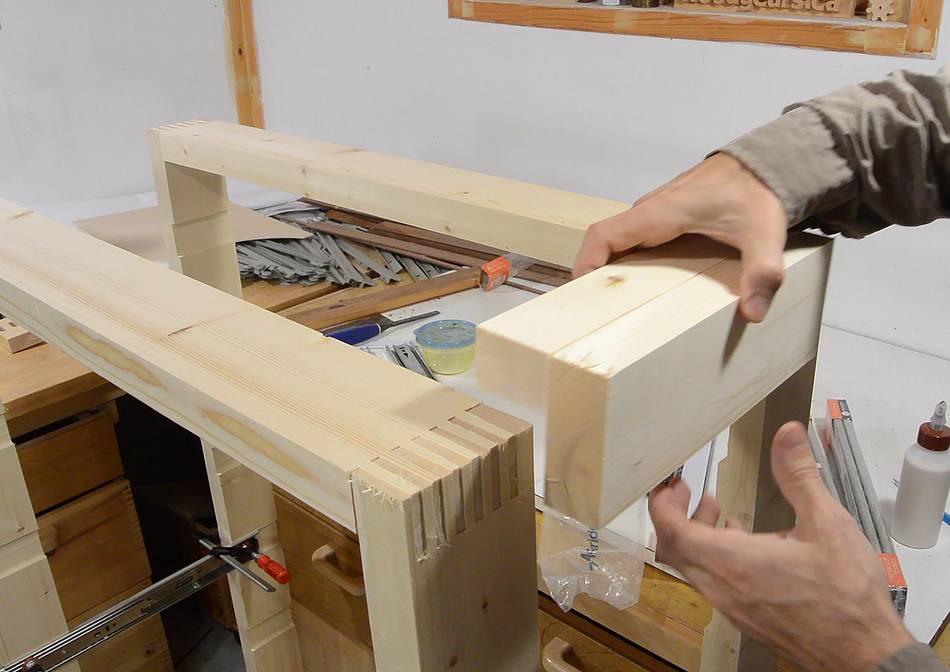
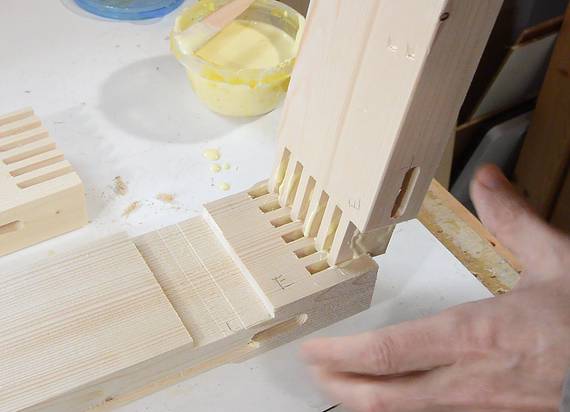
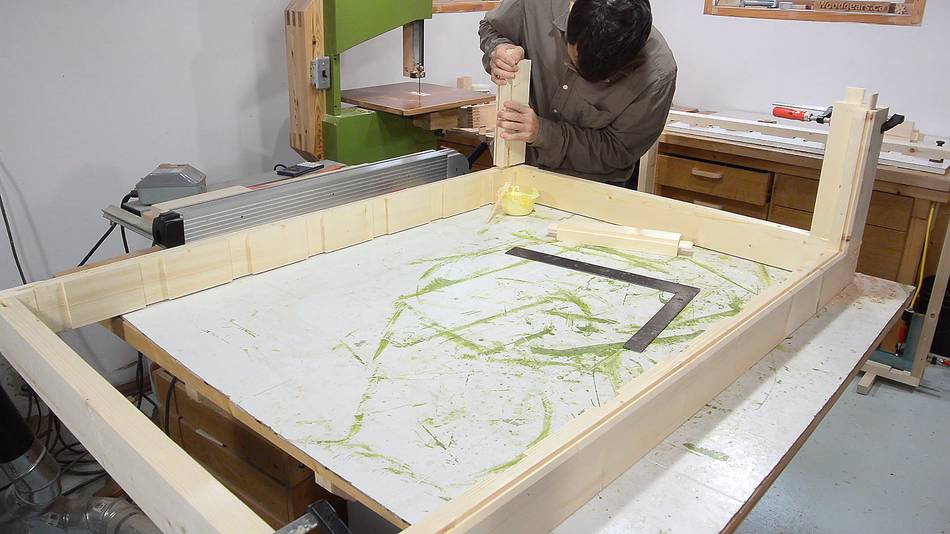
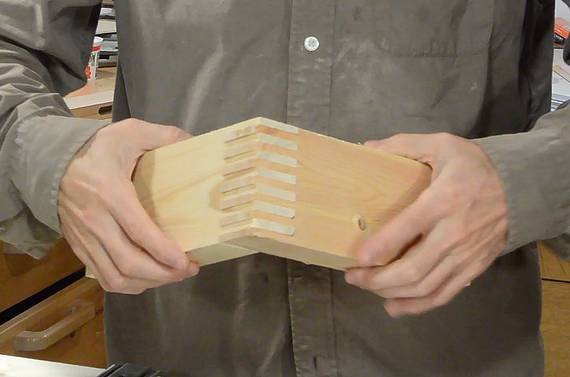 I want to join the uprights with horizontal rails at the top and bottom
using a form of box joint, or finger joint, like the one at right.
I want to join the uprights with horizontal rails at the top and bottom
using a form of box joint, or finger joint, like the one at right.
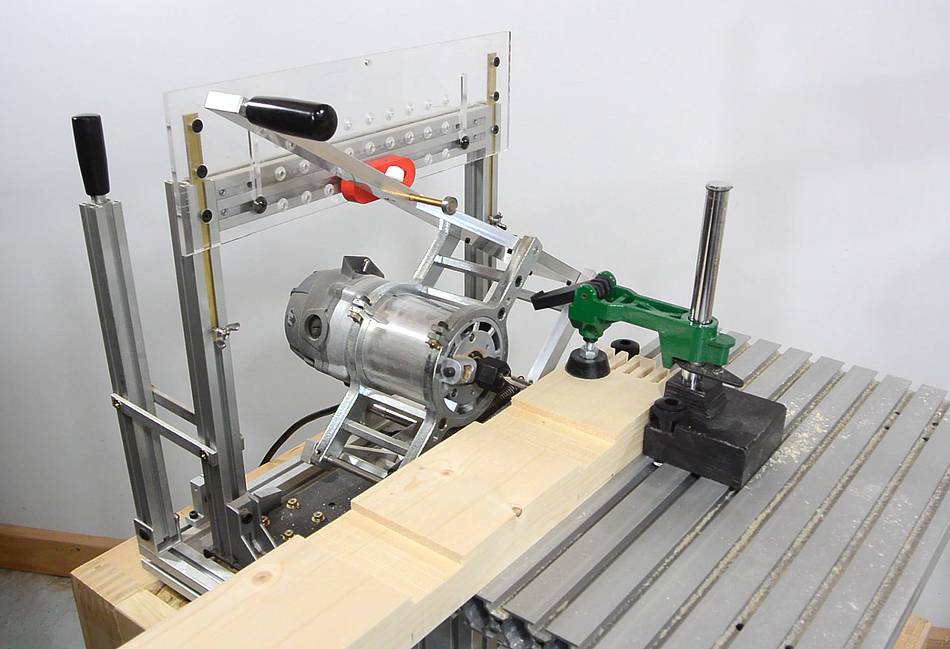
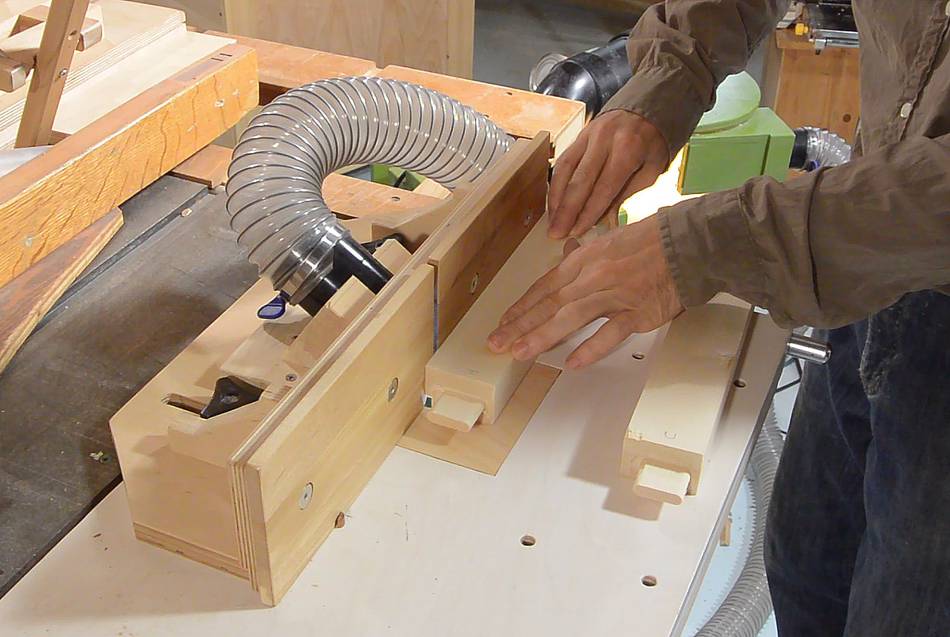
These are best cut with my screw advance box joint jig, but the longer pieces can't be put upright on my table saw without hitting the ceiling.
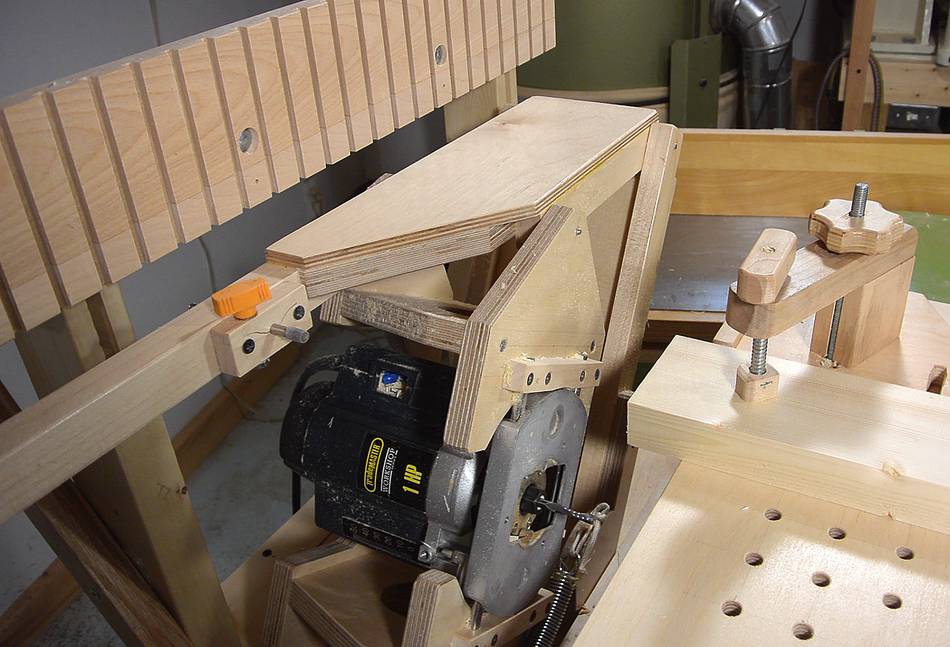
 So I made a box joint template for my pantorouter
with slots 1" (25 mm) apart. With the 2:1 reduction,
that makes for a cut every 1/2", and with a 1/4" bit in
the router, that makes for 1/4" slots with 1/4" fingers in between.
So I made a box joint template for my pantorouter
with slots 1" (25 mm) apart. With the 2:1 reduction,
that makes for a cut every 1/2", and with a 1/4" bit in
the router, that makes for 1/4" slots with 1/4" fingers in between.
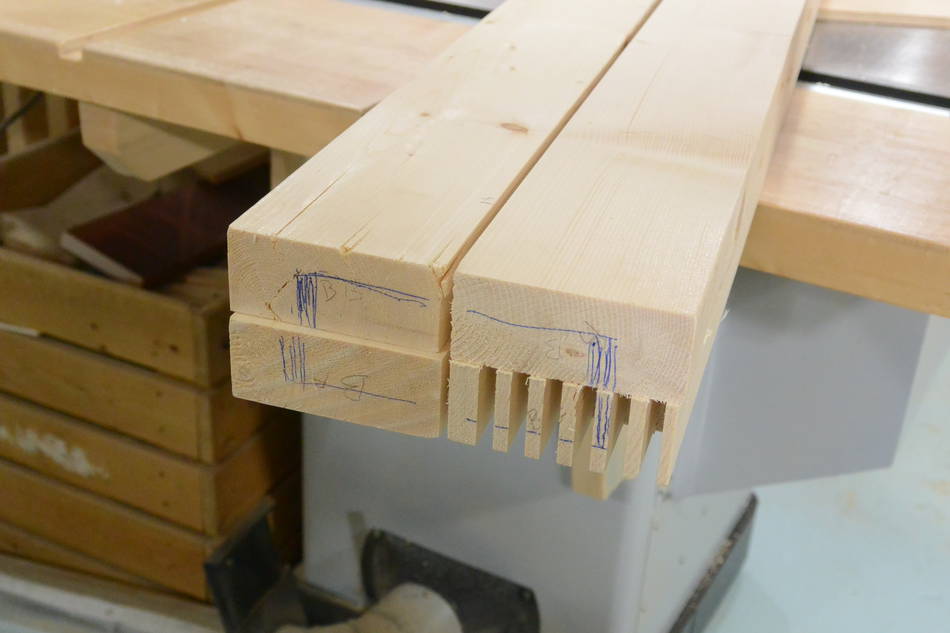
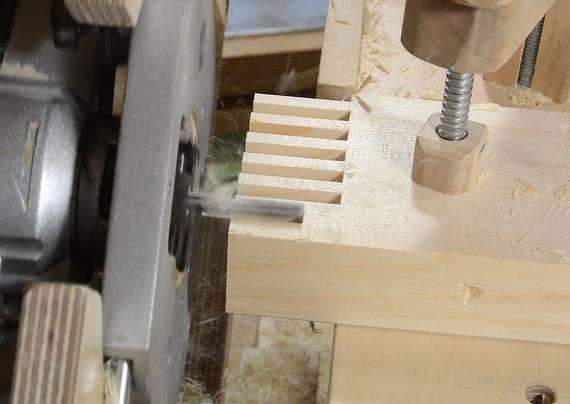
 It's too easy to cut some of these joints in the wrong orientation, so I marked
the cabinet orientation on the bottoms before I started.
It's too easy to cut some of these joints in the wrong orientation, so I marked
the cabinet orientation on the bottoms before I started.
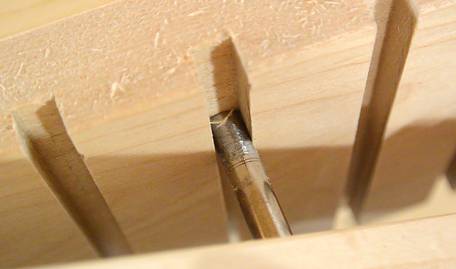
I also found my initial test joint was a bit too tight. So I ground down the follower slightly, so that it would have a bit of play in the slot. By making passes with the follower touching either side of the slot on the template, I was able to make a cut that was slightly wider.
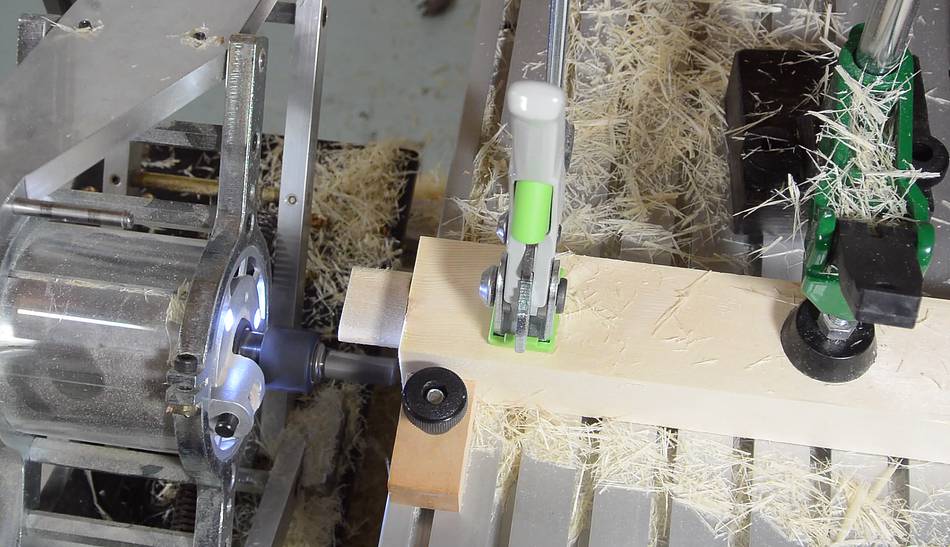
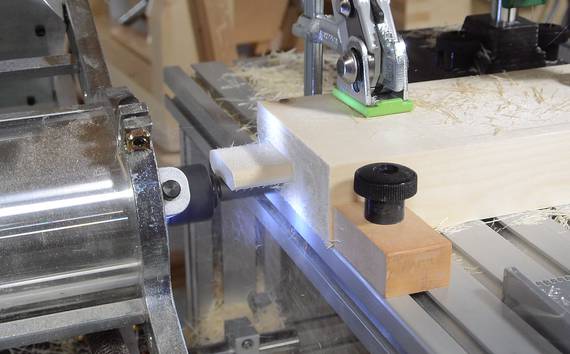
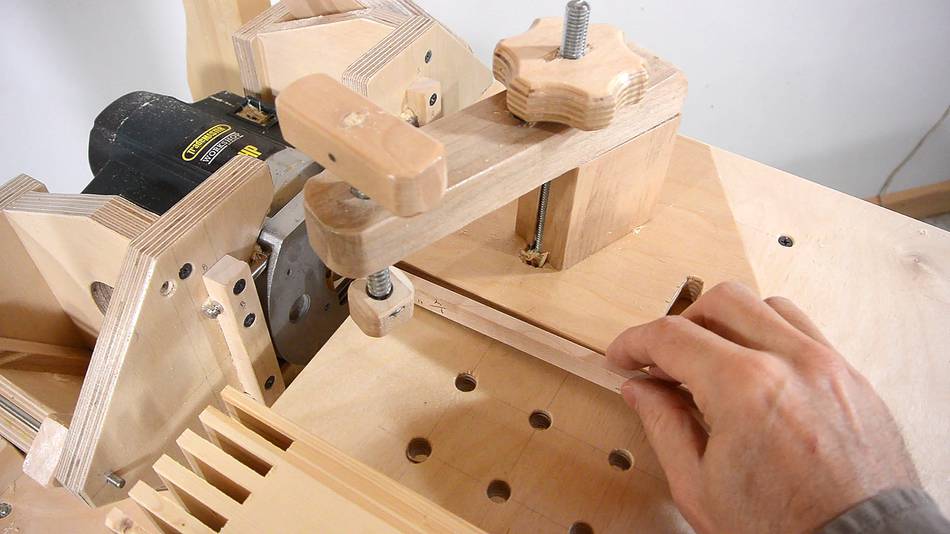 The piece that joints with each piece needs to have slots where the other piece
has fingers. So I needed to offset the mating piece to the side by 1/4".
I made a 1/4" spacer, which I put next to the fence
when cutting the fingers.
The piece that joints with each piece needs to have slots where the other piece
has fingers. So I needed to offset the mating piece to the side by 1/4".
I made a 1/4" spacer, which I put next to the fence
when cutting the fingers.
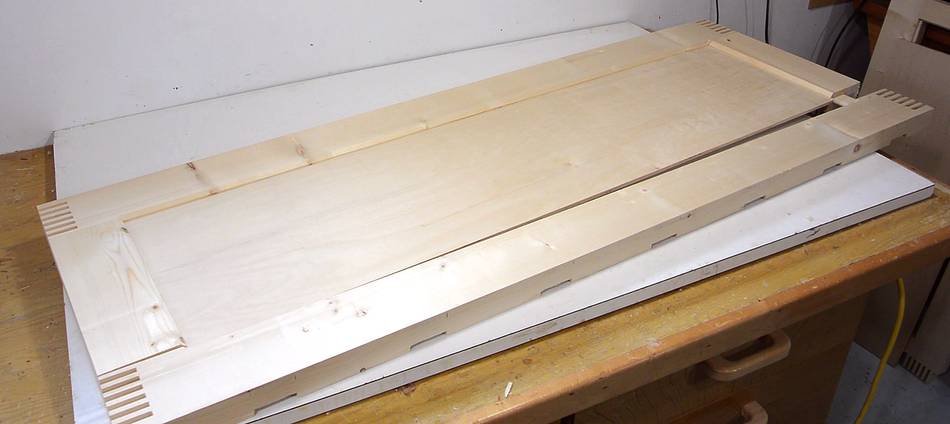
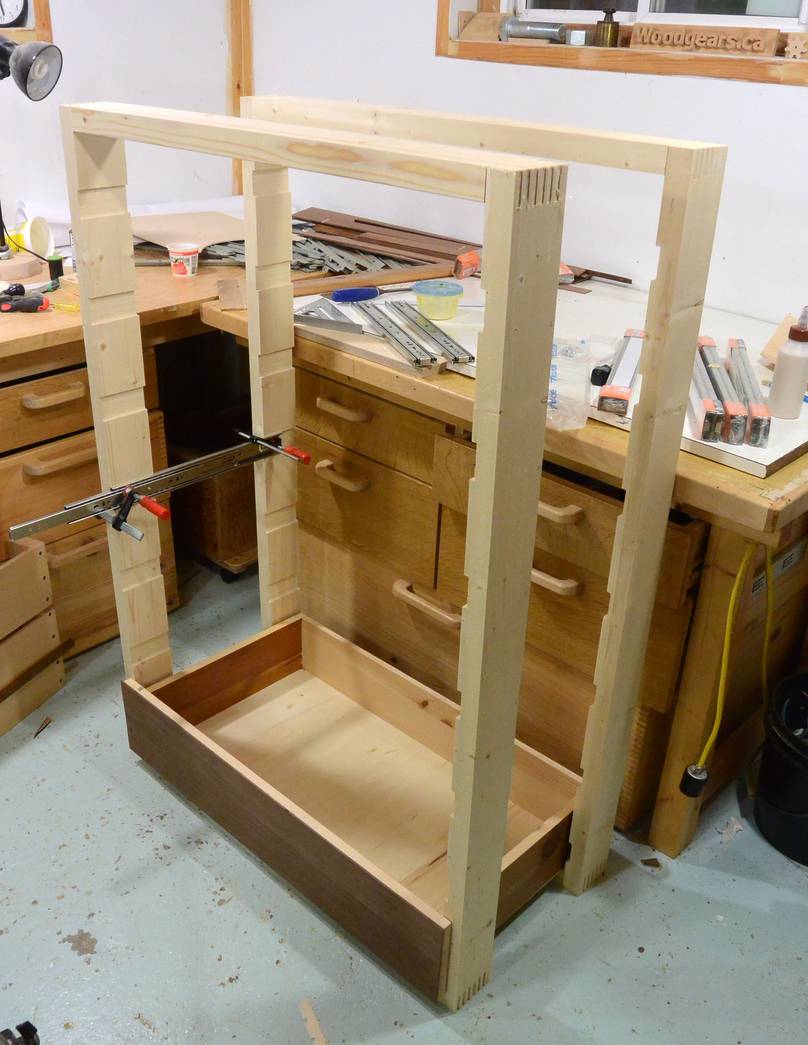 Dry fitting the front and back frames, and making sure a drawer
fits inside.
Dry fitting the front and back frames, and making sure a drawer
fits inside.
 I want to join the front and back frames with some more pieces
of lumber so that I have about 9 cm wide lumber on all the edges.
I want to join the front and back frames with some more pieces
of lumber so that I have about 9 cm wide lumber on all the edges.
 I figured mortise and tenon joints would be best for this, and I'm
using my metal pantorouter for this.
I think the parallel vertical adjustment for the template is the coolest feature
of the metal machine.
I figured mortise and tenon joints would be best for this, and I'm
using my metal pantorouter for this.
I think the parallel vertical adjustment for the template is the coolest feature
of the metal machine.
Here I'm cutting the mortises.
 Then cutting the tenons
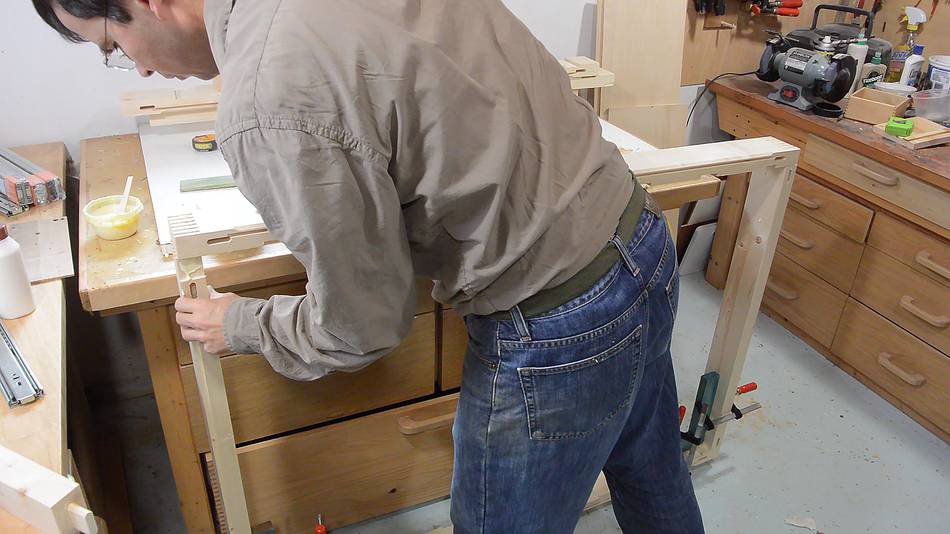
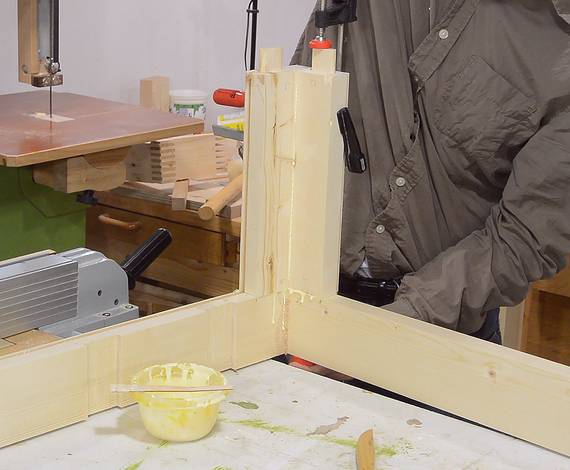
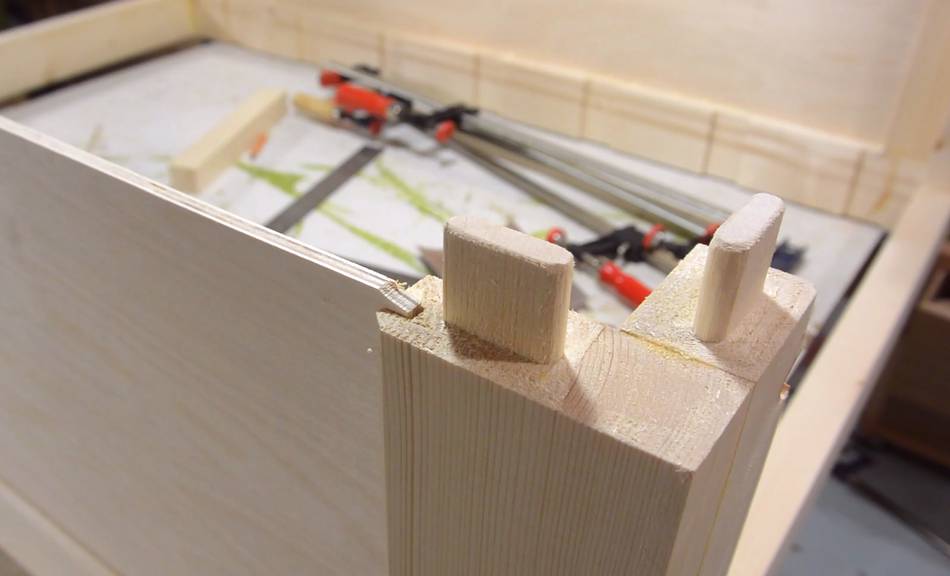
 Two pieces, with a tenon each, form the corner. Here I'm checking the fit.
 Before I can glue this together, I need to cut some rabbets for a plywood panel
to fit in the top, and slots for thinner plywood panels to fit into the sides.
Before I can glue this together, I need to cut some rabbets for a plywood panel
to fit in the top, and slots for thinner plywood panels to fit into the sides.
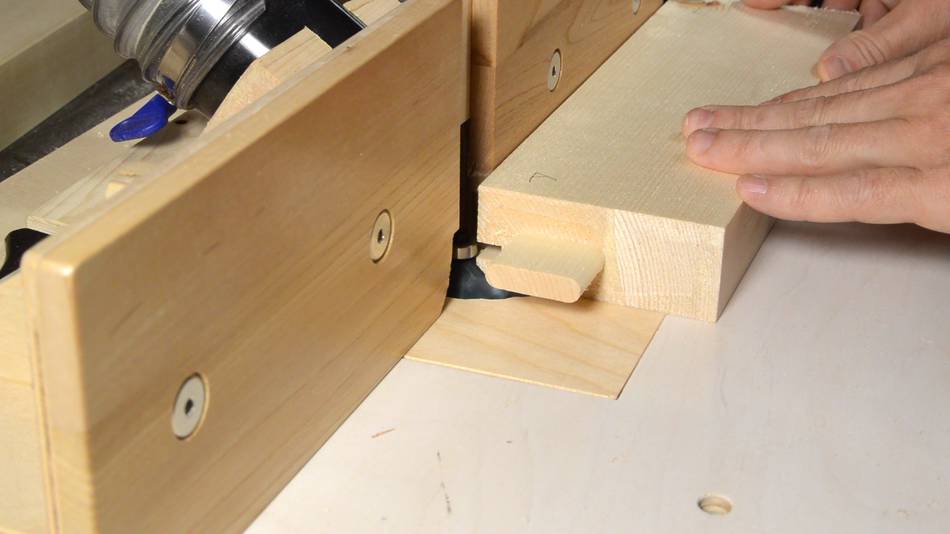
 I cut the rabbets on the router table. That way, I could cut them
only part of the length of the longer rails.
I cut the rabbets on the router table. That way, I could cut them
only part of the length of the longer rails.

 Rabbets cut, and checking the fit.
I used a 3/4" diameter bit to cut the rabbet. Next, I used a chisel to chisel the corners square so that a rectangular panel can be inserted.
 After that, I used a 1/4" slot cutter to cut the slots for the side panels,
and a 45 degree bevel bit to cut a chamfer.
After that, I used a 1/4" slot cutter to cut the slots for the side panels,
and a 45 degree bevel bit to cut a chamfer.
 Checking the fit.
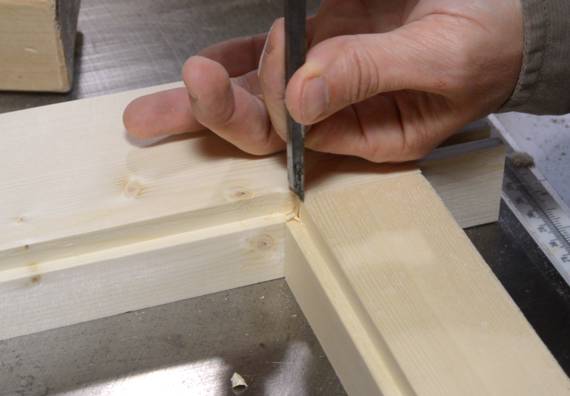
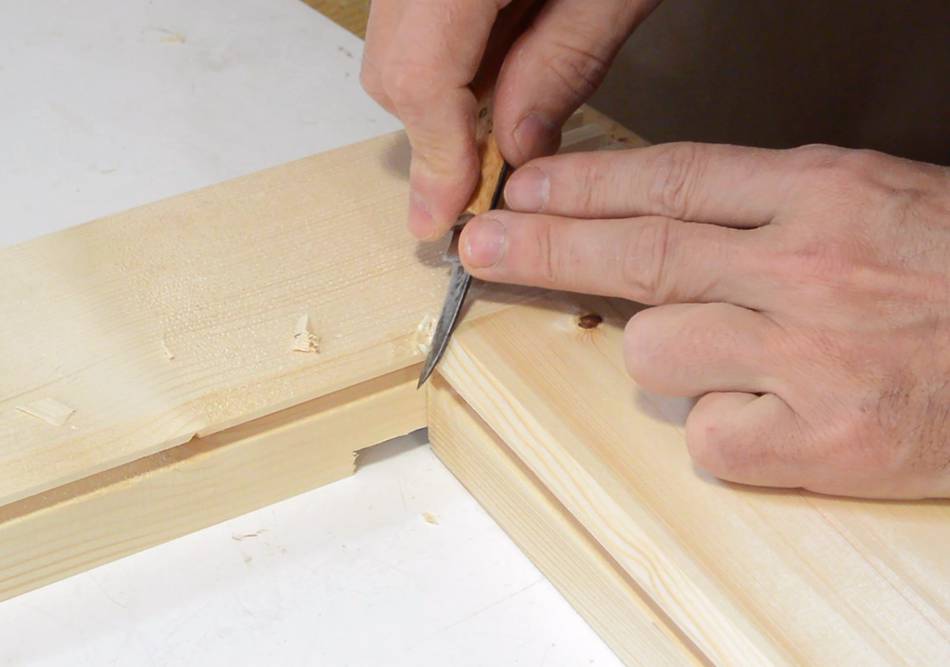 As before, I could not get all the way into the corner with the router,
so I'm extending the chamfer into a corner with a knife.
As before, I could not get all the way into the corner with the router,
so I'm extending the chamfer into a corner with a knife.
 Dry fitting the side frame with the panel.
It was tempting to start by assembling the side frames, but I was more worried about getting all the box joints aligned perfectly, so I figured it was best to start by assembling the front and back frames.
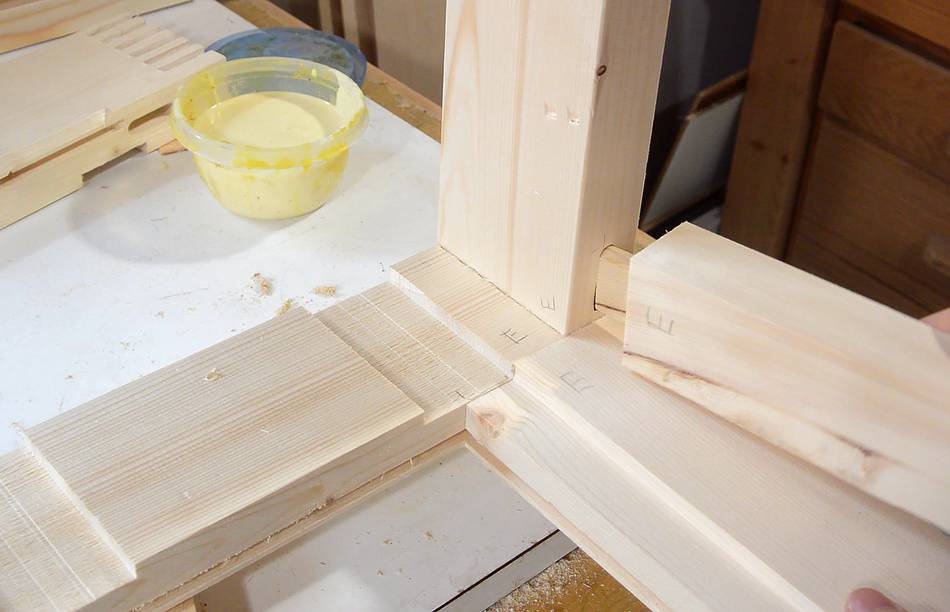 But before starting the glue up, I made sure I had all the parts correctly
dry fitted. I labelled all the parts so I would get the right part
in the right place and the right orientation. All the pieces that join
in this corner are labelled "E", for instance.
But before starting the glue up, I made sure I had all the parts correctly
dry fitted. I labelled all the parts so I would get the right part
in the right place and the right orientation. All the pieces that join
in this corner are labelled "E", for instance.
 First I assembled the box joints, or finger joints, in the front and back frames.
 After that, I glued the joining pieces into the back frame.
Some of the mortises took a lot of force to assemble once I had glue on them.
With a precise joint, and very little room on the bottom, the glue had no
place to go. But with a clamp, I was able to slowly close the joints.
After that, I glued the joining pieces into the back frame.
Some of the mortises took a lot of force to assemble once I had glue on them.
With a precise joint, and very little room on the bottom, the glue had no
place to go. But with a clamp, I was able to slowly close the joints.
 I dry-fitted the front frame on the joining pieces while the glue was
drying, to make sure I didn't have anything misaligned.
I dry-fitted the front frame on the joining pieces while the glue was
drying, to make sure I didn't have anything misaligned.

 With the previous glue-up dried, and the front frame removed again,
I can glue in the side panels.
With the previous glue-up dried, and the front frame removed again,
I can glue in the side panels.
No doubt, people will repeat the mantra of not gluing in panels in YouTube comments, but this only applies to solid wood panels. Plywood doesn't move the same way, and by gluing the panel in on all sides, it adds rigidity to the cabinet.
 I also slightly tapered the tenons. With 8 tenons to fit at the same
time in the next step, a slight taper makes it easier to get them
all to align.
I also slightly tapered the tenons. With 8 tenons to fit at the same
time in the next step, a slight taper makes it easier to get them
all to align.
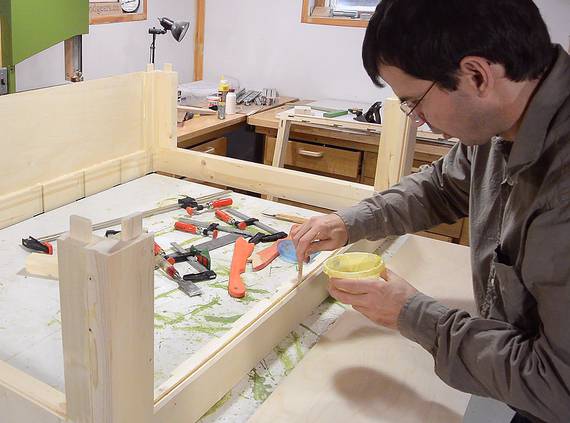
 Front frame glued on, and using bar clamps to force the joints closed.
 After that, I carefully measured the opening in the top and cut some
11 mm thick plywood to glue in there.
After that, I carefully measured the opening in the top and cut some
11 mm thick plywood to glue in there.
 And this is as far as I have got for now. Building a dresser
like this is, unexpectedly, much work. It's comparable to
building a bandsaw
or a pantorouter, but less fun.
And this is as far as I have got for now. Building a dresser
like this is, unexpectedly, much work. It's comparable to
building a bandsaw
or a pantorouter, but less fun.
In my next instalment, I'll install the drawers, add a back panel, and finish it up.
Next: Finishing up the dresser
 Mobile tools stand
of
Mobile tools stand
of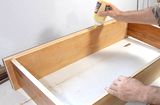 Making the drawers for this dresser
 Metal pantorouter
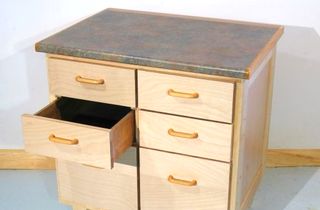 A previous dresser build
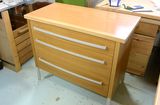 Dresser made from junk