 A cool feature of my new quick-set tenon jig is that it can be used
with templates for cutting multiple slots, such as this joint,
for making very sturdy corner joints in wood.
A cool feature of my new quick-set tenon jig is that it can be used
with templates for cutting multiple slots, such as this joint,
for making very sturdy corner joints in wood.
A cool feature of my new quick-set tenon jig is that it can be used
with templates for cutting multiple slots, such as this joint,
for making very sturdy corner joints in wood.
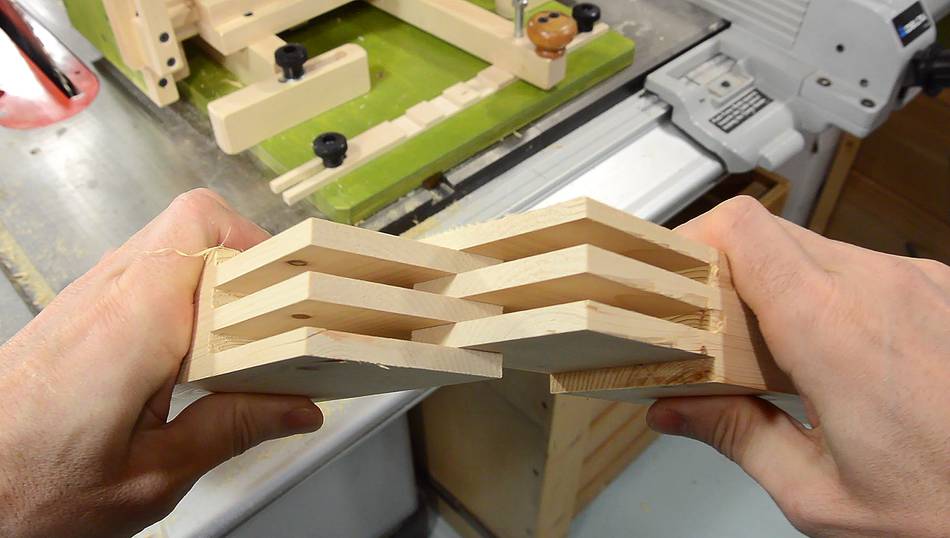
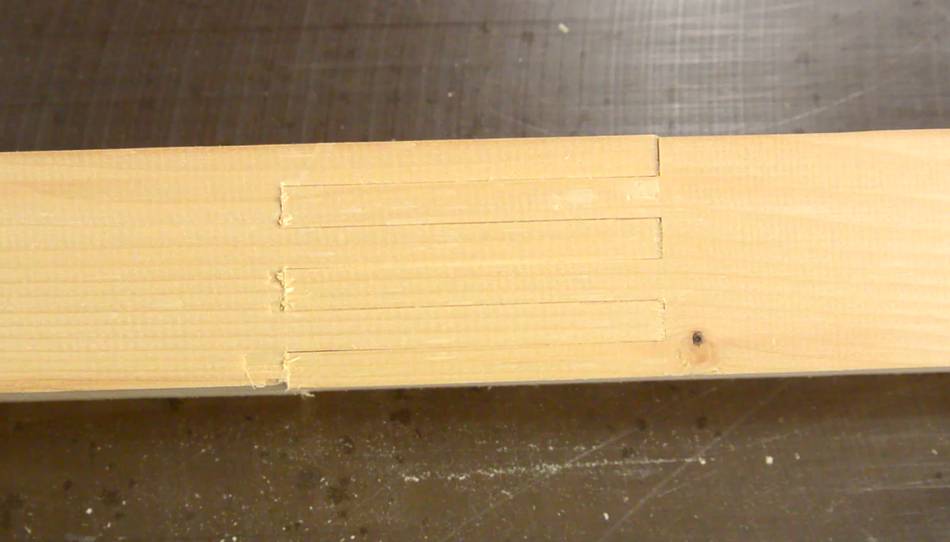
I couldn't find a good name for this type of joint. It's like a box joint, but it's for pieces oriented more like in a lap joint or bridle joint. "Multi-bridle joint" sounds silly, so I'll call it a multi-lap joint.
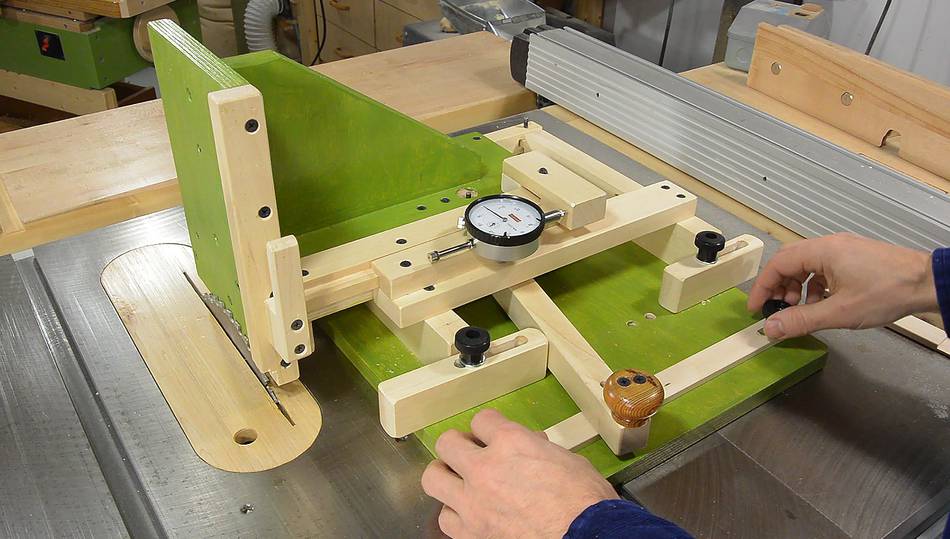 The quick-set tenon jig already has two stops for alternating between two
cut positions with the flip of a lever. But by adding a template to the
front, many more stops positions can be obtained, Here I'm adding a "blank"
for a new template.
The quick-set tenon jig already has two stops for alternating between two
cut positions with the flip of a lever. But by adding a template to the
front, many more stops positions can be obtained, Here I'm adding a "blank"
for a new template.
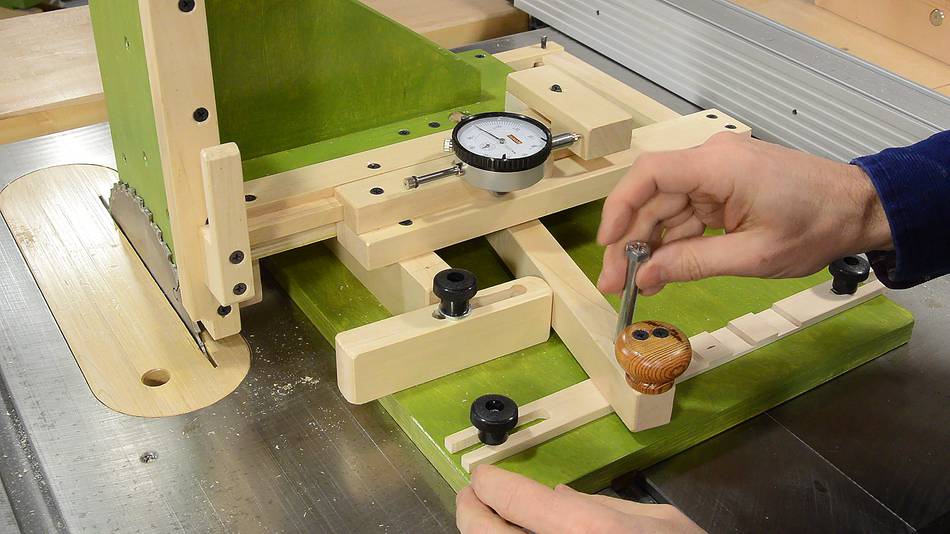
The set-up begins with the face of the jig against the saw blade, and the dial indicator adjusted so that it reads zero.
I'm making a template for cutting a joint with 1/4" (6.35 mm) wide fingers. The first slot goes from the edge to 1/4". The blade itself already cuts away 0.100", so I only need to move the jig over by 0.150", plus another 0.003" to give the joint some slack.
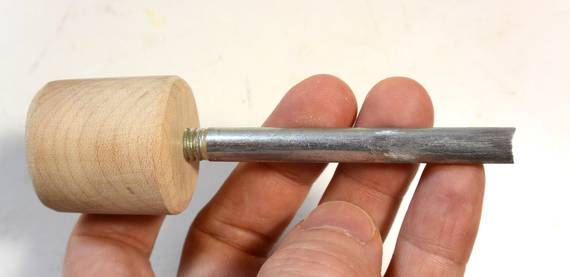
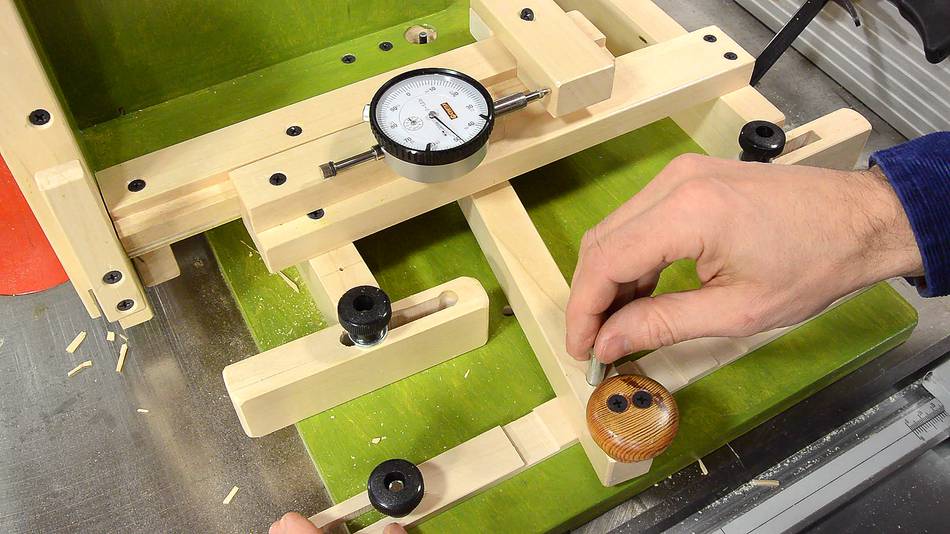
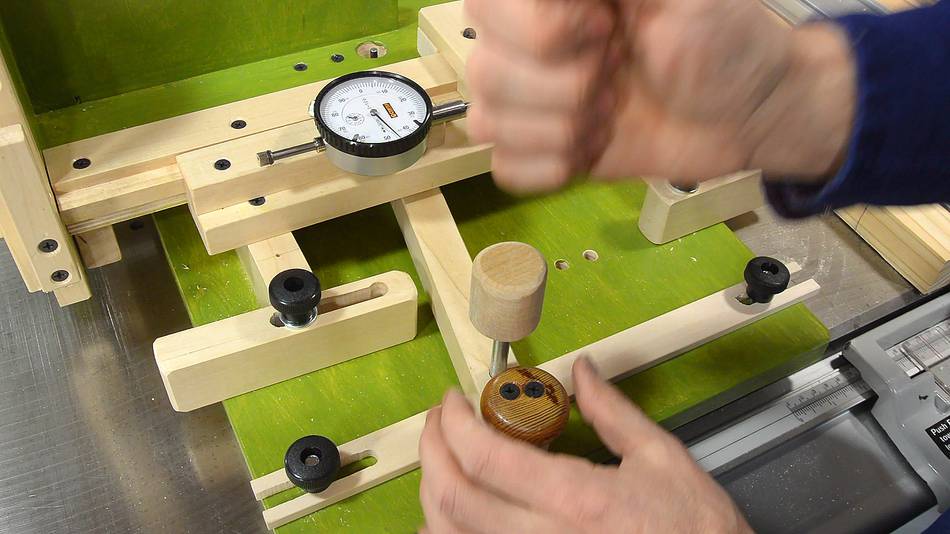 Once I set the position
using the dial indicator, I use a punch to mark the position.
The punch is a 5/16" bolt that fits in the hole in the handle.
The end is ground to leave two sharp edges.
Once I set the position
using the dial indicator, I use a punch to mark the position.
The punch is a 5/16" bolt that fits in the hole in the handle.
The end is ground to leave two sharp edges.
I then move the jig to 0.500" from the starting point (move by 0.250 finger width plus 0.100 blade thickness), I again punch this location, then move by 0.250 + 0.003, repeating the above steps for each slot I need to cut.
The dial indicator only has 1" (25 mm) of range, so after 1" of movement, I move the dial indicator's reference point by exactly 1" (using the dial indicator to check) to get another inch of range. You can get dial indicators with more range, but for most things, the one I have is enough.
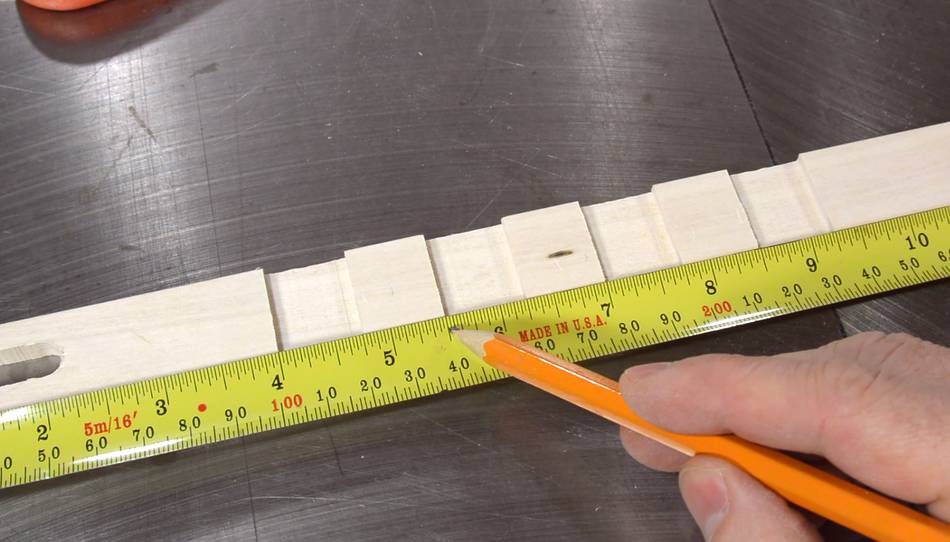
 The edges of the punch leave score marks in the wood. I'm highlighting these
with a pencil.
The edges of the punch leave score marks in the wood. I'm highlighting these
with a pencil.
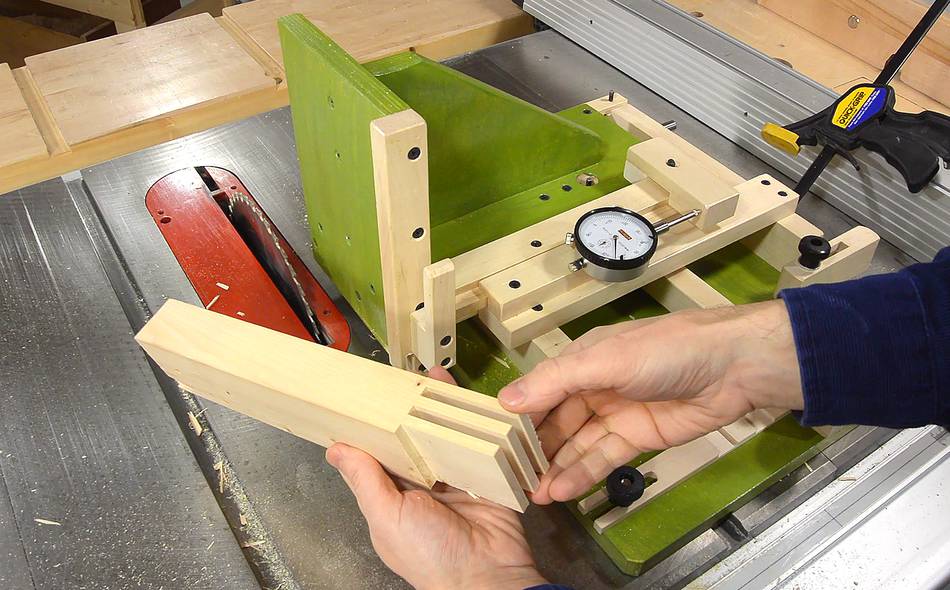
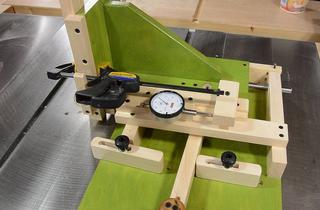
 I need to cut slots between the edges of the punch marks. The easiest way
to do that is on my table saw, using my
small table saw sled
I need to cut slots between the edges of the punch marks. The easiest way
to do that is on my table saw, using my
small table saw sled
It's much easier to position the workpiece with the marks facing up, cutting the slots on the bottom side of the template.
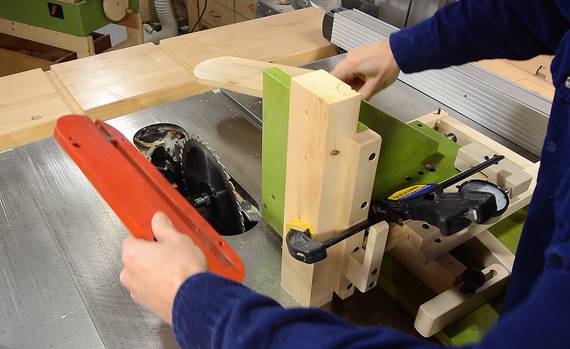
 I then put the template back on the jig. With the jig face touching the blade
again, I use a cut off bolt (the thread-less part), inserted into the hole
in the lever, to line up the template so the start of the first notch is where
the jig is now.
I then put the template back on the jig. With the jig face touching the blade
again, I use a cut off bolt (the thread-less part), inserted into the hole
in the lever, to line up the template so the start of the first notch is where
the jig is now.
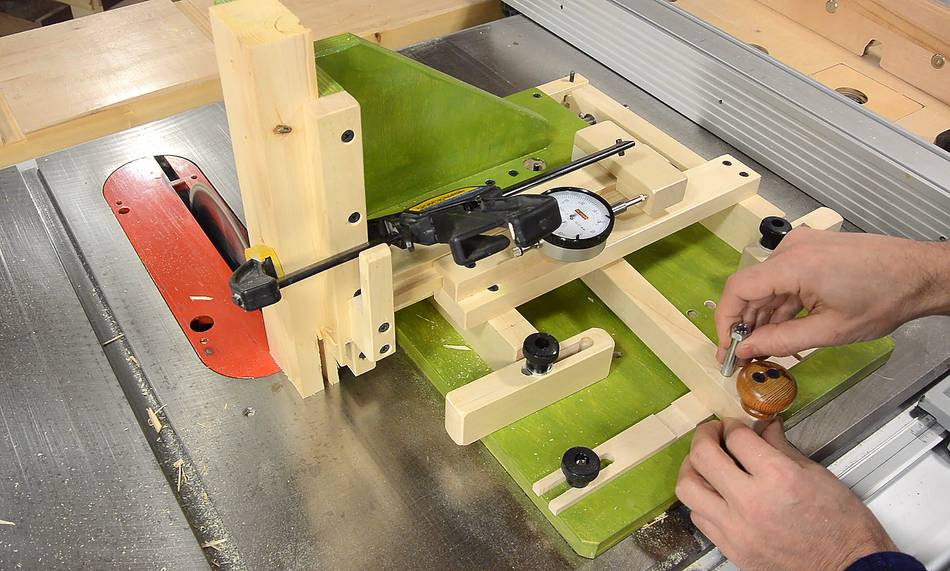
 I also change the insert in my table saw to the factory one.
With the tenon jig it's better to have a larger opening around the blade
so that more of the dust gets thrown into the saw.
I also change the insert in my table saw to the factory one.
With the tenon jig it's better to have a larger opening around the blade
so that more of the dust gets thrown into the saw.
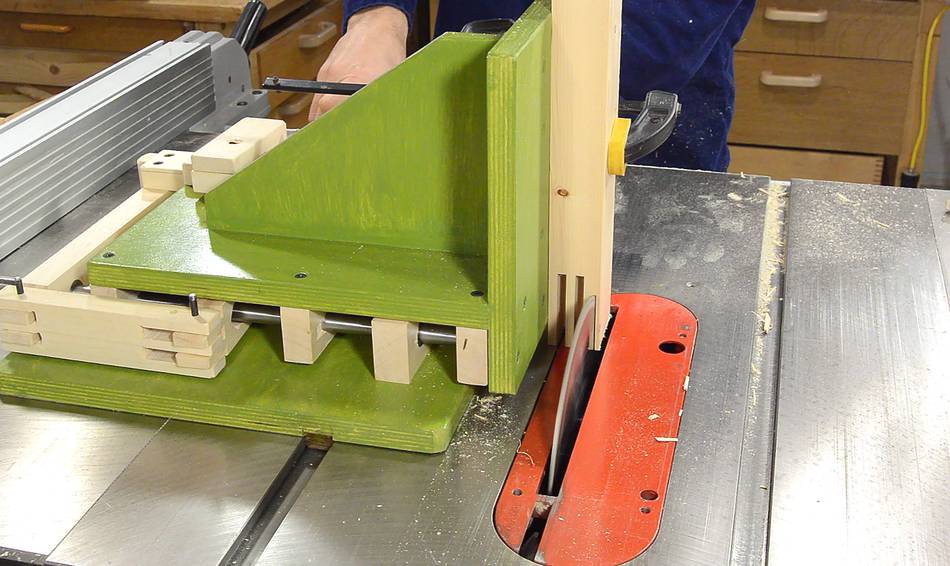
 I push the handle to the left until the bolt hits the left side of the
first slot, make a cut, then push the handle right until the bolt hits
the other side of the slot, make a cut there, and then make a third cut
between those two to clean out the rest of the slot.
I push the handle to the left until the bolt hits the left side of the
first slot, make a cut, then push the handle right until the bolt hits
the other side of the slot, make a cut there, and then make a third cut
between those two to clean out the rest of the slot.
To move to the next slot, I lift the bolt and move the lever over the next notch, letting it drop into that notch, and repeat.
 First part of this joint cut.
 To cut the mating part, I need to move the template so that all
the notches are offset by 1/4". So I start with the face of the jig touching the blade
again, move it over by 0.250", then loosen the template and line it up with the bolt
in the handle so that a notch starts where the jig is now.
To cut the mating part, I need to move the template so that all
the notches are offset by 1/4". So I start with the face of the jig touching the blade
again, move it over by 0.250", then loosen the template and line it up with the bolt
in the handle so that a notch starts where the jig is now.
 Then cutting the second half of the joint.
Finished joint. It goes together with just a bit of friction. Very satisfying to
push together and pull apart.

 I used joints like this for my long reach clamps, though
I cut the joints on that clamp with my screw advance box
joint jig. But I can cut much deeper with the tenon jig.
I used joints like this for my long reach clamps, though
I cut the joints on that clamp with my screw advance box
joint jig. But I can cut much deeper with the tenon jig.
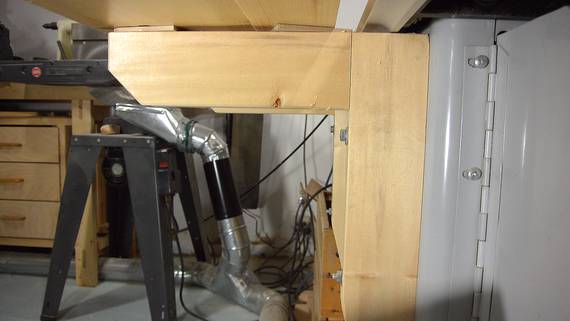
I also used this type of joint for the angle brackets that hold up the outfeed table of my table saw.
 The cool thing is that the template works out to be exactly 3x the size of the joint that I cut.
The 1/4" slots end up 3/4" wide on the template, with 3/4" of material in between them.
The cool thing is that the template works out to be exactly 3x the size of the joint that I cut.
The 1/4" slots end up 3/4" wide on the template, with 3/4" of material in between them.
So next time I need to make a template, I can just triple the size that I need and cut that straight out without setting it up on the jig.
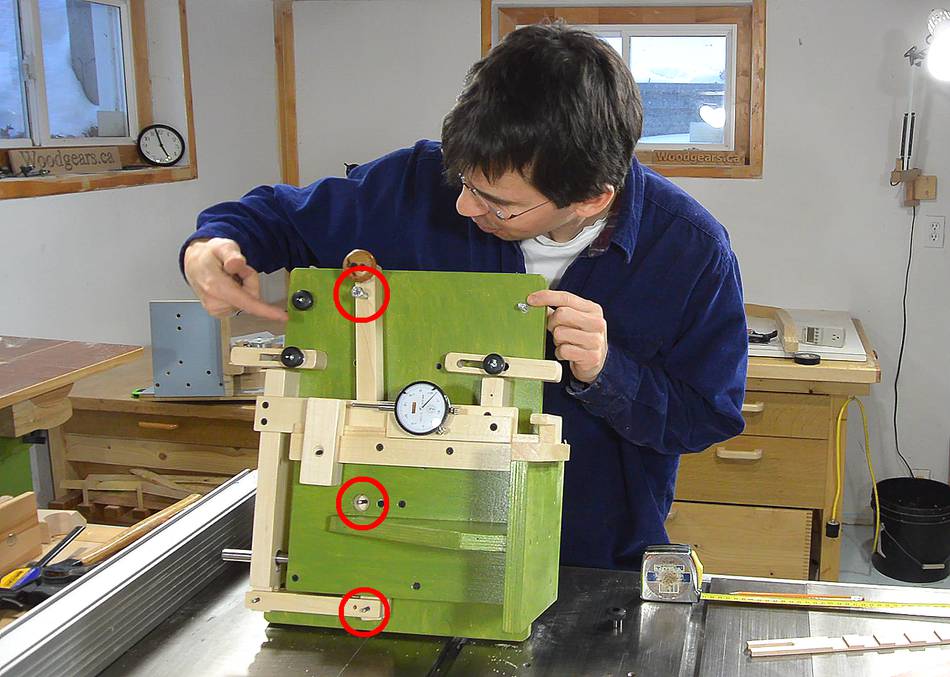 This because the control lever gives exactly a 1/3 reduction from where the bolt is
(top circle) to the pivot point on the carriage (middle circle), so long as the fulcrum
(bottom circle) doesn't move side-to-side. The fulcrum does move slightly because
the middle pivot is fixed to the sled, so it has to move in a straight line. This means
the fulcrum on the back has to move forward and back just slightly as the lever rotates.
That's what the link on the back is for. And as long as that link doesn't pivot
too far, it causes only negligible side-to-side movement of the fulcrum (< 0.0005" or 0.01mm).
This because the control lever gives exactly a 1/3 reduction from where the bolt is
(top circle) to the pivot point on the carriage (middle circle), so long as the fulcrum
(bottom circle) doesn't move side-to-side. The fulcrum does move slightly because
the middle pivot is fixed to the sled, so it has to move in a straight line. This means
the fulcrum on the back has to move forward and back just slightly as the lever rotates.
That's what the link on the back is for. And as long as that link doesn't pivot
too far, it causes only negligible side-to-side movement of the fulcrum (< 0.0005" or 0.01mm).
 And finally, another shot of the joint that I just cut, this time pushed
straight together.
And finally, another shot of the joint that I just cut, this time pushed
straight together.
Precision can be very satisfying.
To my woodworking website
 Quick-set tenon jig
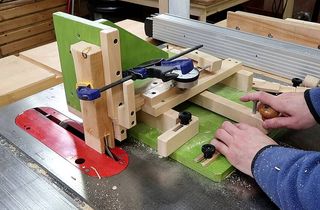 Double tenon shelf brackets
 Cantilevered table using this joint
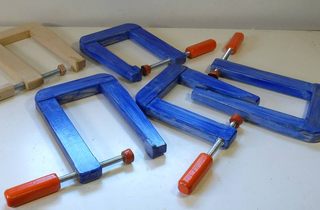 Long reach C clamps
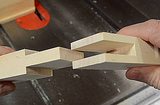 Bridle joints
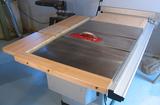 Table saw table extension
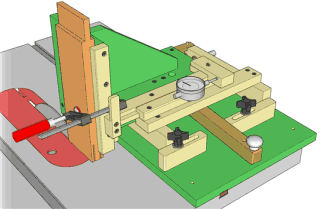 Buy plans for the tenon jig