Horizontal boring machine
(Contined from part 1)
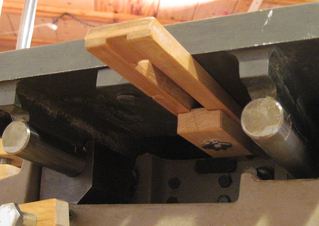
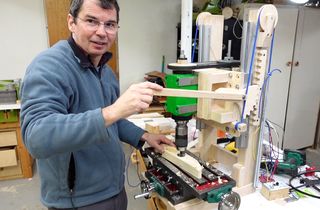
 Drilling holes with some drills requires the drill to be pushed into the stock quite hard.
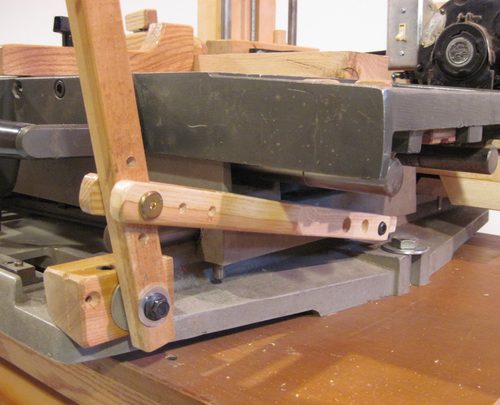
So I have a "plunge lever" to help push the table forward and back. I already had a plunge lever
assembly just like this when I was using this table as a
home-made mortising machine, but I ended up
rebuilding the lever assembly to make it sturdier.
Drilling holes with some drills requires the drill to be pushed into the stock quite hard.
So I have a "plunge lever" to help push the table forward and back. I already had a plunge lever
assembly just like this when I was using this table as a
home-made mortising machine, but I ended up
rebuilding the lever assembly to make it sturdier.
 Of course, if the drill needs to be pushed into the stock hard, one also needs to hold
the stock very securely in place. This is never much of a problem on a conventional
drill press, because the drill just pushes the stock against the table. But on a
horizontal boring machine, the work piece likes to slide away from the drill if it's
not securely held down against the table.
Of course, if the drill needs to be pushed into the stock hard, one also needs to hold
the stock very securely in place. This is never much of a problem on a conventional
drill press, because the drill just pushes the stock against the table. But on a
horizontal boring machine, the work piece likes to slide away from the drill if it's
not securely held down against the table.
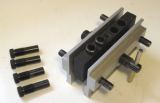
I made a bunch of wooden hold-downs, that attach to the T-slots in the table.
I also made two back-stops, which are useful for providing positive stops for positioning
the work piece when cutting a series of identical work pieces.
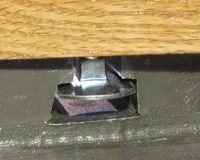 I found this interesting variation on carriage bolt with a really large head, that, if ground
flat on two sides, makes for a really convenient mount in the T-slot. Unfortunately,
I could only find these up to 5/16" size, and only 2.5" long, so for the longer hold-down
bolts, I'm using 4" long 3/8" carriage bolts, with a block of wood on the head of them
to slide in the T-slot.
I found this interesting variation on carriage bolt with a really large head, that, if ground
flat on two sides, makes for a really convenient mount in the T-slot. Unfortunately,
I could only find these up to 5/16" size, and only 2.5" long, so for the longer hold-down
bolts, I'm using 4" long 3/8" carriage bolts, with a block of wood on the head of them
to slide in the T-slot.
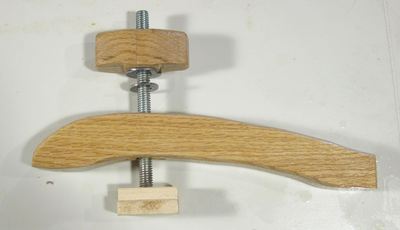 The hold downs are patterned a bit after what would be used in a machine shop, but made
out of wood, of course. The one at left uses a 3/8" x 4" carriage bolt. The head of the
bolt has a T-profile piece of maple attached to it, to hold it securely in the T-slots
of the table.
The hold downs are patterned a bit after what would be used in a machine shop, but made
out of wood, of course. The one at left uses a 3/8" x 4" carriage bolt. The head of the
bolt has a T-profile piece of maple attached to it, to hold it securely in the T-slots
of the table.
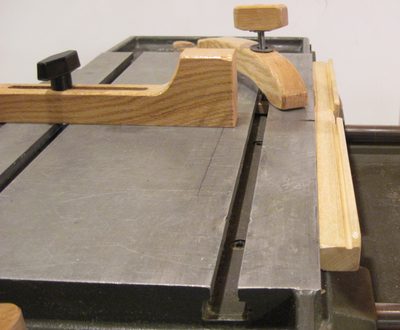
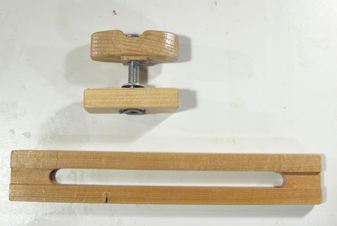 I made some adjustable side-to-side stops. These are useful when pairs of holes need
to be drilled at a consistent spacing. It's just a matter of pushing the table up against
one or the other stop to get the positions repeatedly.
The knobs end up in the trays to either side of the table, just below the surface of
the table, and the sliding stop with the elongated slot in it mounts below
the table.
I made some adjustable side-to-side stops. These are useful when pairs of holes need
to be drilled at a consistent spacing. It's just a matter of pushing the table up against
one or the other stop to get the positions repeatedly.
The knobs end up in the trays to either side of the table, just below the surface of
the table, and the sliding stop with the elongated slot in it mounts below
the table.
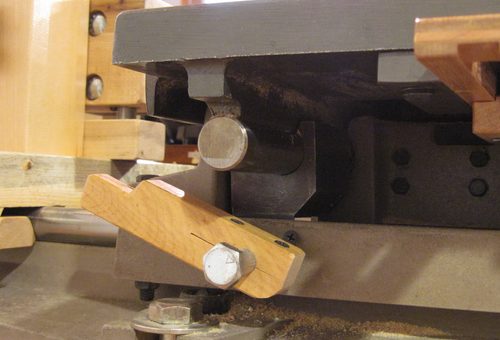 I also added a side to side lock to the table.
The table originally came with a solenoid powered lock that would lock the table in both
directions. I removed that mechanism, but adapted part of it to just give me a side
to side lock. The big bolt that the piece of wood is attached to pushes against a block
of metal that slides along the shaft. When pushed against, the block of metal jams the
shaft, and locks side to side motion. It only takes a fraction of a millimeter of push
to lock it, so locking it is achieved by turning the big bolt by about 45 degrees
using the wooden lever attached to the bolt.
 When making multiple dowel joints, its useful to be able to get the lateral position
for more than just two holes precisely. I made a series
of guides that can be clamped to where the table's templates used to go.
This was inspired by a similar feature I saw on a
professional slot mortising machine that also served as a horizontal boring machine
When making multiple dowel joints, its useful to be able to get the lateral position
for more than just two holes precisely. I made a series
of guides that can be clamped to where the table's templates used to go.
This was inspired by a similar feature I saw on a
professional slot mortising machine that also served as a horizontal boring machine
The way I use these is to move the table all the way back, maneuver the guide pin
into one of the slots, then lock the side to side motion and bring the table forward
to drill a hole.
To cut these slots precisely, I put a 1/4" box cutter in my table saw, and used
my screw advance box joint jig to precisely space
the cuts. I used this feature to precisely space the holes for the dowels when
I built this mobile planer stand
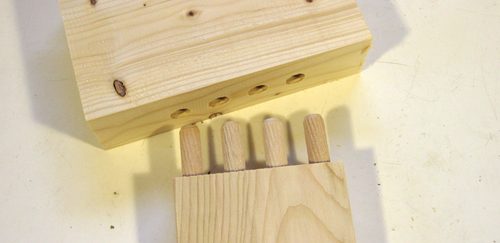 With the vertical position fixed by the drill head height adjustment, and the lateral
positions from my guide bar, drilling the holes for multiple dowel joints precisely
is quite easy. I would expect a multiple dowel joint with proportions of the one
shown at left to be very competitive with mortise and tenon joints for strength.
I will have to do an experiment to test this at some point. Last time I did
a relative strength test the dowel joint lost,
but this dowel joint might do better.
(Update: I have done more joint tests)
With the vertical position fixed by the drill head height adjustment, and the lateral
positions from my guide bar, drilling the holes for multiple dowel joints precisely
is quite easy. I would expect a multiple dowel joint with proportions of the one
shown at left to be very competitive with mortise and tenon joints for strength.
I will have to do an experiment to test this at some point. Last time I did
a relative strength test the dowel joint lost,
but this dowel joint might do better.
(Update: I have done more joint tests)
In the meantime, I can also make slot mortises with this horizontal boring machine,
so I have a lot of choices as to how I cut my joints.
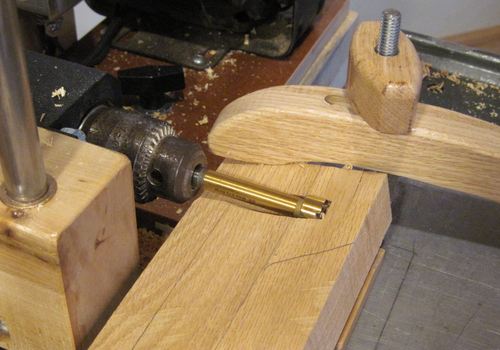 Another thing that I can do with my horizontal boring machine is cut holes that would
be difficult on a drill press. With the drill head and the work piece held very
securely, as long as my drill is short and stiff enough, I can drill holes that are
only partially in the wood, or make things like pocket holes without having any
sort of guide for the drill. I can't use the machine to drill pocket holes
into the end of a rail though, because the machine would get in the way.
Another thing that I can do with my horizontal boring machine is cut holes that would
be difficult on a drill press. With the drill head and the work piece held very
securely, as long as my drill is short and stiff enough, I can drill holes that are
only partially in the wood, or make things like pocket holes without having any
sort of guide for the drill. I can't use the machine to drill pocket holes
into the end of a rail though, because the machine would get in the way.
 I found that end mills and spiral router bits actually work better at drilling than
drills. On account of being short, the bit doesn't flex as much. They also plunge
much better than a drill, because unlike a drill, they don't have a lip on
the edge or a point in the middle. Drills need the point and the lip to guide
them straight and keep the bit from wandering, but with my horizontal boring
machine, it's the rigidity of the machine that guides the bit.
I found that end mills and spiral router bits actually work better at drilling than
drills. On account of being short, the bit doesn't flex as much. They also plunge
much better than a drill, because unlike a drill, they don't have a lip on
the edge or a point in the middle. Drills need the point and the lip to guide
them straight and keep the bit from wandering, but with my horizontal boring
machine, it's the rigidity of the machine that guides the bit.
The rightmost bit is a four flute 5/8" end mill, which never worked that well
in my slot mortising machine. It's meant to run much slower than a router does. But
it works really well running at about 1200 rpm in my horizontal boring machine.
Back to Part 1
Projects using the horizontal boring machine
 Drilling / milling machine build
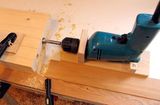 Horizontal boring jig
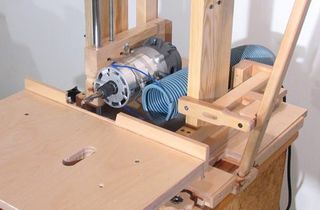 Homemade slot
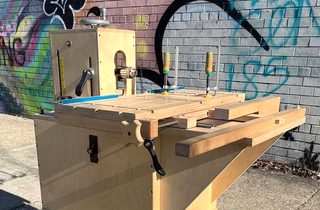 Tracy Landon's horizontal boring machine
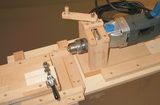
 Using a doweling jig
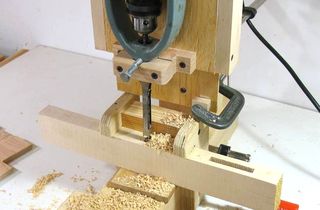 Hollow chisel mortiser experiments
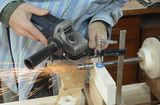 Grinding a machine taper with an angle grinder
 Shawn Haven's mill-drill table based slot mortiser
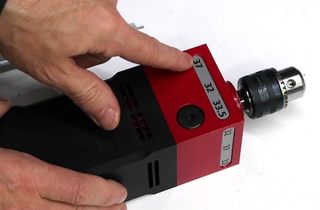 A square drill
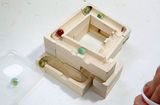 Marble toy ramps
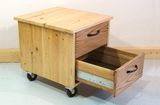 Planer stand
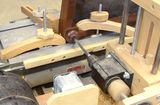 Steel pin chair repair
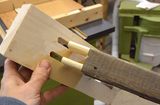 Double tenon shelves