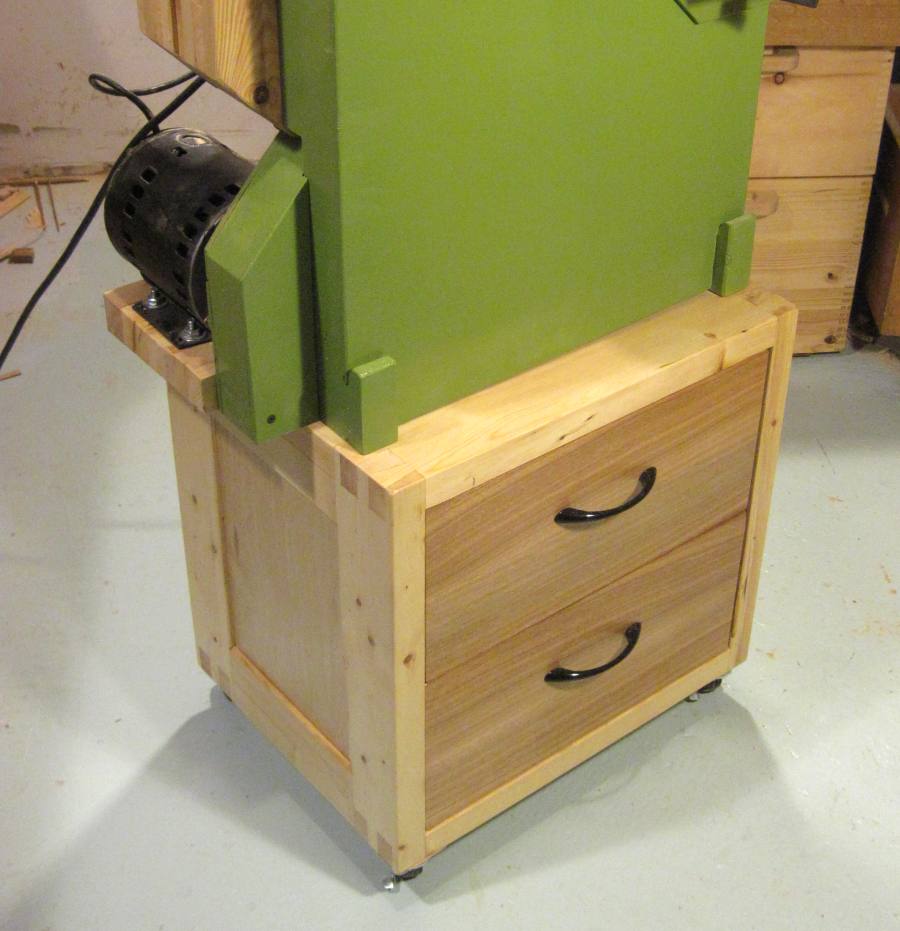
 This bandsaw didn't need a motor mounted below it, so I had room for two big drawers in the stand.
This bandsaw didn't need a motor mounted below it, so I had room for two big drawers in the stand.
The top drawer is just there to catch sawdust. The bandsaw is open on the bottom, and the stand open on the top. This works fairly well at directing the sawdust into the drawer so that I don't have to hook it up to a dust extraction system yet still don't get as much of a mess around my bandsaw.
The bottom drawer is for storage. It's big enough to put coiled up bandsaw blades into.
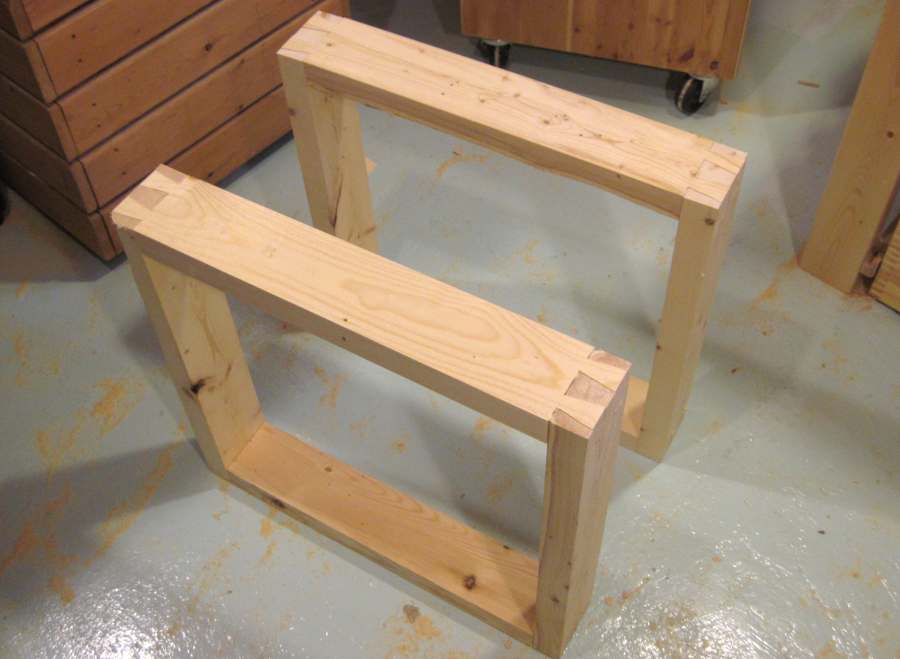 The frame of this tool stand started out as two rectangular frames cut from 2x4 stock,
very similar to this tool stand or the
base for my other bandsaw.
I keep getting back to this same basic design for a tool base because it's sturdy and allows
for a maximum size opening at the front.
The frame of this tool stand started out as two rectangular frames cut from 2x4 stock,
very similar to this tool stand or the
base for my other bandsaw.
I keep getting back to this same basic design for a tool base because it's sturdy and allows
for a maximum size opening at the front.
I had joined the corners of my other stands with very tight finger joints. But with my 16" bandsaw only weighing about 100 pounds (or 45 kg), I didn't need this stand to be quite as sturdy. So I played around with joining the corners with dovetail joints. I cut the dovetail joints on the bandsaw.
 On my other tool stands, I used mortise and tenon joints to join pieces that connect the front
and back rectangular frames together.
But seeing that my whole bandsaw design doesn't need any mortise and tenon joints, I figured
it would be easier for people to replicate this design if I used dowels instead.
On my other tool stands, I used mortise and tenon joints to join pieces that connect the front
and back rectangular frames together.
But seeing that my whole bandsaw design doesn't need any mortise and tenon joints, I figured
it would be easier for people to replicate this design if I used dowels instead.
The connecting pieces are short enough that you can put them upright in a drill press to drill the holes in the ends, but for expedience, I drilled the holes on my horizontal boring machine instead.
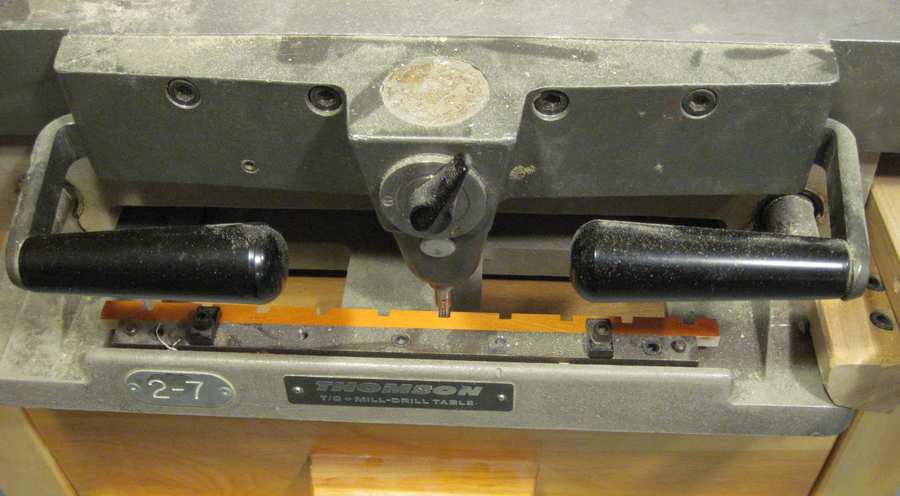 The indexing feature on my horizontal boring machine came in really handy for spacing the holes.
It saved me from having to mark where all the pieces for where the holes had to go.
The indexing feature on my horizontal boring machine came in really handy for spacing the holes.
It saved me from having to mark where all the pieces for where the holes had to go.
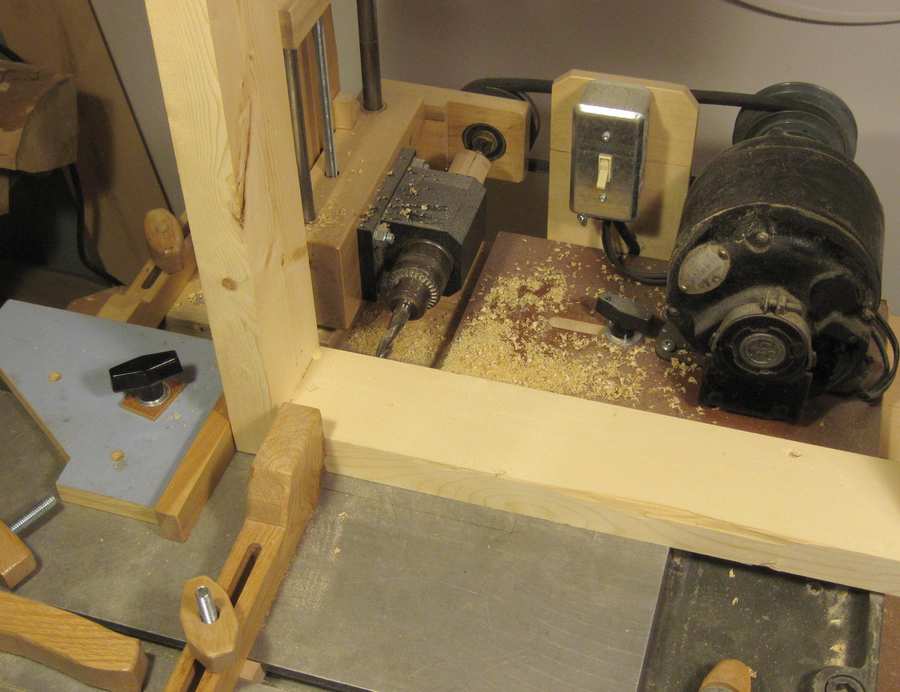 I used the same index positions to drill the holes into the frame, ensuring that they would align
with the holes in my connecting pieces.
I used the same index positions to drill the holes into the frame, ensuring that they would align
with the holes in my connecting pieces.
Except this is where I screwed up. I meant to put the connecting pieces into the frames so that they'd be on the sides, but I placed my frames on the machine horizontally when I drilled the holes. So now I had a horizontal series of holes in my frames, and my connecting pieces had to go on horizontally. Oops!
So I glued another piece to my rails to make them "L" shaped, so that they'd have a horizontal and a vertical component to them. My plans differ slightly from what I built in this regard.
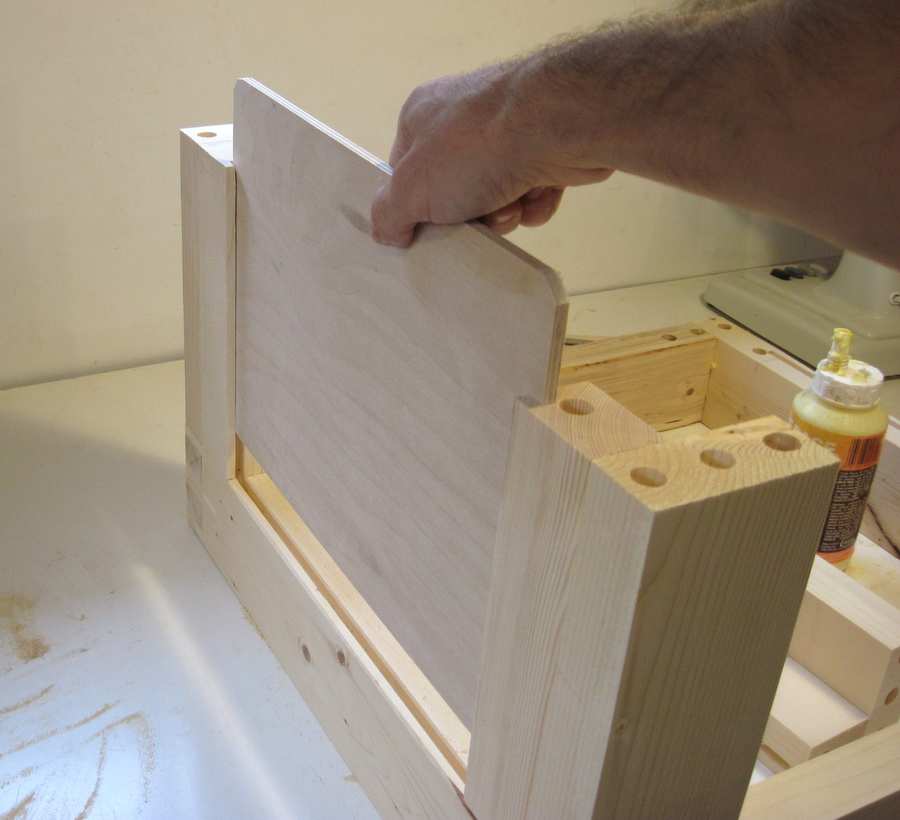 The sides of this stand are plywood panels which fit into a slot I routed into the pieces.
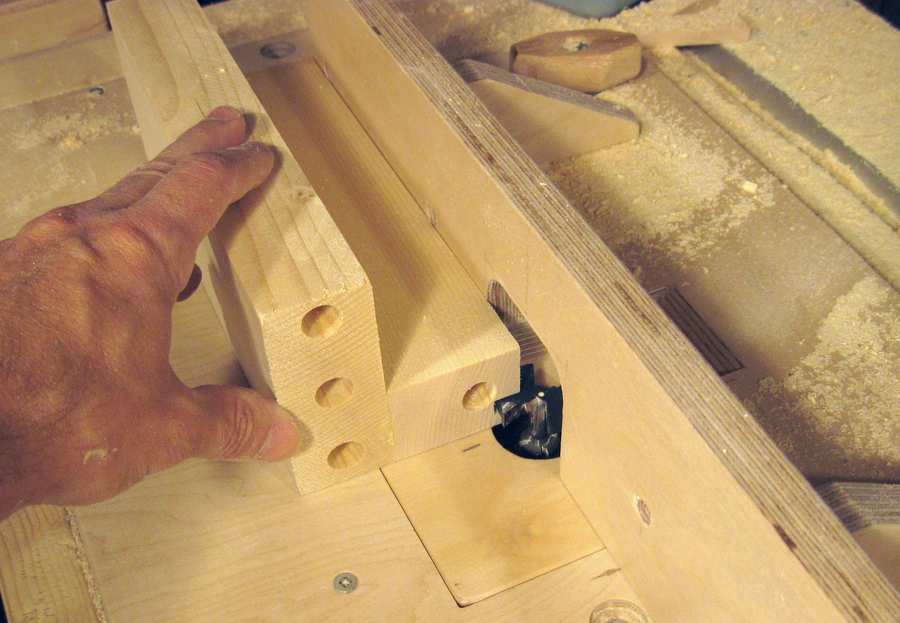 I routed the grooves into the pieces before assembling the stand. Here's routing the grooves
into the short "L" shaped pieces on my router table.
I routed the grooves into the pieces before assembling the stand. Here's routing the grooves
into the short "L" shaped pieces on my router table.
Although I have a sacrificial fence for my router table, I would have had to cut a big hole into it for my slot cutter. I wasn't prepared to sacrifice so much of it just yet, so I took the sacrificial fence off for this operation. This leaves a rather large opening around the router bit, but with relatively large work pieces, there's less risk of them getting pulled into the opening.
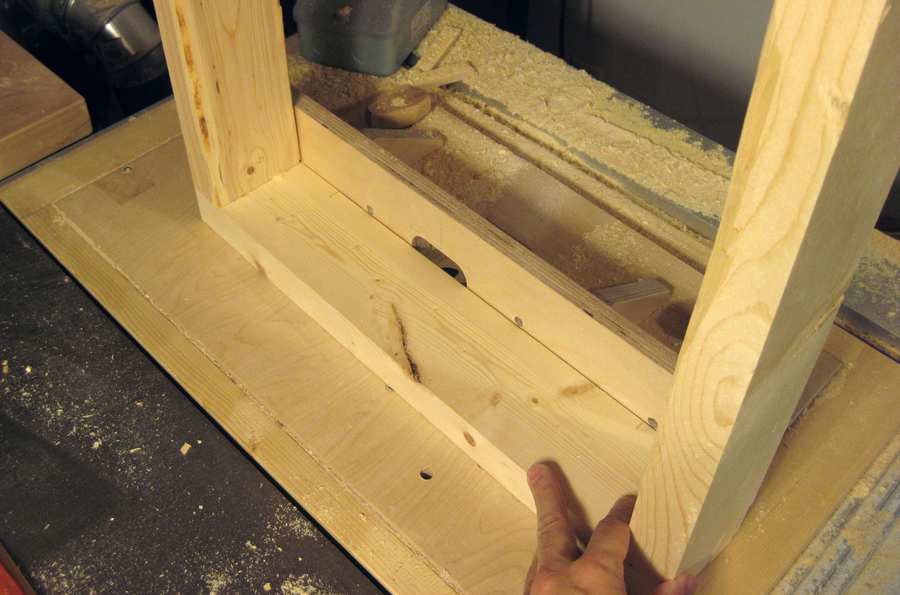
Here's routing the groove into the frame pieces
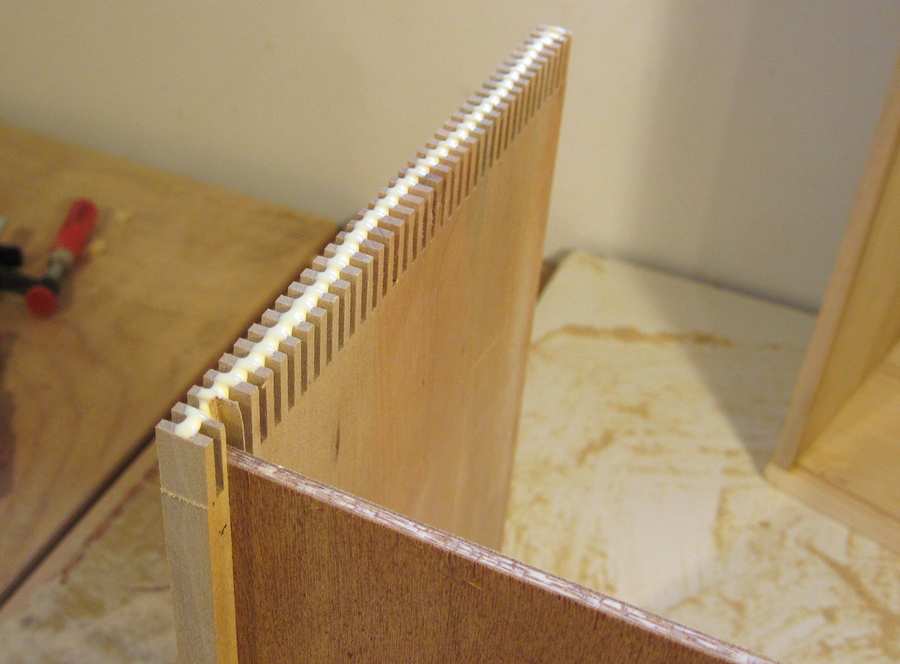
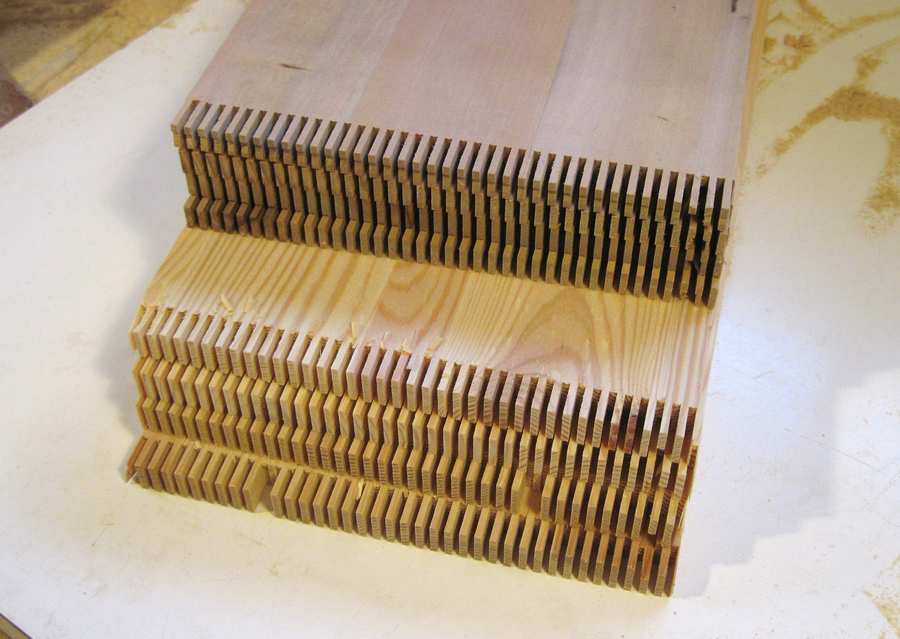 For expedience, I used my screw advance box joint jig to cut some
finger joints into the drawers. Nailed together rabbet joints or dovetail joints would work just as well but,
believe it or not, it was actually faster to make these joints than even rabbet joints.
I always leave my
jig already set up to the right spacing for making finger joints using the sawblade I normally have in the
saw, so the only "setup" I had to do for these joints was to set the sawblade to the right height.
For expedience, I used my screw advance box joint jig to cut some
finger joints into the drawers. Nailed together rabbet joints or dovetail joints would work just as well but,
believe it or not, it was actually faster to make these joints than even rabbet joints.
I always leave my
jig already set up to the right spacing for making finger joints using the sawblade I normally have in the
saw, so the only "setup" I had to do for these joints was to set the sawblade to the right height.
I drew the corner joints as rabbet joints in the plans for this stand, so you don't need a screw advance box joint jig to make the drawers.
I used all recycled wood for the drawers. The top four pieces in the photo are the sides of some old wooden desk drawers. The four pieces of pine below were once part of some Ikea furniture. They had a few screw holes near the ends, which just happened to fall on some of the fingers, so these fell out. No big deal with so many fingers in the joint.
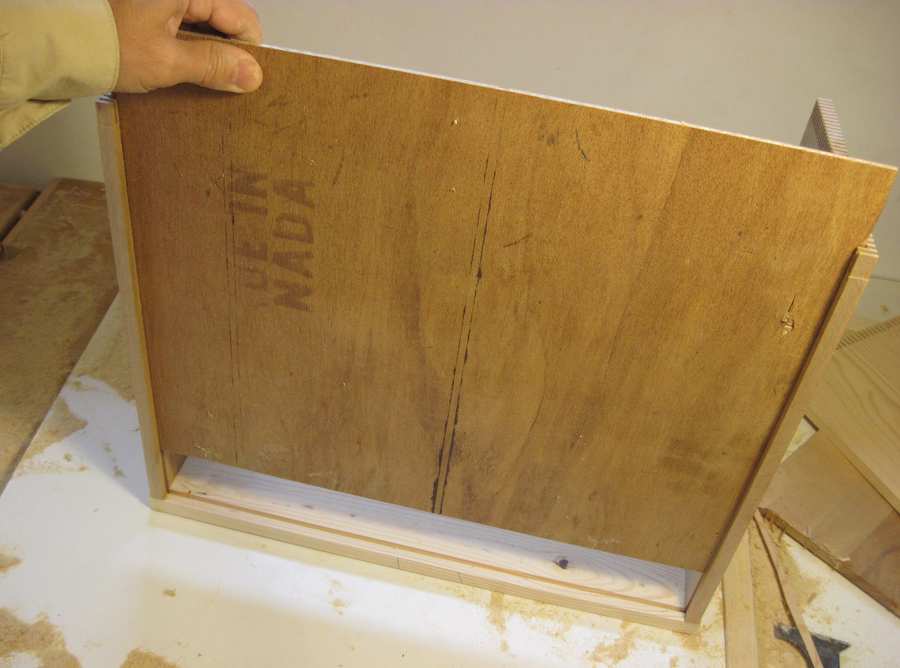 I usually glue the bottom panel to the bottom of my drawers, but my hardwood pieces from recycled drawers already
had a groove for a drawer bottom in them, so I just added a groove to the pine front and back to put the panels in.
I usually glue the bottom panel to the bottom of my drawers, but my hardwood pieces from recycled drawers already
had a groove for a drawer bottom in them, so I just added a groove to the pine front and back to put the panels in.
I'm using a piece of 1970s style fake wood paneling as my drawer bottom. I have the finished side of the paneling facing up so I get the smooth surface on inside.
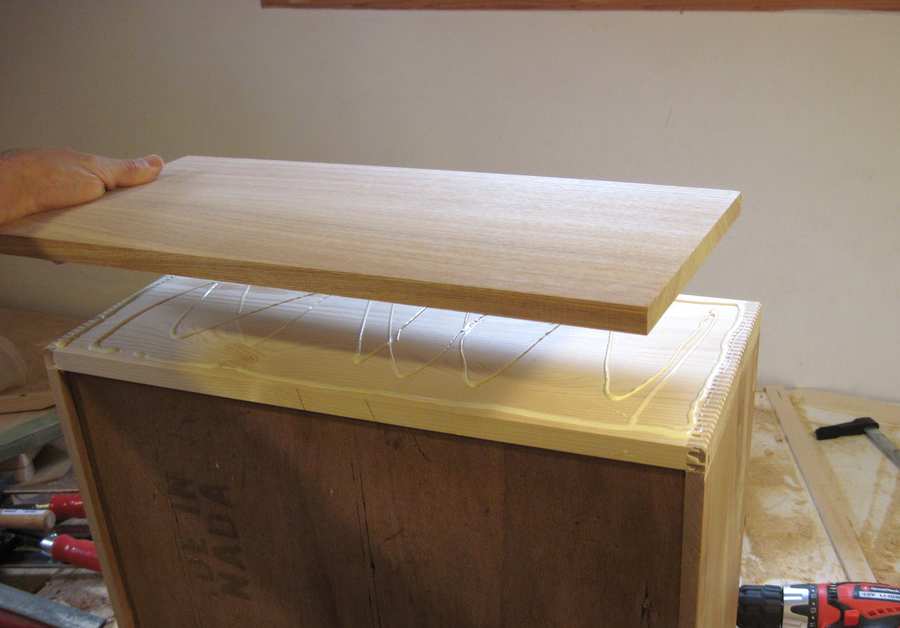
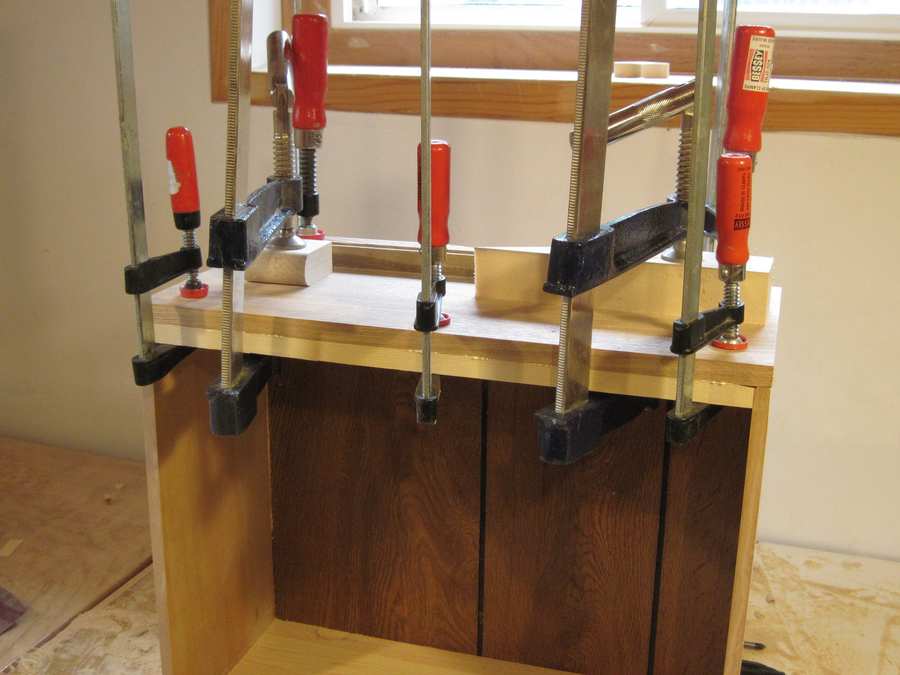
 Gluing it up. I only put a bead of glue over the edges of my joints prior to assembly.
It would have been better to spread the glue into the fingers, but as soon as the wood gets
glue on it, it starts to swell a little bit.
The joint is fairly tight to begin with, so extra swelling can make assembly difficult.
With the glue just on top of the joint initially, most of the wood only gets glue on it when the joint is
actually pushed together. I'm not sure if this is ideal, but with so much joint surface, I don't need
to worry about whether the joint is glued optimally. It will be more than strong enough regardless.
Gluing it up. I only put a bead of glue over the edges of my joints prior to assembly.
It would have been better to spread the glue into the fingers, but as soon as the wood gets
glue on it, it starts to swell a little bit.
The joint is fairly tight to begin with, so extra swelling can make assembly difficult.
With the glue just on top of the joint initially, most of the wood only gets glue on it when the joint is
actually pushed together. I'm not sure if this is ideal, but with so much joint surface, I don't need
to worry about whether the joint is glued optimally. It will be more than strong enough regardless.
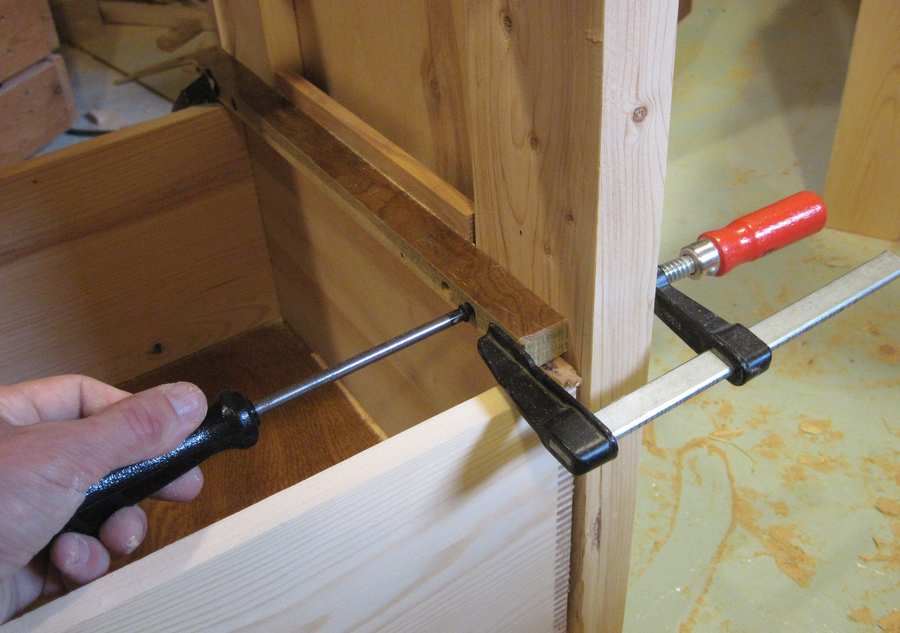
 After assembling the rest of the drawer, I'm adding a piece of hardwood with a nice
grain pattern to the front.
This piece was resawed out of an old door frame. I resawed it on my homemade bandsaw, of course.
After assembling the rest of the drawer, I'm adding a piece of hardwood with a nice
grain pattern to the front.
This piece was resawed out of an old door frame. I resawed it on my homemade bandsaw, of course.
 I really like making drawers this way. The "traditional" way would be with half-blind dovetails,
but by making the front out of two layers, I don't need as much of the nice hardwood, and I don't
have to worry about cutting half blind joints.
I really like making drawers this way. The "traditional" way would be with half-blind dovetails,
but by making the front out of two layers, I don't need as much of the nice hardwood, and I don't
have to worry about cutting half blind joints.
Another plus is that with the drawer front going on last, I don't have to be as careful about not damaging or getting glue on the nice front during the construction process.
 These drawers run on wooden rails. With the top drawer serving to catch sawdust, it wouldn't make sense to use
any sort of fancy metal ball bearing drawer slide. Plus, the drawer has to be easy to take out for emptying.
These drawers run on wooden rails. With the top drawer serving to catch sawdust, it wouldn't make sense to use
any sort of fancy metal ball bearing drawer slide. Plus, the drawer has to be easy to take out for emptying.
I used some discarded exotic wood floorboards for the runners, orienting them so that the smooth prefinished side is facing up.
The rails are just screwed onto the inside sides of the stand. These only support the top drawer, and that drawer only needs to hold sawdust, so there was no need to rabbet the rails into the frame.
 I also cut a 1.5mm (1/16") thick veneer off the same boards I used for the top drawer's rails and
glued them to the bottom of the stand. The bottom drawer runs on these.
I also cut a 1.5mm (1/16") thick veneer off the same boards I used for the top drawer's rails and
glued them to the bottom of the stand. The bottom drawer runs on these.
 I had what I thought was a really clever idea for the wheels. I made two holders for rollerblade
wheels and attached them to one side. Then I added fixed rubber feet on the other side.
I figured I would just pick up one side of the saw when I wanted to wheel it around the shop.
When standing there, the arrangement of feet and wheels would keep the saw from moving around.
I had what I thought was a really clever idea for the wheels. I made two holders for rollerblade
wheels and attached them to one side. Then I added fixed rubber feet on the other side.
I figured I would just pick up one side of the saw when I wanted to wheel it around the shop.
When standing there, the arrangement of feet and wheels would keep the saw from moving around.
Bad idea...
When I tried it out, I realized this idea was only good in theory.
It's actually quite awkward to pick it up on one side of the saw from where I normally have
it parked. And usually, I just want to pull the saw straight forward, and the wheels only
allow side to side movement.
Also, both the wheels and the feet are fairly soft rubber, so the saw kind of rocked back and
forth on those. And finally, this arrangement isn't very safe for a tall machine like a bandsaw.
There's the danger of over-tipping the saw when moving it.
I think this arrangement of two wheels and two feet would be practical for lower stand
in a less tight space. But I ended up taking those feet and wheels off and bought some
2-inch locking casters instead.
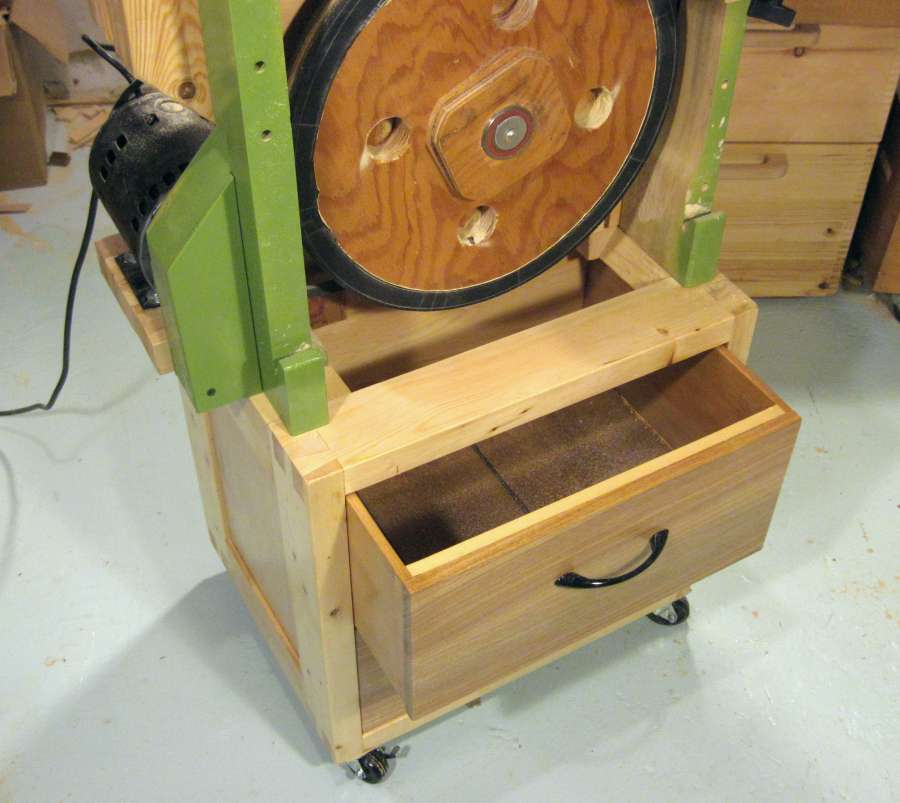 I mounted the saw on top of the stand with just a few screws screwed into the saw's frame from
the bottom of the stand.
I mounted the saw on top of the stand with just a few screws screwed into the saw's frame from
the bottom of the stand.
You can see the opening in the top of the stand in this photo. The entire bottom of the saw is open, and sawdust can fall down into the top drawer.
It's a system that works fairly well, though some of the sawdust seems to stick to the blade as it goes around the bottom wheel and ends up getting released somewhere around the top wheel. So some sawdust still ends up on the table.
But overall, the system works. On my other saw, I once forgot to empty the drawer and let the sawdust pile all the way up to the lower bandsaw wheel. I noticed that the saw made a bit of a rumbling noise that it didn't normally make, and only realized the drawer was full when I investigated the rumble. The rumble probably came from all the extra sawdust that got squished between the blade and the lower wheel. No harm done though. Emptying the drawer and brushing the dust off the wheels was all that was needed.
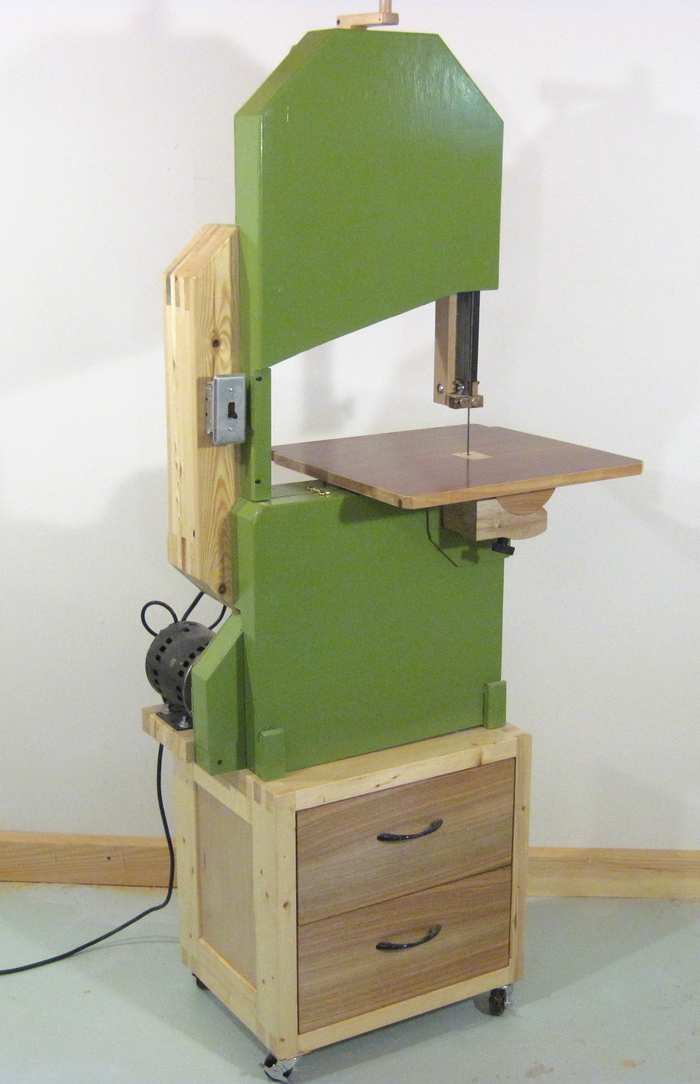 The saw on its stand doesn't take up too much floor space. And with it easy to wheel around,
I normally keep it pushed against the wall near my workbenches. When I need to cut something
bigger, I pull it out a bit so I don't hit the wall with my workpiece.
The saw on its stand doesn't take up too much floor space. And with it easy to wheel around,
I normally keep it pushed against the wall near my workbenches. When I need to cut something
bigger, I pull it out a bit so I don't hit the wall with my workpiece.
 Mobile tool stand
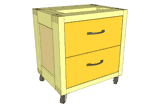 Plans for the stand
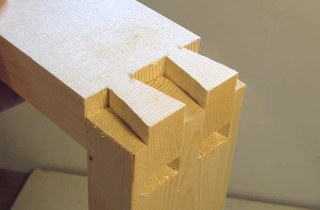 Dovetail joints on the bandsaw
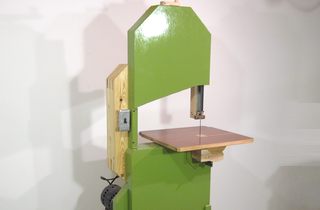 Homemade bandsaw
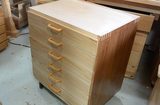 Tool stand / parts cabinet
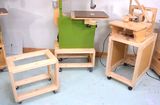 More tool stands