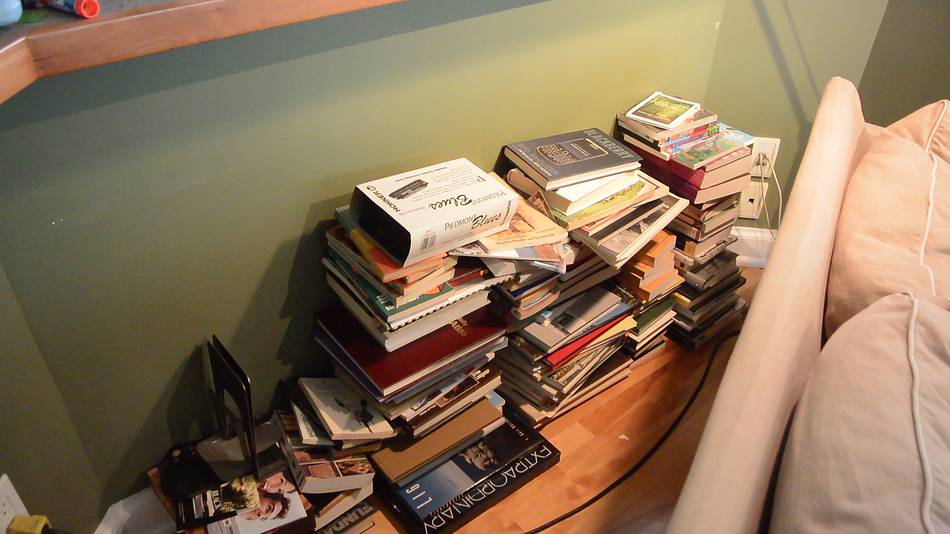
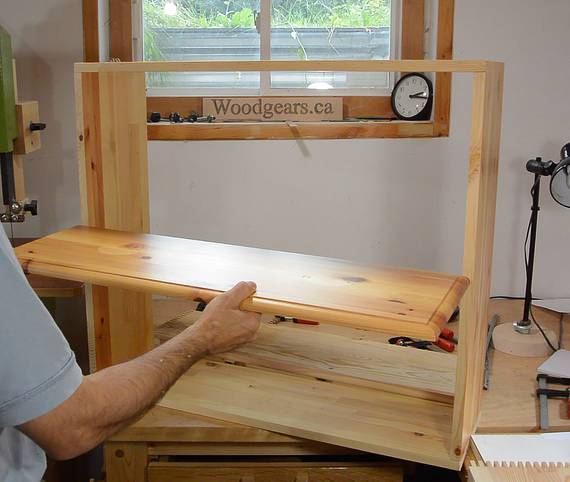
I needed more shelf space in a bedroom. Rather than build more shelves,
I took the books off my bookshelf and piled them behind the couch, where I
used to have this shelf.
So I figured I should build some actual bookshelves for behind the
couch instead.
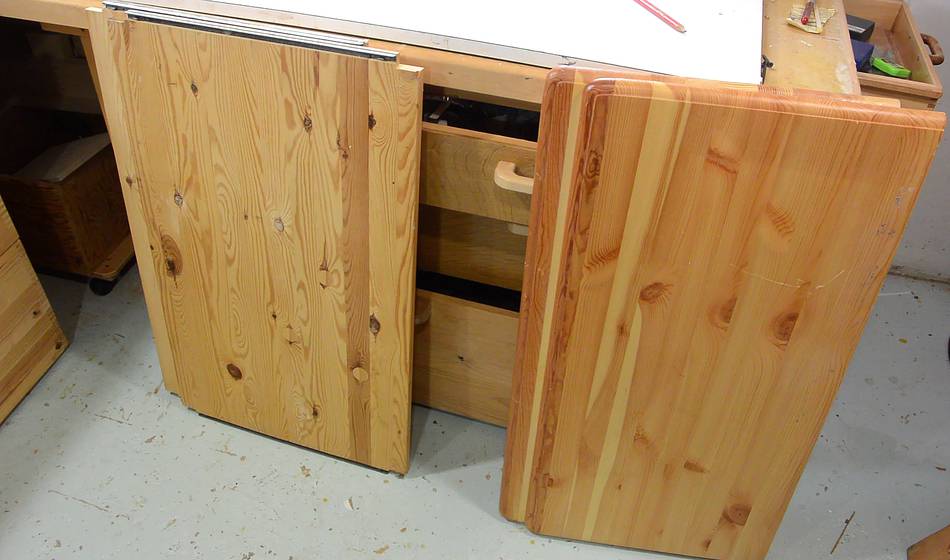
I used all recycled material, some old Ikea shelves, and some varnished
pieces of wood from a dresser that I picked up off the curb.
(Whenever I see thrown out furniture made from good materials, I take
it apart for reuse.)
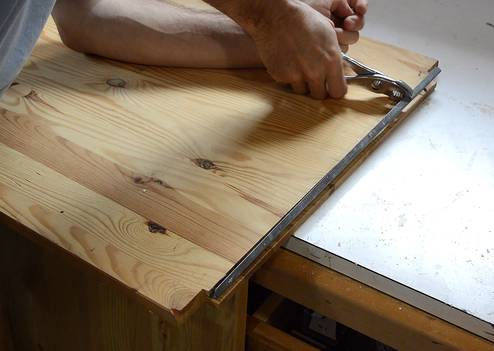
The Ikea shelves have a strip of metal along the end grain edge, but
these come off easily enough.
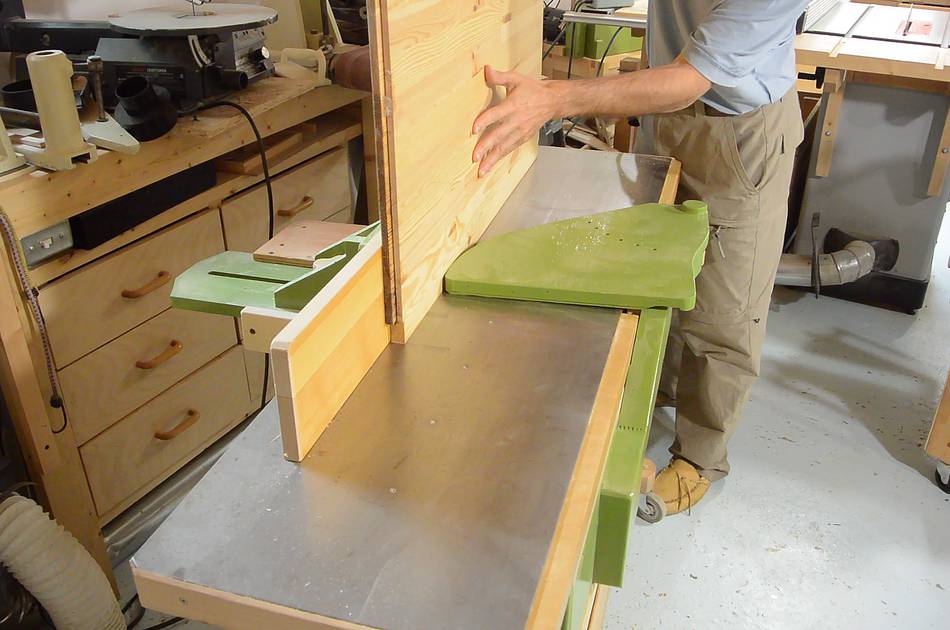
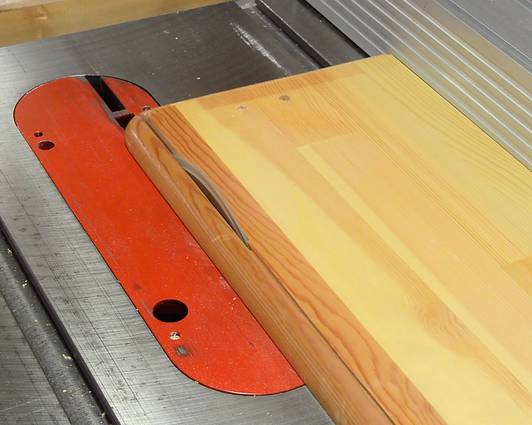
Next I put a clean straight edge on all the pieces on
my jointer
Then ripping everything to width. I made the shelves 22 cm deep. The Ikea
shelves were good for two widths, but the other parts, after cutting off
the edge profile, were a bit too narrow.
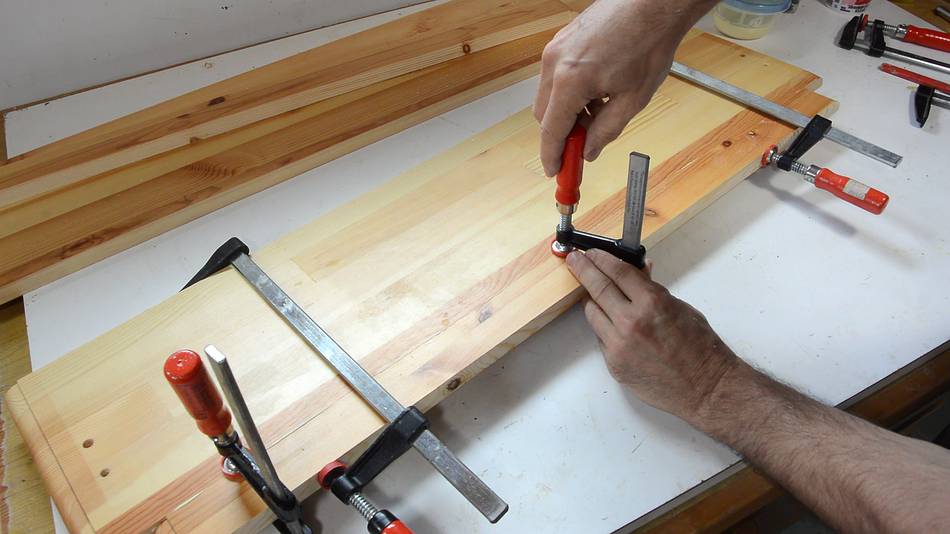
So I glued some more pieces to the edges. These pieces also had varnish on
them. With both pieces the same thickness, I used some clamps across
the glued edges to force the two parts into precise alignment.
I planed the Ikea shelves to get a good smooth surface on them.
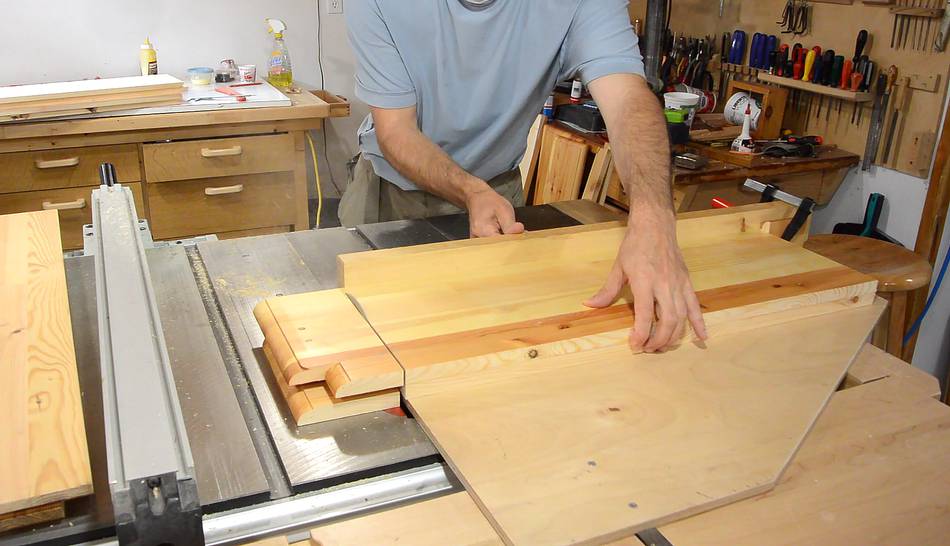
Cutting everything to length using my
table saw sled. I have a small block of wood clamped to the far
end as a stop to get the lengths consistent.
Material for the outside of two shelves (they'll be like
big boxes).
And naturally, I'm joining the corners of the boxes using
my box joint jig.
I have gotten out of the habit of using dado blades for this
type of work, and cut my box joints by making a series of cuts
with a regular blade
using this method.
Each turn of the big gear on the jig moves the stock by 1/4",
and I have the positions of the gear marked for hogging out
a 1/4" slot. After each 1/4" slot, I turn the gear further
until it's 2 turns from the start of the previous slot, and
repeat.
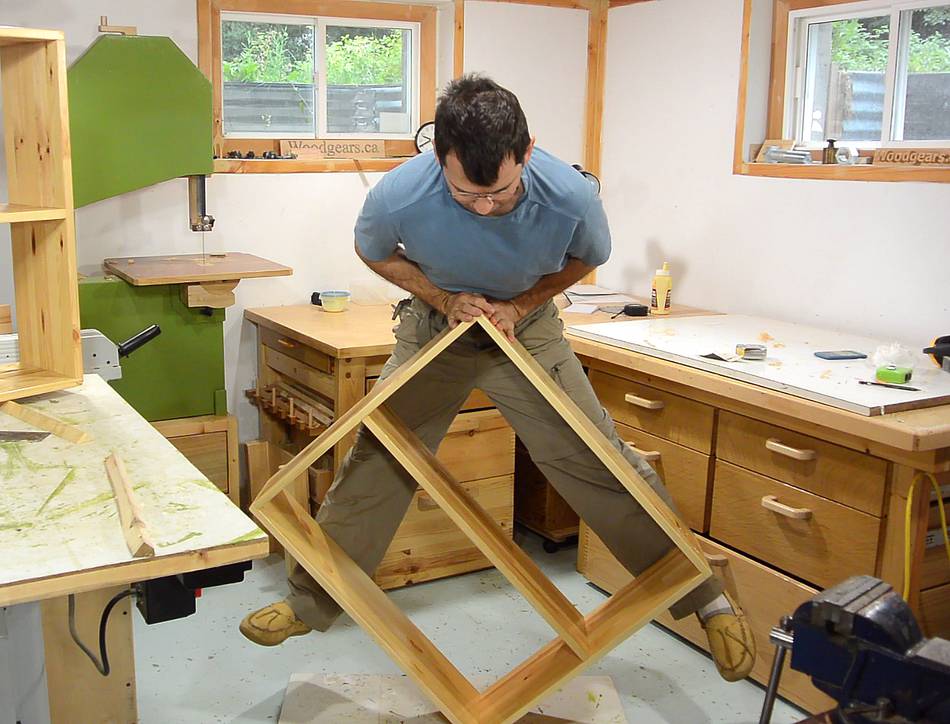
A quick test fit on the cut pieces. I didn't actually
bother with making a test joint, because I still had tape
markings in the right place from a
previous project
Box dry fit. Before I glue it together, I want to securely
fasten a shelf in the middle.
There's only room for two levels of books in the shelf, so
the only logical place to put the shelf is in the middle.
As such, no need to make the shelf adjustable.
I'm not a fan of dado joints for this type of joint. They
weaken the material too much.
The strongest way to put a shelf like that in is with
a series of small mortise and tenon joints, with the mortises
parallel to the wood grain. This can be a lot of work,
but with the right machines, it's manageable.
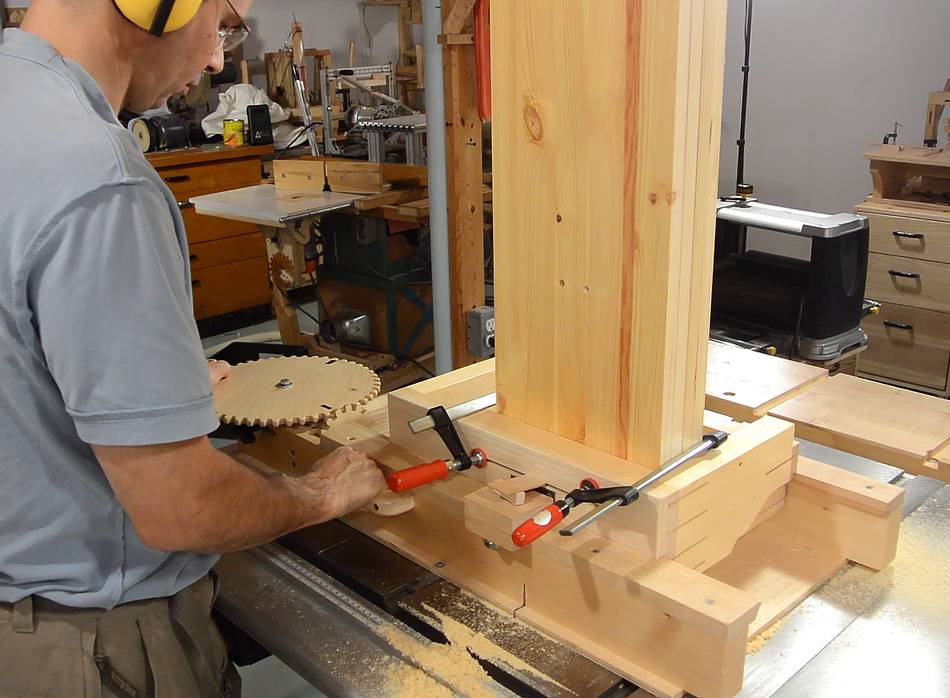
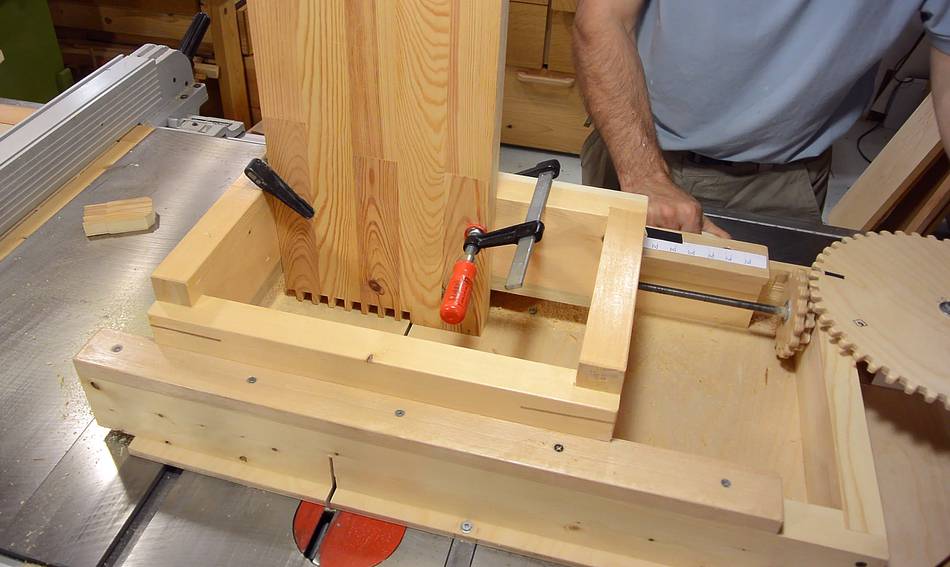
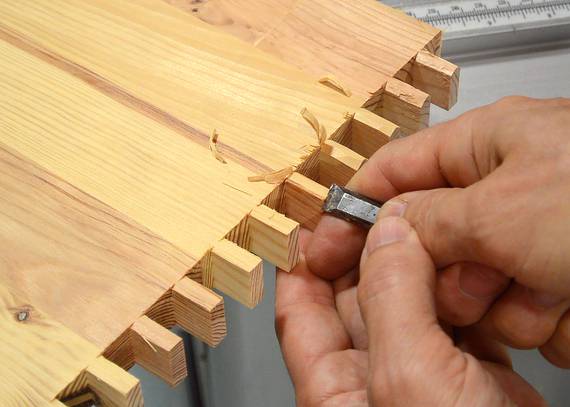
I cut the tenons using my box joint jig. But instead of
cutting out 1/4" between 1/4" fingers, I cut out 1/2" between
1/4" fingers, for a tenon every 3/4".
The sequence of cuts for this is much the same as for the box
joint, except that I'm cutting out two slots next to each
other before skipping over where the finger needs to be left.
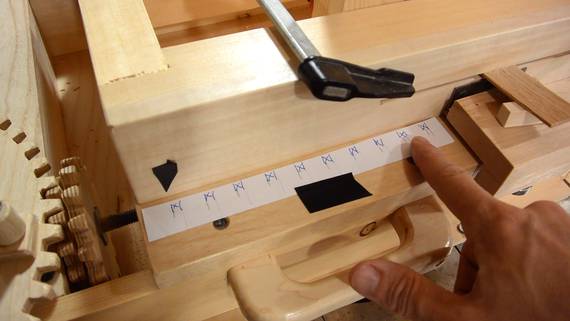
It's too easy to lose track of where one is in the sequence of
increments, so I made a paper scale, with a "pointer" of electrical
tape to indicate where I need to leave the material. The scale
doesn't need to be that precise, I'm only using it to make sure
I don't accidentally skip a turn (and a skipped turn would
throw me off by a full 1/4")
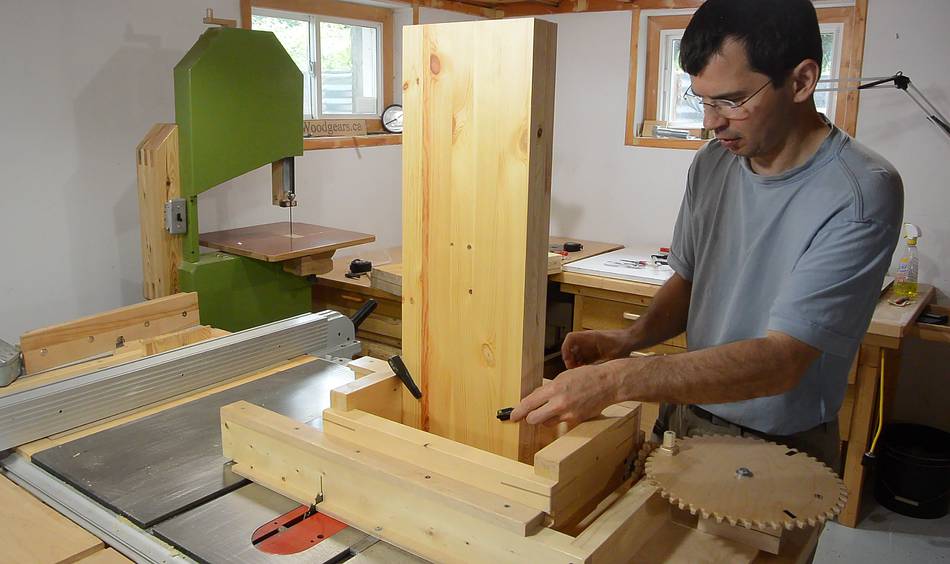
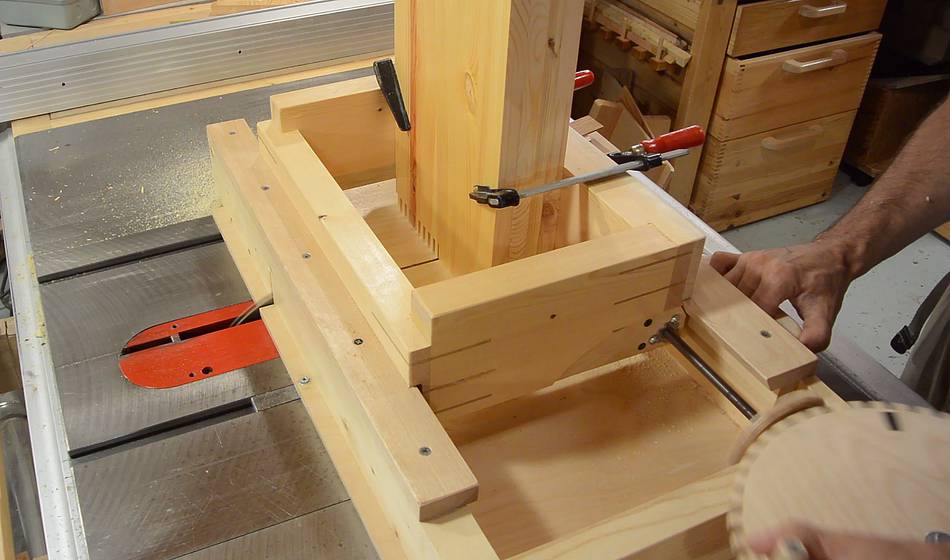
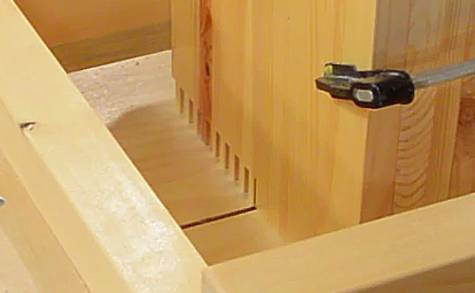
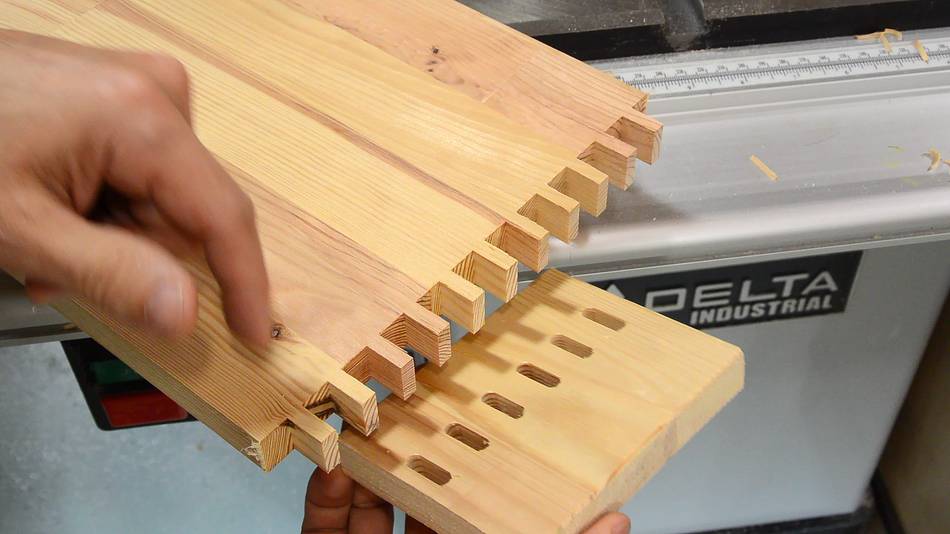
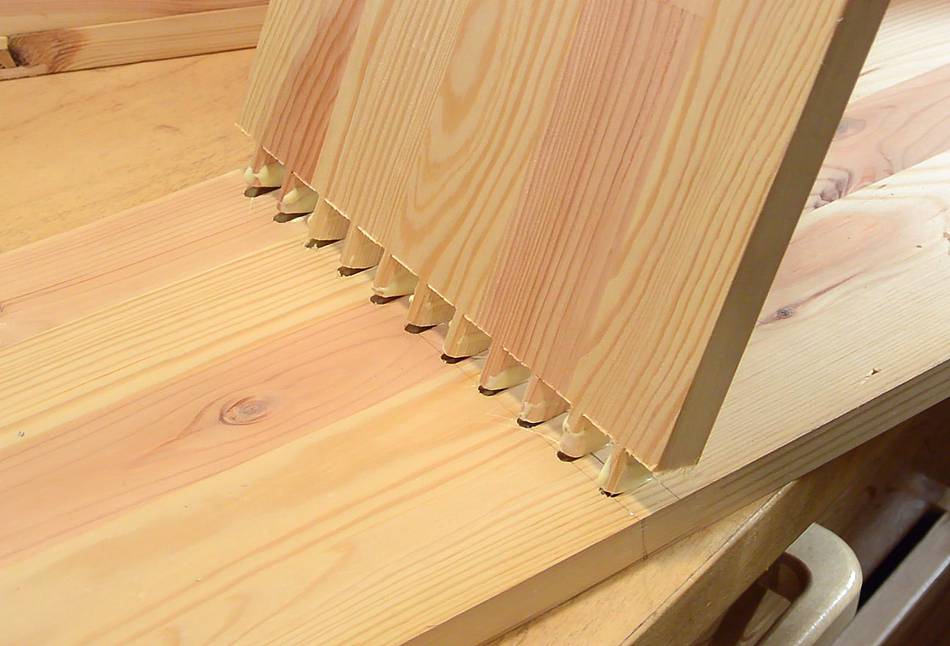
The tenons need to fit into round mortises in a piece of wood.
I manually chiseled the corners off the tenons.
With the right templates and setup, I could have cut these tenons
already round on the pantorouter,
but it would be a complicated template to make and I only had four sets
of tenons to make. It wasn't worth it to make a template.
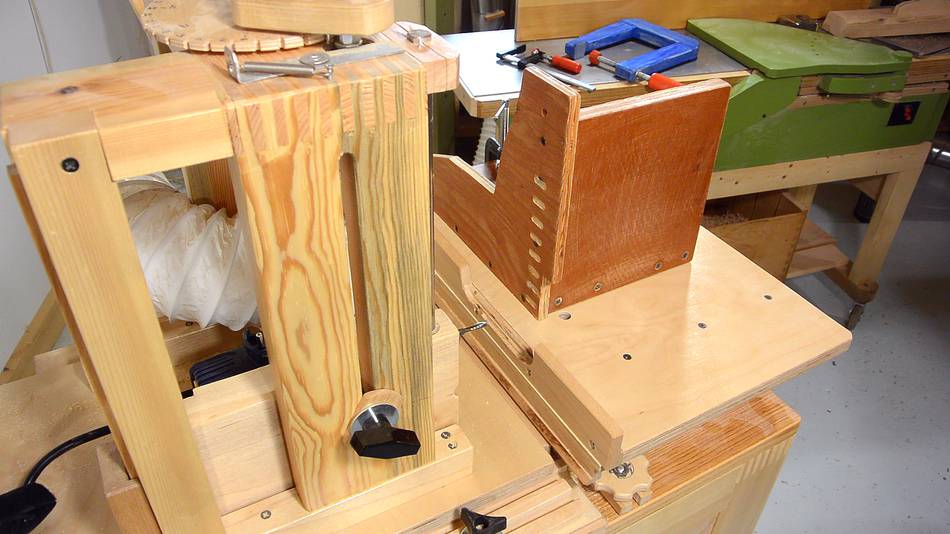
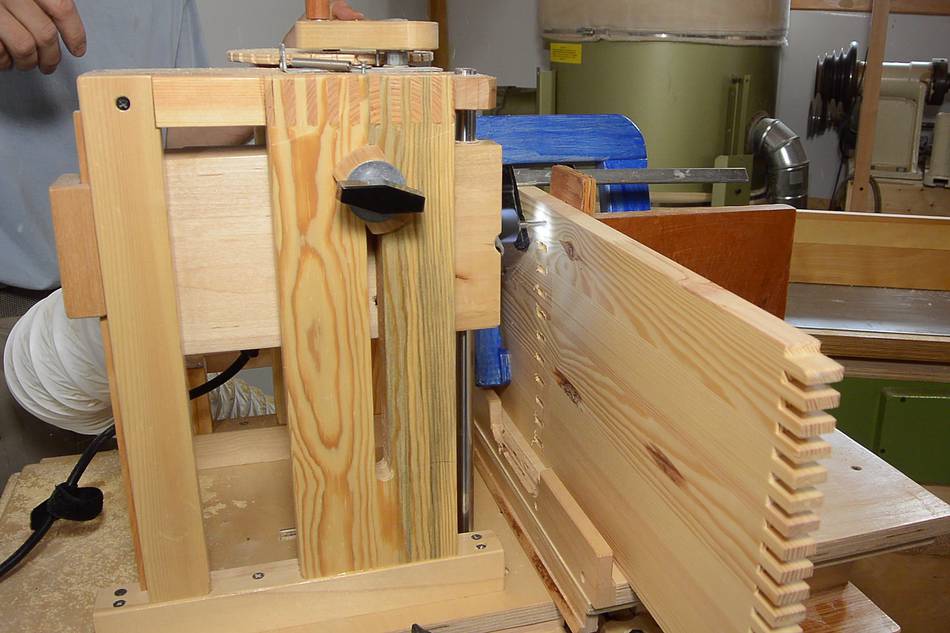
I cut the mortises on my slot mortiser.
The mortiser has enough range to cut a wide series of slots side by side.
I used the counter wheel on the crank to keep track of how many turns.
I need 12 turns between slots (the threaded rod for vertical adjustment
is 12 TPI). The wheel has 32 increments on it, so after the
third set of 12 turns, I will have turned the crank
36 times, but the wheel will have returned to zero after 32 turns, so it
will read just 4. Still good enough to guard against being off by one
turn, and off by 4 turns would be a full 1/4", obvious enough to the eye.
11 mortises cut side by side.
Two mortises would be a double mortise. Had to look it up:
11 is an undecuple mortise.
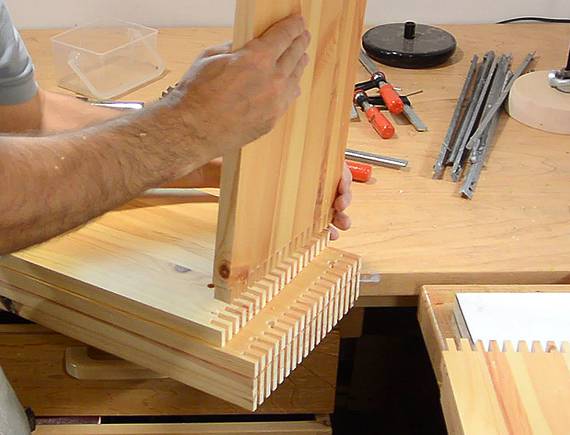
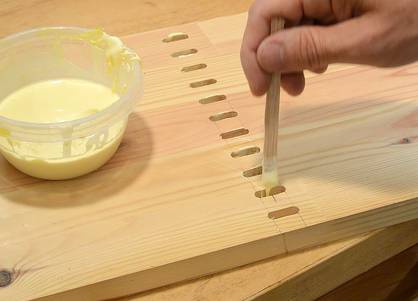
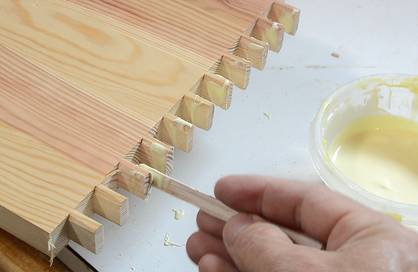
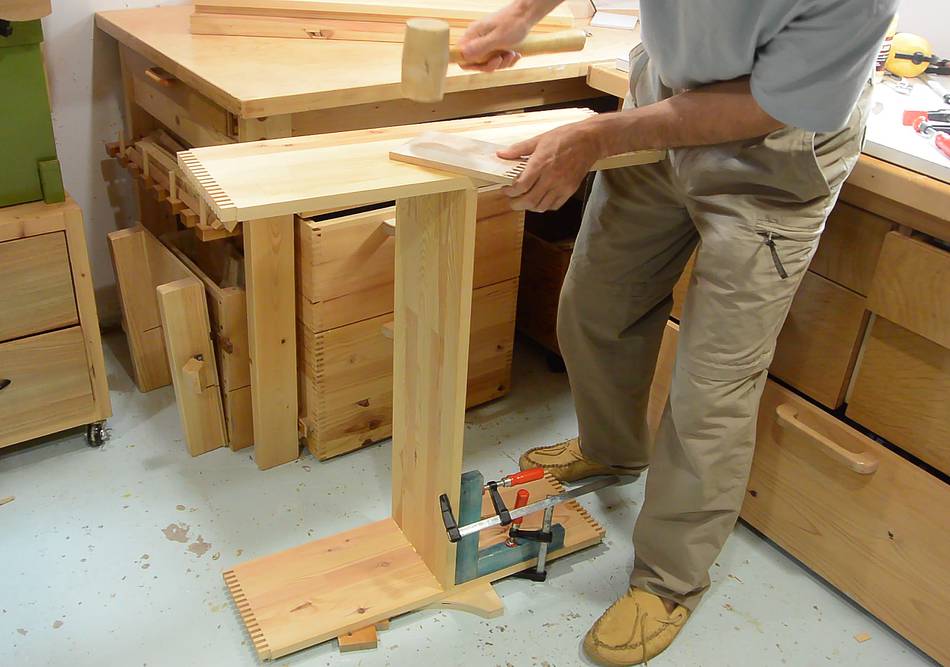
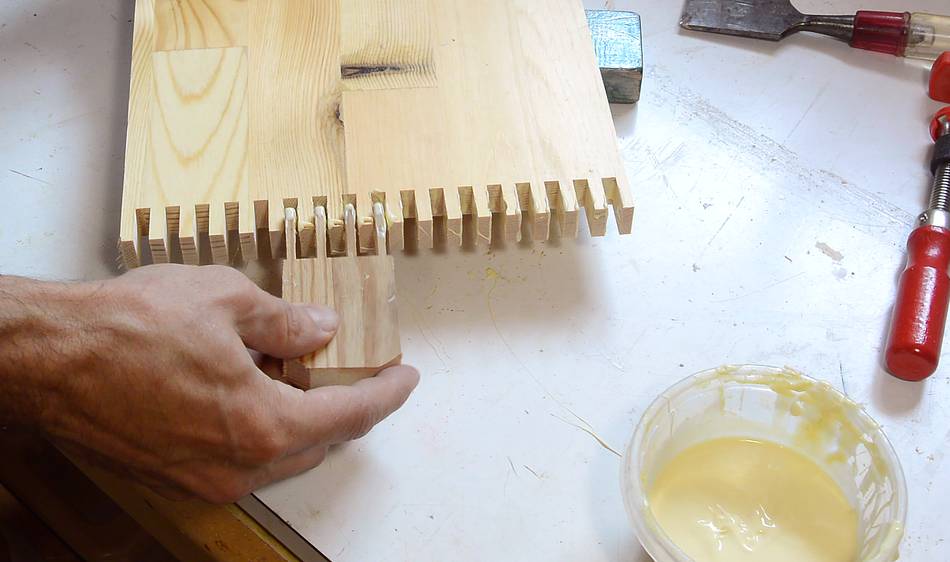
I glue the shelf into the side pieces first, with glue on both the
mortises and in the tenons.
The side pieces and middle shelf form an "h" when assembled.
I'm using my clamping squares
to keep it square as I glue it up.
I made a little tool to apply glue to four fingers at once.
The tool is just a scrap of wood, cut the same way as the box joints,
but with the fingers a bit longer and thinner.
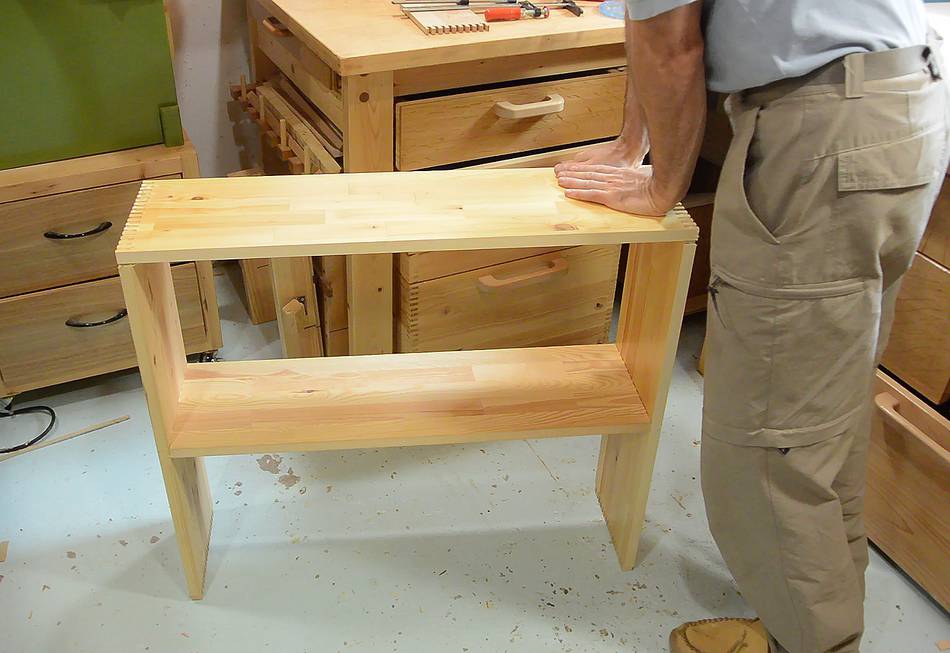
After the middle come the outside pieces.
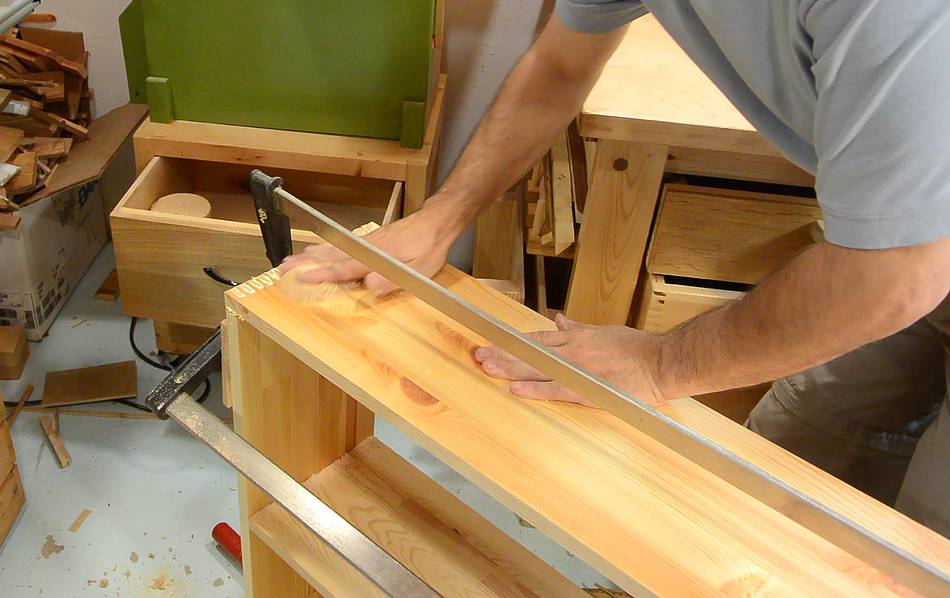
I clean up the excess glue squeezeout using sawdust from my
bandsaw sawdust drawer.
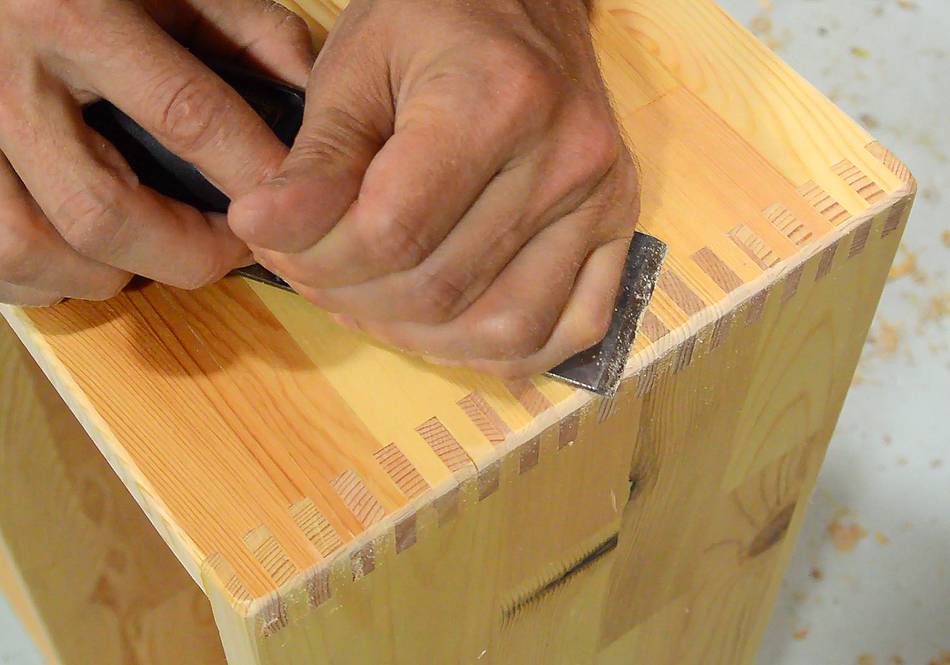
I cut the fingers about 0.5 mm longer than needed and later cut them flush with
a (very) sharp chisel. I was able to trim them flush with the varnish that was already
on some of the boards without damaging the varnish. This is possible because
the varnish is smooth and slightly harder than the wood.
Normally, one relies on the back of a shelf to give it lateral stability.
But with the corners all joined with box joints, these shelves are very
stiff, able to support my weight across the diagonal.
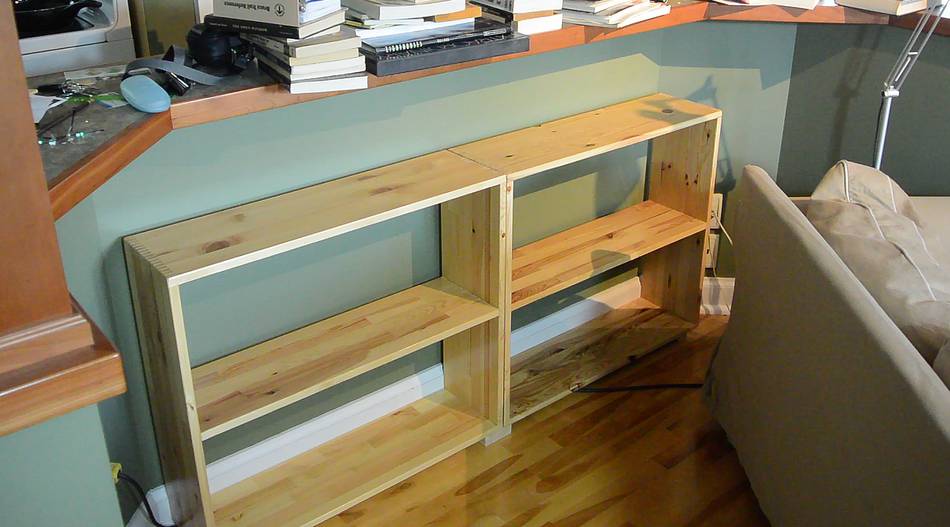
I needed one wide low shelf, but making it as two units makes it
easier to make and move, and, if at some point I need the shelves somewhere
else, I can stack them to make a regular bookcase.
Shelves put in place...
... books put on the shelves...
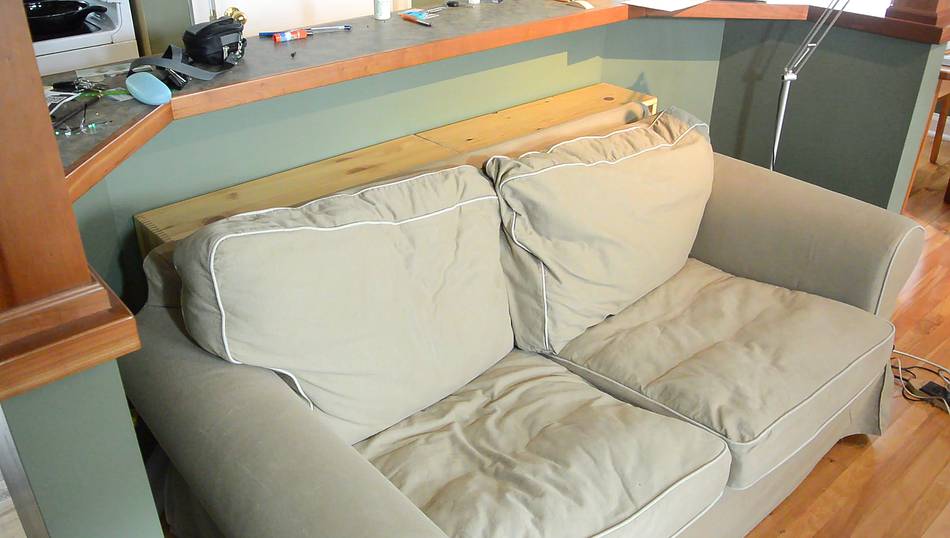
...and couch slid back in place. The couch slides very easily
on the hardwood floor, so the books aren't hard to get at. But I really
have not been using these books in years, so out of sight and out of mind
is just as well. Even if the information I need is in one of my
books, I'll still look for it online.
Update 2020
I built those shelf boxes in 2014. Six years and two house moves later,
I never ended up stacking them on top of each other. They are currently
used as a children's book shelf and as a shoe rack Rachel wanted some
dividers in the bookshelf and another level for the shoe rack. I made
a video of the work.
 I needed more shelf space in a bedroom. Rather than build more shelves,
I took the books off my bookshelf and piled them behind the couch, where I
used to have this shelf.
So I figured I should build some actual bookshelves for behind the
couch instead.
I needed more shelf space in a bedroom. Rather than build more shelves,
I took the books off my bookshelf and piled them behind the couch, where I
used to have this shelf.
So I figured I should build some actual bookshelves for behind the
couch instead.


 Building a bookcase for the basement
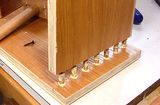 A bookcase joined
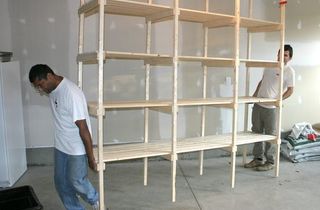 Building storage shelves
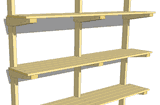 Garage shelves
 Basement storage
 Building a bookcase
 Quick shelves with
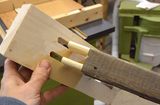 Double tenon shelves
 Storage cabinet
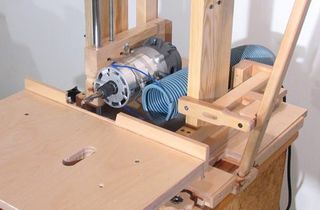 Slot mortiser
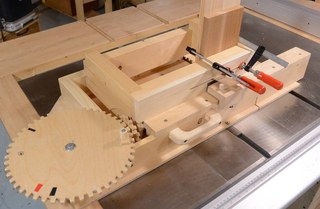 Box joint jig
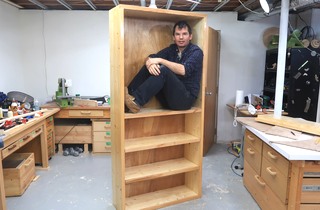 Big box joined bookcase